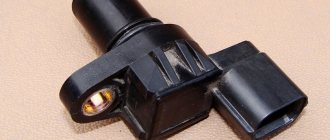
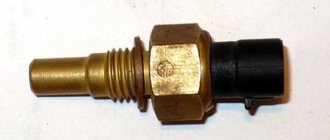
DPKV (crankshaft position sensor), also known as TDC sensor (top dead center sensor) is the only sensor of the engine management system, if which breaks down, the engine will definitely not start. This sensor has no mechanical moving parts, so it rarely fails. Most often, corrosion-damaged wiring is to blame for its failure.
Purpose and principle of operation of the crankshaft position sensor
The crankshaft position sensor (CPS, synchronization sensor) is a component of the electronic engine management system. Therefore, the sensor is only available in modern cars equipped with an electronic engine control unit (ECU).
The function of the crankshaft position sensor is to transmit signals to the electronic engine control unit about the position of the crankshaft, as well as the speed and direction of its rotation. Thus, the sensor affects the functioning of the main engine systems, including ignition, gas distribution, power, etc. Based on the readings transmitted by the DPKV, the electronic control unit solves the following range of tasks:
- determines the moment of injection and the duration of operation of the injectors (control of the fuel injection system);
- controls the ignition timing in each of the engine cylinders (ignition system control);
- determines the moment when the pistons of the first or fourth cylinders pass the top and bottom dead centers;
- controls the valve timing system;
- controls the operation of individual components of the fuel vapor recovery system;
- monitors and adjusts the operation of other engine systems.
It is the DPKV that determines the correct functioning of the two main engine systems - ignition (only on gasoline engines) and fuel injection (on diesel and injection gasoline power units).
The sensor itself is a steel core with a copper wire winding, filled with a compound resin and placed in a plastic housing. A special feature of the sensor is the presence of a wire 50-70 centimeters long, ending with a special connector that connects to the engine control unit.
There are 3 main types of DPKV.
- A magnetic (inductive) sensor is the most common option and does not require separate power. A signal is generated to the electronic control unit at the moment when a special tag passes through the magnetic field created in the area where the sensor is located. At the same time, the magnetic sensor can serve as a speed sensor.
- Hall sensor, the operating principle of which is based on the Hall effect (the occurrence of a transverse potential difference). The signal to the ECU is received from the DPKV at the moment when a changing magnetic field approaches the sensor. The synchronizing disk blocks the field, and the teeth of the disk interact with the magnetic field of the DPKV. A sensor of this type can simultaneously serve as an ignition distributor sensor.
- An optical sensor whose operating principle is based on interaction with the synchronization disk by blocking the optical flow passing between the LED and a special receiver. The receiver detects the overlap of the light flux and generates a voltage pulse, which is transmitted from the DPKV to the electronic engine control unit.
Most often, magnetic meters and Hall sensors are found on cars - the versatility of these devices makes them more popular than optical crankshaft position meters, which are an outdated solution.
Crankshaft sensor: why does it break and how to replace it?
December 10, 2013
Probably every car enthusiast has found himself in a situation where one fine day, after turning the ignition key, his “iron friend” completely refuses to start. Oddly enough, the reason for this may be not only a dead battery or a burnt-out starter, but also a crankshaft sensor. If its body has been deformed or the entire structure has moved a couple of millimeters to the side, this part needs to be replaced.
And when your garage neighbors tell you that replacing this element is a rather complicated operation that requires special, expensive tools, do not believe these words. You can change the crankshaft sensor yourself. Moreover, by doing this kind of work, you save a lot of money on service station services and at the same time gain experience in this area. Therefore, today’s article will be important for all motorists.
Why does the crankshaft sensor fail?
Based on the readings of this part, the injection system synchronizes the operation of the injectors and ignition. Therefore, injection is not possible without this part. And when the crankshaft sensor stops working, interruptions begin in the engine. Therefore, not a single modern car can do without this small spare part. And in order to prevent this malfunction, you need to regularly check the condition of the sensor. But when the symptoms began to become reality, the driver had no choice but to urgently replace it.
How to remove the crankshaft sensor?
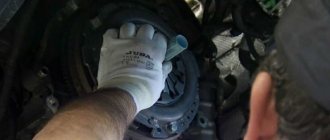
Let us immediately note that this procedure can be performed without a special lift. So, let's get to work. First, unscrew the sensor mounting bolts that connect it to the gearbox. In fact, to remove the necessary spare part, we only need this stage. But since this part is located in a very hard-to-reach place (almost on the bottom), we will have to work hard. To work, we need an extension cord, an 11 mm wrench and, of course, good lighting. It is important that the length of the first part is about 80-90 centimeters. If you have these tools, unscrew the bolts. But before you remove the crankshaft sensor, pay special attention to the rubber pad. If in the future it is poorly installed or its gap is equal to at least 1 millimeter, all readings of the measuring device will be inaccurate, and, accordingly, the engine will operate intermittently. It is best to mark this part and put it in a separate place. The entire process of removing the spare part, bolts and lining must be carried out with great care. This part does not like rough handling.
Next, take a new crankshaft sensor and mount it in place of the old one. During installation, this element should be lowered through the entire engine compartment so as not to catch the connector from the installed element on top. Then don't forget about the gasket. We install it carefully and check the integrity of the structure. It is important that the gap between it and the sensor is minimal or completely absent. After this, we attach the wires to the part, connect all the connectors and start the ignition. If you did everything correctly, rest assured that the engine will start with half a turn.
Signs of sensor malfunction
The sufficient simplicity of the sensor design leads to the fact that most often it either functions normally or does not work at all. Periodic failures in the operation of the DPKV are quite rare.
Signs of sensor malfunction appear as follows:
- fuel detonation occurs at high engine speeds;
- the power of the power unit decreases, the engine, as they say, does not pull, especially when overtaking, heavy load or driving uphill;
- engine speed begins to float uncontrollably both while driving and at idle;
- fuel consumption increases;
- dips appear when you press the gas pedal (the engine does not pick up speed);
- engine ignition failure is possible;
- An engine error light appears on the dashboard (error code P0336 - “Crankshaft position sensor error”).
These manifestations may also be characteristic of malfunctions or malfunctions of other sensors that ensure normal engine operation. Therefore, to confirm that the problem lies precisely in the crankshaft position sensor, it is necessary to diagnose the operation of the DPKV.
Diagnosis of DPCV
If the car does not start, it may be due to a faulty DPKV. Then the device must be removed and diagnosed.
Symptoms of a problem
The main symptoms of a malfunctioning crankshaft position sensor are the following:
- Engine detonation occurs periodically, i.e., spontaneous ignition of the fuel.
- The car simply won't start.
- The dynamics of the car and engine power are significantly reduced.
- When switching modes, a spontaneous change in the number of revolutions, etc. is observed.
This is interesting: Kia Rio car review: technical specifications, configurations and prices in 2021
Thus, you do not need to be a professional to determine whether the sensor is faulty. It is enough to pay attention to the dynamics, quality of the car engine and other obvious signs.
Using an Ohmmeter
So, you have removed the DPKV and externally determined the presence of malfunctions. But only special devices will help to identify hidden threats and internal disruptions in work. This also includes an ohmmeter.
An ohmmeter determines the current resistance in a circuit. Based on the indicators of the device, you can judge whether the sensor is serviceable or broken. The optimal resistance values for such devices are 550 - 750 Ohms.
Using an Oscilloscope
The next device is an oscilloscope. It is recommended to use it with the engine running without removing the sensor. But if this is not possible, the device can be removed from the engine and diagnostics can be carried out offline.
Using an oscilloscope, you can not only obtain the final values, but also thoroughly study the process of their formation and transmission to the central unit. Thus, diagnostic results using such a device provide the most comprehensive results.
The oscilloscope diagnostic process consists of several simple steps:
- Connect the measuring device to the sensor. Polarity may not be observed.
- Run a program on your PC that can be used to track the device’s values.
- Pass a metal object in front of the sensor several times.
- Observe the signals on the PC screen. If the oscillogram shows the movement of a metal object, the sensor is working. Otherwise, you need to carry out a comprehensive diagnosis.
Comprehensive examination
The methods described above provide only one-sided information about the state of the sensor. To obtain comprehensive information, it is necessary to conduct a comprehensive examination. This includes the use of the following devices:
- Multimeter. It includes ohmmeter, voltmeter and ammeter functions, measuring resistance, voltage and current respectively. Advanced versions of the multimeter may include other functions.
- Megaohmmeter. It differs from a conventional ohmmeter in that the resistance in the circuit is measured at high voltage values, which are artificially created by the device.
- Inductance meter.
Before starting a comprehensive examination, the sensor must be removed from the engine, thoroughly washed and dried. After this, you can start measuring. It is carried out only at room temperature so that the readings are as accurate as possible.
First, measurements are taken with a multimeter. Next, the inductance of the circuit is measured. Lastly, a megohmmeter is used.
Possible causes of malfunction
The causes of failure of the crankshaft position sensor can be varied. The following faults occur most frequently.
- Winding break, short circuit or contact failure, as a result of which the signal from the sensor does not enter the electronic control unit. Most often, a break in the sensor winding occurs; less often, damage to the insulation or a break in the supply wire.
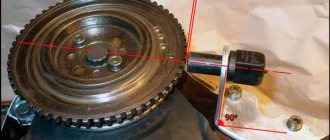
- Violation of the required distance between the synchronization disk and the steel core of the DPKV. The specified distance between them is usually from 0.5 to 1.5 mm and is adjusted using shims. If these parameters are violated, the sensor malfunctions, resulting in incorrect data being transmitted to the ECU or not being received at all. The reason for the violation of the distance between the core and the synchronization disk may be dirt or dust caught in the gap, incorrect installation when replacing the sensor or carrying out other repair work, mechanical impact as a result of an accident, etc.
- Damage to the synchronization disk that provides signal generation. The cause may also be mechanical damage, physical wear, foreign bodies, contamination of disk teeth, etc.
- Damage to the LED or signal receiver of the optical type sensor. The reasons for part failure are similar - dirt, mechanical stress, etc.
In most cases, sensor malfunctions lead to its replacement due to the low maintainability of the meter. The DPKV body is non-separable, so replacing the winding or core is impossible. An exception is if the insulation of the sensor wire is damaged - in this case, you can get by with insulating or replacing the wire.
Checking the crankshaft position sensor
As already mentioned, the manifestation of a malfunction of the crankshaft position sensor has similar symptoms to the failure of other sensors that ensure optimal engine operation. Therefore, diagnostics is a necessary step before replacing the meter.
You can check the serviceability of the crankshaft position sensor in three different ways:
- measuring the resistance using an ohmmeter (multimeter);
- checking the inductance value;
- by measuring the parameters of the electrical signal using an oscilloscope.
When measuring resistance using an ohmmeter or multimeter, the required value should be 600-1000 ohms. The measurement is carried out by applying the probe of the device to the inductor.
To measure the inductance value you will need a megohmmeter, a voltmeter, a high-precision inductance meter and a network-type transformer. When measuring inductance, the indicators should be within the range of 200-400 mH. A megohmmeter measures the resistance between the wires of the coils (normally not lower than 0.5 mOhm). Deviations in these indicators indicate a malfunction of the DPKV. Using a network type transformer, the coils are demagnetized after the measurement.
The sensor is checked using an oscilloscope with the engine running. The probes of the device are connected to the wires leading to the coil. Data on the performance of the sensor is visualized directly on the oscilloscope screen in the form of amplitude and signal shape indicators.
Replacing the crankshaft position sensor
To replace, you must use only a sensor of the type that was previously installed on the vehicle and recommended by the automaker. Unsuitable sensors can produce measurement errors, which will certainly affect engine performance.
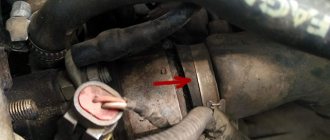
Replacing the sensor usually does not cause serious difficulties. To do this, the DPKV must be de-energized by disconnecting the terminal block from the meter. Then you need to use a 10-mm open-end wrench to unscrew the bolt(s) securing the sensor. After this, the meter must be removed from the mounting socket and a new sensor installed in it.
After installing the DPKV, you need to adjust the distance between it and the end of the synchronization disk. It should be from 0.5 to 1.5 mm (the exact data is in the car’s manual). Adjustment is carried out using adjusting washers. After installing the new sensor, the motor should start operating normally. If this does not happen, it is necessary to reset the engine errors and calibrate the sensor.
How to change the crankshaft sensor on a VAZ 2114
The VAZ 2114 crankshaft position sensor must be replaced when one of the following symptoms is observed:
Unstable operation of the power plant in idle mode.
Loss of power, “dips” in engine operation during acceleration.
“Floating”, that is, spontaneously falling and growing crankshaft revolutions.
Detonation occurs during acceleration or under high load conditions.
Difficulty starting the power unit.
The crankshaft position sensor (item 2) is mounted using one bolt (item 1), which is typical for almost all car models produced at the Volzhsky Automobile Plant. Consequently, the algorithm for replacing DPKV with “VAZ 2114” is similar to the algorithm given above.
However, the procedure for replacing the 14th model sensor has some features that can affect the quality of the final result:
Before performing dismantling work, it is necessary to apply marks indicating the position of the bolt in relation to the sensor, the sensor itself, as well as the marking of electrical cables and contacts.
Be sure to turn off the power to the vehicle before starting dismantling and installation work.
Clean the synchronization sensor seat from dirt.
Fasten the new DPKV with old bolts.
Adjust the installation depth of the synchronization sensor using special washers included with the new sensor.

