26.09.2018
18834
Cars, Repair
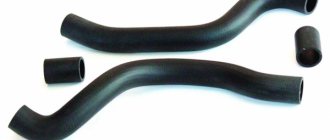
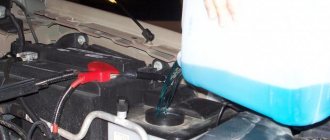
When is it necessary to replace the cooling system pipes? Everything is very simple - when they crack, burst, tear and begin to leak coolant. Something similar happened to me - hernias appeared on some of the pipes in the area of the clamps. There were no fluid leaks, but their appearance indicated that this could happen at any moment. Therefore, it was decided to replace all the pipes, as well as the thermostat and, at the same time, fill in new antifreeze.
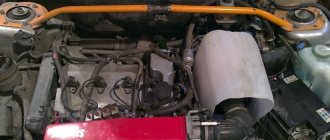
To gain access to the pipes on Kalina, you need to remove the air filter and the corrugation going from it to the throttle assembly.
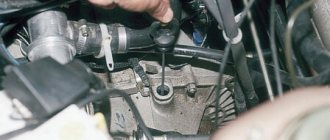
Also, drain the coolant first. It is better to do this on a cold engine to avoid getting burned. You need to drain the cylinder block and radiator. The drain hole on the block is located directly behind the ignition module (so it also needs to be removed), and on the radiator - at the bottom left.
How did I drain the antifreeze? I cut off half of a plastic bottle (it turned out to be something like a watering can) and put a hose on the neck itself. I placed the bottle under the drain hole, and led the other end of the hose under the engine into a bucket. It turned out very convenient. The pressure of the drained liquid can be controlled by the cap on the expansion tank (by opening/closing it slightly).
After the coolant has been completely drained, you can begin to remove the pipes and thermostat. There is nothing complicated here - unscrew the clamps and remove the pipes and hoses. The only thing that caused me difficulty was removing the outlet and inlet pipes of the stove. The clamps are very inconvenient, I had to tinker a little.
Having removed the pipes, I realized that I had not bought a new thermostat in vain. There was a rather large hole in the fitting going to the stove. As I understand it, it appeared as a result of the interaction of antifreeze and its additives with metal. The remaining thermostat outputs were in slightly better condition, but there were traces of interaction with the coolant.
Theory: What is a cooling system pipe?
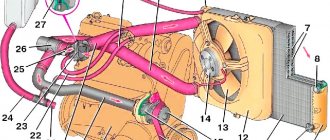
By definition, the term “pipe” means a section of pipe or hose that has a connecting element at one end (threaded, flanged, etc.) and at the other end is connected to a piping system or tank of a certain type. Purpose – supply or removal from the system of liquids or gases in a given temperature range. In a car's cooling system, the radiator and thermostat are connected by this element.
Toluene or antifreeze is used as coolant.
Divided into two types:
- Supplying fluid. Their job is to pass hot fluid into the radiator;
- Removing liquid. Discharges cooled liquid to the street.
Since the temperature regime of these two branches is different, the load is different. In the case of the intake pipe, where hot fluid is used, the load level is highest, so the rubber wears out (dries out) much faster. As a result, the intake pipe requires much more frequent replacement.
How to change a radiator hose?
The first step is to drain the antifreeze from the system. If the drained liquid is not too contaminated, it can be refilled. Then unscrew and remove the clamps from the failed pipe. If they are rusty, you can use WD 40 to make removal easier. All work on replacing a swollen pipe should be done on a cold engine to avoid burns. The new pipe should already be prepared. Removing the old pipe should be done slowly and without using force, as you can damage the radiator neck. If the old pipe is very stuck, you should try to rotate it in different directions, but under no circumstances bend it. In the end, you can just cut it with a knife. Before installing a new pipe, it is better to lubricate its inside with soap and water. And to make it softer. You should keep it in hot water for a few minutes. It is not recommended to lubricate the pipe with oil, as it can corrode it after some time.
Now we put the clamps on the hose, and then we put the pipe on the radiator and the engine water jacket. Make sure that the radiator pipe is in the correct position and is not twisted. Then we tighten the clamps and pour antifreeze into the cooling system. When the liquid is completely filled, you should check the repair areas for leaks. Now you can start the engine and check the functioning of the system.
What problems can arise if the pipes are badly worn?
- If the engine hose tube becomes leaky, oil may be lost. This will cause the engine piston to seize due to excessive friction against the cylinder walls. As a result, repairing your car will cost a lot of money.
- A worn-out hole in the air filter pipe supplies heated air. The engine is not able to operate at full power, which also causes serious problems.
- Damage to the filter causes the ingress of foreign particles and impurities, which negatively affects the condition of the car.
If your car begins to overheat frequently, there may be several reasons for this:
Thermostat. It is very simple to check its performance: on a warm engine, touch the lower and upper radiator hoses with your hand. If the latter turns out to be cold, and the lower one is barely warm, then, most likely, the thermostat is jammed, and the antifreeze circulates only in a small circle. In this case, the solution to the problem will be to install a new device in the car. Clogged radiator honeycomb. This is also one of the common causes of malfunctions in the cooling system. It occurs especially often in late May - early June, when annoying poplar fluff flies along the street. The solution to the problem is to clean the outer part of the radiator. This work often causes difficulties for car enthusiasts, but no other methods have yet been invented to solve clogged honeycombs. Therefore, everything is cleaned by hand. Faulty fan. If you notice that when the coolant heating level increases, this part does not turn on, you should check the temperature sensor, wiring and relay. Air in the cooling system. "Kalina", like any other car, is not immune to an airlock inside the SOD. And if in all previous cases the problem was solved very quickly, or at least clearly, then here car enthusiasts often have problems. Therefore, in order to fully explain the picture, below we will look at how such breakdowns are eliminated.
How can you identify problems with pipes?
- Wet and greasy stains left by leaking fluid.
- Insufficient coolant level.
- The smell of antifreeze in the cabin is a consequence of a leak.
Recommendation:
- Check the fluid level in the expansion tank at least once every 3 months.
- Check the cooling system hoses for kinks or cracks.
Where to look for a coolant leak?
- Check where the hoses connect to the radiator.
- Check the cooling system connections for leaks.
- Check the clamps - if they are loose, tighten them.
- If the oil foams, this means that antifreeze has entered the engine lubrication system. Contact a service station for replacement!
Correct driver actions
In situations where the engine overheats but the radiator remains cold, it is important to take the right measures to prevent the situation from getting worse and also try to prevent any serious malfunctions and costly breakdowns. Sometimes it happens that the driver panics ahead of time
This usually happens to motorists who have only recently gotten behind the wheel, or who have changed cars without having yet had time to get used to the peculiarities of its behavior and the operating modes of the engine itself.
Sometimes it happens that the driver panics ahead of time. This usually happens to motorists who have only recently gotten behind the wheel, or who have changed cars without having yet had time to get used to the peculiarities of its behavior and the operating modes of the engine itself.
Here we are talking about short-term overheating, which can to a certain extent be considered the norm for many engines. Short-term overheating usually occurs when sitting in a traffic jam for a long time. Then the temperature sensor arrow displayed on the dashboard rises to the critical red zone. But as soon as the car starts moving, when airflow appears due to oncoming air flows, and the cooling fan is activated, the temperature returns to normal. That is, first, try to observe and see whether the temperature will drop after a jump upward, to the red zone.
But you shouldn’t wait and watch when the car was in motion, that is, there was oncoming air blowing, or the fan was running. In such situations, experts give several useful recommendations:
- If the car was moving under completely normal conditions that do not provoke short-term overheating, but the temperature still begins to increase and reaches a critical level, do not immediately turn off the engine;
- Also, do not try to cool the power unit by pouring cold water on it from the outside, or by adding cold water to the expansion tank with cooling liquid;
- If you ignore these recommendations, fill the engine with water or add it to the tank, you will probably have to repair the engine. Moreover, such repairs are often accompanied by a mandatory replacement of the cylinder block and cylinder head;
- If you want to cool the engine, lower the engine temperature with a cold radiator to normal levels, it is better to drive off the road, stop and turn on the heater in the car. It doesn’t matter if it’s spring or summer, the cabin is warm enough without the heating working;
- Turning on the heater will remove excess heat from the engine, transferring it to the interior of your car;
- At the same time, you cannot turn off the engine itself. Just move the gearbox to neutral and leave the engine idling;
- Wait a few minutes after completing all the steps described;
- At the same time, check for any signs of coolant leakage. To do this, you will have to get out of the car, look under the car and into the engine compartment;
- If there are no leaks, then the manipulations carried out with the stove and the idle speed of the power unit did not allow the temperature to drop below the critical level, turn off the engine.
Next, you will need to call a tow truck or ask someone to tow you to get to the garage or the nearest service center. There you will find out the reasons, look for the culprit and carry out the appropriate repair and restoration work.
But there are situations when the engine needs to be turned off as soon as the engine temperature has reached its peak value. These are cases when, while driving, you suddenly saw steam billowing from under the engine compartment, and at the same time there were traces of a coolant leak. If you encounter such circumstances, stop and turn off the engine. There is no need to wait until the temperature starts to drop after turning on the stove. Otherwise, you risk completely ruining the engine.
The engine needs proper operation. This is the basis for its safety, effective, safe and long-term operation. Also, at the same time, always try to monitor the condition of the cooling system. Any traces of a coolant leak, a low level of coolant in the expansion tank, or an excessive increase in temperature under normal operating conditions should be a reason to check the condition of the entire system.
When faced with a situation where the power unit in your car is noticeably overheating, take appropriate measures, find the cause of the increase in temperature and eliminate it. If difficulties arise with self-diagnosis, it is better to immediately seek help from qualified specialists.
The main signs that it is necessary to replace cooling system components are the following:
- The clearest and most obvious sign is the temperature sensor readings. If there is a leak, the arrow goes out.
- The engine may “boil”.
- The smell of antifreeze is noticeable in the car interior. Inhaling antifreeze vapors is harmful to health. Therefore, when the smell first appears, it must be eliminated immediately. This is not easy to do, regular ventilation is not enough, it is advisable to use dry cleaning services.
- Visual detection of a direct pipe leak - liquid is clearly dripping.
How to Diagnose Cooling System Leaks
- First check the coolant level in the reservoir. If the coolant level decreases, proceed to the next steps.
- When inspecting the radiator, carefully check the connecting hoses. The check must be carried out along the entire length. It is important to detect a leak in time, since a small hole may be sealed, but in case of serious damage, replacing the entire hose is inevitable.
- Next, inspect the mounting clips. The clamps must be dry and tight, but not too tight, as the hose is under pressure, which leads to cracks and subsequent rupture.
If you suspect a coolant leak in the engine compartment but cannot determine the location or type of coolant, follow these steps.
- Start the engine when it gets cold and open the hood;
- In cold weather, all fasteners are loosened until they reach operating temperature, so detecting leaks during a visual inspection should not be difficult;
- If damage to the bushing or hose is detected, it is necessary to urgently replace the part;
- If a leak is detected, but it is not possible to determine the type of fluid, throw a piece of white paper under the car and let it lie there for 20 minutes with the engine running. During this time, the required amount of liquid will drip onto it, then determine what kind of automotive liquid it is based on color, smell or viscosity.
Why does the heater in a Lada Kalina car blow cold air?
Breakdowns are common not only to old, but also to new cars. Some owners of Lada cars notice that the heater blows cold air; Kalina may also be susceptible to this problem. This can happen for many reasons.
Regardless of this, it is better not to delay repairs. Here, as in the human body, one small violation can trigger a chain reaction. You can deal with such a breakdown yourself or in a service station.
Attention to every detail
It is easier to prevent a technical malfunction than to spend time and money fixing it later
In order to avoid having to repair the stove on your Lada (it doesn’t matter whether it’s Kalina or Vesta), you need to carefully monitor the technical condition of the car:
- every morning at Kalina’s parking lot, you need to check for dark spots indicating an antifreeze leak;
- inspect the system hoses for leaks;
- if any are found, then it is necessary to immediately change the tank cap;
- daily inspection of the stove radiator;
- If the stove blows cold air, then the reason should be sought in increased coolant consumption.
Daily checks of the vehicle’s “health” will help avoid many problems.
If the radiator valve is loose or the coolant reservoir is leaking, the problem will spread at an alarming rate within a short time.
The first result will be a breakdown of the vehicle's computer. Such a malfunction is not covered under warranty, so repairing the heater and replacing the computer will fall entirely on the shoulders of the car enthusiast. A small rearrangement of the on-board computer will help reduce the risk of such troubles for Kalina:
- carefully dismantle the cladding;
- unscrew 2 screws;
- gently squeeze the computer towards you;
- place it on a shelf in the glove compartment area;
- There is no need to disconnect the wiring harnesses;
- fix the computer in a new place;
- re-grounding is not carried out.
If everything is done correctly, then in the future the Lada Kalina will not be left without an on-board computer, even in the event of an unexpected problem. The main thing is for the driver to make sure that the fastenings are secure after rearrangement.
Technical specifics of restoration of functionality
In most cases, repairing a heater takes little time. If the Lada Kalina requires one, then if you have the necessary tools, you can do everything yourself.
In order to solve the problem with the stove on Kalina, you need to perform the following sequence of actions:
- drain all coolant;
- remove the air filter (the heater damper cannot be removed);
- the brake and gas pedal are dismantled for more convenient replacement of the radiator;
- in some cases there is a need to dismantle the steering structure assembly;
- the battery is removed together with the stand;
- remove the air duct;
- carefully unscrew the hose from the radiator;
- The interior heating hose is dismantled.
To save time in the future, it is necessary to fix the position of the parts in space. This will allow you to avoid delaying the repair of the Kalina heater. In some cases, the above algorithm does not work fully. The culprit here is the individual characteristics of the vehicle. In this case, there is no need to rush or start using brute force.
Experienced drivers recommend removing more parts and components of the vehicle, which will ultimately make it possible to replace the radiator and grille.
Regardless of the complexity of the repair, you must ensure that the coolant has been properly drained and then refilled. Any drips and leaks can negatively affect the technical condition of the iron horse.
During repairs, the car owner may notice wear and tear on some parts of the car. In this case, they should be replaced.
Firstly, this will eliminate the risk of repeated repairs. It is impossible to predict exactly when the car will start to feel unwell. Secondly, high-quality operation of the vehicle saves time and money that the driver would have spent on visiting a service station.
How to replace a coolant hose
The process of replacing the silicone pipe of the cooling system consists of the following steps:
- The first thing to do is drain the coolant from the system. It can be reused. But only pour into a clean container;
- Then moisten the clamps (clamps) that contain corrosive formations with a low-viscosity liquid;
- As soon as the system has completely cooled down, we will begin to remove the tube, starting from the neck. Loosen the clamp and slowly slide it to the free side, first one end, then the other;
- Then proceed to install the new pipe. Pull the pipe through the neck, making sure that the edge of the pipe is straight, without bends or kinks. Then tighten the clamps with a screwdriver;
- Fill the system with coolant;
- Then start the car and check the tightness of the assembled connection.
- Then regularly check the coolant level in the tank and the condition of the connections.
Useful videos
Tips for installing cooling system pipes
Tips and nuances in the process of installing pipes.
Lifehack for replacing cooling system pipes
Replacing the cooling system pipes of a VAZ-2109 (2108-21099) yourself. Nuances, difficulties, solutions
Replacing the engine cooling system pipes on a nine-system car - VAZ-2109 (2108-21099).
- how to unscrew old screw clamps yourself,
- how pipes age and “dull” and why they need to be changed,
- how do incorrect clamps affect the rubber of pipes,
- how to reduce the deformation of pipes from clamps,
- how to check the tightness of the thermostat valve,
- how and why to install pipes on sealant.
We do all the work independently and on our own, which is easily doable if you want and have the time.
Radiator replacement
Sometimes a clogged or damaged radiator causes the heater to not work properly. If this happens, you should replace it with a new, similar one.
It is done as follows (without dismantling the panel):
- Place the car in a pit and drain the coolant (the same as when replacing a valve).
- To quickly and more completely drain the coolant, unscrew the cap of the expansion tank.
- After draining, screw the plug-bolt into place.
- From inside, close the tap by moving its lever to the left position.
- Move the passenger seat back as far as possible.
- Remove the plug in the center of the panel and unscrew the screw underneath it.
- Unscrew the 4 screws securing the left panel cover.
- Unscrew 6 screws (3 on top and bottom) on the steering column casing, and then remove the casing.
- Disconnect the radio and cigarette lighter connectors.
- Remove the plastic covers on the stove adjustment levers.
- Unscrew a couple of screws in the upper part of the center console, and then remove the latter.
- Unscrew the diagnostic connector mounting bolts.
- Disconnect all remaining electrical connectors in the console.
- Remove the console completely.
- Unscrew the screws securing the panel base to the body.
- Remove the 4 screws securing the panel from the side.
- Unscrew the panel screws in the center.
- Remove the ECU.
- Lift and secure the panel.
- Loosen the pipe clamps and remove them.
- Drain the leaking liquid.
- Unscrew the bolts securing the radiator (4 pieces).
- Remove the old radiator.
- Install a new radiator.
Reassembly is carried out in the same sequence, but in reverse order.
