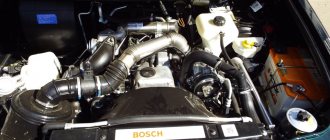
To avoid unpredictable consequences for the main power unit of the Lada Kalina, it is worth changing the timing belt on time. Since untimely replacement can lead to major repairs and a blow to the owner’s wallet. Of course, not every car enthusiast can do this himself and has to contact a car service center.
But after reading this article, you can not only learn how to change this unit, but also correctly select spare parts and determine the timing belt malfunction.
Video of replacing the timing belt on Lada Kalina (8-valve engine).
Article number and price of the video for Lada Kalina
An integral operation of selecting a belt is also selecting a timing pulley. As in the first option, there is an original and several analogues that can be used. Let's look at the article numbers and prices for the timing pulley Lada Kalina 8 valves:
- The original catalog number of the timing belt roller of the 8-valve Lada Kalina is: 21126-1006135. The average cost of this part in the Russian Federation is 700 rubles.
- There are quite a lot of analogues of the original timing pulley, which are successfully certified for use on a car and differ only in quality and service life. Let's consider which timing pulley can be installed instead of the original one on a Kalina with 8 valves:
Table indicating manufacturers, part numbers and prices for a non-original timing pulley
| Manufacturer's name | Catalog number | Average price in the Russian Federation in rubles |
| Master-sport | 21126-1006135-ST-PCS-MS | 580 |
| QML | BT1006 | 650 |
| Pilenga | PT-P1571 | 670 |
| Torque | KR5016 | 680 |
| Caffaro | 320-99 | 720 |
| Trialli | CM172 | 735 |
| Optimal | 0-N2044 | 750 |
| LYNXauto | PB-3012 | 1080 |
| Gates | T42150 | 1300 |
| Dayco | ATB2543 | 1450 |
| Ina | 532060410 | 1470 |
| SNR | GE372.00 | 1500 |
| Ruville | 57207 | 1550 |
| Coram | C834 | 1850 |
| Outlog | RT1663 | 2000 |
This is a Chinese video, the quality is not very good, it quickly became noisy
A fairly large selection of timing rollers is available to the owner of the 8-valve Lada Kalina. It is worth noting that most of the products from the table have high quality workmanship and also have a service life of about 40,000 km.
Cost of replacement work
Prices for Lada Kalina timing belts in our auto stores vary from 400 to 1000 rubles per unit. If you also need to replace the tension roller, be prepared to shell out another 400-600 rubles.
The cost of replacing a belt is 500-800 rubles. With a roller – up to 1000 rubles.
When buying a timing belt, it is better to give preference to a branded VAZ product. If this is not possible, you can purchase an analogue produced by a well-known brand. Below are samples showing the catalog numbers of the original belt and worthy imported analogues.
| Natural wear and tear. | During operation, the element is constantly exposed to high temperatures, which ultimately leads to stretching, and then to the appearance of microcracks. |
| Product quality. | A low quality part will not last long. |
| Errors when choosing components. | The gas distribution mechanism may be damaged due to the installation of an incorrectly selected part or due to unqualified replacement work. Violation of the valve timing threatens with excessive wear of engine parts and, as a result, expensive repairs. |
| MANUFACTURER | CATALOG NUMBER OF SPARE PARTS |
| TIMING BELT VAZ 2110 (8 VALVES) | |
| AVTOVAZ | 2112-1006040 |
| BOSCH | 1987949559 |
| CONTI | CT996 |
| CONTITECH | CT 996 |
| GOODYEAR | G1535 |
| GATES | 5539 |
| FLENNOR | 4428 |
| LUZAR | LTB0112 |
| LYNX | 136CL254 |
| PILENGA | CTP0996 |
| OPTIBELT | ZRK1538 |
| TENSION ROLLER | |
| AVTOVAZ | 21120-100612000 |
Reasons for failure and consequences of not timely replacement
There are several reasons for the failure of the timing belt on the Lada Kalina with 8 valves.
Due to poor quality, the timing belt slides closer to the driver's side
Let's consider the main ones:
- Wear. During operation, the belt heats up, which leads to its stretching. In turn, the consequences are the formation of cracks.
- Quality workmanship of the part. A bad part can last much less than its intended service life.
- Incorrectly selected spare parts. If a part is installed incorrectly or is not the correct one, the engine will not work correctly and the gas distribution process will be disrupted. This leads to increased wear of the elements of the power unit or replacement of the cylinder head.
Consequences of untimely replacement of the timing belt and pulley
On the 8-valve Kalina, the engine is “not plug-in” - in slang this means that the pistons do not meet the valves in the event of a timing belt break
The consequences of untimely replacement of the timing belt can be both minor and large-scale, which will hit the owner’s wallet. On the 8-valve Lada Kalina engine, the valves do not bend, so if the timing belt breaks, you will only need to replace it and find out the reason. Either the belt broke on its own, or it was helped, for example, by a jammed pump.
So, let's look at the main troubles that can happen:
- Wear of piston and liners.
- Increased oil consumption.
- Worn camshaft and valve guides.
- Bent cylinder head valves.
- Timing gear deformation.
The timing belt is a special toothed belt made of rubber and reinforced with nylon thread. The role of this device is to transmit rotational torque from the crankshaft pulley to the camshaft while simultaneously reducing the speed by half.
Video of replacing the timing belt on an 8-valve Lada Kalina:
STAGE 1
We drive the car into the inspection hole and lift the front right wheel with a jack. We remove the wheel and, opening the hood, let the engine cool. It is desirable that the engine temperature is approximately 60 degrees Celsius. Before getting to the Kalina timing belt, you need to remove the generator belt and its drive pulley on the crankshaft.
The generator drive device is shown in the photo below:
FIGURE 4 Installing the generator belt for 8 valve Kalina
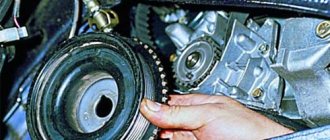
As can be seen from the photo, the generator belt is tensioned using a roller. To remove the poly V-belt, you need to loosen the tension on this roller. To do this, you first need to loosen the rod locknut with a wrench (19). We loosen the lock nut and use a wrench ( we tighten the rod itself until the belt loosens and it becomes possible to remove it. Now it’s time to get to the generator drive pulley on the crankshaft. To do this, you need to go down into the pit and remove the engine “boot” protection on the right side. Also you need to remove the flywheel protection, which is secured with three bolts (10) from the bottom of the engine, on the gearbox housing. We remove the protection and, by inserting a flat-head screwdriver between the teeth of the ring gear and the gearbox housing, we will lock the flywheel. This is necessary so that when the bolt is unscrewed, the crankshaft does not turn. Bolt ( the key 17) is tightened very tightly, so to unscrew it, you will need to apply some force. To do this, it is better to use a socket with the same size and a pipe as a lever. After tearing off the bolt, unscrew and remove the generator drive pulley.
STAGE 2
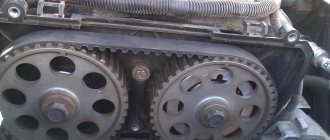
We leave the pit and remove the upper plastic engine protection. It is attached to the engine with four clips; you just need to carefully pull it off from each clip in turn. Next, remove the timing belt protective cover of the Lada Kalina. To do this, you need to unscrew the three mounting bolts with a wrench (10). One of them is located in front of the casing, and the other two are on the side. Having unscrewed the bolts, we removed the casing, and the entire gas distribution mechanism drive opened in front of us (see photo).
FIG.5 Timing drive Kalina 8 Cl
Now the crucial moment has come! It is necessary to install the entire Kalina timing belt drive strictly according to the marks. To do this, you need to take a socket head (19), preferably with an extension, and screw back the bolt that we unscrewed when removing the generator drive pulley.
Using this bolt, turn the crankshaft clockwise until the marks on the crankshaft and camshaft gears match. The locations of these marks are indicated in the illustrations above.
It is better to turn it by the crankshaft, but it is not advisable to do this with the camshaft. This must be done because the Kalina timing mechanism is driven precisely by the crankshaft, and not by the camshaft.
Next, you need to use a wrench (17) to loosen the bolt securing the tension roller and loosen the tension of the timing belt. Remove the belt and tension roller to check the condition. Usually, when replacing the Kalina timing belt, the roller is also changed, since most often the bearing on it has, albeit a small, play. And this is unacceptable. Checking the condition of the pump. You need to tug on the pulley without removing it, and if there is play, it is better to replace it immediately.
The pump may work for a while, but then it will still fail, and to replace it, you have to open the entire drive again and replace it. And it also happens that it jams and because of this the belt breaks. Then you have to open this entire system again and repeat all the work again. It is advisable to check the condition of the crankshaft and camshaft seals. To do this, you need to remove the corresponding gears and the rear cover of the gas distribution mechanism.
After checking the condition of the seals, we will replace them if necessary, which will save you from unnecessary work in the future.
STAGE 3
So! We removed the timing belt, checked the condition of the pump and seals, and, if necessary, replaced them with new ones. Next, we can begin assembling the Kalina timing belt drive.
We install the previously removed camshaft and crankshaft gears into their seats. If during the process of removing them the marks have shifted, then they must be installed strictly in their places.
Before you start installing a new Kalina timing belt, you need to either count the number of teeth, there should be 111, or carefully read the markings. Their number should be indicated there. You can also simply compare the new belt with the old one, they should have the same length. Important point! When installing a timing belt, you must carefully ensure that during the installation process the marks remain strictly in their places.
First you need to put the belt on the crankshaft pulley. Then put the belt on the camshaft pulley on the right side of the camshaft. This is done so that the tension roller can be used to tighten the drive more easily. We install the tension roller, screw it on, but do not tighten it. It should fit against the back of the belt. We put the belt on the pump pulley and tighten it with a roller, turning it counterclockwise with a special key.
To check the belt tension, take it from the right side of the camshaft and turn it along itself. A properly tensioned belt should rotate no more or less than 90 degrees or flex no more than one centimeter when you press it.
After the drive belt has been tensioned, you can already tighten the roller mounting bolt. Here you need to make sure that the belt on the right side of the camshaft pulley is properly tensioned and does not sag.
A photo of the roller is shown below, it also shows which holes need to be used to turn the roller: FIG. 6 Tension roller for Kalina 8 valve
Roller adjustment key:
FIG. 7 Tension roller adjustment key
Using a wrench (17), turn the crankshaft three to four turns so that the crankshaft pulley is aligned with the mark in its place. After that, we check them again. All marks must be strictly in place.
We exhale, we are not in danger of bending the valves
If you have an 8-valve engine, then bending the valves and replacing them, as a rule, does not threaten you, but if the “head” is 16-valve, you are definitely guaranteed to replace these elements. However, in this article we will look at how to change the timing belt on a younger brother, when a breakdown does not entail any unpleasant consequences, and all work can be carried out almost in the field and with minimal knowledge.
Major breakdowns
There are three main types of timing belt failure:
- The integrity of the belt structure is compromised - in this case, the belt delaminates, and the internal threads on its surface become visible to the naked eye. These problems occur due to mechanical damage or due to incorrect adjustment. This belt must be replaced immediately.
- Over-tension or under-tension of the belt - the tension roller is responsible for the degree of belt tension, which allows the belt to rotate around its own axis and allows it to be adjusted correctly. If the belt is too tight or too loose, it will fall into an indecent state very quickly.
- A break is the most unpleasant situation that can happen on the road with a timing belt. In this case, the engine will completely stall and it will be possible to start it again only by installing a new element.
To avoid such troubles, the manufacturer recommends checking it every 15,000 kilometers and replacing it every 75,000 kilometers. In fact, it should be changed as soon as visible cracks are detected on the surface.
Video about setting marks on Kalina's 8-valve valve
When performing all work, do not close the hood and start the engine. If everything is installed correctly, then there should be no extraneous noise or creaks in the operation of the motor. With a well-tensioned drive, the engine should not move in “waves”, that is, regardless of the speed, the engine should not deviate from stable operation. If the belt is tensioned too much, a peculiar “hum” from the tension roller may be observed. If this happens, loosen the roller and fix everything again. Upon completion of all work, reinstall the belt and engine cover.
Belt replacement
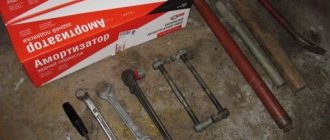
Required tools and tools:
- open-end wrench or ratchet head 10;
- open-end wrench 17;
- key to 13;
- Large slotted screwdriver;
- special key for rotating the tension roller;
- jack;
- balloon wrench.
If the belt is not broken, we start by setting the gas distribution mechanism settings according to the marks.
1. Place the car on a flat surface, engage the gear, and jack up the right front wheel.
2. Raise the hood, use a 10 mm wrench or socket to unscrew the 3 bolts securing the timing belt casing.
3.Using a 13mm wrench, unscrew the generator belt tensioner nut. We remove the belt.
4. Visually look for a mark on the camshaft sprocket. It looks like a rectangular protrusion on the inside edge of the gear.
5. Turn off the gear and, turning the front right wheel with your hands, ensure that this mark coincides with the upper protrusion of the casing mounting plate.
6. Using a screwdriver, pry off the rubber plug on the gearbox housing (behind the 4th cylinder) and open it. There is a flywheel under it. There is also a mark on its gear, which should coincide with the triangular protrusion located on the left.
7. If the gas distribution phases are set correctly, then in this position both the mark on the timing sprocket and the mark on the flywheel will coincide with the pointers. If the marks do not match, you need to release the tension roller, remove the belt from the timing sprocket and, by turning the crankshaft pulley, make sure they match. We carry out the same procedure if the belt has been broken.
8.Fix the position of the flywheel by locking it through the hole for the plug with a screwdriver. Unscrew the tension roller if it has not yet been relaxed.
9.Remove the front right wheel.
10.To remove the old belt and install a new one, you need to dismantle the generator drive pulley. After making sure that the flywheel is securely locked, use a 17mm wrench to unscrew the bolt securing this pulley. Let's take it off. We remove the generator belt to the side.
11.Remove the old belt from the crankshaft pulley and throw it away.
12. Install the new belt in the reverse order, checking the position of the marks.
13. We tighten it by rotating the tension roller with a special key to the right and left. A timing belt is considered ideally tensioned if its plane can be rotated horizontally by a maximum of 90 degrees (1.5-2 kgf) in the middle between the timing sprocket and the crankshaft pulley.
14.Clamp the tension roller in this position.
15.Remove the screwdriver from the flywheel and close the plug. We are not installing the belt cover yet.
