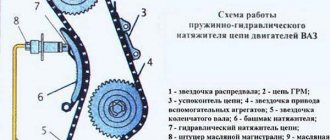
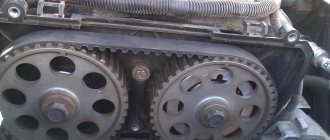
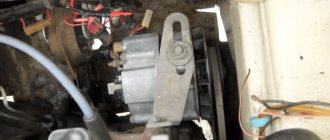
Owners of the VAZ-2114 car know that the timing belt, according to the vehicle’s operating manual, must be replaced with a new one based on strict regulations. This part is positioned to act as a synchronizing link between the crankshaft and camshaft.
The location of the timing belt is very noticeable if you open the hood of a car with an 8-valve engine. The VAZ-2114 also falls into this category, and wear on the timing belt, which results in its replacement, occurs due to the increased load that accompanies the main function of this belt. Connecting not only shafts, but also other important parts, the timing belt may begin to tear and slip. After all, this product is made of durable rubber and is a ring with cuts in the inner circle.
Step-by-step instructions for replacing the timing belt on a VAZ 2114 with your own hands.
The timing belt is a rubber enclosed product used to synchronize the crankshaft and camshaft.
It is imperative to replace this part, because the consequences of its failure can be very different: from stopping the engine to immobilizing the entire car. In this case, as a rule, the replacement itself must be carried out in several stages. VAZ 2114 has two of them.
First stage.
1. To begin, you need to place the car on a flat surface and secure its position using the hand brake. The gearshift lever is set to 4th or 5th gear.
2. After this, remove the front timing cover.
3. The crankshaft is turned counterclockwise (the camshaft mark has moved from the rear cover antenna to a couple of teeth). This allows you to slightly loosen the belt tension. Now the latter can be removed from the generator drive.
4. The fastening bolt is put in place, and the generator drive pulley is removed from the crankshaft.
5. The gearshift lever is set to neutral.
6. Then turn the crankshaft again until a mark appears on the flywheel. When this mark is in the center, the rotation stops. The camshaft pulley mark is located opposite the installation mark, which is located on the rear cover.
6. Now the tension roller mounting nut is loosened and the old timing belt is removed.
7. Put a new belt on the camshaft pulley (we hook the left side of the belt to the roller and put it on the pump pulley and the crankshaft pulley) and tighten it - using a roller, which should be turned counterclockwise.
8. As the final action of the first stage, the crankshaft is turned several revolutions, returning the marks to their original places.
The second, final stage.
The belt replacement is almost complete. All that remains is to unscrew the crankshaft bolt, secure the generator pulley, finally tighten the timing belt (using the same pulley) and check the results of the work by starting the car engine. If everything is in order, you can reattach the front timing cover.
As you can see, it is very difficult to call the process of replacing a timing belt easy and fast, because only a professional can carry out this procedure quickly and efficiently.
Pulley removal
Unscrewing a fastening bolt or nut is only half the battle. Next you need to pull the pulley out of the shaft. The pulley cannot be removed easily by hand unless its seat is broken. In addition, if the pulley fits tightly onto the shaft, it is also secured against turning by a key.
There are special pullers for removing the pulley from the shaft. There are mechanical and hydraulic pullers.
The design of a mechanical puller is simple. Usually it has three legs, with which you need to hook the pulley itself, and rest the central rod against the shaft. After which, you need to rotate the rod, the legs will straighten and pull the pulley towards you. There are even simpler pullers that you can make yourself. If there is no removable device for the pulley, then you can use pry bars. If one person is filming, then take turns, moving it a little on each side so that there is no distortion. If there are two, then at the same time, from different sides, the pulley is pressed out from the crankshaft with a sharp movement.
It also happens that when using a puller, the walls of the pulley grooves cannot withstand and break off. Therefore, when using pry bars, they must be engaged as close to the shaft as possible.
Signs of the need to replace the timing belt and the consequences of a broken belt
On a VAZ 2114 car, like on any other car, sooner and later the timing belt can start to eat up.
As a result, it will slowly begin to slide and, as a result, will finally burst.
If it breaks while driving, the car will most likely jerk quite sharply, as if you had switched from 4-5 gears to 1 and performed engine braking, and it will not start again.
If the car is equipped with an on-board computer, the “phase sensor error” icon will appear on it.
To prevent such a situation from arising suddenly, the condition of the belt must be constantly monitored.
The timing belt is changed according to the operating manual every 50 thousand km, and on the advice of professionals, after 40.
On a 1.5-liter, 8-valve engine, nothing critical will happen if it breaks, but when the car is equipped with a 1.3-liter power unit, the valves can bend.
This would be very sad, because what happened would entail very expensive work, if not a major overhaul of the engine.
FakeHeader
Comments 17
I installed the Trially kit GD 708. No problems and the price is adequate
Put on a Bosch belt.
take the Gates, along with the rollers, I’ve already driven 40 thousand)
Bosch has been running for about a year and a half, so far everything is fine.)
I also thought about Boshevsky.
Take it, the quality is good) I got it for about 600 rubles
PowerGrip is a good and timeless company, and most importantly not Russian. A little more expensive, but eternal. The main thing is not to run into a fake. How to distinguish the original on the drive is full of information.
Looked at us, one fake(
Well then, either AvtoVAZ or Balakovo! The belts are good and the most common; there is no point in counterfeiting them, since these are not expensive spare parts.
They themselves suck. My grandfather's car does this a little. He says he changed the timing belts a lot. Our Russians are the most eager. I'll probably take the Bosch, the reviews are praising it
I drove an AvtoVAZ for 2 years - 50 thousand km. I drove to Balakovo for 2 years - about 60 thousand km. Nothing ever broke.
Well, maybe it also depends on the frequency of driving and driving style. Now I will be doing a lot of long-distance driving, I’d rather not take risks with Russian timing belts.
I drove my car both to Irkutsk and Sochi))) and I rev it up to 5 thousand rpm) so...))))
Well, I also turn it up to 5, sometimes up to 6.5)
PowerGrip is a good and timeless company, and most importantly not Russian. A little more expensive, but eternal. The main thing is not to run into a fake. How to distinguish the original on the drive is full of information.
I got the flu. Well, it’s a given)))…although there is a reinforced contitech that costs 200 rubles more than anything else.
V-belt (profile A) Used on “Classic”, Samara, Niva 710 mm cars – VAZ 2108-21099 with a carburetor engine and generator drive. Of the most common 715 BRT cat. number 2108-3701720-01RU,
820 mm – VAZ 111, 1113 (OKA) – generator drive The most common are BRT 1111-3701720-01RU (geared), BRT 1111-3701720RU (simple).
840 mm – used on LADA 4×4 in a variant version to drive the power steering pump (vehicles of new years of production)
940 mm – the generator drive of the VAZ “Classics” 2101-2107 of their modifications, the VAZ 2121 NIVA, the generator drive and the steering hydraulic pump drive of the VAZ 21213 (costs 2 belts) in a variant version a poly V-belt is installed, we will consider it below. AvtoVAZ 21010-1308020-82 (geared), BRT 2101-1308020RU (can be either simple or geared).
Poly V-belts (ribbed) are used to drive the generator and auxiliary mechanisms.
6PK698 – drive of the VAZ 21093 generator with an injection motor, 2113-2115 with an 8-valve injection motor. The belt tension is produced by a generator, without additional rollers or mechanisms. BRT 21082-3701720RU
6PK742 – drive of the VAZ 2110-2112 generator without power steering, found on the first production LADA Priora. BRT 2110-3701720RU
6PK823 Lada Granta – generator drive. Engine 2116, 8 valves. There is no belt tensioning mechanism. Elastic belt used 6PK823SF
6PK882 – drive of the LADA Kalina (1118) generator with an 8-valve engine, the belt tension is carried out by a mechanism.
4RK913 – drive of the generator and air conditioner Lada Largus, engine 1.4 BRT 4RK913RU
5K990 – alternator belt Lada Largus BRT 5K990R
6PK1005 – Lada Kalina (1118-1119) generator and power steering drive.
6PK1015 – drive of the generator and power steering VAZ 2110-2112 with a 16-valve engine, LADA Priora, Priora2 with a 16-valve engine, LADA Kalina, Kalina2, Kalina-cross with a 16-valve engine, LADA Granta with a 16-valve engine. Motor VAZ 21126, VAZ 21127
6PK1025 drive of the generator and air conditioning compressor of VAZ 2110-2112 with a 16-valve engine, LADA Priora, Priora2 with a 16-valve engine, LADA Kalina, Kalina2, Kalina-cross with a 16-valve engine, LADA Granta with a 16-valve engine. Motor VAZ 21126, VAZ 21127
5РК1110 – generator drive LADA Largus engine 1.4. BRT 5RK1110RU
5PK1747 – generator drive, power steering, air conditioning LADA Largus 8 valve engine. BRT 8200833541RU
6PK1822 – drive of generator, power steering, air conditioner LADA Largus 16 valve engine BRT 8200598964RU
5PK1885 drive of generator and auxiliary mechanisms LADA 4x4 21214, 21230, Chevy Niva 2123
–> Auto-moto-bicycle equipment –> Posted: 12/16/2015
Articles
- 2108-1006120 – video. Attention: parts 2108-1006120 and 2112-1006120 are not interchangeable!
- 2108-1006129 – pin for the roller;
- 2108-1006040-10 - belt;
- 2108-1006149 – seal under the casing;
- 2108-1006146 – plastic casing.
Analogs of belts
- GATES 5521 or 5521XS (heavy duty), recommended
- FINWHALE BD-111
- BOSCH 1 987 949 559
- LEMFORDER 58-111-19 or 14458 01
- CONTITECH ST-527
- GOOD YEAR G1474 (semicircular tooth) or G1485 (trapezoid tooth)
- DAYCO 111x190/1
Show all articles
- HANSE HZ 011 008
- BRTI 21080-1006040-10
- TOYOTA 13568-19035
- RENAULT 7701462019
- OPEL 636359
- ROVER GTB1124
- AYWIPARTS AW2110560
- PROCODIS FRANCE 05CD27
- FAI 40305
- GK 791170
- MAGNETI MARELLI 340018181434
- MAPCO 43080
- HEPU 29-0165
- OPTIMAL R-1113
- SCT G124
- WILMINK WG1151273
- VEYANCE G1474
- OPTIBELT ZRK 1123 (3 pcs.)
- TRISCAN 8645 5521 (2 pcs.) or 8645 5124 (2 pcs.)
- FLENNOR 4410 (2 pcs.) or F904410 (belt + roller)
- LYNXauto 111CL19 (1 piece) or PK-1236 (belt + roller)
Analogues of the video
- GATES T42042 or T42042A (2 pcs.)
- MAPCO 23081
- FLENNOR FS99018
- LUK 531 0671 20
- OPTIMAL 0N1917
Show all articles
- BREDA LORETT TDI3009
- TORQUE 830900AE2
- ESPRA 2108-1006120/ES0108
- INA 531075010
- CORAM C747
- VPZ-23 830900AE1
Which timing chain and tensioner should I install on the VAZ 2106, VAZ 2107?
timing chain number is 2103-1006040, the average price is 380 rubles.
Analogues:
- Fenox PC2103C3 — 519 rub.
- Kraft KT 017736 — 620 rub.
The original number of the timing chain tensioner is 2101-1006060, the average price is 364 rubles.
Analogues:
- TSN 671 — 254 rub.
- Riginal RG2101-1006060 — 230 rub.
- Trialli MT 151 — 407 rub.
Prices are current for 2021, although the cost has not changed much in three years.
The price of a timing belt and the cost of replacing it
A timing belt can be purchased without any problems at any auto store. Its cost, depending on the manufacturer, ranges from 400 to 1000 rubles. However, when replacing the belt, it is recommended to also change the tension roller, the price of which ranges from 400 to 600 rubles.
The approximate cost of replacing a belt complete with a roller in a car service ranges from 600 to 1000 rubles.
If you do not have the opportunity or desire to go to a service station, you can do the repairs yourself. But first you need to purchase a new timing belt and pulley.
To make it easier to select spare parts, use the table below, which shows the catalog numbers of original parts and their analogues.
| BRAND | CODE |
| TIMING BELT | |
| AVTOVAZ | 2112-1006040 |
| GOODYEAR | G1535 |
| GATES | 5539 |
| CONTITECH | CT 996 |
| CONTI | CT996 |
| LYNX | 136CL254 |
| FLENNOR | 4428 |
| BOSCH | 1987949559 |
| OPTIBELT | ZRK1538 |
| LUZAR | LTB0112 |
| PILENGA | CTP0996 |
| TENSIONER ROLLER | |
| AVTOVAZ | 21120-100612000 |
Considering the possible malfunctions caused by a broken timing belt, as well as the complexity of repairs, it is extremely undesirable to buy spare parts of dubious quality and unknown manufacturers.
Purpose of the timing belt
An internal combustion engine is a complex system that consists of hundreds of parts and several more or less independent mechanisms. And the engine will only function normally if its mechanisms, assemblies and systems work in harmony. This quality - consistency of operation - is of decisive importance for the engine. For example, a certain position of the pistons corresponds to a strictly defined position of the valves, and if this condition is not met, the engine simply will not work.
Therefore, in internal combustion engines there is an urgent task of synchronizing and coordinating the operation of several systems. In modern engines, this problem is solved using several drives - a gas distribution mechanism drive, a generator, a water pump, an ignition distributor, a fuel pump, etc. But the most important thing is the timing drive, which is necessarily present in all types of engines.
Timing belt VAZ-2190 set with roller, water pump GATES
Timing belt VAZ-21126,11194 set with roller and water pump GATES
Timing belt VAZ-2108-099 kit with CONTITECH roller
Timing belt VAZ-21126,11194 set with rollers GATES
Timing belt VAZ-2108-099 CONTITECH
Timing belt VAZ-2108-099 set with roller GATES
Timing belt VAZ-21126,11194 set with rollers AvtoVAZ
Timing belt VAZ-21126,11194 set with INA rollers
Timing belt VAZ-2190 set with roller GATES
Timing belt VAZ-2190 set with AvtoVAZ roller
The engines of VAZ passenger cars initially used a timing drive, implemented using a metal chain that connected the crankshaft gear to the timing shaft gear and some other units. However, later VAZ designers abandoned the use of a chain, preferring a simpler, more reliable and modern solution - a rubber timing belt.
The timing belt in VAZ engines solves several problems at once:
It should be noted that in VAZ cars the timing belt serves to drive the camshafts and water pump. This belt could, in principle, rotate the generator and other mechanisms, but VAZ designers abandoned this idea. Why? Because in this case, a broken belt or jamming of any of the units would immediately disable the entire engine, so it is more reliable and safer to make a separate drive for some units. And a breakdown of the water pump will not stop the engine immediately, so combining the drive of this unit with the timing drive does not pose a potential danger.
VAZ cars use several types of timing belts, which differ in characteristics and design.
How to change it yourself?
You can replace the belt on an 8-valve VAZ 2114 with an injector engine yourself or by ordering the appropriate service at a service station. During the shift process, there are nuances that must be taken into account when performing the task. If you make mistakes and do not change the strap correctly, this can lead to rapid wear and breakage. Below are instructions for replacing the belt in a VAZ 2114 8 valve.
Tools
If you change the belt yourself, prepare the following:
- a set of open-end wrenches, you will need tools for 13 and 17;
- long flat blade screwdriver;
- 10mm ring wrench, you can use a ratchet head;
- key for installing the tension roller;
- wheel wrench;
- jack.
User Pro Remont shared a video that describes in detail the procedure for replacing the timing belt pulley and timing belt in a VAZ 2114 car.
Algorithm of actions
How to change a belt correctly:
- Drive the car into a garage with a pit. The surface on which work is performed must be level. Switch the gear selector to neutral position.
- Loosen the bolts on the front right wheel. Place this part of the car on a jack so that the wheel can be rotated.
- Open the hood of the car. Using a 10mm wrench, remove the three screws that secure the plastic strap protector.
- Using a 13mm wrench, you need to loosen the bolt that secures the tension roller. Remove the device.
- You can see a mark on the camshaft gear; it is made in the form of a rectangular protrusion on the edge. When performing work, it is necessary that this mark coincides with the protrusion located on the fastening of the strap casing. If these marks do not match, you need to turn the wheel until they match.
- Then find the rubberized plug installed on the top of the clutch housing; it is located to the right of the power unit’s BC. The part is carefully pryed off with a screwdriver and removed from the seat. Under the plug you can see the flywheel crown; there is a mark on this device. It should be opposite the triangular protrusion located on the left. If the marks do not match, then take a 17mm wrench and loosen the tensioner. Using a pulley removal wrench, turn the device counterclockwise to loosen the timing belt.
- When the upper part of the belt is removed from the gear assembly, take a 17mm wrench and turn the crankshaft until the flywheel marks are opposite each other. The flywheel itself must be secured in this position; to secure it, use a screwdriver and install it between the teeth. If you have an assistant, ask him to hold the tool to prevent it from turning.
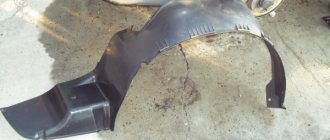
- Now you can remove the right wheel. Unscrew the screws that secure the arch protection and dismantle it.
- Using a 17 mm wrench, unscrew the nut securing the generator set pulley. When unscrewing, make sure that the flywheel does not turn.
- Dismantle the generator pulley and remove it from its seat.
- Remove the timing belt from the crankshaft disc.
- Using a 17mm wrench, completely unscrew the tensioner pulley lock and remove it from its seat. If you loosen the fastening, the belt can be removed.
- Install the new product onto the crankshaft disc. When installing, make sure that the marks are not broken. Install the generator set drive pulley by first placing a strap on it.
- Place the product on the gear of the mechanism. Install the tension roller.
- The strap is being installed. During installation, the tension roller must be turned with a special tool purchased in advance at the store. If you don't have one, you can use two self-tapping screws and a screwdriver. Self-tapping screws are installed in the grooves, and a screwdriver secures them. Turning is done counterclockwise. Tension the belt using the tension roller and tighten the screw that secures the roller.
- It is necessary to set marks if they are lost during the work process. The installation procedure for all components is performed in reverse order.
Photo gallery
Photos of belt replacement are shown below.
Unscrew the screws securing the timing belt protective casing. The mark on the camshaft gear should coincide with the mark on the casing fastening. Loosen the belt tension roller by turning it counterclockwise. Remove the belt from the pulleys and install a new product. Unscrew the nut securing the generator shaft. Put on the new belt and tighten the roller.
Video “Replacing the oil seal”
This is a very useful video for owners of a VAZ 2109 with an engine equipped with an injector. It shows in detail how to remove the timing belt, as well as how to unscrew the crankshaft pulley to replace the gasket. Do everything as the car mechanic says, and you will be able to do everything yourself.
When carrying out repair work on the engine and engine-related parts, it is necessary to remove the pulley from the crankshaft, for example, to replace the pulley or to replace sealing seals in case of engine oil leakage. It would seem a simple task, but removing the pulley from the crankshaft poses difficulties and it is not so easy to remove it. Therefore, in this article we will look at how this can be done quickly.
Removing a worn out timing belt and replacing it with a new one
- After the car is put into manual control, you need to activate fourth gear.
- Remove the protective cover from the belt and, loosening it, remove the timing belt.
- It is necessary to carefully remove the crankshaft generator drive pulley. Once only the bolt remains at its attachment point, you can move the car to neutral.
- While turning the crankshaft clockwise, you need to carefully monitor both the position of the mark and the flywheel through the hole in the clutch housing.
- When the mark is in a position parallel to the middle stripe on the scale, you should begin to loosen the bad timing belt by unscrewing the roller nut. Now the timing belt and pulley can be removed to prepare for the procedure of replacing the belt with a new one.
- Replacing the timing belt is done in the reverse order. Particular attention should be paid to the position of the pulleys and marks, which in no case should be knocked down.
- When the new belt is put on the camshaft pulley, you can tighten it using a roller that turns counterclockwise. In this case, the crankshaft should rotate until the marks return to their previous position.
- Replacing the belt at the final stage involves adjusting it, for which it is necessary to finally tighten the belt. An amplitude of 5-6 m is ideal, and you can do it without the device used in such cases at service stations. After starting the engine, you must make sure that the manipulations were performed correctly, after which the front timing cover can be returned to its place.
Chain him!
Car engine designers quickly came to the conclusion that the camshaft belongs next to the valves. This solution simplifies valve drive and reduces inertia, which is especially important for high-speed motors. And the distance between the camshaft and crankshaft has become quite large, especially on long-stroke engines. These are the motors whose piston stroke is greater than the cylinder diameter. By that time, bush-roller chains had already been mastered in production, and they began to be used to drive camshafts. The gear ratio was ensured by a twofold difference in the number of teeth of the drive and driven gears. And double-row chains were used for reliability.
The timing gear drive has been preserved on modern V-shaped multi-valve engines. This became possible because the camshafts, located in the camber of the V-shaped cylinder block, are relatively close to the crankshaft.
The timing gear drive has been preserved on modern V-shaped multi-valve engines. This became possible because the camshafts, located in the camber of the V-shaped cylinder block, are relatively close to the crankshaft.
The main problems on the road (and how to fix them yourself)
For the first time on a mass-produced domestic engine, a chain drive appeared on the Moskvich UZAM-412 engine, developed in the first half of the 60s of the last century. And soon the triumphal march of Lada began, on which the camshaft chain drive reigned supreme until the early eighties.
I note that when using a chain drive, complex vibrations of the system always arise, caused by uneven operation of the chain. To dampen these vibrations, motorists have to install dampers in the form of plastic (sometimes rubber-coated steel) plates. In this case, the chain must be tensioned. This has to be done immediately after assembling the motor, and during operation due to lengthening (stretching) of the chain.
Where does the “hood” come from? Interest Ask. Of course, there can be no question of elongation under load of each individual plate that makes up the chain. Calculating the strength of these elements is as easy as shelling pears. Chain elongation occurs when wear occurs and the gap in each joint increases, and there are usually more than a hundred of them. Accordingly, the total length of the chain can increase by several millimeters as it wears out.
Early imported and domestic engines described above had mechanical tensioners with a spring, serviced at every maintenance. At the same time, the chains on our engines (remember, double-row) lasted a little more than 100,000 km with proper maintenance. Further, Tolyatti engine builders stopped developing new designs with a chain drive for many years, and only when modernizing the good old 1.7-liter engine for the Chevrolet Niva and Lada 4×4 did they slightly change the design. Instead of a double-row chain, a single-row chain was used, equipped with a hydraulic tensioner. I note that with equal quality of materials, the service life of a single-row chain is less: after all, in a double-row chain there are at least three plate surfaces interacting with the rollers, and in a single-row chain there are only two.
This is how narrow the chain has become on current VAZ all-wheel drive vehicles.
This is how narrow the chain has become on current VAZ all-wheel drive vehicles.
Meanwhile, the global engine industry switched to gear chains, which reduced noise and wear. This effect was achieved due to the fact that the number of plates working in tandem with the chain rollers was increased to four, even in the simplest designs. The second factor that extended the life of the chains and made them maintenance-free was the use of hydraulic tensioners. Such devices provide the constant necessary chain tension, especially if they are equipped with a ratcheting mechanism that will not give back the slack taken from the chain.
This is what the camshaft chain drive looks like in the engines of Korean Kia Rio or Hyundai Solaris cars of the previous generation. |
In modern multi-cylinder V-engines there may be several chains, including a small oil pump drive chain. |
On boxer engines, designers also use a chain drive. |
By the way, do you know that the people's favorite Logan has a chain on him? “No, it’s not true, the author has gone crazy! There's a belt there!" - you say. But no. The oil pump on this decent engine is actually driven by a small chain.
Step-by-step instructions for replacing the timing belt
- We put the car in a position convenient for you, securing it with the parking brake.
- We engage fourth gear.
- Using a 10mm wrench, unscrew the three bolts securing the timing belt cover. One is located at the end, 2 others are on the left side of the lid, at the top and bottom.
- We loosen the tension of the generator belt and then dismantle it along with its pulley.
- We put the car in “neutral” and begin to turn the crankshaft clockwise while looking into the hatch of the clutch housing, watching the flywheel located there. When the mark on it reaches the scale division located in the middle, we stop the action.
- We check that the marks on the camshaft and rear cover are correctly positioned.
- Using the tension roller, you need to loosen the timing belt and then remove it. We immediately put on a new one.
- We place part of the new belt behind the tension roller and put it on the pump pulley. Next to the crankshaft pulley. Now we tighten it using the same roller.
- We turn the crankshaft again two full turns and again compare the correctness of setting all the marks. If they do not match, we start all over again.
- We “introduce” the generator pulley into its homeland and secure it.
- Once again, tighten the tension roller and check the tension level of the timing belt. Next, put the generator belt in place and tighten it with the required force.
- We start the car and make the necessary adjustments (if any).
Timing belt or chain: which engine is better to look for aftermarket?
To begin with, it’s worth remembering what the timing system itself is responsible for and why it is so important. The main task of the mechanism is the timely admission of a new portion of the fuel mixture into the cylinders and the release of exhaust gases.
This happens by synchronizing the operating mechanisms and transmitting torque from the crankshaft to the camshaft. It is for this very synchronization and transmission of traction that the timing belt or chain is responsible. The slightest malfunction in the operation of the system leads, at best, to unstable operation of the motor, at worst, to its serious damage and, in fact, to a major overhaul.
In fact, there are not two, but three types of timing systems used. In addition to the belt and chain, a truly eternal gear drive was used, which is considered archaic, but is still used, for example, on the ZMZ-402 motor.
As for the belt and chain, due to the constant improvement of manufacturing materials, manufacturers used one or the other. As a result, both types of drives have survived to this day, and the auto giants themselves use a chain and a belt in parallel on different units, sometimes exchanging one for the other and back. This alone suggests that the type of timing drive is not of fundamental importance, however, each of them has its own nuances, which sometimes cause problems with maintenance and repair.
Outside and inside
Photo: Vladimir Astapkovich/RIA Novosti
Despite the fact that the timing chain and belt perform the same function, the mechanisms are designed differently. The belt, although covered with a special casing, is located outside the engine, but the chain is located inside the engine in an oil bath. This means that the chain is not subject to any external factors that affect its wear, except for a sufficient oil level and pressure in the oil system, on which the operation of the hydraulic tensioner, in particular, depends.
But dust, dirt, and moisture can get on the belt, increasing abrasive loads. Another treacherous drawback is leakage of camshaft seals, which can go unnoticed for a long time: oil that gets on the timing belt very quickly destroys the rubber layer and leads to a break.
In addition, with a timing belt drive, you need to carefully monitor the drive belt. The fact is that when the latter is destroyed, scraps are scattered throughout the engine compartment, including with the risk of pieces getting into the timing system. In this case, there is a serious risk of the timing belt turning and damaging the engine.
Life time
Photo: Vladimir Astapkovich/RIA Novosti
Everyone knows that the timing belt has a clear replacement schedule, which is determined, first of all, by mileage. Depending on the design of the motor and the components used, as well as operating conditions, this regulation may differ two to three times - from every 60-80 thousand km to 150 thousand km. The main criterion for the condition of the timing belt is a visual inspection, when it is possible to clearly identify problems with the part.
Oddly enough, despite the fact that the mileage intervals are set by the manufacturer themselves, they are not entirely correct. In addition to the direct run-up, in megacities the engine spends a huge amount of time, for example, in traffic jams, where it continues to work, reeling in its service life. This means that for a given mileage, the actual engine output is noticeably higher, so it is advisable to change the timing belt without waiting for the maximum values. It is reassuring that global manufacturers of timing belts include an increased margin of safety in their design, sometimes doubling the required service life.
One way or another, when buying a used car, if the mileage on the odometer is real, you can determine how many times the timing belt kit has been changed and when it needs to be done next time. By the way, this is why it is highly desirable to have a saved service book or operating history - this is a very powerful argument in favor of a particular car seller.
With a chain everything is much more complicated. Chain motors really do not have any regulatory indicators for replacement or even mileage. All manufacturers claim the chain “for the entire service life” of the car, which, of course, has nothing to do with Russian reality.
In fact, there are no eternal timing chains and never have been - they also require replacement, just at high mileage, which depend on the load and operating mode. Only to determine wear requires additional labor costs. Caring automakers, like the VAG concern, make a special inspection window in the engine, in which the divisions of the tensioner are visible: from them you can quickly understand whether the chain requires replacement or something else.
If there is no window, then the chain wear can be checked, for example, with an endoscope, and a good mechanic will identify possible problems even by ear - a stretched chain has a characteristic sound of operation.
How does it happen that an iron chain, which is also in oil, wears out and stretches? In fact, the problem is in the plain bearings that hold the chain together. Due to enormous loads and vibrations, the bearing bushings wear out over time and the chain stretches. Moreover, the stretched chain begins to “eat” the teeth of the camshaft gears, which doubles the risk of chain jumping and valve timing failure.
As a result, the average timing chain resource is 150-200 thousand km. The strongest and most durable structures can sometimes withstand 300 thousand km. Well, on the most delicate engines, the chain life sometimes does not exceed 100 thousand km.
For example, the Franco-German EP6 engine of the first years of production was famous for its extremely low timing chain life, and Ford, due to an unsuccessful timing chain system, was even forced to order its suppliers a unique design of a belt operating in an oil bath in order to replace the chain drive.
Difficulty of replacement and cost of maintenance
Photo: iStock
As mentioned above, the belt is located outside the engine, and the replacement procedure itself is routine, that is, it is included in the list of mandatory regular work. Accordingly, the belt is not changed alone, but as a set with all the rollers and tensioner. If the timing system is dependent on the operation of the cooling pump, which often happens, then it is advisable to change it immediately, even if there are no complaints about the mechanism.
If the pump is not replaced, and after some time it starts to fail, you will have to disassemble everything again, which will cost much more. As already mentioned, special attention is paid to the camshaft and crankshaft seals - even the smallest oil leaks are not allowed. With high mileage, the car's pulleys will most likely require replacement. Replacing the last parts can double the cost of replacing a timing belt kit, but this procedure will have to be performed, otherwise the consequences could be much worse. On average, the cost of replacing a timing belt ranges from 10-25 thousand rubles for mass-segment cars.
Replacing a timing chain kit is a much more complex and costly operation. Firstly, because it requires partial disassembly of the engine, or even its removal. In addition, it is usually necessary to replace the protective covers of the timing mechanism, which are often made disposable.
Another feature is the use on some engines of not one, but three chains at once - separately to drive the camshafts and the oil pump, which immediately increases the cost of the procedure. Of course, this also includes replacing the tensioner and when the same camshaft and crankshaft pulleys wear out. So don’t be surprised if you may be asked from 30 to 100 thousand rubles to replace the timing chain, if we are talking, for example, about premium brand models with large engines.
Conclusion
Photo: iStock
Answering the question in the title of the article, we can say that there is no point in chasing the type of timing drive. The chain and belt have a set of advantages and disadvantages that cancel each other out.
The belt has a clear understanding of replacement time, inexpensive and relatively uncomplicated repair work. In addition, modern belts are sometimes stronger than iron chains: well-known belt manufacturers put a breaking load of up to 2.5 tons in them. That is, using a timing belt instead of a cable, you can drag away a frame SUV.
The advantage of the chain is its service life, which is on average two to three times greater, as well as the risk of breakage reduced to almost zero. However, unfortunately, the chain mechanism instead has an increased risk of slipping, as well as two to three times the cost of replacing the set. So, in general, for example, there are no financial savings in maintenance between the two types of systems.
You need to look at the structural reliability of the timing mechanism and the engine as a whole, but what type of motor - belt or chain - today, by and large, makes no difference.
Basic timing belt faults
The main malfunctions of the timing belt are:
- deformation;
- cracking and delamination;
- cutting teeth;
- gap
Deformation occurs due to displacement of the axis of the tension roller or toothed pump roller. With further use of the belt, it will certainly lead to its delamination or breakage.
Cracks and delamination can also be the result of long-term use, high belt tension, or problems associated with malfunctioning water pump. These same factors, as well as mechanical damage to the teeth of the crankshaft pulley or timing gear, often cause belt teeth to cut off.
A belt rupture is the result of the influence of the listed problems, as well as the car owner’s irresponsible attitude towards his car, often leading to a major engine overhaul.
VAZ timing belts on AvtoVAZ cars
Toothed timing belts used on Lada models for replacement...
Greetings to all VAZ car enthusiasts in my auto blog RtiIvaz.ru. Today we will look at the timing belts used on your Lada cars.
In front of us lies on the hood of my Renault Logan car one of the belts to be replaced (see video). Let's first find out what a toothed rubber drive is used for. The timing belt serves to transmit the rotational movement of the crankshaft to the camshaft, whose task is to open and close the intake and exhaust valves in a strictly defined sequence. This rubber drive has 111 teeth and is designated with the number 111-19 II CR, manufactured by the Balakovo rubber plant BRT.
On cars “Kalina”, “Priora”, as well as VAZ-21012 and other models with a V8 engine, exactly the same strap of 111 teeth, 19 mm wide, is installed.
For VAZ 2110, 2111, 2112 cars with a sixteen-valve engine, a timing belt with a number of teeth of 136 and a width of 25.4 mm is used. Its number is 136-25.4 HNBR. If we compare this drive with a 111-tooth drive, then for sixteen valve engines it is 6.4 mm wider.
The next strap is designed for the VAZ-2170 Priora. This strap has 137 teeth and is 22mm wide. Its designation is 137-22 HNBR. Also suitable for model 2190 “Grant”, VAZ-1118 “Kalina” with a sixteen valve engine. Please note that they have a 21126 engine installed. Such an engine can be installed on VAZ-2112 models, which also use a rubber gas distribution mechanism drive, the number of 137 teeth, 22 mm wide.
Next, let's look at the strap from the VAZ-2190 Lada Granta model with an eight-valve engine. This timing gear drive has 113 teeth and is 17 mm wide (113 SP 170 H). It is similar to the timing drive from the VAZ 2108, but is slightly narrower in width and has two more teeth - please do not confuse it when purchasing.
As mentioned above, for the Lada Granta, which has a sixteen-valve engine, there is a timing belt of 137 teeth, 22 mm wide.
The more valves in the engine, the more powerful the drive, since the engine power increases, so the load increases proportionally.
Watch the video below, it shows all the timing belts used on eight and sixteen valve engines of the family of AvtoVAZ front-wheel drive models.
Let's look at the photos in order:
For front-wheel drive AvtoVAZ models, four types of timing belts are produced, which have a different number of teeth and different widths, which creates some confusion when purchasing them. I hope that this video and photo will help you understand the timing belt size used specifically for your VAZ car model. Video:
Source
VAZ 2106 engine assembly
After installing a new chain, you need to carefully double-check the marks that are on the casting of the cylinder block and on the casting of the camshaft housing, as well as the correspondence of the marks on the gears to them. If the chain is installed correctly, the automatic hydraulic spring tensioner itself will take care of tensioning the chain, all we have to do is reassemble the engine in the reverse order.
When installing the cover, you should not use an old gasket, even if it looks perfect. It has already been pushed through and will not be able to perform its functions at the proper level. Now there are a lot of good sealants on sale that completely replace paper gaskets, seal the connection reliably and are not afraid of high temperatures.
By replacing the VAZ 2106 timing chain in a timely manner, we will not only get rid of excess noise and clanging when the engine is running, but will also prevent more serious malfunctions that can occur from a worn mechanism chain. Change your chains on time, and have a good trip!
Timing chain tension VAZ 2106
In this procedure, you should also follow a certain sequence:
- Unscrew the cap nut and remove it. At the same time, the timing tensioner rod extends and the chain is tensioned by means of a shoe.
- Turn the crankshaft one to one and a half turns. In this case, the spring on the shoe should itself adjust the tension force. Please note that you can turn the crankshaft in three ways: with a ratchet wrench, with a crooked starter, or if you jack up one rear wheel and engage maximum gear. Of course, it is most convenient to do this with a ratchet wrench, since the next step will be problematic to complete yourself.
- Feel the tensioner rod and turn the crankshaft. Stop at the moment when the rod goes to its maximum depth into the body.
- Replace the cap nut and tighten it.
It is worth saying a few words about the correct replacement of the timing chain of the VAZ 2106 and similar models (2101-2107). You should not succumb to provocations and listen to “experts” who advise disconnecting the chain and stretching it, tying it to the old one with wire.
This method has a chance to exist only in one case - if the breakdown overtook you on the road, far from populated areas, and you need to drive a bloody nose for a hundred, five hundred, thousand kilometers in order to carry out high-quality and correct repairs after that.
But if you have all the tools and capabilities, then you shouldn’t do repairs right away that are of poor quality, no matter how. Here, perhaps, we can finish a short excursion into the theory of engines, and specifically into the design of the timing chain drive on the VAZ 2106.
As you can understand, all the work can be easily done with your own hands and quite quickly.

