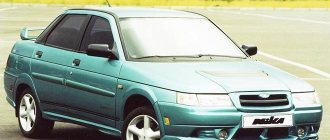
Serial production of the VAZ 2114 lasted from 2003 to 2013; the car continued the line of VAZ “nines” and became its restyled version. The five-door hatchback received updated front body lines, new headlights, and moldings.
Structurally, the Lada Samara of all years of production was built on the same platform as the VAZ 2109; the model received universal engines, an all-metal body with attachments. Considering that the car has been out of production for almost seven years, replacing VAZ 2114 thresholds is one of the most common types of body repairs today.
Replacing thresholds with your own hands
Welcome to the kuzov.info blog!
In this article we will look at how to replace thresholds with your own hands.
The threshold is a stamped panel, which is a structural part of the supporting body of the car.
In a monocoque design, sill panels provide structural reinforcement that influences the vehicle's underbody rigidity and also provide torsional rigidity. While the front and rear parts of the body have zones of planned crumple, the sills provide rigidity to the middle part of the body, which should remain as intact as possible in a crash. Thus, the safety of the driver and passengers depends on the condition of the thresholds.
Thresholds, especially their lower part, are often ignored when washing. Road salt and other contaminants left on them accelerate the onset of corrosion. Also, these elements are constantly exposed to stones and sand that fly from the road while driving and act as an abrasive.
Since the thresholds are a closed, non-ventilated structure, they are vulnerable to corrosion. The worst aspect of threshold corrosion is that it starts from the inside and spreads outward. Thus, corrosion becomes visible when the threshold has already been significantly destroyed. In advanced cases, it may even be impossible to use special places for a jack to lift the car, since these areas have lost their strength due to corrosion. Another problem caused by both completely rusted sills and the bottom can be exhaust gases that can enter the car interior.
Causes of rust and preventive measures
The first versions of the VAZ 2110 were characterized by the fact that their paintwork began to peel off in the area of the windshield frame. The problem began to develop from the seal and gradually spread to the entire body element.
Soon the manufacturer changed the painting and installation technology, but still the problem of a body that was not resistant to corrosion could not be completely overcome.
We will look at the main reasons for the probable appearance of rust on the sills, bottom, arches, and side members. We will also give some tips on how to deal with them.
Causes
Prevention measures
After 5-7 years, traces of corrosion may appear on the body and bottom. There are no remedies against age, so listen to the following protective measures
It is easy to advise avoiding accidents. In this case this is the only recommendation
Do not try to save money on body repairs, since an unqualified specialist will not really do anything, but will only waste your time and money. Choose experienced, proven craftsmen and service stations
The worst thing is snow and rain. Try to knock down and wash away the snow stuck under the bottom. Especially if you often drive on roads sprinkled with salt or snow and ice melters.
Humidity in the garage
Think about the issues of moisture protection of the room; in winter, periodically turn on the heater or heat fan in the garage in order to at least partially combat the high level of rust
Small stones destroy the anti-gravel coating within a year, after which corrosion begins to appear. Avoid such roads, carry out periodic preventive maintenance
It gets through wet shoes and snow brought into the cabin. As a result, the bottom begins to rot from the inside. Be sure to lay down rubber mats with sides in winter; be careful that water does not get inside the cabin during rain or car wash.
To increase the service life of the underbody of your own car, periodically perform anti-corrosion treatment. Pay special attention to the hidden cavities of the side members and sills.
Rusted thresholds
Problem Definition
It is not difficult to determine the presence of rust on the bottom. Although if you bought the car second-hand, these problems can be carefully disguised.
- Be sure to inspect the body from below. Traces of corrosion may be hidden behind a layer of anti-gravel coating or putty. Use a hammer or awl to hit these areas lightly. If rust is present, you will see it.
- Check the condition of the body along the thresholds, in the cabin at the feet of the driver and front passenger. It is these places that are quite weak in the case of the VAZ 2110.
- If the bottom is rotten, you can notice this by the sagging of the floor under your feet under load.
- When the driver's seat comes off or cannot be moved, a rotten body may also be the cause.
- One of the most unpleasant situations is rotten thrust pads designed for lifting a car on a jack. But this way you will immediately determine that there are problems and they need to be solved.
Design features of thresholds VAZ 2114 and 2115
In cars of the Lada Samara family, thresholds are elements of the structural reinforcement of the supporting body. The parts are welded to the sidewall and form a single unit with the body and spar. Structurally, the thresholds on the VAZ 2114 and VAZ 2115 are a box that consists of four parts:
- outer cover;
- connector;
- seal;
- inner part.
The elements, like the rest of the body parts, are made from rolled steel, the minimum sheet thickness is 0.8 mm. Standard processing does not involve galvanizing the metal; the body is primed and covered with 2 layers of auto enamel. Insufficient anti-corrosion treatment of panels leads to the fact that the first signs of rust are noticeable in the second year of operation. Thresholds and wheel arches are among the most vulnerable parts of the body and need to be treated with anti-corrosion first.
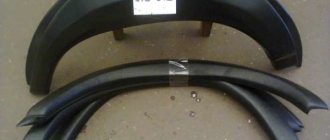
Often additional plastic or iron linings are installed on the supporting unit, which protect the part from premature wear and mechanical damage. A set of plastic linings for the VAZ 2114 “Noodles” provides additional protection and harmoniously combines with the tuning elements of the body kit.
The panels are made from a smooth sheet of ABC plastic 1.8 mm thick and are attached to the main threshold with self-tapping screws from the inside of the cabin. The linings can be painted to match the body color or use the shagreen option.
What may determine the cost of elements?
For the body of the Lada Sputnik, black rolled steel was used, which was not galvanized. When replacing with your own hands or in a car service center, they use factory repair kits, parts from the secondary market, or make them themselves.
With a full replacement, the price of thresholds for a VAZ 2114 will depend on several factors:
- parameters of the steel used;
- is the original amplifier used?
- where repair or replacement is carried out.
Standard parts for VAZ today are produced in the experimental workshop of AvtoVAZ (Tolyatti) and in Naberezhnye Chelny. The steel threshold comes complete with an aluminum trim. When installing on a car, parts must be additionally measured. The cost of the original repair kit is 2,600 rubles.
What is this?
By overcooking car sills we mean tuning the body part of a car by a master in order to restore the presentable appearance of this element and give it protective functions. Overlays are usually made of plastic or metal. Plastic is an unaesthetic and impractical material. Therefore, metal sheets are more often used.
Thresholds prevent the formation of dents, abrasions and cracks in the space under the doors. Therefore, when they wear out, repairs are simply necessary. Typically, recovery is carried out by overcooking. For this purpose special tools are used. The work is troublesome and painstaking. There is a risk of damage to the door lock motor. Therefore, it is better to trust the overcooking to service station professionals.
If repair of the linings is required, the motorist needs to do a number of the following actions:
- Choose a service station that specializes in restoring cars of a specific brand.
- Call the administrator and clarify all the terms of cooperation, the approximate cost and deadlines for completing the work.
- Bring the car to a car service center at the time agreed with the technician.
- Wait until a specialist inspects the vehicle.
- Find out the exact price of the work.
- Agree to overcook.
- Wait for the repair to be completed.
- Evaluate the quality of work.
- Pay the auto mechanic for his work.
The wizard’s work follows the following algorithm:
- Inspection of the damage to the threshold.
- Removing the cover.
- Removing the entire element or damaged part by cutting.
- Cutting patches from high-quality metal.
- Welding the cut part to the thresholds.
- Cleaning the trim.
- Coating it with a protective compound or film.
- Installation in place.
How to cook thresholds on a VAZ 2114
If the sills on a VAZ 2114 are rotten, in addition to replacing the main element, you will also have to re-weld the bottom by cutting out the old metal and installing patches. Step by step process:
- The connector or the lower part of the box is welded.
- The amplifier is installed.
- The outer part is welded by arc welding.
- Welding seams are cleaned with a grinder, primed and puttied.
- After 12 hours, anti-corrosion agents are applied to the bottom and outer part, and at the final stage, painting is carried out with auto enamel.
It is not recommended to operate the car for 24 hours until the paint has completely dried.
Where and from whom can I order the service?
If it is necessary to digest the thresholds in the car, the motorist has three options:
- Contact the service center.
- Find a competent private auto mechanic.
- Do the work yourself.
The first option is the best, but expensive. You should only contact a private owner if he has been recommended by a good friend. You can digest the rapids yourself. But for this you need to have knowledge, skills, a welding tool, follow the algorithm of actions and be extremely careful.
Important points
- All work on replacing thresholds should be carried out with the machine installed on a level surface, without distortions.
- Before welding the top edge of the new thresholds, you should definitely try hanging the doors on the car yourself. There are often cases when doors after welding either close with difficulty or do not close at all. And this can happen due to one slight misalignment of the thresholds, which is not always possible to notice with the naked eye.
- You should never skimp on anti-corrosion treatment of thresholds. If it is not carried out, all the work done will go down the drain in a few years.
- It is best to clean thresholds from rust and dirt using a solvent. When working with it, you need to follow safety rules: use gloves, wear safety glasses (this is especially important if you have to work on the bottom of the car while standing under an overpass - drops of solvent can easily get into your eyes), and apply the solvent itself only with a paint brush.
- Before welding the thresholds, a series of holes with a diameter of at least 3 mm should be drilled in the areas of metal to which the threshold is planned to be attached. This will greatly facilitate the spot welding process, and the threshold will be held more firmly.
How to replace the thresholds of a VAZ 2109 with your own hands
If a significant part of the thresholds is damaged by corrosion, then there are no options other than completely replacing these body elements. To carry out repair work you will need the following list of tools and materials:
- semi-automatic welding machine;
- new thresholds;
- Bulgarian;
- drill;
- sandpaper;
- putty and primer;
- anti-corrosion compound (mastic).
Features of replacement and preparation for it
When planning body repairs, you need to understand that the design of the VAZ 2109 thresholds consists of the following elements:
- outer box;
- inner box;
- amplifier
The outer and inner boxes are the outer walls of the threshold. The outer element goes outside and is located under the door, and the inner one is located in the cabin. The amplifier is an element located between two boxes inside. Most often, the outer frame is subject to corrosion, and when replacing thresholds, this particular body part is taken into account.
Even though new parts are used when replacing thresholds, they still require preparation. From the factory they are covered with shipping primer, which must be cleaned before installation, i.e. the metal must shine. This is done using sandpaper or grinder attachments. After cleaning, the elements are degreased and coated with epoxy primer.
The final preparation of the thresholds comes down to drilling holes with a diameter of 5–7 mm for welding in the places where the parts adhere to the body.
Preparatory procedures also include the dismantling of doors, aluminum sill trims and interior elements (seats, floor covering, etc.). Before the immediate start of work on removing the old thresholds, a metal corner is welded to the racks from inside the cabin. It will provide rigidity to the body and prevent it from deforming after cutting off the thresholds.
Step-by-step replacement instructions
Having prepared everything you need, you can begin the repair. The procedure consists of the following steps:
- Place the new threshold on top of the old one and outline it with a marker.
Video: replacing thresholds on a VAZ 2109
Damage to the sills by corrosion on the VAZ “Nine” is common. These body elements can be replaced by every car owner who knows how to use an angle grinder and semi-automatic welding. If you don’t have such experience, then it’s better to trust the specialists. Only in this case can one hope for high-quality repair work and a long service life of the thresholds.
Hidden body cavities and their processing
| Cavity name | Injection point | Composition injection direction | Additional instructions |
| Hood pockets | In the openings of the interior upholstery | Over the entire inner surface | Open the hood |
| Door pockets | In the panel openings under the upholstery | Along the inner surface of the bottom | Remove the upholstery |
| Cavities between wheel arches and rear fenders | From the trunk | Over the entire inner surface | Open the trunk |
| Rear floor rails | Below the body, in the trunk and under the rear seat | Forward and backward | Open the trunk, lift the seat cushion |
| Middle floor cross member | Below the body and under the rear seat | Right and left | Raise the seat cushion |
| Front floor cross member | From the interior and from below the body | Right and left | Remove the floor mats |
| Door thresholds | From the interior, from the front and rear ends of the threshold | Forward and backward | Remove the floor mats |
| Front side members | From the interior and from below the body | Forward and backward | Hang up the car |
| Bulkhead shield reinforcement cavities | From the interior and engine compartment | Right and left | Open the hood, remove the floor mats |
| Floor Threshold Connector Cavities | Bottom of the body | Over the entire inner surface | Hang up the car |
| Rear lower cross member | Behind the car | Right and left | Remove the rear bumper |
- Absolutely legal (Article 12.2);
- Hides from photo and video recording;
- Suitable for all cars;
- Works through the cigarette lighter connector;
- Does not cause interference to radios and cell phones.
The current condition of the car can largely be assessed by analyzing the body. If all kinds of consumables need to be replaced, you can even rebuild the suspension yourself and even install a new engine, then restoring a completely rusted body is expensive and pointless.
No one will tune, modify, or invest a lot of money in a car if its body is already in its last years. This significantly reduces the cost of the car, even if the engine is in perfect condition.
Therefore, if you want to maintain the attractive appearance of your VAZ 2110, extend its service life, and, if necessary, sell it for good money, keep an eye on the body and periodically carry out repair or preventative body work aimed at combating corrosion.
Determining the cost of replacing thresholds
Prices for this service are determined taking into account many factors. But first of all, the cost of such work depends on the material and method of fastening the spare part. There are two types of thresholds:
- Removable. Most often they are made of plastic and attached to the body with self-tapping screws. Given the easy installation and low-effort installation, these parts are cheap to replace.
- Fixed. Such thresholds are a metal part of the body. They consist of an amplifier, a connector, outer and inner panels, which are connected to each other and to the frame by auto arc welding. Their dismantling is possible with special equipment and tools. Accordingly, the price of replacing a threshold using welding work will be high, since the craftsmen performing it must have the appropriate knowledge and skills.
Repair without welding
If the car owner is not enthusiastic about the idea of overcooking the car, you can use several proven methods for repairing parts from corrosion. However, it should be understood that such repairs are only a cosmetic procedure that is used for minor corrosive wear. It will give the car a fresh look, but after 6-8 months you will need a full replacement of the part.
To repair a threshold without welding, you will need the following materials and tools:
- epoxy resin or glue;
- solvent, rust remover;
- fiberglass or fiberglass;
- aluminum powder or silver;
- sandpaper R-80;
- automotive putty;
- priming;
- paint brush, rubber spatula, roller;
- auto enamel.
Instructions on how to repair a threshold using epoxy resin and fiberglass, step by step:
- Mix epoxy resin and hardener in a glass container, add silver. Aluminum powder plays the role of internal reinforcement of the composition and prevents the glue from cracking after complete hardening.
- Clean the threshold from old paint, remove rust with a corrosion cleaner.
- Clean the surface with sandpaper and degrease.
- Cut patches from fiberglass that are slightly larger than the corrosion dents.
- Coat the surface of the threshold with glue, attach a piece of fiberglass, and smooth with a spatula.
- Depending on the thickness of the corrosion dent, apply as many layers of fiberglass as necessary. If a hole in the threshold is sealed in this way, there cannot be less than 5-6 layers. Impregnate each layer with glue and roll it with a spatula.
- Roll the surface of the threshold with a roller to remove excess air and let the epoxy resin dry.
- Polymerization of epoxy glue lasts up to 12 hours; after drying, treat the surface of the threshold with sandpaper.
- Prime if necessary. If the dent was significant, apply a layer of putty and level the surface.
- After the putty has dried, paint over it with auto enamel.
All repair work using epoxy resin is carried out with gloves, this is convenient if you don’t have a roller and you have to level the surface with your hands.
Threshold selection
The threshold consists of three parts:
- External lining.
- Amplifier inside.
- Connector.
Thresholds can corrode in different ways, but generally, if there are through holes, you will need to purchase the entire three-piece threshold kit.
Threshold article number for the right side is 21100-5401060-00, for the left side 21100-5401061-00. Ask for connectors and amplifiers in stores; they are not available for order according to factory articles.
Welding work in Saratov | Prices for work
Welding services in Saratov:
The cost of work is different for each car!
You start my wing where it’s rotten and I have to patch it up so that everything is of high quality!
People call and say that they need to weld a small hole, but many do not understand that there is nothing to weld since the entire bottom needs to be changed! Therefore, the final cost of the work may sometimes differ from the declared one! == Approximate prices! ==
VAZ Classic (01, 02, 04, o5, 06):
Replacement of the entire floor without thresholds 15000 External threshold, threshold connector, threshold amplifier, internal threshold -5000 RUR Front floors (without thresholds) -5000 RUR Fuel tank or spare tire floor -1000 RUR Front fender -2500 RUR Apron 1500 RUR TV and apron 4000 RUR Rear panel 1500 RUR Trunk floor 1000 RUR Rear wing 2000 RUR House 4000 RUR
VAZ Front wheel drive (08, 09, 099, 110, 110, 112):
External threshold, threshold connector, threshold amplifier 5000 RUR The whole bottom, 2 floor members, 4 jacks, 2 threshold connectors, 4 floor amplifiers, 2 boots (on 08) - 17,000 RUR Rear fender 2500 RUR TV - 3000 RUR Floor member - 2500 RUR