Instructions for replacing the windshield and rear glass on a VAZ 2110, 2112
The condition of roads in Russia has dropped below zero. This is the reason for frequent accidents on the road, car breakdowns every two years, as well as cracking glass. One small pebble thrown out from under the wheels of an oncoming car, and you already need to go to a car service center.
Replacing a windshield on a VAZ 2110 at a car service center will cost from 1,500 to 6,000 rubles. The price practically does not depend on the model; the costs of installing the shield on a VAZ 2112 do not differ significantly. Few people want to spend that amount twice a year, so car owners prefer to replace the damaged part themselves.
Necessary tool
To ensure that the replacement of the VAZ 2110 windshield goes smoothly, you should get a gluing kit. When purchased through an online store, the TEROSON PU kit will cost approximately 1,150 rubles, but it will quickly pay for itself. Its composition:
In addition, you need to have other devices on hand:
With an assistant, changing a part is easier and faster.
Price is not a guarantee of quality! But you shouldn’t take the cheapest materials either: fakes are not uncommon.
DIY replacement
Replacing the rear window on a VAZ 2110
Even if you trust professionals, it is useful to know how to make a replacement in order to eliminate possible defects when accepting the work performed. In addition, the saying “if you want to do it well, do it yourself” is still relevant. And it’s always nice to look at work done yourself, especially if it’s done well.
The first part of the work
To replace the rear window we will need:
- Directly new rear window.
- Adhesive composition.
- A string for cutting out old glass (if the glass is left in the opening and is also not included with glue)
- New rubber seal for the perimeter of the glass.
- A tool that holds the glass (usually these are two kind of suction cups connected by a handle; two such holders are needed).
- Tool for cleaning the opening - knife, sandpaper.
- Scotch.
- Degreasing solvent (may be included with adhesive).
- A warm and well-lit place to work.
- Assistant (you can do it alone, but it will be quite inconvenient and will take much more time).
Note. The best glue is a two-component one (the so-called “prime” is applied before applying the glue itself) and with sufficient components. It is useful to have a solvent and a special string (with handles) for cutting out old glass, if necessary.
Replacing the rear glass of a VAZ 2110
Next you need to remove the old glass. If it is badly broken or missing altogether, then there is no problem, but if replacing the glass is due to only a crack, then you will have to work. Here we need a steel string to cut through the glue between the opening and the glass, as well as an assistant, because It is necessary to work with the string both inside the car and outside. So let's get started:
- Disconnect the rear window heating contacts (if there is one).
- Remove the old rubber seal from the glass.
- Between the glass and the opening, piercing the old glue, we stretch a steel string. Then we attach the handles to it.
- With the help of an assistant, using the string as a knife, we cut through the entire perimeter of the glass. You must act carefully so as not to damage the paintwork of the body, otherwise you will also have to carry out body repairs.
- We remove the old glass. This can be conveniently done using a special tool for holding glass.
Note. If trim elements on the inside of the rear window interfere with the use of the string, then they must be removed so as not to damage them (for example, the third brake light, if installed on the rear window or close to it). It is better to carry out an inspection before starting work.
The first part of the work has been completed, now it is necessary to prepare the opening for gluing in the new rear window. These works must be approached with the utmost care, because... this will directly affect the final result and durability.
The second part of the replacement work
Replace the rear window on a VAZ 2110
- Completely remove any remaining old glue. This is necessary in order to eliminate the negative consequences of possible chemical incompatibility of the old glue with the new one (the glass may simply fall out) and to eliminate aesthetic defects - due to the layer of old glue, the glass may not lie smoothly in the opening.
- On vehicles that have been in use for a long time, rust may appear at the bonding site. We remove all traces of rust using sandpaper. If this is not done, corrosion will continue to spread.
- We remove dirt and degrease the entire area of the opening.
Note. It is useful to treat the metal in the opening with an anti-corrosion compound to prevent the spread of rust. For this purpose, it is better to use liquid and not “greasy” anticorrosive. The places where the glue will lie must be cleaned of anticorrosion using a solvent.
The final stage of work
How to replace the rear window of a VAZ 2110
Now the opening is ready. The final part remains, but it is useful to prepare for it, because... there are procedures limited in execution time. It is necessary to place the new rear window nearby, having first attached a tool to it to hold it and put on a rubber seal. Prepare the tape and place it within reach (for example, on the roof of a car), because It will be necessary to hold the glass and fix it with tape in parallel. You also need to carefully read the instructions for the adhesive composition and, if necessary, make adjustments to further actions, as well as prepare it for use. You can watch the replacement process in this video review.
How the system works
The operating principle of heating is very simple; it is used today in almost all cars, including foreign cars. Something simpler and better has not yet been invented. A conductive thread is applied to the rear window on the interior side, which heats up; accordingly, the glass is heated, which eliminates fogging from the inside, as well as snow and ice located on the outside.
Rear window heating operation diagram
This system is made up on a VAZ 2110:
- the thread itself, which provides heating;
- wiring going to it;
- heating relay;
- switch with signal light inside;
- fuse.
That is, nothing complicated for a craftsman. Considering that the size of the rear window of the VAZ 2110 is 121.3x67.6 cm, the heating size is usually only a couple of centimeters smaller, and essentially covers the entire surface, providing complete heating and good visibility of what is happening behind. There is no point in installing a much smaller heating system, because the driver should see the entire road behind, and not part of it.
We change the windshield on a VAZ-2112 with our own hands in a garage
The question of how to independently change the windshield on a VAZ-2112 is asked by many car owners. This is not surprising, since the service life of glass is affected by both its manufacturing quality and the quality of the roads. Many people can do this kind of work on their own if they have some experience and some skills.
Carglass® always tries to repair the glass first if possible and save the customer money. If the chip is beyond repair, we will try to replace the auto glass within 1 hour on a predetermined day.
You do not need to leave your car for a day to carry out work. In Carglass®, when replacing auto glass, you can operate the car within 1 hour after installation. If you wish, you can leave your car at our service center
Carglass® is a highly specialized company. This allows us to concentrate on constantly improving the quality of specific types of work. High-tech equipment and qualified personnel allow us to provide services that meet international standards.
Reasons for contacting the service center
VAZ 2110 windshield replacement is a leisurely and labor-intensive process that requires precision and accuracy.
Therefore, if the driver is not confident in his abilities, he can always turn to specialized service stations for help, and here’s why:
- services are provided by qualified specialists with many years of experience;
- work is performed using professional and modern equipment;
- manipulations are carried out quickly;
- provide a quality guarantee;
- Many service stations determine acceptable pricing for the services provided.
Do not operate a vehicle with a cracked windshield. Replacing the windshield of a VAZ 2110 should be carried out as soon as possible. Moreover, the procedure can be performed independently if it is not possible to contact technical service.
>
Prices for installation of auto glass for LADA
• windshield - from 2000 ₽; • rear window — from 2000 ₽; • side glass - from 1000 ₽; • body non-encapsulated glass - from 1000 ₽; • body encapsulated glass - based on the results of vehicle inspection.
Contact us by phone and schedule a convenient time. And you can be sure that the work will be completed as quickly as possible. If it would be more convenient for you to call our specialized team at your address, this option is also provided, and we will do the work on site. If you decide to simply purchase auto glass from us, we will deliver it to the specified address.
Necessary tool
To ensure that the replacement of the VAZ 2110 windshield goes smoothly, you should get a gluing kit. When purchased through an online store, the TEROSON PU kit will cost approximately 1,150 rubles, but it will quickly pay for itself. Its composition:
In addition, you need to have other devices on hand:
With an assistant, changing a part is easier and faster.
Price is not a guarantee of quality! But you shouldn’t take the cheapest materials either: fakes are not uncommon.
Preparing the perimeter of the opening
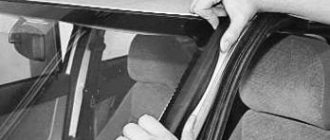
After dismantling the old VAZ 2110 windshield and before installing a new transparent shield, it is recommended to prepare a seat.
First of all, the preparation of the opening is carried out by removing the old dried glue. If rust is present, it also needs to be removed and the cleaned area primed.
Reference! Cleaning must be done as carefully as possible so as not to damage the paint of the vehicle. And when removing old glue, you should not completely clean the opening. It is recommended to leave a slight layer in order to better adhere the fresh substance to the mounting parts.
The thin adhesive layer is degreased along with the edge of the new glass. The degreaser should dry a little, after which the activator is applied. This substance promotes better bonding of elements.
Before application, the special adhesive should be warmed up slightly. This is done so that it becomes soft and fits better on the surface. The layer thickness is usually indicated in the instructions for use.
The glass itself is also prepared for installation:
- wipe the transparent dust shield;
- put on the molding; if it does not fit tightly, secure it with tape;
- degrease the edge on which the activator is applied;
- Along the entire length of the molding, using a primer, mark the place where the glue will be applied.
Now we’ll figure out how to properly glue the windshield onto a VAZ 2110 with our own hands.
Types of damage
The structure of the windshield is triplex - an impact-resistant material in which there are two layers of glass and a thin film in the middle. This allows the spare part not to crumble upon impact.
Masters divide damage into two types:
If you can’t change it soon, you can resort to several tricks:
All measures will give a temporary effect, and the spare part will still need to be replaced.
Replacing the rear window of a VAZ 2110
Developed in conjunction with
Car service
- Car air conditioners Refilling a car air conditioner
- Car air conditioner diagnostics
- Car air conditioner repair
- Diagnostics and repair of electrical equipment Repair of electric drives
- Installation of car radios
- One way car alarms
- Body repair Body geometry
- Bumper painting
- Soldering bumper cracks
- Windshield replacement
- Inspection and repair of chassis Replacement of grenades
- Replacing the crankshaft
- Replacing clutch discs
- Replacing the working cylinder
- Replacing the pump
- Argon welding
- Vibration isolation
- Wheel balancing
DIY repair
Sometimes it turns out that it is not possible to purchase a new device, if the cable gets tangled, or the electric motor fails, then there is always the opportunity to repair it all with your own hands. Only obvious mechanical fracture of any part cannot be repaired.
If the electric motor fails, most likely your brushes or windings are simply clogged; just remove the motor, disassemble it and clean it carefully with an alcohol-soaked cloth or gasoline; you can buy special products (enough for more than one time). It is advisable to lubricate all mechanisms during disassembly.
When the cable flies off the mechanism, you should remove the entire mechanism, again remove the electric motor or unwind the cable itself if you have a mechanical one, carefully pull the cable into its place (grooves) and install it back.
Often the fault is not in the window regulator itself; by studying the diagram below you will understand which wires go where, by calling them you can find the true cause.
I would like to add that repairs, as a rule, do not help for long; if it happens that your window regulator has failed, it is better to replace it, because all the parts have their wear and tear and are unlikely to serve you for a long time, but there are exceptions.
