Types of body repair
Body repair of VAZ 2106 has the following types:
- Redecorating. The paintwork and bumpers are restored, scratches, chips and areas of corrosion are eliminated.
- Treatment of internal cavities. Spars, sills, door and luggage niches are difficult to access for anti-corrosion treatment. To prevent parts from rusting, they are treated with special protective agents.
- Car underbody treatment. The working surface is covered with special protective mastics.
- Removing dents. To level the dented area, various impact pads, spoons, hooks, suction cups and reverse hammers are used.
- Major body repairs. It is carried out in case of violation of the geometry of the vehicle body, excessive damage to the paintwork, or the presence of a large number of dents, chips and scratches. Also, major repairs are necessary when corrosion has spread to more than 50% of the surface area of the vehicle body.
When carrying out restoration work, the specifics of the car body are taken into account.
DIY body repair
VAZ 2106 car body
Repairing the outer tail of a car must be taken very seriously, because such repairs are the most expensive, but at the same time it is the most important work on the vehicle. After all, the appearance of a car is directly related to the degree of its grooming. Here, a lot depends on how to carry out this type of repair of the VAZ 2106 body - with your own hands or at a service station. In a broad sense, such body repair is the restoration of paintwork, as well as the original geometry of the body, deformed due to an accident. If there are shallow dents and irregularities on the elements of the body part, repair using the classical method involves treating the damaged area with sandpaper with a fine abrasive, applying putty with a special tool to give the surface a uniform level throughout. But with a dent of small depth, you can use the method of paintless dent removal, photos with application samples posted on our portal. Such work is usually carried out by specialists at a service station. This also applies to sheet metal, welding and other specialized work that should be carried out at a specialized enterprise. Specialists have not only knowledge and skills, but also the necessary software and special tools.
Body Shape Restoration
The car body elements are made by stamping from sheet metal. The tension in the molecular bonds of iron is formed during the extrusion of body elements under a press machine and retains the configuration of the product. When impact is applied to the body tail, which has a convex shape, they are compressed, and then alignment begins, but the tension of the molecular bonds is aimed at maintaining the already changed surface of the body element, already concave in shape. When forming the so-called the molecular tension belt that arose during impact in the damage zone, actions to unload this stress area should be carried out exactly at the place where the defect was formed. It follows from this that when carrying out body repair work, it is enough to clean the paint and primer from the damaged area with a scraper, as well as remove the fold of body metal that has formed on the area of the deformed surface.
Linear dimensions of the body shape of the VAZ 2106
If the defective surface is large in size but shallow in depth, then to level it, blows with a straightening hammer should be applied to the top point of the unevenness. If the defective surface is small but of sufficient depth, then straightening is carried out in parts, starting restoration from the edges of the deformed surface. It is necessary to place an anvil of the desired configuration under the plane being processed. If there are struts or pads in the damaged segment, then these components of the body product are initially restored. The first step in body repair is the restoration of the factory body configuration, which involves 2 main types of body repair - knocking out and straightening. The first type of repair is returning the body to its factory dimensions in a rough version. Here the craftsmen use a wooden mallet in their work so as not to damage the body metal. The next step is straightening. Here it is necessary to work with a hammer even softer in order to prevent linear expansion of the metal.
Attention: If the deformed area is small in size and takes the form of a bubble, then this defect can be eliminated by heating. When the surface cools, the bubble should “dissolve.” It is not recommended to heat such points more than 2-3 times.
Restoring body defects using electric heating
Attention: If it is impossible to use automatic welding in places that are difficult to access, when section elements such as posts, gaskets, etc. are in the deformation zone, a connection such as soldering is used. To do this, the metal surface must be cleaned and the dent filled with tin solder. Excess solder residues are removed and the surface is sanded.
Using automatic welding, you can also carry out restoration by heating the metal and removing dents. This technology is based on the principle of instant heating of a metal surface. A carbon electrode is used for this. Preparatory activities are carried out as usual; it is important to remove the paint, which has insulating properties.
This is interesting: What kind of bulbs are in the foglights on the Hyundai Solaris
Specifics of the VAZ 2106 body
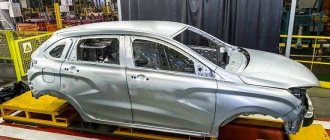
The Lada sixth model has a sedan body type; it consists of a main load-bearing all-metal frame and various attachments. The units and parts that are installed on models from the classic series are made using the stamping method and are connected to each other by welded seams.
The body includes the following parts: engine frame, front fenders, roof, floor panels, left and right side panels. The front and rear bumpers of the car are chrome-plated; they are attached to the body using special brackets. The trunk and hood are quite bulky.
As for the doors, they are made of two panels: outer and inner, they are connected by welding. Both front and rear doors have the same type of attachment to the body.
Six models produced in the mid-90s and early 2000s have thinner body metal compared to cars produced between 1976 and 1990.
Specifics of the “six” body and its restoration
The body of the “six” consists of a large number of materials, forged by stamping and connected to each other by welding. The following features distinguish it:
Restoring the body of the “six” with your own hands is possible if there is minor damage. If we are talking about changing the geometry of the body, it is better to entrust the work to a pro.
So, the purpose of repair when restoring a body is to bring body parts back to normal using blows. Specific straightening hammers with rubber knobs are very helpful in this matter. Note. Restoration is carried out, as a rule, in two stages: first, knocking out with a wooden mallet, and then straightening.
Tools
To carry out work on restoring the body of the “six”, we will need the following set of tools:
- A set of hammers of different types and weights. Rubber mallets and percussion instruments with a grooved working surface.
- Special hooks.
- Reverse hammers.
- Impact spoons.
- Jack.
- Anvils and substrates of various shapes and sizes.
You should also stock up on 8 and 22 wrenches, as well as a screwdriver. You will need these tools to remove body parts such as bumpers or trim moldings.
Straightening
Tools for straightening the body of a VAZ 2106
It is straightening that should be given more attention if the body of the “six” needs to be given its original appearance.
What does the word "straightening" mean? It is translated as alignment. As mentioned above, body straightening is considered the main work and its goal is to restore deformed areas or the entire body.
Body work in service
Carrying out straightening, as is known, involves a special technique. It is done efficiently and quickly. The goal is to stretch out or straighten concave parts of the body. If the person doing the straightening has little experience, it will be very difficult for him to cope with the work.
On the other hand, thanks to modern technologies, even a beginner can cope with straightening. What does a pneumatic hammer cost, allowing you to quickly bring a body part back to normal.
Common tools for straightening: hammer and jack. Here's how the main stages of straightening are carried out:
- First the paint is removed;
- The area is being straightened;
- The area is puttied and rubbed.
Note. Some experts recommend heating up body parts to make the straightening effect even better. Only in this case it is necessary to control the process, otherwise the metal will overheat and may even melt.
Another secret to straightening: if the dent that needs to be leveled is small, then it is recommended to straighten it from the middle. On the contrary, if the dent is large, it is leveled from the edges.
Straightening dents
In addition to a hammer and a jack, to carry out this operation yourself, you will have to arm yourself with the following tools:
- A spotter used for spot welding;
- Hammers of different types: inertial, reverse and with a sharp striker;
- Notching block.
Recently, it has become popular to carry out vacuum straightening. This procedure allows you to eliminate bruises on a metal surface many times faster. Vacuum straightening is carried out using special suction cups.
Note. This type of straightening is suitable for large dents, but if there are scratches on the surface, this method is not recommended.
Tools used for work
Reverse hammer for body work, used for straightening the body
The tools for body work on the VAZ 2106 are anvils of various configurations, which for the most part correspond to the factory images of the part to be straightened. A body mechanic should have special hammers of various types and weights in his arsenal. Conventional metalworking hammers are not suitable for working on body parts due to the specific design of the working (impact) surface of the tool. If you use a metalworking tool, then under its impact the thin metal of the body is subjected to strong pressure, which causes a decrease in the thickness (thinning) of the surface and its linear expansion, which leads to the formation of new defects. Special straightening hammers differ from metalworking hammers in having a corrugated striking part and are similar to the working plane of a file. In addition, body mechanics in their work range also have hammers with a rubber striking part, which serve to soften the impact.
This is interesting: Replacing a Daewoo Nexia headlight: instructions, photos, videos, process
Straightening process technology
Complete instructions for body work on the VAZ 2106 can be found here. If the rules for straightening work are correctly followed, the necessary result for the restoration of body parts will be achieved. These rules include the following:
- Anvils should only be used in the appropriate configuration.
- Even when using special straightening hammers, the impact of this tool will cause the metal to change its physical properties, becoming thinner and changing its linear dimensions. Therefore, the blows should be weak but frequent.
- If there are folds on the surface to be repaired, then it is necessary to begin restoring the surface from them, moving towards the center of the defect.
- Every few blows, it is necessary to assess by touch the condition of the metal being restored, check the condition of irregularities and defects, and, taking this into account, adjust the process of working with body metal.
Attention: When restoring large, flat parts of the bodywork, such as the roof, hood and trunk lid, check the product using measuring tools.
Process technology
The VAZ 2106 body is straightened immediately before painting the restored part:
- The surface to be treated is cleaned of dirt, washed, dried and degreased. Remove old paint from the working surface.
- Use frequent gentle blows of a hammer to smooth out the dent. If the defect is deep, then the process is performed from the edge of the damage, and gradually moves towards its center. Metal substrates are placed on the reverse side of the area to be restored. They must have the appropriate shape.
- Metal breaks are repaired using a welding machine. Next, the weld is ground.
- The area restored from damage is covered with putty. It levels the work surface.
- The putty part is sanded and painted.
The putty should be applied in a thin layer. Otherwise, the paint will become covered with numerous cracks and begin to fall off.
Anti-corrosion treatment
On the “six” the following elements are most susceptible to corrosion:
Note. The owner of a VAZ 2106 car needs to be extremely attentive to the penetration of moisture and dirt into the area of hidden cavities of the body and into its lower parts. In order to further protect these parts of the body from corrosion, they are treated with anticorrosive, and the soldering of individual elements is treated with a special mastic.
Algorithm for carrying out work on anti-corrosion treatment of hidden cavities of the “six” body
Here are the instructions to follow:
Threshold replacement
The thresholds on the VAZ 2106 during long-term use of the car become covered with rust and, as a result, rot. To replace damaged body elements, perform the following algorithm of actions:
- The doors are removed, the floor mats are removed, and the aluminum trim is dismantled.
- Remove the rusted body element. To do this, use the thresholds, dismantle them using a drill, and cut them out of the fastening with a grinder.
- Clean the work surface from dirt and remove rust.
- Next comes the installation of new thresholds. To do this, weld the connector in place of the dismantled parts.
- After adjusting the elements to size, they are welded to the car body.
- At the end of the work, a trim is attached to the thresholds, it is primed and painted.
When performing repair work to replace thresholds, the trim is washed, corrosion is removed from it, and old paint and primer are removed.
Anti-corrosion treatment
To increase the durability of the VAZ 2106 car body, the body, bottom and hidden cavities are treated with special compounds. Anti-corrosion agents are divided depending on the area of their application:
When performing rust protection, a number of nuances are taken into account:
Installing fender liners will protect the vehicle's wings from corrosion.
VAZ 2106 is one of the oldest domestic models; it began production in 1976, and only in 2006 the car finally rolled off the assembly line. The machine is distinguished by its maintainability and reliability, which allows you to repair the vehicle yourself.
REPLACING SPARERS
At the junction with the steering mechanism, cross member and stabilizer bar mounts, the VAZ 2107 side members are quite weak and often fail. Even the amplifiers provided in these units do not help. Due to the poor condition of roads, cracks form on the side members, most often at the points of bolted connections. Any crack on the spar is a reason for urgent repairs. The spars are restored from the inside, which can only be reached from the mudguard. The work is carried out in the following order.
- Drill out several points for welding. The number of points depends on the size of the damaged area.
- Cut out the damaged part with a grinder.
- To provide access to the inside of the crack, the amplifier is removed along with the plate.
- A new reinforcing plate is installed and carefully welded around the entire perimeter.
- Welding areas are treated with an anti-corrosion compound.
In critical cases, the front spar is replaced entirely. Such cases include simultaneous failure of the stud and beam.
Replacing a VAZ 2107 spar implies the mandatory use of a reinforcing plate
The spar is replaced as follows.
- The suspension is disassembled and its fastenings are loosened.
- The oil filter and exhaust system pants are dismantled.
When replacing a VAZ 2107 spar, you need to dismantle the exhaust system pants
- The axis of the lower arm is knocked off the beam.
- The damaged part of the spar is cut off.
The damaged part of the spar is cut out with a grinder
The new part is cut to size and welded with an overlap.
Full scale replacement
Body with documents VAZ 2106
Such a replacement is an important and, in some cases, inevitable process. Over time, any metal frame will be exposed to rust, and today it is almost impossible to avoid getting into an accident over a long period of driving.
It is clear that the list of work required to restore the body of the “six” depends on the degree of defects. After an accident, the most important structural part of the car undergoes changes: the geometry is disrupted, visible and invisible flaws appear, and the coordinates of the installation locations of body elements are shifted.
Advice. Any restoration measures should be carried out so that the body number on the VAZ 2106 remains clearly readable. If it involves correcting minor defects, straightening and other similar activities, the VIN code must remain intact.
Body with documents for a VAZ 2106
If the body is badly damaged, then after hard work it will not be easy to return the original shape of the frame elements to their previous state. In some cases, welding special rings helps, but as a result of such operations the VIN code is damaged.
Passport details and number
VAZ 2106 body number
When replacing the body, you must take into account that it is a separate element of the car and is assigned an individual number. It is recommended to pay attention to the following points:
- The identification plate on the body of the “six” contains all the necessary information: the VAZ 2106 body number, the internal combustion engine model and other equally important information are indicated here;
- The identification number can be decrypted. As a rule, the first three characters indicate the car manufacturer code, the next 6 characters indicate the car model, the Latin Y is the model year code, and the numbers following it are the body code;
- You can find IT on the air supply box from the engine compartment (on the right).
Note. On some sixes, the number may be located on the left wheel arch connector in the left front corner of the luggage compartment.
Legal side of the issue
New body for the “six”
Be that as it may, every owner of the “six” can face a complete replacement of the body. And in this case, he should be interested in the proper execution of documents.
The first thing to do is prepare a documentation package:
- Write a statement outlining the essence of the appeal;
- Prepare a paper proving the material rights of the owner;
- Vehicle registration certificate and document confirming the identity of the owner;
- License plate for the car;
- Various certificates from regulatory authorities (customs, etc.);
- Insurance policies;
- Transit numbers (if available).
Note. If changes have been made to the design of the car, then it is necessary to prepare a certificate of their history.
Further, after this entire list of documentation is handed over to the inspector, they will be checked for accuracy, and the car will be inspected on the site. After which, the changes made will be formalized, the information will be entered into the database, and the owner of the car will be issued with the appropriate official papers.
Note. Until 8.10. In 2013, all these actions were considered full rights and any car owner could replace the body. But then new amendments appeared, which were never fully confirmed. Because of this, it is recommended that you obtain local recommendations before undertaking any replacement.
One rule applies strictly: body replacement can only be carried out with exact agreement on the number, which will be clearly visible on the metal surface.
Transmission repair
The VAZ “six” was equipped with two versions of manual transmissions - four- and five-speed. Both units are interchangeable. The VAZ 2106 gearbox is simple and at the same time reliable, which allows the owners of this car to carry out repairs themselves in case of problems. The main gearbox malfunctions are:
- oil leak;
- knocking out one of the gears;
- difficult gear shifting;
- extraneous sounds during operation.
One of the gearbox malfunctions is oil leakage.
Table: main faults of the VAZ 2106 gearbox and ways to eliminate them
| Cause of malfunction | Remedy |
| Presence of noise in the gearbox (may disappear if you depress the clutch pedal) | |
| Lack of oil in the crankcase | Check the level and add oil. Check for oil leaks, clean or replace breather |
| Worn bearings or gears | Replace damaged or worn elements |
| There is no noise, but the speeds are difficult to switch on | |
| The shift lever is damaged, the spherical washer, the gearbox lever travel limiting screw are worn out, the lever is bent | Replace damaged parts |
| The lever joint jams | Replace the worn element, lubricate the joint with the recommended lubricant |
| Rusks and dirt get stuck in the fork rod sockets | Replace parts |
| The movement of the coupling on the hub is difficult | Clean the splines, remove burrs |
| Forks are deformed | Replace with new ones |
| Clutch won't disengage | Troubleshoot clutch problems |
| Between third and fourth gear there is no way to lock the gear shift lever in neutral | |
| Broken release spring | Replace the spring or replace it if it has come off |
| Spontaneous gear shutdown | |
| Loss of elasticity of clamps, wear of balls or rod seats | Replace parts |
| Worn synchronizer rings | Replace parts |
| Clutch teeth or synchronizer ring are worn out | Replace damaged parts |
| The synchronizer spring has failed | Install a new spring |
| There is a noise, crackling or squealing sound when shifting gears | |
| Incomplete clutch disengagement | Troubleshoot clutch problems |
| Insufficient oil level in the crankcase | Check for oil leaks, add oil, clean or replace the breather |
| Gear teeth worn | Replace parts |
| The synchronizer ring of a particular gear is worn out | Replace worn ring |
| Presence of shaft play | Tighten bearing fastenings, replace worn ones |
| Oil leak | |
| Worn cuffs | Replace worn elements. Clean or replace the breather |
| Wear of shafts and nicks in places where cuffs are installed | Sand with fine grain sandpaper. Replace cuffs. If there is severe wear, replace parts |
| Breather clogged (increased oil pressure) | Clean or replace the breather |
| Weak crankcase cover, worn gaskets | Tighten fastenings or replace gaskets |
| The oil drain or fill plugs are not fully tightened | Tighten the plugs |
Repair of the gearbox is carried out after its removal from the car and is carried out using standard tools (a set of keys and sockets, a screwdriver, a hammer, a wrench).
Removing the box is mainly required for its complete disassembly
What parts do the thresholds of the VAZ 2107 consist of?
Thresholds on a VAZ are considered non-removable body elements. The parts are welded to the bottom and, in addition to their main purpose, protecting the body from mechanical damage, they perform a power function, increasing the overall rigidity of the vehicle’s base.
The iron bears the general structural load, so a rotten threshold primarily affects the overall geometry of the body, the doors begin to shift, the shape of the bottom changes, and as a result, the main components and assemblies move out of their place. The thresholds on the VAZ are structurally similar to a hollow box. They consist of the following parts:
- External element. Performs a decorative function and protects the body from external influences of an aggressive environment and mechanical damage.
- Amplifier. The power load element is a stamped sheet of rolled steel.
- Connector. The element is located inside the threshold block, connected by spot welding to the amplifier and the outer part, providing the necessary rigidity of the structure.
In cars assembled before 2000, rolled steel of maximum thickness was used for all body elements; the elements were characterized by increased resistance to corrosion. Since 2000, the thickness of the rolled sheet has decreased, the design of the threshold has also changed, and a partial internal connector was used during assembly.
When choosing a repair, it is necessary to take into account the design features and complete any intervention with anti-corrosion surface treatment, since galvanizing of the metal is not carried out.
