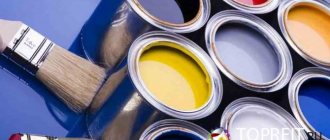
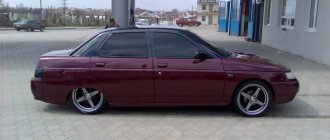
Temperature for painting a car
The technology and principle of painting a car body is very dependent on the air temperature in the room. In auto repair shops, cars are painted in special chambers in which high temperatures can be set to dry the paint. High temperature for drying painted cars is not always necessary. These conditions are created for some types of paints that are sold complete with hardeners. In order to obtain a high-quality coating as a result of painting with such paint, the car must be dried at +80C degrees, and this can only be done in special chambers. But recently a lot of paints have appeared that can dry perfectly at a temperature of +20C degrees. These are enamels intended for so-called air drying, which do not require the use of chambers. Therefore, when choosing paint, you should pay attention to what temperature is needed to dry it!
Choosing car dealership services
Often, accidents on the roads occur in winter, which is associated with ice, snowfall or severe frosts. Damage sustained by a vehicle forces the driver to solve the problem promptly. This can only be done in a specialized car service center.
The quality of service painting is not affected by weather conditions and negative temperatures, since a special microclimate has been created in the salon. The organization providing the service selects the required premises and paint materials. Technologically complex painting with enamel, which hardens at fairly high temperatures, requires an individual approach.
Conclusions and recommendations
Preserving and restoring a car's paintwork is a problem that all car enthusiasts face sooner or later. It is very important to maintain it in good condition and carry out repairs in a timely manner. This will avoid metal corrosion and extend the life of the machine.
The car owner chooses which type of painting: full or partial, to prefer based on material costs, terms of work, and condition of the car. It is important that paint and varnish work is carried out at a high professional level.
Pros and rules of winter car painting
Painting the body or parts of a car in a garage or on the street requires compliance with certain conditions. In winter, selecting the required temperature can deliver
a lot of problems . However, paints and varnishes should be used within the temperature range indicated on the packaging.
If there is a need to urgently paint your car in winter, then after-sales service will solve the following main problems:
- Removing signs of wear.
- Carrying out urgent repairs.
- Hiding damage to the body.
- Updating the appearance of the car.
- Detailed painting of the structure.
Experts do not advise beginners to paint the body themselves. You can gain the necessary knowledge and experience if you start painting individual machine parts. Before carrying out work, you should remove all unnecessary objects from the garage and sweep away dust.
Painting taking into account temperature differences requires a step-by-step execution of work . The time interval between application of paint layers, indicated by the manufacturer on the packaging of the paint and varnish material, may be increased. The duration of the pause is usually 20-30 minutes .
To regulate the temperature in the garage, you can use various heat sources , including a gas gun, fan heaters or heaters. By heating the room in the morning, you can maintain the desired temperature throughout the working day.
As you continue to prepare your garage, you need to keep in mind that the car should be painted within a few days . The step-by-step painting process is due to the fact that it is impossible to paint an entire car yourself in a day.
To make painting easier, you must first remove the doors from the car body. Bumpers should be painted first after being removed from the car. At the next stage, you can begin painting the trunk and hood.
How long should paint on a car dry and when can you start washing the car?
Have you thought about painting the car body or its individual parts yourself? Then you will definitely have standard questions that many car enthusiasts ask, and in this article we will try to answer them.
How long does it take to dry a car after painting?
As you yourself understand, this time interval directly depends on many factors.
Firstly, this is the temperature regime, which must be maintained at +18 - +22 degrees Celsius. Secondly, it is the type of paint itself. Acrylic enamel and nitro enamel dry quickly enough, and after just a few days you can operate the car. Other types of paints and varnishes require a longer drying period. Thirdly, this is the use of additional equipment in the form of air-heated convectors or IR heaters, which can significantly speed up the paint polymerization process, and you will gain in terms of the time it takes such a coating to dry. Let's look at the approximate time intervals that you will need to carry out the work. If you paint in a garage, the varnish and paint will set in 6–7 hours when using a spray booth or IR panels, and about 1–2 days simply by maintaining the temperature in a ventilated garage. But determining exactly how long the paint on a car dries is quite difficult even for an experienced master. Usually they choose time with a margin so that the car can sit and the paintwork gains the required level of strength, and this is a period of about a week.
How long after painting a car can you drive?
It all depends not only on the type of material, but also on the operating conditions. If you drive carefully, without getting caught in the rain or driving into mud, then after 2–3 days you can use your car. The best option would be to let the car sit for about 14 - 20 days, but not every car enthusiast is ready to leave their vehicle for such a period of time. Such a long term is obtained due to the fact that in addition to the paint itself (base), you also cover the car body with varnish, which also takes a long time to dry. First of all, the varnish dries, and then there is a gradual crystallization and drying of the base itself.
How long after painting can you wash your car?
Experienced professionals advise not to wash your car for a month, especially avoiding high-pressure washing.
This is due to the slow polymerization of the paint under the varnish, and using mechanical force can damage the coating. The minimum period of time after which you can start a car is 15 days. After this period, you can use auto chemicals. Here are some tips for washing your car after painting.
- For the first 15 to 30 days, do not use chemicals to wash your car.
- Do not use a high pressure washer.
- It is better to wash with soft rags or washcloths, and never use hard brushes.
Of course, there are cases when car enthusiasts wash their vehicle at a car wash within a few days. But the question is, are you ready to risk your money? If not, then it's better to wait.
Disadvantages of painting a car in winter
Car owners with experience in body painting can do this work in winter, but to obtain a high-quality surface, you must follow certain rules . It is necessary to carry out painting in special clothing and a mask , since it is impossible to provide air access through the window.
The main problem is creating special temperature conditions for painting a car body in winter. Before performing work, an additional degreasing liquid must be applied to the prepared surface, which complicates the entire process. Other disadvantages associated with painting a car body in winter:
- Creating an uneven surface.
- The paint layer is rough to the touch.
- Difficulty leveling the putty layer.
- Slow drying surface.
- Formation of drips.
The painting process in the garage does not require perfect cleanliness. Particles of dust, dirt, and hairs may get onto the surface to be painted. Cleaning the garage before painting the car body will help eliminate unwanted inclusions. This takes quite a lot of time.
When applying paint, dust may settle . This can be avoided by vertically hanging small elements on a wire after the applied paint layer has dried. Another trouble when painting is associated with the appearance of drips. To eliminate this process, you can use heating of the parts, giving them a horizontal position.
Apply primer filler
When working with secondary primers, it is important to pay attention to both the overall thickness of the coating and the thickness of individual layers, as well as the dwell time between them.
It would seem that the thicker the layer of filler, the higher the quality of the surface, and it is easier for us to work with it. But no, it's not that simple. The main problems that arise with secondary soils are associated precisely with exceeding the thickness of the working layer and insufficient interlayer curing.
What are these problems?
The first problem is associated with long curing and shrinkage of the material. We all know that if a certain amount of varnish or primer ready for spraying is left in a jar, then after a while not a solid substance will form, but a kind of jelly-like substance. When applying too thick layers of soil, almost the same thing happens.
A layer that is too thick does not dry immediately and will remain in this half-baked “plasticine” state for quite a long time. At best, this will lead to suffering and excessive consumption of abrasive materials during grinding. At worst, applying coating materials to a not completely dry primer can lead to “compression” of the paint and disruption of adhesion between the enamel and the primer.
The second problem is “boiling.” We have already talked about this defect several times, but we will talk again.
The fact is that polymer materials do not just dry - in addition to the evaporation of solvents and diluents, the process of cross-linking molecular chains takes place in them. And although the polymerization process occurs throughout the entire volume of the material, evaporation of the solvent occurs only from its surface. This process is accompanied by the formation of a film on the surface of the paint layer.
From a layer of normal thickness, solvents have time to evaporate in time - before the formation of a surface film begins. All processes in this case proceed correctly and evenly, everything fits into a certain scheme, structure.
A thick layer contains more solvents, which means it takes longer to evaporate. And since the evaporation of solvents occurs more intensely at the top, this leads to the fact that the creation of a surface film is somewhat faster than the evaporation of all solvents from the layer.
Recommendations for car painting in winter
To ensure quality work, it is important to install good, uniform lighting . There should be no shadows in the room caused by lamps of different power. If necessary
You need to install additional lighting fixtures in the garage. Fixtures and lamps should be placed around the perimeter of the garage, ensuring that there are light sources on all sides.
If the temperature is higher in any place in the garage, the paint used should have a thinner consistency. To obtain it, it is enough to add a solvent to thick paint and only then begin painting the hotter elements of the body. If it has cool areas in some places, then they should be covered with thicker paint. This will prevent the formation of drips and uneven paint application.
Apply anti-corrosion primer
In the article about the types and properties of soils, we have already said that the adhesive strength of a layer of anti-corrosion soil is inversely proportional to its thickness, therefore such soils are applied in a thin single layer , the thickness of which should be in the range of 10-15 microns.
Visually determining this value is very simple: if the soil completely covers the repair area and does not show through, its thickness is more than 15 microns. It is recommended to apply a slightly transparent layer, on the verge of opacity - adhesion in this case will be maximum.
Significantly exceeding the recommended thickness of anti-corrosion primers can cause deterioration in the adhesion of the entire coating.
One of the common mistakes when working with acid-containing anti-corrosion primers is the so-called “preservation” of the first layer, when after applying the acid, which seems to dry instantly, a filler primer is immediately applied.
In this case, the acid remains under the next layer without having time to fully react. And besides it, soils contain many other volatile substances, but they also need time to evaporate. Therefore, you should not rush, you need to give the primer layer at least 15-20 minutes to react and evaporate, and only after that apply the filler primer.
Possible combinations
Among the etching anti-corrosion primers, there are materials that allow the coating enamel to be applied directly to them, without the prior use of a secondary primer. We must say that although this is the fastest, but, alas, not the best method, since due to the absence of a layer of secondary primer, the coating will be too fragile, and its durability will be insignificant - precisely because of the small thickness of the entire paint and varnish “pie”.
One more word of caution. If the surface requires filling, then acid-curing primers can be applied only after completion of the filling work. It is unacceptable to putty over acidic or 1K etching primers! The only anti-corrosion material that can be applied under polyester putties is epoxy primer.
By the way, it is the presence of a layer of primer under the putty (and not just on it) that distinguishes the highest quality paint from the standard one.
In the standard case, we apply the putty to the bare metal, grind it, then put an acid on top to protect the metal around the repair area, and then a filler primer. Or a layer of epoxy primer, and then filler - this option can also be used (especially on old, problematic paintwork). But one way or another, in this case, bare metal remains under the putty.
In luxury painting, puttying is preceded by applying a layer of epoxy primer to the bare metal (read why this is done here), after which the part is puttyed and sanded, and then again “sealed” with a layer of epoxy (the so-called epoxy pocket), and after that filler is applied.
Of course, visually the result in these two cases (standard and luxury) will be the same, but reliability and durability... Unless, of course, this concerns you.
By the way, epoxy primer itself can act as a filler primer (if it is applied in 2-3 layers). In this case, subsequent application of filler is not required. However, it should be borne in mind that epoxy primers have increased hardness and are therefore more difficult to process than conventional fillers. And the maximum thickness of their application is less than that of acrylic primers, which requires a very high quality of surface treatment. Draw conclusions.
It is not advisable to use two different anti-corrosion primers during the repair process on one element. However, most manufacturers strictly prohibit applying epoxy primer over acidic primer.
Since primary soils have a protective function, they do not need to be sanded (and their layer thickness is already small). Therefore, after the recommended exposure, it is necessary to immediately apply secondary primer. So let's get started.
To protect bare metal, a layer of etching anti-corrosion primer is applied to the repair area
Problems with winter car painting
The manufacturer will always write at what temperature the materials can be used. It is better to do coloring if it is +15…+20 degrees outside. The minimum possible temperature at which it is permissible to work in emergency situations is +8…+10 degrees. Therefore, the answer to the question whether it is better to paint a car in winter or summer is obvious. It’s another matter if all operations are done in a warm garage or box - knowing the rules, you can take risks.
In the cold season, painting a car body can lead to a number of unpleasant consequences:
- the paint will lie unevenly, the coating will look rough, but will remain the same to the touch (it will look like shagreen);
- drips are possible, especially along the edges of parts;
- During the day, when the coating is vulnerable, it must dry out - this will not happen in cold weather.
These are the most important disadvantages of dyeing in winter. There are many other disadvantages. For example, applying a degreasing liquid must be done, but you will have to wait a very long time for drying.
Another drawback is that you will only have to work in a mask; you won’t be able to open the windows for ventilation. There is only one way out - you need to create optimal temperature conditions for painting the car, and the quality of the result will please you.
Is it possible to paint a car in a garage?
Is it worth the risk and start painting? Considering the disadvantages of garage conditions, truly high-quality coating can only be done with good experience. Painting in a garage has many differences from carrying out the procedure in a special chamber, where all conditions are provided. Professionals do not advise beginners to take on such a complex task or to first study in detail all the features and specifics of the work.
Differences between painting in a garage and painting in a special chamber
The differences between the two types of painting are primarily in cramped conditions. In a regular garage box there is no space for conveniently laying out materials and tools. The time for preparing the room and the painting procedure itself will be longer, therefore, there is a higher risk of disrupting one of the stages. It is difficult to create a constant temperature in the garage - there is a draft from the door, the heat is distributed unevenly, so car paint dries unevenly quickly.
Another important difference: it is not possible to maintain perfect cleanliness in the garage - dirt, dust, hairs, and other particles can get on the painted parts. You will have to first remove from the room everything that could harm the paint. It will take even longer.
The lighting problem is no less important. Garages rarely have high-quality lighting installed, so in one part the lamps shine stronger, in others there is a shadow, and visibility is worse. Making an even, high-quality coloring will not be easy. You will have to bring additional lighting sources, otherwise the quality will suffer.
The lack of an exhaust hood is no less unpleasant, since in winter a cloud of paint and varnish will irritate the respiratory tract. Microdroplets will not allow you to see well; they will settle on the surface and spoil it. The same sediment settles on the painted parts of the car; they will have to be additionally sanded. To create a high-quality coating, you need supply and exhaust ventilation in the room.
How to paint a car in the garage
Having cleared the garage, removing unnecessary rubbish and dust, you can begin further preparation of the room and the car. Usually the work is completed in a few days (up to 3 - 4), since the car will be painted in several stages. It is impossible to paint a car entirely in a garage, unless the conditions are as close as possible to professional ones.
The order of work is as follows:
- Remove the doors, bumpers and paint them first.
- The second stage is to start working on the hood and trunk, paying the greatest attention to the quality of the paint.
- Finally paint the remaining parts.
There are a number of tips that will help you do the job better:
- Bring additional lighting sources - lamps, lamps. They are placed around the perimeter of the front, side, and rear of the car being painted.
- In areas of the garage where the temperature is higher, use thinner paint, and vice versa. A little more solvent is added to the material - this paint is used on the “hot” part of the car. Cooler parts are painted with thick paint, otherwise drips will form on them. If there is a large temperature difference, painting is done in several stages, dividing the parts depending on the degrees of heat.
- Warm air is well supplied with a gas gun, heaters, and fan heaters. Usually the equipment is turned on in the morning, the temperature is brought to the optimum, and then maintained at the desired level.
- The paint (varnish) and hardener are mixed in advance; if necessary, the materials are heated well using an infrared lamp. You can use the same method to warm up car parts if the room is not higher than +12 degrees.
- Pauses between layers are doubled instead of those specified by the manufacturer. Usually 20 – 30 minutes are enough.
- When is the best time to touch up parts after puttying? This should be done on the second day - the putty finally “sits” after 8 hours. You can urgently heat the putty with a lamp, then it will dry earlier.
- Against the ingress of dust, it is allowed to fasten car parts vertically with wire when the paint layer has dried a little. When drips appear, the part is immediately moved to a horizontal position, and heating is applied.
How to arrange the necessary air heating for painting?
We offer you several options:
- Avoid heating with open flames and open coils, as this is highly fraught with fire.
- Use air heating elements with a radiator for heating. They must be collected in a heater and blown through with a fan. All this should be located outside the camera.
- You can also install a water heater - an autoradiator driven by a heating boiler. Air must be supplied according to the recirculation principle to avoid uneven heating.
- The simplest way is to build a conventional water heating system, but instead of batteries, install a pair of passenger car radiators with an electric fan. The boiler can be installed in one that can run on bottled gas, diesel fuel, fuel oil, coal or wood.
The room itself must be very carefully insulated. It is advisable to install 2 hoods or one two-speed one. A large hood will be needed so as not to suffocate from the vapors when painting, and a smaller one in order to draw out solvent vapors during drying without cooling the chamber.
When is it better to paint a car in summer or winter?
Greetings dear reader. Glad you came across this article. Most likely you are the car owner of your favorite iron horse. And like a good owner, you take care of your car. Let me give you some good advice. Since I have had experience for about 7 years. And I continue to expand my knowledge in the field of auto painting tin business.
Knowing first-hand all the underground valuable information in the field of auto painting. I want to share and tell you when is the best time to take your car in for painting.
What time of year is the most profitable for this business? I don’t know for what reason, most likely because big big cars often sit in garages in the winter, but for many years now 95% of cars have been brought to a car service center for painting or minor repairs in the summer. Auto painters call this season. And at this time, prices for repairs rise, queues increase, and quality deteriorates.
Why is the quality worse, because in such a large molasses, every master wants to make as many cars as possible, no matter what kind of super-duper master he is. The quality will be worse, it is known that “If you hurry, you will make people laugh,” but you can’t waste your skill, and for this reason, a noble master of auto painting or tin can always hide his mistake and keep silent about it. This is true in every service. You leave by car and have no idea about it. But the wood screw will be under the bumper and you won’t know. If this is the norm for one, then for another it is not acceptable.
It's a shame when you find out this during a sale or minor repair. It's a disaster if it's just a screw. But the same thing happens in specialized services. There are masters who don’t give a damn, but there are also those who approach their work responsibly. In the next article I will definitely write about how one old man bought a car at a dealership and came to us with annoyance when he learned what happened to his car and what he bought at the dealership.
Well, now the main advice.
Stop by to get your car painted if you can't stand it in the winter.
.
And the best month is January and February. Set aside money for this time in advance. Take this seriously. It is at this time of year that the flow of customers drops to almost zero and prices can naturally be lower. Because rent needs to be paid, but there are no clients after the new year. At this time, the service sits idle for weeks. And we are ready to take any car for an acceptable amount if the craftsmen do not receive a monthly salary. At best, those who work on a percentage of the cost of repairs will do it slowly and efficiently. Fitting every gap.
It's up to you to decide when to make your horse. But he will still have to be treated. Don't launch too hard. But in half a year or a year there will be no serious rust damage. If you have a lot of money, then do it wherever your heart desires. I just revealed a little secret for those who don’t know.
Thank you for reading to the end. If it was interesting, don’t forget to like it so I will understand that it was useful to you. Subscribe to the channel to receive notifications about new releases. An interesting article will be published soon.
Comments
This winter, during severe frosts, due to the hood, the temperature reached 8-10 degrees, everything worked out fine, but there was a very high risk of drips, it could have leaked in 5 minutes.
From +15 degrees, if less then even the putty will not polymerize.
For half a year nothing happened to the car. Then they hit it in the back and I never saw the car again
the hairdryer is only for Gazelles and VAZs, I’ll try to explain why; When drying, the hair dryer heats and dries the top layer first, but the solvent remains in the bottom layer, which cannot come out due to the dried top layer. Correct me if I'm wrong.
Well, I use a hairdryer quite often on foreign cars, and it’s a very useful thing for straightening plastic. At low temperatures, below 20, it reduces the preparation time by half or even more, the main thing is not to overheat, I apply the putty and wait 5 minutes. I warm it up with a hairdryer, constantly stirring the hairdryer, if you keep it in one place, the putty will swell from overheating, wait until it cools down, and rub it in. The solvent in the putties is at least 2k in the primer, also if you don’t add it yourself, the boiling effect occurs in the paintwork in the 2k system from incorrect use of the hardener If the putty You need to heat it on the plastic very gently, just a little warm.
Each brand has technical documentation where everything is detailed in what temperature conditions this material is used, what drying time, etc.
You can also use industrial. hair dryer for putty and primer and partial touch-up, even at sub-zero temperatures. For example, if the Gazelle does not fit into the garage in winter.
Right, right Conclusion: IR lamps, or drying from the inside of the part if possible. Although with layers up to 200 microns (three layers of paint), the fact that the top layer dries a little earlier is not critical. But there were incidents. If anyone has seen how, after complete drying, the car was covered with small bubbles (with 100% confidence that everything was fine with the underlayer and the paint and hardener), this is exactly what it is, the release of solvent from the bottom layer of paintwork through the dried top layer. But again, microscopic gerbil from the solvent is always there, no matter how you paint it.
Damn, the wiki has a weird proportion, I can’t say for sure, but I think it’s 3:1.
thanks for the clarification))) it’s good when there is someone to support and correct)))
I took Vika's varnish several times, I didn't like it, the other varnishes dry without problems at plus 10, but the same constant problem does not dry out (dirt gets in and all the matte stains get in). I came to the conclusion that it needs to be warmed up after coloring or is it just one big hemorrhoid
That’s how it’s written on the can. I’ll look later, I’ll have to go into the basement to get the can.
Vika acrylic. On the can it is written: one part of hardener to four parts of paint. by volume or by weight.
You can understand this Vika, either she really doesn’t want to dry, or she dries in the spray gun. You can't understand Russia with your mind
Condensation may appear on adjacent parts.
If you have a potbelly stove, well, melt it again and warm it up. The dependence of the drying time on the drying temperature is not direct. At 10, the glaze dries in about 2 days, and at 20, only 8 hours.
what should be the proportion please tell me maybe I mixed it wrong
Or maybe put a halogen lamp next to it, the heat comes from it
Well, put it further away. How long will it take to dry at 0 degrees?
What kind of paint was it?
A painter I knew used to paint with it a long time ago, and in normal weather it took a long time for him to dry.
I made bekha for sale with vetch, I’ll say this: it dries in 4 hours at 18 degrees, but I measure it on a scale.
It took 2 cars, I tried to paint both of them at +8 dash +12, this is PPC, the Daina HS varnish ran like that. after 50 minutes, influxes appeared. Moreover, it takes only 15 minutes to dry from dust at +20. as a result, I redid it, heated the parts with an infrared lamp and immediately blew them out until they cooled down, 2 layers of varnish in a row without waiting, and no matter what, no problems with smudges. In general, you can paint as you want, but personally, I won’t even try at temperatures less than +15
Car painting in winter
The need to paint the body of your car is necessary for a variety of reasons. This can be either a direct necessity, due to damage to the body and subsequent repairs, or simply the driver’s desire to add newness to the car and hide signs of wear. And if painting, if desired, can be postponed until the appropriate time comes, then painting the car body, if necessary, is often carried out at the earliest possible moment. Such a time may come in the winter, as a result of which many car owners are concerned about painting vehicles in winter.
Painting at the service
I would like to say right away that painting at the service is carried out at any time of the year and in no way depends on weather conditions. When contacting this type of organization, you receive a number of advantages, including these points:
- The time of year and weather conditions do not play a role, since painting is carried out in rooms with their own microclimate
- The temperature in the rooms will be selected individually, depending on the type of paint used and recommendations regarding its use
- Painting with enamel, which requires high hardening temperatures, is carried out under separate conditions
These points contribute to the choice in favor of the service center.
Necessary conditions for polymerization of low-temperature powder compositions
Not long ago, low-temperature powder paint appeared on the market of construction technologies and materials. This innovative product is designed for protective painting of structures and parts that cannot withstand high-temperature polymerization conditions. Low temperature coatings have:
- excellent technical characteristics;
- chemical resistance;
- excellent protective properties;
- can be smooth, glossy, semi-glossy, matte, transparent.
Low-temperature powder compositions can be used to paint not only automotive parts, elements, fittings, but also furniture, shelving and other products and structures.
Low-temperature powder compositions do not require high temperatures for polymerization; +70...+90 °C is enough for them. To maintain a constant temperature, thermoelements (sensors) are used. The use of this operating mode significantly saves energy, which is one of the most important factors when operating paint shops and enterprises. Therefore, low-temperature powder painting materials are quickly gaining leadership among all similar paints.
Problems with winter car painting
The packaging of the coloring composition indicates the requirements for temperature and humidity in the room. Painting outdoors can only be done in warm weather. In rare cases, work is performed at +8…+10°С. Therefore, it will not be possible to paint the body outside in winter. It’s another matter if the repairs are carried out in a heated box.
Painting a car in winter leads to the following problems:
- Reduced coating quality. The paint applies unevenly, forming stains and streaks. The surface becomes rough and unpleasant to the touch.
- Increased paint drying time. The surface must dry well, which is hampered by sub-zero temperatures.
- Inconvenient application of degreaser. The composition will spread and take a long time to dry.
- The need to use personal protective equipment. It will not be possible to ventilate the garage in winter, so you will have to work in a respirator.
What is a paint booth
This is a room in which ideal conditions are created for painting the car body. Creating such a room is not easy, but with the right approach and full technical equipment it is quite possible.
Not all service stations follow the painting rules and very often use a repair box for painting work. As a result of such violations, the coating on the car quickly becomes unusable, and the owner is forced to seek help again.
The choice of room for a painting booth must be done wisely. It shouldn't be too small. Here you will need to place a fairly large amount of equipment and organize a high-quality ventilation system.
spray booth
Requirements for the premises under the painting booth:
- Don't limit yourself to small sizes if possible. Remember that there will need to be a vehicle and equipment in the room and there should still be room for free movement around the vehicle.
- The door to the premises must be large enough for vehicles to enter and exit without risk. It is also desirable that the door closes tightly and does not allow dust and drafts to pass through.
- The lower part of the room should be equipped with a metal mesh or trenches covered with bars. This is done in order to ensure high-quality and uniform air outflow. For the floor, the most optimal material is concrete, and if you have dug trenches for the air duct, it is advisable to fill them with concrete.
- The lighting of the spray booth should be bright and uniform. Daylight lighting fixtures should be placed not only on the ceiling, but also on the walls. Each lighting element must be installed at the same distance from each other.
- The equipment control panel should be located in close proximity to the work area. It helps the master to quickly complete or stop the painting operation, and set the temperature of the heat exchanger for the paint booth. The remote control can be remote or stationary. If the room allows, it is better to make a mobile device that would allow the master to take it with him when drying at high temperatures.
- High-quality ventilation in the ceiling is necessary to ensure a constant flow of air. Air mass flows should be distributed evenly around the entire perimeter of the room. The ventilation shaft must be protected from dust and dirt by a reliable filter. The air duct openings must be equally spaced so as not to create turbulence in the chamber.
- A high-quality heat exchanger for a painting booth must be fully automated and connected to a remote control. When drying paintwork, the temperature in the paint booth must be stable.
- The lower ventilation system with outlet to the street must ensure constant air outflow. It is best to make the floor in the painting room concrete or raise its level using a metal grid. The second option is considered the most convenient for air exchange.
Here's how a paint booth works. In such a scheme, everything is thought out to the smallest detail; all that remains is to show creativity and come up with a coating for the walls and ceiling that meets the high fire safety requirements. The most common is sheet metal, painted white.
The white coating helps the master to clearly see the shades of colors and does not in any way affect the perception of the color palette.
Is it possible to paint a car in a garage?
Given the humidity and air temperature in the garage, it will be difficult to obtain a uniform and durable coating. Painting under these conditions differs from that in a paint booth. Experts do not advise beginners to carry out such work. It is necessary to study the rules of body repair in advance.
Differences between painting in a garage and painting in a special chamber
Winter painting in a garage differs from car repair in a special box in the following ways:
- Limited space. It is inconvenient to locate the necessary materials and tools in the garage. Preparing for work will take more time, which may disrupt one of the repair stages.
- Inability to maintain a constant temperature. Warm and cold air flows are distributed unevenly, which increases the drying time of the paint.
- Presence of contamination. Debris particles present in the garage can settle on the body and ruin the applied coating. The room will have to be cleared of anything that could damage the painted surface.
- Poor lighting quality. Garages are rarely equipped with powerful lamps, so you will have to purchase additional lighting devices.
- Lack of ventilation. Vapors from paint and varnish products will irritate the respiratory system, and condensation will impair visibility and damage the coating. Drops of water settle on the machined parts, requiring re-grinding.
Using a special painting chamber
When choosing the option of where to paint a car in winter, in a special chamber or in a garage, it is recommended to give preference to the first. This is explained by the fact that when carrying out this procedure, it is necessary to take into account several factors, each of which has a direct impact on how the coating will be applied.
Thus, it is necessary to paint the car body in conditions of almost sterile cleanliness. Therefore, before starting any manipulations, the garage must be completely cleaned, removing dirt, dust, and more. These particles, when released into the air, settle on the body, thereby interfering with the uniform distribution of paint.
Another important nuance is that dust is constantly present in the atmosphere. And to prevent these particles from falling on the body, it is necessary to hang each painted part vertically, which is not always possible to do in a garage. The third point is that after the procedure is completed, streaks appear on the body. To avoid such consequences, it is necessary to ensure heating of the processed parts.
In addition, properly placed lighting helps to check the uniformity of the paint coating, which will not create shadows on the car body. And the last nuance is that the required temperature conditions are recreated in a special chamber. The air in the garage is heated unevenly. The temperature near the door is always lower than near the heating devices. This factor negatively affects the condition of the paintwork.
In addition, in order to prevent poisoning by particles of material, it is necessary to organize fresh ventilation in the garage. All described conditions are observed in a special chamber.