Malfunction of LED brake lights
If, after carrying out the measures described above, it is not possible to determine the reason why the brake lights do not light, you should clarify the type of lamps used. They can be made using LEDs. Their installation has a number of features. Typically, LED lamps have a certain polarity for connecting to the vehicle’s on-board network.
Manufacturers always take this into account when developing. Incorrect connection results in the lamp not lighting up. In some cases, such inclusion may lead to damage. If a connection polarity violation is detected, this indicates that the repair on the vehicle was carried out by an unqualified person.
Brake lights don't come on completely
If the brake lights on the car stop lighting completely, then you should look for a break in the wires, in the limit switch or a faulty fuse. The search for a breakdown should begin with the fuse box. On its cover there is usually a table showing which circuit is protected by which fuse link. If it is missing or the information in it is unreadable, you can use the owner's manual for the vehicle.
If the required fuse has blown, it cannot be replaced until the cause is determined. This usually happens when there is a short circuit or the insulation of the wires is damaged and they touch the housing. A similar effect is observed when water gets into electrical connections. In this case, it is necessary to dry the area where moisture has entered. To speed up the process, you can use a hair dryer (being careful not to melt the wire insulation or sheathing elements). Then you need to remove the fuse from the holder and test the circuit after it with a multimeter.
Often the wires fray at the point where they pass from the body to the trunk lid. Typically, the casing must be removed to detect cable damage. Therefore, in the absence of proper experience, it is better to entrust this work to a service center. If damage is found, the insulation coating must be restored. To do this, you can use ordinary insulating tape.
If the fuse is OK, you can assume the limit switch is faulty. It is located in the pedal assembly. It is necessary to inspect the condition of the switch and test it with a multimeter while the brake pedal is pressed. The multimeter should show a resistance of less than 1 ohm. If it is large or the switch has mechanical damage, it must be replaced. Due to the complexity of such an operation, it is better to entrust it to experienced car service workers.
If both the fuse and the limit switch are not damaged, this indicates a broken wire. To find such a fault, you will also need to open the casing. If you lack experience, it is better to entrust these actions to a car service.
If a wire break is detected, it is necessary to strip the insulating layer from the wire, make a connection and insulate the joint. A break in a section of wire is repaired by soldering. To insulate the connection, you can put on heat shrink tubing and heat it until it is fixed to the wire. If the terminal breaks, it is removed from the plastic case and replaced with a new one, crimping the stripped end of the wire into it, then inserted back.
Effective “recipes” for maintenance and repair of brake lights: advice from professionals
The purpose of the brake light is to warn drivers behind you about braking. It should turn on as soon as the brake pedal is pressed. If the stop is faulty, it can cause an accident. The article discusses the brake light, the principle of operation, typical malfunctions, methods for eliminating them, and provides instructions for replacing them yourself.
Malfunction of brake lights together with other indicators
Quite often, the brake indicator lamp is used together with the side lighting of the car. One cylinder contains two filaments, one end of which is connected to the base, and the other two are brought out to separate contacts. If the brake lights and parking lights do not light up, the most likely loss of contact is at the point of their connection to the body (“ground”) of the car or in the socket. This can happen due to a broken wire or oxidation. The broken end is connected to the terminal by soldering or crimping. Oxides are cleaned off with a sharp tool (knife or screwdriver); after repair, it is advisable to cover the joint with paint or grease to prevent re-oxidation.
It is quite rare to encounter a malfunction when not only the brake light, but also the other indicators on the car do not light up. This is usually observed in “drowned” cars that have somehow been in water (as a result of careless driving or an accident). Even after thorough drying, moisture still remains inside the interior trim and electronic components. Its presence leads to increased oxidation of conductive surfaces. In such a car, having eliminated the malfunction of one system, you cannot be sure that it will not appear again.
Causes of malfunction
The main reasons for this malfunction are:
- defective or burnt out light bulb;
- break in electrical wiring or plug connections;
- fuse blown due to a short circuit or overload in the on-board network;
- limit switch malfunction;
- problems with electronic systems or units.
Such malfunctions can usually occur on high-mileage vehicles. However, there are exceptions.
The additional brake light does not light up
If the additional brake light does not light up, this indicates a break in its wires or an unreliable connection. It usually connects to one of the stock brake light sockets. It is necessary to ensure that the wires are securely fastened and that there are no signs of oxidation.
If they are present, it is necessary to cut off the damaged end of the wire, clean it again and connect it to the socket. If the cable is broken in another place, it is advisable to install a new one. In this case, it is better to use a thicker wire (to avoid recurrence of the malfunction).
Removing and replacing rear lights
The procedure for replacing rear lights is as follows:
First you need to turn off the ignition, open the hood and disconnect the terminals from the battery. Then open the trunk of the car and remove the protective cover on the headlight, disconnect the mount and disconnect the wiring connector from the contacts on the board. Be careful not to damage them. Using a socket wrench size 8, you need to unscrew the four nuts that secure the taillight
Having done this, under the nuts of the studs you will be able to see the tips of the ground cable. Next, you need to carefully remove the taillight from its seat. To change the diffuser, it must be removed from the optics body. The procedure for installing and assembling optical elements is performed in reverse order.
Separate brake light does not light up
If only one brake light does not light, then the most likely problem is the lamp or poor contact in the socket. In this case, you need to disassemble the trunk trim on the side of the car where the signal is not lit. If necessary, remove the lamp unit, remove them from the sockets or holders, carefully inspect the contacts in the socket and on the lamp base.
The presence of rust, traces of oxidation (white or greenish coating), soot, as well as dust or moisture confirms that the brake light does not light due to missing or poor contact in the circuit. Cleaning the indicated areas will help eliminate the problem. To remove rust and oxides, you will need a sharp object, such as a screwdriver. It is also necessary to check the serviceability of the lamp. To do this, you can use a multimeter or the on-board voltage supplied to the lamp via wires through a fuse. The burnt-out lamp is replaced with a similar new one.
Car alternator malfunction
LED lamps are very sensitive to voltage surges in the on-board network (along with this, the current through the LEDs increases, which leads to their destruction). The voltage may increase if the generator components (namely the stabilizer) are faulty. This is especially common on domestic cars due to the lower quality of component production compared to more well-known brands.
Therefore, if the brake light on a VAZ 2114 or another model does not light up (provided that LED lamps are used), you should also check the generator and replace the damaged element, then change the lamp.
Such a malfunction can occur periodically and is associated with wear and tear of the entire generator. If the brake lights on the VAZ 2115 do not light up and other breakdowns often occur, you should also think about replacing it with a more reliable car (in some cases, this is more profitable than constantly investing money in endless repairs).
READ Do-it-yourself wheel alignment VAZ 2105
Common problems with brake lights
- blown fuse;
- faulty sensor;
- frayed or broken power cord.
No one will show you this. VAZ repair of rear lights 2105-2107
The most common cause is a blown fuse responsible for protecting the signal light circuit. This fuse is located on a block built to the left of the steering column. This capacitor can withstand a current of 7.5 amperes, as evidenced by the inscription on it. It is located in the bottom row, fourth from the right edge.
If after replacing this circuit element the problem has not been resolved, other possible causes of failure should be considered.
The next troubleshooting point is to check the brake light sensor. To do this, you need to check whether voltage is entering and exiting the sensor. In this case, you need to use a control lamp. If the lamp does not light up when connected in front of the sensor, then the problem may be in the wires going to the sensor. If the lamp works before the sensor, but not after, then the problem lies in this part. You can also simply disconnect the input and output of the sensor and close it “directly” using a copper wire; if after these manipulations the lights in the brake lights light up, then the reason is precisely in the sensor. The sensor cannot be repaired, and the only way out is to replace this part with a new one.
Damaged wires may also be the cause, this will be especially noticeable if the just replaced fuse blows out - this means that the wire is frayed and there is a contact to ground. If the fuse blows without pressing the brake pedal, the wire before the sensor is damaged, and if it blows after pressing, the wire after the sensor is damaged. If there is no voltage, perhaps the wire is simply broken and does not short to ground. When troubleshooting, you should pay special attention to bends and possible areas of damage to the wires.
The next cause of problems is burnt-out LEDs in the brake light; there have been cases when both burned out at once. To replace the light bulbs, you need to remove the flashlight board by squeezing it from the sides and pulling it slightly towards you. Next, you should visually inspect the light bulbs; perhaps a visual inspection will already answer the question about the reason for the non-working brake light. After this, you should replace the old lamps with new ones.
Advantages of brake lights 2110
Unlike old VAZ models, where the sensor that turned on the brakes was closed from pressure, liquid or gas directly when the brake pads were activated, on the 2110 model the sensor is located on the brake pedal, and thus the lights come on at the slightest press on the pedal even before braking, giving road users a little advance warning.
We turn on the brake lights forcibly
Relay K1 is successfully replaced with a pad with jumpers. In Fig. 1 just shows its diagram. If there is no such platform, you can temporarily close contacts 4-5. First, check everything mentioned above.
Have an observer watch what happens to the lamps. Press the pedal with one touch and release it. If the lamps do not turn on, check that the fuse is working properly. It's burned out, which means you're looking for a short circuit.
WHY ARE THE STOP LIGHTS NOT GOING ON?
The brake light indication is one of the most important signals indicating driver actions. Therefore, it is impossible to postpone repairs if the brake lights are not on. If you notice a malfunction along the way and you are unable to eliminate the cause of the breakdown, turn on the hazard lights and drive at low speed to the nearest service station or a place suitable for DIY repairs.
A few words about the “serviceability relay”
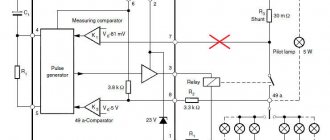
The lamp health relay is called K1, and it is the largest in the mounting block. If you remove this relay, then when you press the pedal you can dial the voltage at terminal 5 (but not 4). Look at the diagram again, and it will become clear what we are talking about.
All relay contacts are numbered. Check the voltage at the block terminals:
- 6 – “mass” potential;
- 2 – voltage “12”, but only after turning on the ignition;
- 5 – “12” by pressing the pedal;
- 4 – terminal rings as a ground tap.
If terminal “4” does not call potential “0”, it means that the lamp filaments are burnt out or there is a break in the wiring. Now consider something else: the ground potential has been detected, but the lamps do not light. This is where suspicions of a short circuit arise.
ELECTRICAL DIAGRAM
We immediately emphasize that the pinout of connectors and color markings of wires may differ not only between different models of the same automaker, but also among one model of different years of manufacture. Before you start searching for the cause of the breakdown, you need to find an electrical diagram specifically for your car model.
We will consider the principle of operation of brake lights and the troubleshooting algorithm using the example of the VAZ 2101-2102 circuit. The photo shows the general diagram of the vehicle's lighting and light signaling. We need to isolate the components involved in the operation of brake lights.
- 6 – mounting fuse block;
- 13 – brake light switch. It is a non-locking button (returns to its original position after removing the force). Located directly next to the brake pedal. When the brake pedal is released, the contacts of the limit switch are open, no current passes through it. Accordingly, when pressed, the contacts close, allowing flow through the lamps;
- 19 – lamps that light up when you press the brake pedal.
We do not have a diagram of the mounting block, but we know in advance that the brake lights only work when the ignition is on. There is a wire from the mounting block to the brake light limit switch, on which, after turning on the ignition, the wire is constant. As soon as the limit switch contacts are closed, it goes to the brake light bulbs, which are connected in parallel. The “ground” of the rear lights is common and consists of a wire screwed to the car body.
In the diagram we presented, the elements are depicted as close as possible to how they look in reality. Don’t be alarmed if you only find a schematic diagram for your car with symbolic images of the elements. Schematic diagram of external lighting for VAZ 2114, 2115:
- 3 – mounting block;
- 8 – lamps for side lights and brake lights;
- 11 – brake light limit switch;
- K4 – relay for monitoring the serviceability of brake light lamps and side lights.
Advantages of brake lights VAZ-2110
Unlike old VAZ models, where the sensor that turned on the brakes was closed from pressure, liquid or gas directly when the brake pads were activated, on the 2110 model the sensor is located on the brake pedal, and thus the lights come on at the slightest press on the pedal even before braking, giving road users a little advance warning.
Workflow Description
In order to complete the work, it is necessary to prepare everything necessary and ensure comfortable working conditions.
Preparation
As part of this stage, the following activities are performed:
If the low beam on a VAZ 2107 has disappeared and as a result of the check it is found that the lamps are to blame, then you should purchase new products. This model uses the AKG12-60+55 modification with an H4 socket; this marking indicates that the product has a power of 60 W for high beam and 55 W for low beam; you can purchase such an element at any store that deals in spare parts for domestic cars.
- The work must be carried out in a dry place with good lighting, the ideal solution is a garage, but you can even do it outside if the weather permits and there is no precipitation.
- No special tools are required, which is an undoubted advantage of this type of work.
The working process
Everything is quite simple and takes very little time:
A huge advantage of the work is that, unlike modern models, access to the headlights is not limited in any way; this greatly simplifies doing the work yourself and allows you to achieve the best result, since you are in complete control of the process.
Replacing the low beam lamp on a VAZ 2107 begins, as on any other car, by removing the terminal from the battery. Make it a rule to disconnect the battery when doing any work on the electrical part of the car, this will prevent problems that may arise from short circuits and damage to individual elements, and you will definitely not be electrocuted.
- If there is no low beam on a VAZ 2107 on only one side, then you can replace one lamp, although experts advise installing two at once, since the light may vary. One way or another, the work begins with any headlight that is convenient for you, first wipe the inside, since most often it is dirty and debris can get inside later.
- First of all, it is necessary to remove the plug, which covers the installation site of the light bulb and serves as protection against moisture and dirt getting inside the housing. This element is removed very simply: grab it and turn it counterclockwise until it comes off, usually this happens in half or even a quarter of a turn.
Then you need to remove the connecting block with the wires, this should be done very carefully: grab the connector body and pull in the direction from the base. If, then you can very easily break contacts, and you will also have to eliminate this problem.
After liberation, you can take out the old lamp, because it is no longer secured by anything
Please note that when removing the new unit and installing it in place, you must not touch the glass part, as this will cause the areas touched to burn. Handle the chuck and be careful to avoid problems. Assembly is carried out in reverse order, so there is no point in describing this process separately.
There is only one thing left - to check the operation of the system, and if everything is fine, then you can completely assemble the structure.
WHY ARE THE STOP LIGHTS NOT GOING ON?
The brake light indication is one of the most important signals indicating driver actions. Therefore, it is impossible to postpone repairs if the brake lights are not on. If you notice a malfunction along the way and you are unable to eliminate the cause of the breakdown, turn on the hazard lights and drive at low speed to the nearest service station or a place suitable for DIY repairs.
ELECTRICAL DIAGRAM
We immediately emphasize that the pinout of connectors and color markings of wires may differ not only between different models of the same automaker, but also among one model of different years of manufacture. Before you start searching for the cause of the breakdown, you need to find an electrical diagram specifically for your car model.
We will consider the principle of operation of brake lights and the troubleshooting algorithm using the example of the VAZ 2101-2102 circuit. The photo shows the general diagram of the vehicle's lighting and light signaling. We need to isolate the components involved in the operation of brake lights.
- 6 – mounting fuse block;
- 13 – brake light switch. It is a non-locking button (returns to its original position after removing the force). Located directly next to the brake pedal. When the brake pedal is released, the contacts of the limit switch are open, no current passes through it. Accordingly, when pressed, the contacts close, allowing flow through the lamps;
- 19 – lamps that light up when you press the brake pedal.
READ How to open the trunk of a VAZ 2105 without a key
We do not have a diagram of the mounting block, but we know in advance that the brake lights only work when the ignition is on. There is a wire from the mounting block to the brake light limit switch, on which, after turning on the ignition, the wire is constant. As soon as the limit switch contacts are closed, it goes to the brake light bulbs, which are connected in parallel. The “ground” of the rear lights is common and consists of a wire screwed to the car body.
In the diagram we presented, the elements are depicted as close as possible to how they look in reality. Don’t be alarmed if you only find a schematic diagram for your car with symbolic images of the elements. Schematic diagram of external lighting for VAZ 2114, 2115:
- 3 – mounting block;
- 8 – lamps for side lights and brake lights;
- 11 – brake light limit switch;
- K4 – relay for monitoring the serviceability of brake light lamps and side lights.
LOCALIZING THE FAULT
Understanding the operating principle allows you to determine exactly why the brake lights may not light up:
- The fuse has blown. In the diagram, the fuses are marked with the letter F (from English - Fuse) and the serial number of the seat in the fuse block, for example, F3;
- poor contact at connectors;
- the light bulbs have burned out, but since the lights are connected in parallel, the likelihood that 2 lamps will burn out at once is extremely low;
- poor contact on the negative terminal of the lights. In this case, problems may begin not only with the feet, but also with the lighting of the remaining lamps in the lanterns;
- Damage to the negative track in the lamp board. From the total mass directly to the brake light lamp, the minus goes along a special path on the board. The path may collapse from water or mechanical impact;
- malfunction of the brake light switch, the so-called frog;
- broken wiring, oxidation of contacts.
Why don't the AUTO brake lights come on? Layout from auto electrician V.Ch.
Lighting and light signaling schemes for VAZ 2107, VAZ 2105, VAZ 2104
Troubleshooting the lighting system of the Lada 2107, removing and installing the lamp of the Lada 2105, light signaling of the VAZ 2104, VAZ 2105, VAZ 2107. Diagnostics of electrical equipment of the Lada 2105. Instructions for repairing electrical equipment: ignition systems, starter of the Lada 2104. Operation of the generator, battery, purifier . Diagram of fret 2107.
Scheme for switching on external lighting: 1 - block headlights with side light lamps; 2 — engine compartment lamp; 3 — mounting block; 4 — glove box lighting lamp; 5 — instrument lighting switch; 6 — rear lights with side light lamps; 7 — license plate lights; 8 — external lighting switch; 9 — indicator lamp for external lighting, located in the speedometer; 10 — ignition switch; A - to terminal “30” of the generator; B - to instrument lighting lamps and switch backlight lamps
Diagram for switching on headlights and fog lights in the rear lights of the VAZ 2107: 1 - block headlights; 2 — mounting block; 3 - headlight switch in a three-lever switch; 4 — external lighting switch; 5 — rear fog light switch; 6 — rear lights; 7 - rear fog light circuit fuse; 8 — fog light indicator lamp, located in the indicator lamp block; 9 — indicator lamp for high beam headlights, located in the speedometer; 10 — ignition switch; P5 - headlight high beam relay; P6 - relay for turning on the low beam headlights. A - view of the plug connector of the VAZ 2104 headlight unit: 1 - low beam plug of the VAZ 2105; 2 — high beam plug; 3 — ground plug; 4 — side light plug; B - to terminal “30” of the generator. B – terminals of the rear light printed circuit board (numbering of terminals from the edge of the board): 1 - to ground; 2 - to the brake light lamp; 3 - to the side light lamp; 4 - to the fog light lamp; 5 - to the reversing lamp; 6 - to the turn signal lamp
Electrical circuit for switching on external lighting for VAZ 2104, VAZ 2105, VAZ 2107. Scheme for switching on headlights and fog lights (for VAZ 2104, VAZ 2105, VAZ 2107 cars produced since 1988). With the circuit for switching on the fog light on cars produced before 1988.
Mounting block VAZ 2104, VAZ 2105, VAZ 2107 (cover removed): 1 - rear window heating relay (P1); 2 — relay for turning on the headlight cleaners and washer (P2); 3 - relay for turning on sound signals (P3); 4 — relay for switching on the electric motor of the engine cooling system fan (P4); 5 - spare fuse; 6 — relay for turning on the high beam headlights (P5); 7 — relay for low beam headlights (P6); 8 - fuse
The brake lights on the VAZ 2111 do not light up: reasons
SEARCH PRINCIPLE
To find a fault in any vehicle on-board network system, you should use the method of sequential elimination of elements. The point is to consistently check electrical appliances and sections of the circuit, excluding elements from the list of reasons that could cause a breakdown. To do this, you need to clearly understand the design and operating principle of the system. When troubleshooting, you need to move from the components that require the least effort to check, to the most difficult to diagnose elements.
FAULT FINDING ALGORITHM
To detect a fault in the electrical network, you will need a multimeter or a tester, which you can make yourself. Previously, we told you how to use a multimeter, so we won’t focus on that.
The sequence of searching for the cause of the breakdown:
- Check the fuse for the brake light circuit. The location diagram of the fuse links can be found in the repair and operating manual for your car;
- often the symbol of the protected circuits is located on the back of the cover covering the fuse mounting block. If the installed fuse of the required rating immediately blows, there is a short circuit (short circuit) in the circuit. Please note that the fuse can protect not only the feet, but also other circuits. Installing a fuse with an increased rating is fraught with the risk of a car fire;
- If oxidation is detected on the terminals, clean the contacts mechanically or use an aerosol contact cleaner.
- Having turned on the ignition first and holding the brake pedal depressed, check whether there is power on the positive wire that goes from the limit switch to the rear light connector. If there is power, there is a malfunction in the lights themselves;
- check whether the positive signal is coming from the mounting block to the limit switch. If it comes, but when you press the brake pedal it does not appear on the second terminal of the limit switch, then the problem is in the “frog”;
- If there is no limit switch on the output, examine the circuit up to the mounting block. If the wire is intact and securely fastened in the connectors, then the problem is in the mounting block.
If, for example, there is a limit switch on both terminals when you press the brake pedal. but it doesn’t come to the headlamp connector, which means you need to look for a break in the wiring. You can check the existing “frog” with a multimeter. Simulate the state of the brake pedal being pressed, attach probes to the terminals, turning the multimeter into resistance measurement mode. If there is no resistance between the terminals, the limit switch is faulty. If you removed the brake pedal limit switch for diagnostics, adjust its position correctly during installation. The brake lights should light up at the slightest touch of the brake pedal.
The search principle we considered is suitable for most cars. But, for example, in some cars, a relay is also involved in the operation of the brake lights, due to which the brake lights may also not light up. That is why it is always necessary to start by reading the electrical diagram.
Causes of reverse lights not working
If you find that the light on the seven does not light up when reversing, then you need to immediately identify the problem and fix it. Most likely the reason will be:
- Fuse blown. If any electrical appliance or circuit malfunctions, the first step is to check the serviceability of the fuses. From the name you can guess that the essence of a fuse is to protect an electrical circuit from high current and short circuit. If the fuse is blown, it needs to be replaced and the lights will work properly.
- Bulbs burn out. One of the reasons is the burnout of the lamps, but this factor is easy to exclude, since if the lamps burn out, not both of them burn out at once.
- The integrity of the wiring is compromised - mechanical stress often contributes to damage to the wires. Rarely is the cause of their damage due to a short circuit. To determine if the wiring is working properly, you will need to use a multimeter by ringing each wire or measuring the voltage on the lights.
- Sensor malfunction - it is also called the reverse switch, since it is responsible for turning on and off the light alarm. Moreover, it may either break, in which case it will need to be replaced, or the terminals may oxidize, compromising the quality of the contact connection.
This is what the sensor on the gearbox looks like:
The sensors on 4- and 5-speed gearboxes of 7s are different. You need to pay attention when purchasing.
Malfunction of the reverse sensor is quite common, so you first need to check the integrity of the fuse, then make sure there is voltage on the lights, and only then proceed to replace the switch in question. Moreover, its malfunction can be manifested not only by the lack of lighting of the lights, but also by constant burning. If the 3X lights are constantly on, then it is necessary to replace the sensor.
How to find the reverse sensor VAZ 2107
The element in question, which is responsible for turning the rear lights on and off on the VAZ 2107, is located in the main mechanism - this is the gearbox. To find the location of the switch, you need to crawl under the car and look at the box. The element is attached to the bottom of the gearbox on the right side.
It is impossible to confuse it with another sensor if you know where the box is and what it looks like. There is only one sensor installed on the box, not only on carburetor, but also on injection modifications.
This small part cannot be repaired, so if it is found to be faulty, it will need to be replaced. To make sure that the cause is in the device in question, you should remove the lead wires from the sensor terminal, and then move the gear shift lever to the reverse position. Set the multimeter regulator to the continuity position and touch the two contacts with the probes. If the device emits a sound signal when the reverse gear is engaged and, on the contrary, is silent when the lever is moved to the neutral position, it means that the element is working and you need to look for the cause in other components. Knowing where the frog is located on the VAZ 2107, it will not be difficult to check it further.
Read, it may come in handy: If the windshield wipers do not want to work
Location under the bottom of the car
Malfunction of the lights themselves
If during the check from the fuse box to the limit switch no problems are found, then you should move on. Now you should test the wiring from the second limit switch connector to the stop connectors with a tester. If it is working, then you need to check the board. The printed circuit board on which the taillights are mounted is not ideal, and is one of the biggest problems of all VAZ cars.
Its tracks often burn out or peel off, causing the lights to stop working. This problem can be solved in two ways - either re-solder the tracks (which can be done with a regular soldering iron, although not in road conditions) or replace the board with a new one (most motorists choose the second option).
Another reason why the VAZ 2114 brake lights do not work may be oxidation of the lamp sockets. In order to eliminate this problem, it is enough to clean all contacts from oxides that have appeared on them.
This is best done in one of the following ways:
- small grit sandpaper;
- WD-40 solution;
- kerosene;
- purified gasoline (“galosh”).
You should absolutely not use gasoline or other solvents to clean contacts.
The last option for faulty stops is the light bulbs themselves. It makes no sense to give any detailed advice here - you just need to replace the burnt out light bulbs with new ones.
By following all the tips listed above, the car enthusiast gets the opportunity to check the entire electrical circuit of the brake lights, starting from the fuse box and ending with the bulbs in the lamps. Thanks to this, the guarantee that the fault will be accurately detected and eliminated is 100%.
The brake lights on the VAZ 2114 do not light up: reasons and methods for eliminating them
According to current traffic regulations, driving a car that does not have brake lights is prohibited, and this should be clearly remembered. True, this rule can be taken into account in practice only when leaving the garage. But what to do if the feet on the VAZ 2114 fail during the trip? Why not call a tow truck because of such a problem? In fact, this problem can be solved even on the road.
To do this, you only need to have a minimum set of tools:
- multimeter (even the simplest one will do);
- Screwdriver Set;
- sandpaper (for cleaning oxidized surfaces);
- set of wrenches.
In addition, it is good to have a fuse box diagram on hand.
How to troubleshoot?
The most common reasons why the brake light on a VAZ 2114 does not work are the following factors:
- Fuse failure.
- Broken wires in one of the sections of the circuit.
- Limit switch faulty.
- Bulbs burn out.
- Oxidation of contacts in lamp sockets.
- Damage to the contact board.
The most common and at the same time the most easily removable of the above reasons is a blown fuse. To identify such a malfunction, you need to examine the fuse box. A 10-amp fuse F3 is responsible for the brake lights, which also protects the ignition switch, computer and interior lighting.
Malfunctions in the operation of the latter may also indicate a malfunction of the stop fuse (and in this case, troubleshooting should begin with the block). If it turns out that the fuse has blown, then you should replace it with a new, similar one.
A new fuse installed in place of a failed one must be designed for exactly the same maximum current. If it is less, the fuses will blow more often, and if it is more, the protected device itself may burn out.
READ Grant Number Illumination Illuminated
The problem may also be in the fuse block itself - sometimes the tracks on its printed circuit boards burn out or the contact legs oxidize. In order to check its serviceability, it is enough to measure the voltage at the contacts of the newly installed fuse.
Another common reason why the brakes of a VAZ 2114 do not light up is a malfunction of the limit switch that turns on the signals. It is located on the brake pedal bracket and is always in working order, regardless of whether the car engine is turned on or not.
It works automatically when you press the pedal. In order to check its serviceability, it is enough to see whether the power supply is suitable for its contacts (on one of the contacts the presence of power must be constant). In addition, if you press the pedal and thus turn on the limit switch, you can measure the voltage at its connectors.
If there is no current at the switch contacts, you should check the wire going to the limit switch from the fuse box. If the test shows that the wire is faulty (there is a break), then it should be replaced with a new one and the test repeated.
Otherwise (if everything is in order with the wire), you should disconnect it (as well as the other wire suitable for the second connector) from the switch and connect directly. If after such an operation the brake light works, then the limit switch itself has failed and should be replaced.
You should purchase a new brake light limit switch that is exactly the same model as the failed one. Installing a different type of switch may result in incorrect signal operation.
Fuse box VAZ-2107
The VAZ-2107 fuse box is located in the engine compartment, to the right of the engine (if you look in the direction of travel of the car). It contains the main fuses and relays. To check whether any of them have burned out, you need to open the hood and the plastic cover of the block, on which the names of the fuses and their nominal values should be indicated.
R1 - relay for turning on the heated rear window . If the heating does not work, check this relay, as well as fuse F5, replace the burnt or faulty ones. If the relay and fuse are working, check the contacts for connecting the wires to the heating strips on the rear window (on the side closer to the side doors)
R2 - headlight high beam relay . Works in conjunction with fuses F12 and F13. If only one headlight does not shine on high beams, most likely the problem is in the lamp, which is time to be replaced or in fuse F12 or F13 (right/left headlight, respectively)
R3 - headlight low beam relay . Works in conjunction with fuses F16 and F17. If the low beam does not work in both headlights, it is most likely the problem with this relay. First of all, replace it with a working one. If it doesn’t help, both lamps could have burned out (this happens) or their fuses.
1 — connector for the relay for turning on the headlight cleaners and washers . If your car does not have these devices, then the presence of a relay is not necessary.
2 — connector for the horn relay . In the figure, a jumper is installed so that the sound signal works without this relay.
3 — connector for the cooling system fan motor relay . In the figure, a jumper is installed so that the fan operates without this relay. Be careful with this connector. Failure to contact the jumper in the absence of a relay can cause the fan to fail, and this can lead to overheating of the coolant and, accordingly, the engine. When the first signs of overheating appear (according to the temperature sensor and boiling of the liquid), turn off the engine as soon as possible.
4 — tweezers for replacing fuses 5 — spare fuses 6 — tweezers for replacing relays
Try to always have spare fuses of different ratings, so that if they blow out on the road, you don’t have to look for the nearest car shop.
Additional Tips
Before each trip, especially over long distances, you should check the functionality of all lighting equipment, including brake lights. In order to reduce the likelihood of breakdowns along the way, you need to periodically check the condition of the sockets and bases of the rear light bulbs, and periodically clean them of oxides and dirt.
In case a breakdown does occur, you should always have an additional set of light bulbs and 10 amp fuses in your car, as well as a multimeter to check them.
Typical faults
If the brake lights do not light up, then it may be the car's brake light lamp itself. The simultaneous failure of lamps from both lampshades is rare, but such a breakdown does occur.
- The brake lights on the VAZ 2107 may fail due to poor connection of the vehicle's electrical connectors.
- The fuse has failed.
- The brake frog has failed.
- Brake light problems.
A lamp can burn out for a number of reasons. This includes a long service life, manufacturing defects, and dirt or water that gets on the base.
The most common manufacturing defect is the lack of connection to the lamp body wiring. In this case, the lamp base often begins to rotate even with minor efforts.
Sometimes the solder on the base oxidizes. This problem can be easily fixed by scraping off the solder with a knife or sandpaper.
The lamp board also oxidizes. In this case, the surface is cleaned with a washing eraser until shiny.
Different lamps may experience different malfunctions at the same time. It can happen at the same time!
A visual inspection of the lamp may not reveal anything. It should be checked by direct connection to source 12.
Poor connector connection. The taillights are connected to the electrical circuit using connectors. This is where the maximum amount of trouble lurks.
Stoplights may not burn due to a poor connection or board oxidation. Remove the connector and wipe the board with a washing eraser until it shines.
The failure may also be in the connector itself. The connector contacts are very delicate. They may move away or burn out. If they move away, they are lifted up a little with a needle. If the contact is burned out, then either replace it or replace the entire connector.
There is a Ш12 connector in the fuse block. Contacts may also come loose there. Move it.
Fuse failure. The brake light lamps operate through fuse 11. You can check it with a tester. The fuse in older units is 8A. The new blocks have 10A. Fuses must be installed only with the calculated rating. They are designed to operate at a certain current in the circuit. All current-transmitting electrical wiring elements are designed for a slightly higher current. Excessive current in the circuit can lead to failure of both the wiring itself and the fuse box tracks.
Frog malfunction. The frog is located on top of the brake pedal. It is very easy to check its serviceability. Remove both connectors from the frog and connect them together. If the brake lights come on, it means it needs to be replaced.
The frog is secured with a nut on the rod and a lock nut. Remove the retaining plastic nut, remove the lock nut and remove the frog from the bracket.
When installing the frog, ensure that the stoppers light up when you press the brake pedal 1.5-2 cm. Be sure to install the protective plastic rod nut. This will protect the rod from failure.
parking lights
Dimensions on the VAZ-2107 are activated by the leftmost of the four key switches located under the gearbox control lever . This switch is a three-position switch: the side light, along with the license plate light and instrument lighting, is turned on in the second position.
On the fuse block, which is located under the hood of the car near the windshield closer to the passenger seat, the rear side lights fuses are numbered F14 (8A/10A) and F15 (8A/10A). In this case, fuse F14 is responsible for the operation of the side lights of the left front headlight and the right rear light, as well as:
Fuse F15 is installed in the side light circuit of the right headlight and left rear light, as well as:
If one of these lamps does not work, you should check the integrity of fuses F14 and F15.
Troubleshooting procedure
Lamps fail most often. It's best to start with them. If they are working properly, remove the plugs from the frog and connect them together. The plugs should have 12.
If there is no voltage, check the fuse. If the fuse is intact, check connector Ш12. By applying 12V to pin 3 of the Ш12 connector, voltage should appear. Check the voltage at the fuse contacts. If there is voltage at the fuse on both sides, we try to apply 12 directly to the frog plug. If the lights come on, change the fuse box.
The fuse box can only be repaired in specialized workshops. In this case, the board track could have burned out.
When there is voltage at the frog plugs, but the lights do not light up, we check 12V directly at the contacts of the lights board. If there is voltage, but the lamp does not light, check the connector contact. When there is voltage at the board contact, but the lamp does not light up, remove the lamp and check for the presence of 12V directly on the current of the conductive surface of the base. If there is voltage and the contact is clean, check the housing part of the base. If necessary, replace the flashlight board.
The brake lights don't light up. How to find a fault.
It is extremely rare for the brake light wire to break. The wiring harness comes out from under the instrument panel and runs along the floor of the car under the carpet. Both brake lights are connected in parallel. We check the integrity of the wire from the frog to the lights. If necessary, replace a separate stop wire.
The main malfunctions of brake lights differ little from malfunctions of any electrical circuit of the VAZ 2107. Knowing the characteristic signs, you can carry out repairs yourself, even in the field. To prevent breakdowns in the circuit, it is necessary to keep the electrical connections clean and prevent water from entering them. Do not pull the electrical connections sharply or forcefully. The integrity of the lamps in the lampshade should be regularly checked. Their darkening indicates the need for replacement in the near future. Only fuses of the rated value should be installed in the power supply circuit. This will prevent the fuse box from failing and will prevent the insulation of the electrical wiring itself from melting in the event of a short circuit. It is necessary to regularly clean the contact group of the flashlight board. The rear lights on the trunk side must be covered with a protective plastic cover. If the outer plastic of the flashlights breaks, it should be replaced to prevent water and dirt from entering the flashlight.
Sources:
https://promremont34.ru/ekspluatatsiya/chto-delat-esli-ne-goryat-stop-signaly-na-vaz-2110.html https://www.vazzz.ru/ne-goryat-stop-signaly-na -vaz-2111-prichiny/ https://remonTVazov.com/ne-goryat-stop-signaly-na-vaz-2114 https://korchim.ru/biblioteka/svet/ne-goryat-stop-signaly-na- vaz-2107.html
Design and characteristic malfunctions of the rear lights of the VAZ-2107
Structurally, the rear light of the VAZ-2107 car consists of:
- left and right diffusers;
- left and right conductors;
- two 4 W lamps and two sockets for them;
- six lamps with a power of 21 W and six sockets for them;
- four M5 nuts.
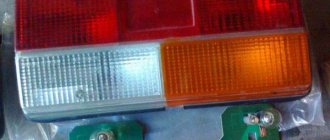
The brake light and side lights on the rear light should be red, the turn signal should be orange, and the reverse light should be white . The most typical malfunctions of the rear lights of the VAZ-2107:
- lack of mass on the lantern;
- lamp burnout;
- oxidation of contacts;
- broken or frayed wiring;
- failure of connector contacts, etc.
One of the reasons that the tail light does not work may be the lack of weight on it. You can check the integrity of the ground wire visually or by ringing it with a tester. The ground wire in the standard configuration of the VAZ-2107 is usually black, and it occupies the extreme position on the connector block. It is followed by wires:
- brake light (red);
- side lights (brown);
- fog lamps (orange-black);
- reverse lamps (green);
- direction indicator (black and blue).
Lamp burned out
The most common malfunction of rear lights is the burnout of one of the lamps. In this case you will need:
- Remove the plastic plug from the trunk side, which is secured with four plastic screws;
