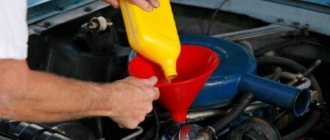
Rear wheel jams: we'll deal with the situation
What to do if your car runs out of gas on the road: tips
- What to do if the rear wheel is stuck
- How to determine the cause of the problem
- Why, according to car enthusiasts, can the rear wheel suddenly jam?
Some motorists experience rear wheel jamming that occurs suddenly. And it’s good if the car is just starting to move. However, it is possible that the problem may arise while driving on the highway. This situation is highly likely to provoke an accident. What are the main reasons that lead to the rear wheel jamming? What should I do to successfully fix this problem? Let's look at these questions in this article.
How to check the operation of the calipers - are they sticking?
"All of these symptoms indicate that your car has one of the following problems:
“The first thing to do is to determine which wheel is sticking. We start the car and drive 10-15 meters, it will be difficult to drive, but quite possible. Then, using our own finger, we test all four wheels. » Touch the surface of the brake disc with your finger through the holes in the wheel rim.
• If the problem occurs to you on the road, then before performing the test, you need to let the brake discs cool for 20-30 minutes.
• We put the car on a jack, remove the wheel and see what the problem is.
What to do if the caliper creaks or jams
How to disassemble a caliper on a VAZ 2107
If the brake caliper creaks or jams, and the part is in good condition, you can try to fix the problems yourself. To do this, it is recommended to perform the following set of actions:
- The first step is to unscrew the brake caliper; to do this, you need to put the car on a jack and remove the wheel. It is worth noting that in some car models the caliper can be unscrewed counterclockwise;
- Having removed the caliper, unscrew the piston using a wrench, then it must be pulled out of the cylinder;
- The removed parts must be carefully inspected for chips, rust, corrosion and various damages. If rust is found, it needs to be cleaned well. When the calipers are heavily worn, problems may arise with cleaning the rust with improvised means; in such a situation, the part will need to be sanded;
After cleaning the caliper from rust, drain the liquid from it, remove the sealing ring and clean everything thoroughly, special attention should be paid to the place where the ring is attached; Next, all the parts need to be dried, filled with liquid, and the caliper put back together.
Diagnostics and prevention
Immediately after driving without actively applying the brakes, touch the central parts of the wheels of your car. If they are slightly warmer than the ambient temperature, then you have no problems with the “wedge” now. If you burn yourself or prudently spit on the wheel and the saliva bounces off, then prepare a tool to find the culprit - there is a high probability that the “guides” or the caliper piston have lost mobility for the reasons stated above.
Almost no one remembers about the second method of prevention, and those who know do nothing, based on erroneous assumptions or myths concocted by narrow-minded service station workers. As you probably already guessed, we will talk about timely replacement of brake fluid, the life of which directly depends on the operating conditions of the car. Follow these simple rules and problems will pass you by. I hope you will never know what it is like when your car brakes jam.
The caliper is jammed, what should I do?
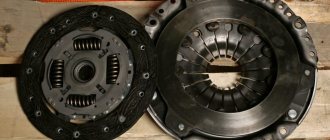
How does a brake caliper work?
In ideal condition, the brake caliper should operate as follows:
- The driver inside the car presses the brake pedal;
- At this moment, pressure is built up inside the brake line and it is transmitted to the piston group of all calipers;
- The calipers, under the influence of pressure, bring the brake pads to the disc mounted directly on the rotating wheel;
- Due to the frictional force that arises, the rotation of the disk, and at the same time the wheel, slows down.
Important: for proper operation of the brake system, the pads must be positioned strictly parallel to the brake disc. Because friction occurs when a vehicle brakes, it also generates heat, which warms the brake pads, fluid, and calipers.
Accordingly, a working brake caliper must consist of a material whose properties do not change when heated. Also, the caliper material must be strong to withstand heavy loads.
Because friction occurs when a vehicle brakes, it also generates heat, which warms the brake pads, fluid, and calipers. Accordingly, a working brake caliper must consist of a material whose properties do not change when heated. Also, the caliper material must be strong to withstand heavy loads.
Why does the brake caliper squeak and jam?
A signal that there are problems with a car caliper is a squeaking sound. It may indicate that the caliper is worn out and needs to be replaced, or that a part needs diagnostic maintenance. The squeaking sound when calipers operate most often occurs for one of the following reasons:
The pads are not installed correctly. If the pads are not parallel to the brake discs (or are not in the right place, for example, due to an error during repair), this can lead to squeaking;
- Worn brake discs, which are also directly involved in the braking process;
- There is no lubricant or the lubricant selected is incorrect. Often, drivers (and private services) save on grease for calipers, which is absolutely not allowed. The fact is that it is necessary to select for the caliper not only a lubricant with the ability to cool and prevent friction. Also, the caliper lubricant must be resistant to external influences, especially in winter, when there is a lot of dirt and salt on the road.
The situation is critical when the brake caliper not only creaks, but jams during operation. In other words, the driver presses the brake pedal, and when it is released, the caliper does not remove the pads from the brake discs, which leads to uncontrolled braking of the car, excessive wear and overheating of parts in the brake mechanism.
What to do if the caliper creaks or jams
If the brake caliper creaks or jams, and the part is in good condition, you can try to fix the problems yourself. To do this, it is recommended to perform the following set of actions:
The first step is to unscrew the brake caliper; to do this, you need to put the car on a jack and remove the wheel. It is worth noting that in some car models the caliper can be unscrewed counterclockwise; Having removed the caliper, unscrew the piston using a wrench, then it must be pulled out of the cylinder; The removed parts must be carefully inspected for chips, rust, corrosion and various damages. If rust is found, it needs to be cleaned thoroughly.
When the calipers are heavily worn, problems may arise with cleaning the rust with improvised means; in such a situation, the part will need to be sanded; After cleaning the caliper from rust, drain the liquid from it, remove the sealing ring and clean everything thoroughly, special attention should be paid to the place where the ring is attached; Next, all the parts need to be dried, filled with liquid, and the caliper put back together.
How to avoid caliper failure
The procedures described above for completely cleaning the caliper are very complex and require a lot of time. To ensure that they are carried out as rarely as possible, be sure to lubricate the caliper surface with special grease or WD-40 every 6 months to avoid corrosion.
It is also recommended to inspect the caliper annually for corrosion, damage, dirt, and boot rupture.
Reasons for caliper failure
The design of the caliper is quite simple: it is a cylinder with a piston, a movable bracket that moves on guides, a bleeder fitting and protective boots. However, even in such a seemingly simple component of the brake system, problems often arise. Let's look at the reasons that lead to brake caliper failure:
- Tearing of the anthers is the first and most important cause of brake caliper failure. Despite the fact that the piston is made of relatively corrosion-resistant steel, when water gets in it gradually begins to rust. And due to the fact that the piston is fitted to the cylinder with a very small tolerance, even surface corrosion can cause serious impairment of its mobility. The caliper boots (both on the piston itself and on the guides) are most often damaged due to unqualified intervention in the system, for example, when replacing the pads by a non-specialist.
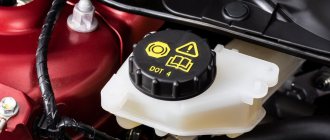
- Late replacement of brake fluid. All modern brake fluids are hygroscopic (except for silicone DOT-5), that is, they accumulate water in their volume. The presence of water leads to corrosion on metal surfaces and accelerated wear of seals. And in this case, visually, the entire caliper may be seriously damaged from the inside due to exposure to brake fluid enriched with water.
It is recommended to change the brake fluid at least once every three years, regardless of the vehicle's mileage. This is the average service life until a critical amount of water accumulates in its volume. In regions with a humid climate, it is better to replace more often: once every two years.
- Critical wear of discs and pads. The more the pads and discs wear, the further the caliper piston has to extend to create braking force. This is fraught with spontaneous tearing of the anthers, the appearance of a leak, and even jamming of the caliper.
We have listed the main reasons why a caliper may fail. The best way to avoid problems is to monitor the brake system: replace worn or damaged parts in a timely manner and periodically lubricate the guides. If you do not deprive this unit of attention, then it is quite capable of working until the end of the car’s service life without replacement or repair.
Consequences of jammed brake calipers
We repair and restore calipers for most types of commercial vehicles, cars and trucks.
In the previous article we wrote about the problem of a stuck rear caliper. And in this article we will tell you what problems may arise for owners of cars, any kind - lekkas, trucks, middle-class commercial vehicles, minibuses, and anything else in general.
The fact is that in addition to troubles with traffic safety, brakes are the most important system that ensures traffic safety. This is not even discussed, everyone understands, except for individual fools, that this cannot be joked about.
Important
Problems and troubles may arise with the technical condition of the car. And it's all interconnected.
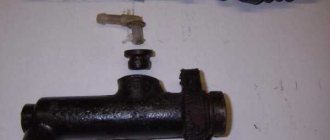
How do calipers work? When you press the brake pedal, the master cylinder piston transmits pressure through hydraulic fluid, in this case brake fluid, to the caliper piston, which presses on the brake pads, which in turn compress the brake disc or brake drum.
So, when the driver releases the brake pedal, the caliper piston returns to its original position. And the wheel rotates freely.
- But when the caliper piston jams, or
- caliper guide, then the pad remains
- pressed against the brake disc. Right here
- the fun begins. Brake discs
- begin to warm up and depending on
- How much the pads are clamped by the calipers depends on
- rate at which the temperature rises
- brake disc and heating temperature
- brake discs or brake drums.
- There are cases when the disks heat up to
- red. At the same time, the braking efficiency is sharply
- falls because the pads and disc become washed out and
- lose their properties.
- When cooling, the discs “lead” and they become deformed
- the disk becomes crooked. And then when you click on
- The brake pedal feels a “beating” of the disc. And this
- that means it's okay to slow down again
- will not work. And the brake disc will have to be thrown out -
- power And since the discs are changed and sold in pairs
- you will have to change both disks.
- But the troubles don't end there.
When the caliper jams, not only the brake discs heat up, the brake caliper itself heats up and the hub to which the brake disc and caliper are screwed heats up. When the hub heats up, the hub bearing and hub bearing seals also heat up.
The hub bearing grease either cokes or leaks through seals that have become hardened and have lost their elastic properties, or loses their lubricating properties. The “dry” operation of the wheel bearing begins. It starts to hum and heats up even more.
If it is not replaced, it simply falls apart, which in turn can lead to an accident. In our practice, there have been cases when the bearing metal was screwed onto the axle shaft, in a rear-wheel drive Volva, and the heat melted the ABS sensors screwed to the hub. On front-wheel drive cars, the CV joint collapses.
And all this could end in disaster
Therefore, it is very important when replacing brake pads to carefully check the brake caliper, its guides and rubber boots.
If there is the slightest problem, the caliper must either be replaced with a new one, or repaired if possible.
Guide faulty
The main problem if the brake does not work can be jamming and souring of the caliper guides.
Repairing this malfunction with your own hands will not be difficult. By the way, in this case there is no difference when disassembling both the front and rear calipers. To do this, you need to unscrew and pull out both guides. Clean them from dirt or poor-quality lubricant, remove and replace the torn boots with new ones, after filling them with special grease for calipers.
Then put them in place, insert and screw the guides back. Then you should try how freely the pressure bar moves along them. This can be seen visually in the attached video at the end of the article.
We should not forget about the housing of this brake element. If significant rust, dents, sagging or other mechanical damage is found on it, it should be replaced completely.
If the repair had to be done on a removed caliper, then after installing it in place, the brake system should be bled.
The situation when the brake caliper jams is not just unpleasant, but dangerous for the driver and passengers in the car. The caliper is the most important element of the braking system of a modern car. Its job is to press the brake pads against the brake disc when the driver presses the brake pedal. The caliper is a complex mechanism, and its serviceability must be monitored. You should not only allow the caliper to jam, but also the appearance of squeaks and knocks in it.
How to turn an inoperative brake cylinder piston into a functional one?
1) At the very beginning of the operation, you will need to remove the wheel from the car.
Note! By the way, when you remove the wheel from the car, try to spin it while it is in the air; if it slows down, then some piston has actually become unusable!
2) After your wheel is removed, immediately remove the caliper from the car after it in order to get out the brake piston that is not working. (For information on how to remove a brake caliper on front-wheel drive cars, see the article: “”, and for information on how to remove this caliper on a classic, see “”)
3) Now, when the caliper is removed from the car, you will need to find a vice, or a very strong compressor, in order to remove the piston from the brake cylinder, so if you have a vice, then go to it and clamp the piston itself and behind the caliper after Once you clamp the piston, pull it, and thereby the piston will be removed from its installation location.
Note! If you don’t have a vice, then pick up a compressor or something else where air can come out under pressure and thereby insert the hose from the compressor into the small hole in the caliper, namely where you connect the brake hose itself and then turn on the compressor and the piston will fly out of its installation location!
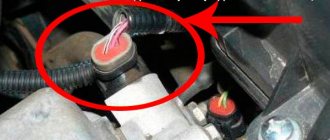
4) Next, take the removed piston in your hands and inspect it, if you find traces of rust on it as shown by the arrow in the photo below, then they will have to be removed using some kind of chemical or something else (A good example of cleaning the piston from rust, shown in one of the videos below), and after the rust has been removed, also inspect the brake caliper itself and finally reassemble all previously removed parts in the reverse order of removal and at the very end check their functionality.
Note! Still, a new piston is not too expensive in the store for our domestic cars, so if you have the opportunity, then it’s better to replace it with a new one and throw away the old one, because who knows after how long it will start to rot again, maybe it won’t even last for a week will last and thus you will again have to disassemble the entire brake system, and by the way, if the boot on it is torn, then you will definitely need to replace such a piston with a new one, since dirt has already got into the inner part and it is unlikely to be able to get it out, yes Moreover, there will still be lubricant there, so as they say, decide for yourself to repair the piston or replace it with a new one!
Additional video: If you want to know how to remove the piston from the brake cylinder on front-wheel drive cars using the VAZ 2109 as an example, then watch the video below, which explains all this in detail:
Very hard pedal
The pedal is tight, the stroke is short when pressed... When braking, the car loses directional stability, trying to go to the side. Most often this happens when the caliper cylinders jam in one of the system circuits. If the car does not skid anywhere, and the trouble is expressed only in a sharply increased force when braking, the vacuum brake booster or the vacuum supply hose may be to blame.
Sometimes increased pedal effort is caused by the use of low-quality brake pads, as well as excessive contamination and oiling of both the pads themselves and the surfaces of the discs or drums. But this happens quite rarely.
It is also possible that the brake pads may completely wear out or break. It happens that an ice or salt crust forms on the surface of the disks. It is also possible that the brake pad linings are of poor quality, as well as severe corrosion of the brake disc (often more on the inside).
How it works
The algorithm is simple. You press the brake pedal and the car slows down or stops. But in fact, behind the simple movement of the leg that causes braking, the work of the entire braking system is hidden. One of its key elements is the brake caliper.
Brake discs are located behind the wheels of the car. And next to it, like a saddle on a warhorse, are calipers. If you imagine a brake disc as a clock, then, as a rule, calipers on cars are set in the range between “nine” and “three” hours. Only on motorcycles they are set strictly at “six” hours. The caliper's job is to turn the brake pedal's pressure into actual wheel retardation. To do this, the caliper presses, like pliers, the brake pads secured in it to the brake disc.
The brake pad is stuck.
Causes: Destruction and misalignment of the pad. She fell off her seats. The friction material has completely worn out.
• A quick solution on the road is to replace it with a new set (if available), install it correctly, if it is skewed, if the block is broken, remove it and carefully drive to the nearest service center.
Issues discussed in the material:
One of the main elements in the design of cars are brakes: problems with their operation or breakdowns make operation impossible. The law prohibits driving a vehicle with faulty brakes, as this is very dangerous. What could cause the malfunction? This article will tell you why the rear brakes stick.
Other reasons why front brakes stick
The front wheels do not always jam the same way; this can manifest itself in different ways. Both front wheels can “stick” at once, and you simply won’t be able to move. It happens that they seem to be spinning, but with great difficulty, making a creaking sound. This is a dangerous situation, especially if you ignore the problem and continue driving. Only one front wheel can jam, while the other spins freely. Let's look at the possible reasons.
The brake pedal is poorly adjusted or has no free play at all
.
There must be sufficient clearance between the master cylinder piston and the pusher for the pedal to move normally. This is adjustable.
Brake pad tension spring is faulty
.
This does not mean that it is cracked or completely torn, perhaps just stretched. There is such a thing as metal fatigue, and a weakened spring will no longer function normally; it is better to replace it.
Another reason why the front brakes stick is that the vacuum booster is not in order.
.
It can jam for several reasons. The diaphragm may be swollen, or the protective cap or lid seal may be pinched.
Pay attention to the amplifier adjusting bolt. It shouldn't be too tight
It is important that it protrudes slightly above the surface of the master cylinder. There is something wrong with the brake pad friction lining.
There is something wrong with the brake pad friction lining.
.
The problems can be different: the gasket wears out, breaks, or becomes too thin. This usually leads to damage to the pad itself, so in this case it is necessary to change both it and the lining
Important: if you change a worn gasket, then the pair to it should also be replaced, they must be the same in thickness, otherwise the car will be pulled away from the line of movement to the side
The reason that the front brakes are sticking may be a stuck piston in the wheel brake cylinder.
.
This kind of trouble can happen in any car, so you need to be able to deal with it. The reasons for this situation are different: low-quality brake fluid, uneven position of the cylinder body in the caliper, rust and corrosion on the working surfaces of the piston. Disassemble the problematic cylinder, clean all components, rinse with brake fluid, reassemble the system and bleed. Fill with good quality brake fluid.
The cuffs on the wheel cylinder have lost their shape or are swollen
- This is also one of the reasons why the front brakes jam.
The cuffs of the master cylinder or wheel cylinders swell from fluids such as oil, gasoline and others that have entered the brake system. This jams the cylinders, which results in a problem with the brakes. But you just have to replace the cuff, and everything will work out
It is recommended to at least occasionally check the condition of the cuffs, and when disassembling the car (no matter for what reasons), replace them, even if these elements look absolutely intact
Oxidation spots on the guides
.
They need to be cleaned, lubricated, and you will no longer have to think about why the front brakes are sticking.
The compensation hole on the brake master cylinder is dirty
.
This is a labor-intensive process, a large and messy piece of work, but no spare parts will be needed, meaning repair costs will be minimal. It is necessary to clean the hole and bleed the brake hydraulics.
The pistons of the master cylinder and wheel brake cylinders are stuck
.
In this case, only experienced car owners who have already disassembled and reassembled various systems of their car more than once will be able to figure out why the front brakes are jamming. It is better to entrust the diagnostics to specialists: they will find the cause of the malfunction and immediately begin repairs.
It often happens that it is enough to just thoroughly clean and lubricate the necessary parts. Check the hoses to see if they are in order. It often happens that the hose is pinched by the clamp holding it, especially if it is corroded. This can also cause the front brakes to jam. The best thing in this case, of course, is to replace the clamp with a new one. But you can just loosen it slightly and blow out the hose well.
It is perhaps not so easy to immediately determine why the front brakes are jamming. This can happen for many reasons, and if you yourself are not very versed in the operation of car systems, then it is better to entrust the inspection and repair of the car to service station specialists. After all, a properly functioning braking system is the key to both your safety and that of other road users.
The front brakes are sticking. Causes, elimination. Watch the video:
https://youtube.com/watch?v=qZ70UPly3kc
The hand (parking) brake cable is jammed.
Causes: The braid is frayed inside or outside - this can be solved by replacing the cable. The return spring has weakened - this can be solved by replacing the spring with a new one. The mechanism of two return brackets has become sour and rusty - clean off the rust and spray with WD-40.
• A quick solution on the go is to return the cable to its original position by hitting the return bracket or spring with a hammer. You can check how the pads are wedged by turning the brake disc by hand. It should turn easily, but with a slight tightness. You can continue driving, but before replacing the cable or spring, DO NOT use the handbrake!
Caliper repair methods
Caliper malfunctions can be different. However, we can highlight the most common cases, as well as recommendations for eliminating them.
Brake pads jam in caliper
This is noticeable when, with the caliper removed, the pads do not move freely. Usually the reason is rust on the stationary caliper pads, which prevents the pads from moving.
To eliminate the problem, you should arm yourself with sandpaper, a metal brush and a file (but only a small one). Then you need to clean off the corrosion from the metal, and then lubricate the surface with a high-temperature type lubricant. However, there should be no wear on the caliper - pits from corrosion. If they are present, cleaning will not help - the pad will not be pressed tightly enough or will not move away from the surface of the brake disc quickly enough.
Sometimes such a defect can be eliminated with a file (subject to insignificant wear), but usually you have to buy a new part of the caliper (fixed).
Something else useful for you:
Corrosion on the caliper piston
It can be triggered either by a defective boot or a long downtime of the machine.
To eliminate the problem, it is recommended to remove and disassemble the caliper. Remove the rust-damaged piston from it and polish it with a special paste or fine rust. After this, thoroughly wash the piston seat with WD-40 and reassemble the caliper. Installing new cuffs won't hurt either. But the best option would be to buy a new piston or caliper assembly.
The caliper guides are jammed
It is necessary to achieve free movement along the guides. To do this, you will need to dismantle the pads, then reassemble the brake caliper and try to move it along the guides. If sliding is difficult, it is recommended to take measures - inspect the guide for bends or breaks, lubricate them, clean them, etc. It is necessary to achieve free movement.
Piston jams in caliper
To check, you need to release the bleeder fitting after the pads jam. In the event of a malfunction, jamming is not observed after that. And with the caliper removed, it is extremely difficult to press the piston back.
For prevention, you can periodically move the piston all the way inside the caliper using a screw, and then push it out with the pedal. But not entirely, so that it does not fall out.
Good day to all!
There are disappointments in life... What to do if this happens to you
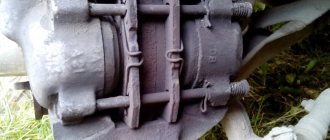
To begin with, we need to remove them from the bracket. Try to knock them out carefully. If they don’t work, then water it with a bucket, heat it up, and try to turn the guide a few turns.
It is better to do this in a vice and not on a car. Moreover, the guide is clamped in a vice and the bracket rotates!
Just be very careful. if you break it off inside, it will be very difficult to remove the fragment later
It will not be possible to drill, because... it starts to spin. And he doesn’t want to go outside because... muck on the walls interferes... So then staples appear with holes sealed with cold welding, plugged with bolts, etc.
If it doesn’t work, then we heat the staples with a burner, spill it with a water heater, heat it again, spill it again. Until it goes by hand. No brute force. The guides break very easily!
And be careful! When warming up, the guides sometimes shoot! and very strongly! The bracket can stick to your forehead! And the guide generally flies away like a bullet!
But in this case, not everything was so simple. I had to spend a cylinder of gas and half a cylinder of a Vedashka...
But they managed to defeat them!
Please note that they have already turned sour, obvious traces of self-clamping pliers on the caps hint that it was not much easier to get them last time...
At one time, one sales representative (hereinafter referred to as TP) from a well-known company said that men have problems with guides due to the fact that “they do not clean the parts properly”
Guys! I show you how to clean parts; no TP could blame us for this!
There's a lot of stuff inside. The only tool that really works wonders even in such advanced cases is unwrapping!
She cleans all the nastiness down to pure metal!
If you don't have one, you can use a drill. Only if you have no experience, then it’s better to blunt it;)
Next, we take scraps of rags and use a screwdriver to construct a cleaning rod.
DIY caliper development procedure
Let's move on to a description of the repair itself. The algorithm will be something like this:
- First you need to lift the car using a jack and unscrew the wheel, locking the steering wheel in the extreme position.
- The mounting spring is removed, and the surface near the brake hose is thoroughly cleaned. To do this, you can blow it with compressed air.
- The brake hose must be clamped with a clamp to prevent leakage of working fluid.
- We continue to repair the caliper ourselves. After this, unscrew the bolt that secures it and remove the hose itself to the side. It is necessary to ensure that dirt particles do not penetrate inside it.
- After this, the caps on the guides are removed, and they themselves are unscrewed using a 7 mm hexagon.
- Using a screwdriver, we recess the piston, moving its body away from the disk to a sufficient distance. You can begin dismantling the old caliper.
- First, take it out of the case and check for moisture. We take the piston out of the housing. To do this, you can remove it from the disk without disconnecting the caliper from the hose. Just press the brake pedal and it should fall out on its own. How to clamp a brake hose? Any tight clamp will do, you can even use the one that is used to secure caps to wheel rims at a tire shop. You can use a vice in which to firmly clamp the body, and remove the piston itself with pliers. Or use compressed air, making sure that the part is not damaged during removal.
- We take out the old cuff, first removing the remaining working fluid. We thoroughly clean the surface in which the protective cover was located and the cuff seats. We rinse and blow with air, after which you can install a new cuff.
- When repairing the front caliper, lightly water the working surfaces of the piston with brake fluid. The piston itself is laid strictly vertically and slightly recessed. We put a protective cover on top. In this case, you need to make sure that the rubber band does not jam.
- Now the piston can be recessed completely, but you need to be careful to prevent the boot from twisting.
- We unscrew the brackets that are equipped with the caliper. We clean the surfaces on which the pads move. Care must be taken not to damage the threads in which the guides are attached. The bracket is screwed into its original place.
- We lay the block, making sure that it has taken its position and is not stuck anywhere. The guides must be cleaned of the slightest particles of dirt. The caliper is put on the bracket, and its guides are tightened with your fingers. We put on the caps and fix the springs. Don't forget to put grease under the brake pistons boot and remove any excess grease from around it.
- All that remains is to put the hydraulic fluid hose back in place and bleed the entire system with a few presses of the brake pedal. We lower the car to the ground using a jack and check the level of working fluid in the tank - refill if necessary. This completes the caliper rebuild.
In short, as soon as you encounter overheating or uneven wear of the brake pads, the appearance of odors and noise, you can be sure that the effectiveness of the braking system will no longer be the same.
Immediately pay attention to the condition of the caliper and, if necessary, use the caliper repair instructions described above
Much has been said about the importance of uninterrupted operation of all elements responsible for applying the brake. This article will talk about repairing the components of the caliper: the piston (cylinder), guides and replacing their boot - with your own hands, you can also learn about this clearly from the attached video.. To fully understand how to repair and replace these parts without any problems, it’s worth understanding in the design of the front and rear calipers and the reasons for their failure, what repair kit may be required for this
To fully understand how to easily repair and replace these parts, it is worth understanding the structure of the front and rear calipers and the reasons for their failure, and what repair kit may be required for this.
What to do in such a situation
If you were able to diagnose creaking and signs of wedging in this unit, you need to perform a number of measures.
And here it is not necessary to contact a car service. You need:
- put the car on a jack;
- remove the wheel;
- unscrew the caliper;
- remove it;
- unscrew the problematic piston;
- remove the piston from the cylinder;
- visually inspect the element;
- check for chips, damage, corrosion;
- if there is rust, clean it;
- if severely damaged, replace;
- drain the working fluid from the element;
- remove the sealing ring;
- clean all surfaces;
- dry;
- fill in new hydraulics;
- assemble in reverse order.
When putting the assembly back together, pay special attention to not accidentally damage the old boot. If you notice cracks on it, then no restoration will help.
Replacement only.
Causes of jamming and creaking
How not to get confused on the road if you encounter an equivalent intersection
Now directly about how to determine the presence of a problem.
The primary sign indicating a malfunction in the calipers of a car brake system is squeaking.
It is the creaking that indicates that the element is seriously worn out. In the near future, the unit must be replaced without fail, which the car literally and figuratively screams about. It is extremely difficult not to hear such a creak. But for some reason, thousands of motorists still stubbornly ignore it. As a result, they pay a rather high price. Sometimes even to the point of road accidents resulting from brake failure while driving. To prevent this, you need to understand the issue and understand the essence of what is happening.
The first step is to look at the possible causes. In fact, there are several potential problems to look for. Some of them arise due to the fault of the motorist, others are caused by the natural process of wear and tear.
In any case, the appearance of a squeak as a symptom is a harbinger that at the most inopportune moment the caliper may simply jam.
If you know the reasons, you can prevent them and troubleshoot them by contacting a car service center or solving the problem yourself.
- The brake pads were initially installed incorrectly. As a result, they are not strictly parallel to the response drives. Because of this, creaking often appears;
- The brake discs are seriously worn out. The reasons are natural wear and tear and aggressive use of the car;
- There is no lubrication in the unit. Initially there was little of it, or it was used up;
- The lubricant was selected incorrectly. Many people skimp on lubricant intended for calipers, hence the consequences.
The most undesirable and dangerous situation is rightly considered when the piston does not return and the unit begins to jam during operation.
Imagine that you are driving a car, press the brake, and then accelerate again. But at the same time, the calipers do not release the front brakes. Additional resistance arises, the car tries to move, but cannot. The result is uncontrolled braking, extremely intense wear and serious overheating of the entire system.
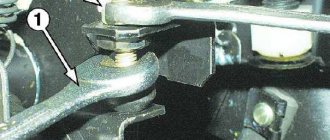
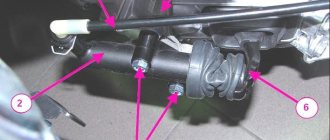
Checking the caliper guides (“fingers”) of Lada Kalina (VAZ 1118)
If after carrying out these measures the problem remains, you can proceed directly to diagnosing the caliper. In this case, the cylinder and the guide pins (“fingers”) deserve special attention, along which the caliper moves when the piston exits the cylinder to compress the pads. The first sign of poor performance of the guides is their heavily contaminated surface, which impedes the movement of the caliper. This is also evidenced by uneven wear of the inner and outer front brake pads - it should not exceed 5 mm.
If you find similar symptoms, it is better to replace the caliper guides. Their cost together with all the washers and anthers is low and will not require any special expenses. The operation to remove them and install new “fingers” will take no more than an hour, provided that all four guides are replaced. If desired (or lack of spare parts), you can try cleaning the old guides.
The main thing is control
Realizing the importance of the problem, many developers install brake pad wear sensors on cars. Sensors come in different types:. Sensors come in different types:
Sensors come in different types:
- Electronic devices that transmit information to the on-board computer or indicate wear by a lamp that lights up on the instrument panel.
- Mechanical. In this case, the driver learns that it is time to visit the service center by a characteristic sound. Most often this is a crackling noise heard in the area of the wheels.
To do this, some manufacturers make a special slot in the lining material. In any case, the thickness of the lining must be at least 2 mm. Otherwise, you risk simply damaging the surface of the disk, and the critical part will require urgent replacement.
Brake problems
After eliminating factors that are not related to malfunctions, you can proceed to analyzing the breakdowns. First of all, you should start with the brakes, since they are the cause of heating of the wheels in 70% of cases. In short, the brake system problems that are interesting in this situation include the following:
- consequences of driving on the handbrake;
- jamming of the brake cylinder piston;
- airing of the system;
- excessive wear or damage to brake discs;
- unsuccessful repair.
Let's look at each of the points in a little more detail.
Consequences of using the handbrake
After accidental driving with the handbrake on, the wheels may become warm for one of two reasons:
- The pads are stuck.
- Discs are deformed.
The pads get stuck due to critical overheating. In some cases, this also causes thermal expansion of adjacent brake system parts, causing them to seize. You can identify stuck pads yourself. The problem is usually visible to the naked eye. As for troubleshooting, it all depends on your skills, desire and availability of tools.
It is perhaps worth talking about the deformation of brake discs separately, since this is not the only possible defect.
Brake cylinder piston jammed
There are brake cylinders with pistons on each wheel. They are the ones that set the pads in motion when you step on the pedal, creating high pressure in the system lines. When the pistons become wedged or jammed tightly in the cylinders, the pads cannot return to their original position after braking. They continue to rub against the discs constantly, as a result of which the wheel hub and then the disc heat up.
Contamination most often causes pistons to jam in cylinders. These parts have anthers, damage to which is guaranteed to result in similar problems. Natural wear of the brake cylinders cannot be ruled out either. If the problem is detected in a timely manner, and the service life of the parts has not yet been exhausted, then the breakdown is eliminated by simple cleaning and lubrication. You should also ensure that the brake cylinders are sealed to prevent dust, water and dirt from getting into them.
There is air in the braking system
There should be no air in a working hydraulic brake system. If it appears there, the node is not working completely. That is, the brake pads may not completely move away from the discs or drums, as a result of which the wheels will heat up. Along with this problem, there may be a failure of the brake pedal, about which there is a separate article on the website. Be sure to read it to broaden your horizons.
It is impossible to visually detect air in the brake system. This can only be done based on indirect signs, many of which are described in the material on pedal failure. If these appear and are accompanied by heating of the hubs, bleed the system. If pumping does not give a positive result, then perhaps the wheels are heating up for another reason.
Critical wear of brake discs
Serviceable brake discs must be:
- Even.
- Smooth.
The brake discs are inspected from the end for any deformations. To do this, you need to hang the car on a jack and remove the hot wheel. Along the way, the part is inspected for damage to the working surfaces. These are the ones that the brake pads rub against. They should not be blue, deep scratches or concentric grooves. If the disc is crooked or scratched, this is the reason why the wheel gets hot.
Replacing brake pads
Quite often, after replacing the pads, the wheel rims get hot, which, in general, is not a breakdown in most cases. After a few hundred kilometers, the parts will break in and will no longer heat up. Completely different conclusions should be drawn if the new pads are of poor quality or are not suitable for a given vehicle. Perhaps non-original spare parts were purchased to save money. In such cases, it is better to immediately replace the pads with normal ones, since everything can end not only with overheating wheels.
Let's get started
Pumping is carried out in a certain sequence.
The diagram is criss-cross. First, the air is pumped out of the rear right wheel. Then - from the front left. Next they move to the rear left and then to the front right disc. So, we tear off the bolts from the desired wheel, put the car on a jack and install the stops. It is impossible to lift on clamped blocks. Next, open the hood and add fluid to the maximum. We will need an assistant who will press the pedal several times on command. Today, for no apparent reason, when I pressed the brake pedal, it sank almost to the floor. The brake grabs, but weakly. When the pedal is near the floor, only then does the car slow down. I barely made it to the garage. It is not a happy prospect to be the victim of an accident. Tell me what could be the reason. How to fix?
The reasons for the failure of the brake pedal can be: Very often the simplest thing is a decrease in the quality of the brake fluid. The liquid is hygroscopic and absorbs moisture; it may be time to foam the liquid and also check its level. It may also be that the main brake cylinder (GTC) has failed. After replacing brake discs or pads, such troubles sometimes occur. Incorrectly adjusted gap between the GTZ piston and the pedal in the car. Sometimes the pedals and their rods are rusty. Vacuum pump, etc. is faulty. The main thing is not to panic, but to identify and eliminate the reason why the pedal fails.
I would first check the brake fluid level, then bleed the brakes. If that doesn't help, then look at the brake master cylinder.
Perhaps air has entered the system; this may be due to wear on the brake pads, drums, or discs. We need to check everything and take action. Brakes are no joke. It is best to contact the service.
Ten years ago, due to inexperience, I poured low-quality brake fluid into the system. As a result, the brake hoses swelled and separated from the inside. This also rendered the cuffs in the GTZ unusable. And similarly, I had problems with the brake pedal. Air got into the system and everything had to be changed. Maybe you have the same problem.
Correctly adjust the gap between the pedal and the piston. If the gap is large, the pedal rod does not reach the GTZ piston and the pedal fails. And on the other hand, with a small gap, the brake fluid does not allow the pedal to reach the end. Both the current and the other are not correct and lead to problems with the brakes.
If you recently changed your brake pads, this may well be the case. The pedal initially fails during break-in. Top up the brake fluid and bleed the brakes again. When bleeding, place a 3-4 cm block under the brake pedal so that the pedal does not rest on the floor and everything will be OK.
After replacing the brake discs, when braking, I felt as if the brake pedal was sinking and hitting my foot. I went to a mechanic who changed the brake discs. He reassured me and said that after running for about 400-500 km everything would work out on its own. And so it happened, everything gradually returned to normal and now everything is OK.
If the brake pedal sinks all the way to the floor, or only engages every once in a while, or does not return to its place, and the brake fluid and spring are fine, then there is no option but the problem is in the master cylinder. It is better to replace the GTZ with a new one. After replacing the brake cylinder, it is better to completely replace the brake fluid.
The brake pedal falls off. Why? The reason may be cracks in the hoses or a broken vacuum pump. As a result, air gets into the brake system. As a result, the brakes do not work well, you need to bleed the brakes, but it is best to contact a specialist. Brakes are no joke.
Without apparent reasons and proper maintenance, brake failure is very rare. If the brake pedal on your car has stuck (fallen) to the mat, you need to press it all the way. Modern cars have a dual-circuit braking system. Maybe one of them has failed, and the brakes are worse, and the brake pedal goes to the floor. If there is no result, quickly release and press the pedal 5-6 times, the pressure in the system should be restored and you will be able to stop the car.
The serviceability of the braking system on any car is, for obvious reasons, of paramount importance, since overall driving safety directly depends on the effectiveness of the brakes. Taking into account the above, any deviations from the norm (even minor ones) in the operation of this unit are a reason to immediately identify the cause of the malfunction. In this article we will talk about what to do if the brake pedal fails while the engine is running, problems arose after replacing the brake fluid, bleeding the brakes or other elements of the brake system, etc.
Read in this article
What to do if the caliper creaks or jams
If the brake caliper creaks or jams, and the part is in good condition, you can try to fix the problems yourself. To do this, it is recommended to perform the following set of actions:
The first step is to unscrew the brake caliper; to do this, you need to put the car on a jack and remove the wheel. It is worth noting that in some car models the caliper can be unscrewed counterclockwise; Having removed the caliper, unscrew the piston using a wrench, then it must be pulled out of the cylinder; The removed parts must be carefully inspected for chips, rust, corrosion and various damages. If rust is found, it needs to be cleaned thoroughly.
When the calipers are heavily worn, problems may arise with cleaning the rust with improvised means; in such a situation, the part will need to be sanded;
After cleaning the caliper from rust, drain the liquid from it, remove the sealing ring and clean everything thoroughly, special attention should be paid to the place where the ring is attached; Next, all the parts need to be dried, filled with liquid, and the caliper put back together.
Important: When reassembling the caliper, pay special attention to the boot so as not to accidentally damage it. If there are cracks on the boot, be sure to replace it
How to bleed the brake system
After replacing your brake caliper, this next procedure will help you remove air from the brake line, even if you are working with the ABS system.
However, if you believe there is air in the brake master cylinder or hydraulic control unit (HCU) and your vehicle has ABS, you may need to take your vehicle to the dealer or workshop and have them bleed the system. If necessary, consult your vehicle's repair manual.
- Without starting the engine, depress the brake pedal approximately five times at normal stopping pressure to remove any residual vacuum from the brake booster.
- Check the master cylinder reservoir. Add new fluid to bring the level to the MAX mark if necessary, and tighten the reservoir cap.
- Place one end of a piece of clear rubber hose onto the drain screw of the new caliper. The hose should fit snugly against the bleeder screw. You can find a clear hose at an auto supply store.
- Insert the other end of the clear hose into a plastic container and add a small amount of brake fluid to the container, large enough to submerge the end of the hose.
- Have a helper press the brake pedal five times and then hold the pedal firmly down.
- Next, loosen the bleeder screw about 1/4 or 1/2 turn, just enough to allow brake fluid to flow through the clear hose for about 2 seconds, and then tighten the bleeder screw again. Watch for air bubbles entering the brake fluid in the reservoir.
- Ask your assistant to release the brake pedal.
- Repeat steps 5 through 7 until you see no air bubbles draining into the brake fluid in the reservoir. When bleeding, be sure to keep the level above the MIN mark on the master cylinder reservoir.
- Correctly tighten the bleeder screw after bleeding the caliper or brake line.
- If necessary, add brake fluid to the master cylinder reservoir.
- Make sure the pedal feels firm and operates properly. Drive at a slow speed to make sure the brakes slow down and stop the car properly.
- Back in the garage, check the brake hose and bleeder screw on the new caliper for leaks. And continue checking for leaks over the next week.
You can remove air from your ABS system by bleeding the brake caliper and connecting line. To bleed the master cylinder, refer to your vehicle's repair manual.
Using additional elements
Some cars have very bad rear view mirrors. They provide a narrow viewing angle regardless of adjustment. In this situation, you can give the driver advice on how to properly adjust the mirrors in the car. We are talking about installing special parabolic reflective surfaces. These parabolic mirrors are glued directly onto the surfaces of the rear view mirrors, occupying only a fraction of their area. Such elements allow you to completely eliminate blind spots by displaying a wider panorama. However, it is worth considering that they are small, but in any case they help to notice cars that are not visible in regular rear-view mirrors.