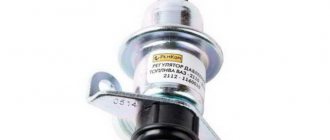
Signs of malfunction of the fuel pressure regulator viburnum
Hello everyone, I continue to run in the new engine, I started turning it up to 5000 rpm. And sometimes problems with traction appeared, namely, a cut-off effect was created at 4000 rpm. Those. The revolutions stupidly dropped to zero and the car did not want to go until the revolutions dropped below 3000. This happened on the old engine, but then I blamed it on a burnt gasket, but then I realized that this was connected with one of the engine systems. It also happened that with about 13 liters left in the tank, the car swallowed air and stalled like a diesel engine, at first it sputtered terribly and then fell silent, although the pump should clear the air lock. All symptoms pointed to problems in the fuel system.
the injectors were washed during assembly, the fuel pressure regulator (fuel pressure regulator) and the pump itself remained.
Checking the pressure in the system is very simple. You need a pressure gauge, a hose and 2 clamps. Do not forget that the pressure gauge accurately shows in the second third of the scale, i.e. if you need to measure pressure in the region of 2-4 kgf/cm2, you need to take a pressure gauge from 1 to 8-10 kgf/cm2. As a last resort, you can remove the pressure gauge from the pump, the main thing is that the limit is around 7 kgf/cm2. I took a certified pressure gauge for 10 kgf/cm2.
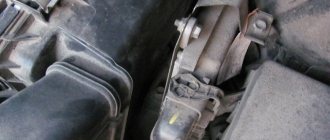
It is connected to the old and new model ramps in the same way. The plastic cap is removed from the end of the ramp. Under the cap there is a fitting in which a regular wheel spool is wrapped, we unscrew it with the cap from the wheel ( IMPORTANT! The system is under pressure, be careful when unscrewing the spool
), or better yet, remove the pump fuse or connector from it and start the car to relieve pressure in the system. And then we put on our hose with a pressure gauge.
Now we check the pressure regulator; to do this, at idle, remove the vacuum hose from the receiver; the pressure should jump sharply by 0.7-0.9 kgf. If this does not happen or happens slowly, the regulator is faulty.
Worked great for me, I changed it a year ago.
Next, we check the fuel pump itself; to do this, open the throttle at idle and look at the readings. The pressure should not fall below 2.2 kgf.
If the pressure does not drop, read how to check the filter, if it drops like mine, then just read why it could be
, mine dropped to 1 kg. The drop may occur due to clogged filters or a half-dead pump. Now, in order to find the culprit of all the troubles, at idle we use pliers to pinch the fuel return, which comes from the pressure regulator. In this case, the pressure should reach 5-7 kgf/cm2. Those. the pump should pump more than 5 kgf at point-blank range. Now we watch how this happens, if the pressure reaches above 6 kgf but for a very long time, about a minute or more, clogged filters are to blame (coarse cleaning in the tank, or fine cleaning near the tank). If it does not reach at least 4 kgf, then the pump is dead, i.e. it works but not as it should. My pump cannot pump up even 3 kgf at point-blank range. The verdict is pump replacement.
Before this, about 3 years ago I already changed the pump, I had no experience then and a couple of times I got up with a dry tank. And now this happened due to a faulty device. All the readings on it are lying, so a replacement is being prepared for it with a 2110 tidy. In general, do not leave gasoline at the bottom of the tank, always keep at least 15 liters in it, the pump does not operate dry, there is no cooling by the flowing medium, i.e. gasoline, in the best cases, wear of the pump and a drop in pressure, and then complete failure. At worst, overheating and ignition inside the pump. There will be no explosion, but it will definitely scare you with smoke.
There was nothing to do, I had to take money and look for a new pump, by the way, 3 years ago I bought the original BOSCH for 750 rubles. He stood the same. Now, having asked for the original, I was shocked by the price of 1600 rubles. It's all about Kalinas and Priors, the prices of spare parts for them are higher than for the same Samara, but the pump, unfortunately, is the same everywhere, and thanks to the new markings because... Samaras are out of production, considered like a pump for a Priora, which is why the price is the same. But I went a different route and found in Magnitogorsk a functional analogue of the BOSCH from SOATE. But the price is 780 rubles. I also took a new coarse filter (crow's foot) and fine filter from SCT.
For those blog readers who follow my YouTube channel, the information will not be new, but for the rest I will describe everything here. So over the past few days my Kalina has started having problems. And they were as follows:
- After a long period of inactivity, the engine began to start poorly, often even on the second try.
- the car became very “dull”, and it felt like the loss of power was about 20%
- fuel consumption increased by 10% when the engine was idling, and when driving too
In general, based on all the signs described above, it looked like a dying gas pump. Of course, I checked the mass air flow sensor first, since its operating voltage is also already close to critical. But when it was turned off, nothing changed for the better.
As a result, I began to deal with the fuel system. I’ll say right away so that there are no unnecessary questions:
What should be the pressure in the fuel rail of the Lada Kalina?
So, having bought a fuel pressure gauge, which, by the way, cost me as much as 1,500 rubles, I decided to measure the pressure, which as a result was around 3.4-3.5 kg/cm². From the data obtained we can conclude that this was not enough for normal engine operation.
Moreover, when the speed increased to certain values, the pressure in the ramp dropped to 3 kg/cm², which also should not happen in a working fuel system.
The normal pressure in the system is from 3.8 to 4 kg/cm². Of course, if you are a fan of the “retirement” driving style up to 2000 rpm, then you may not feel any difference in power loss. But when the speed increases to at least 3000, you immediately feel a failure, and overtaking is difficult with such a “stupid” ride.
Result after replacing the fuel pump
So, after replacing the fuel pump, a pressure gauge was immediately connected and when starting the engine, excellent readings of 4 kg/cm² could be observed, and when the speed was set to almost maximum, the pressure did not decrease.
Here you can see information on replacing the fuel pump, which was done in this case. As for the result specifically in terms of the operation of the motor and its power characteristics, everything is excellent here too. Now the car drives very quickly, there are no dips or slowdowns when pressing the gas pedal. As surprising as it may sound, fuel consumption also returned to normal both at idle and when driving.
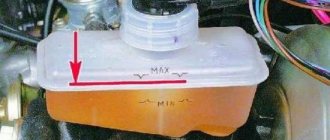
We expel air from the cooling system
The cooling system can become airy for various reasons, and first of all, the heater in the cabin stops blowing warm air, the temperature rises, and the antifreeze boils. If you squeeze the upper and lower radiator hoses, you feel that they are empty, there is no coolant in them. Often, “airing” occurs after replacing the heater radiator, and it is sometimes very difficult to remove air from the system. Alternatively, you can install an additional tee on the lower heater pipe under the hood, and lead the new hose into the expansion tank from above; a plug should be placed in the lower pipe from the tank to the lower radiator pipe.
Video review of a dying fuel pump on Kalina
If you don’t want to read everything written above, then you can watch this video, in which everything was clearly demonstrated.
If you have any questions, ask them below in the comments or discuss them on the channel under the video.
The fuel pressure regulator is a diaphragm valve. Fuel presses against it at one end, and the intake manifold spring presses against it at the other. At lower speeds, the valve opens, accompanied by the draining of residual fuel from the engine into the tank. The next time fuel is supplied, the pump starts, drawing the liquid through the filter. There is a special stabilizer on the fuel rail, whose task is to maintain optimal pressure in the system.
If this component breaks down, the engine power of the machine drops and uneven operation of the engine is felt. To protect yourself from this, you need to systematically check the regulator and promptly respond to symptoms of damage to the device.
Operating principle of the element
The regulator (RDT) is a conventional diaphragm valve, whose task is to maintain constant gasoline pressure in the line running from the tank to the fuel rail. Whatever mode the engine is operating in, its value should be in the range from 3.7 to 3.9 bar.
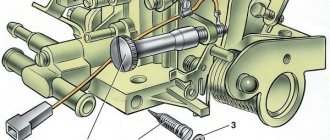
When the upper pressure threshold is exceeded, the valve begins to dump excess fuel directly into the internal volume of the tank. If the fuel pressure is insufficient, the regulator is not able to increase it, but if it breaks down, it can itself cause a decrease in pressure. How Kalina’s power system works is well reflected in the diagram above.
To correctly diagnose a diaphragm valve malfunction, you need to understand the algorithm by which the fuel system operates:
- When the ignition of the Lada Kalina car is turned on, the fuel pump (item 6) starts working, creating the necessary pressure in the fuel rail (item 2). If after a few seconds the starter is not started, the controller will automatically turn off the pump.
- Gasoline passes through coarse and fine filters (item 7) and enters the RTD, and from there along the line (item 4) to the ramp and injectors (item 3).
- After starting, the engine begins to consume fuel to varying degrees, depending on the driving style.
- At idle speed, the fuel pressure regulator dumps most of the fuel back into the tank (item 5), since its consumption is low, and the fuel pump constantly operates in one mode.
- At high speeds, the engine needs a lot of gasoline and the valve resets almost nothing.
There are 2 types of regulator malfunctions, characterized by a decrease in fuel pressure or, conversely, its excessive increase. The element cannot be repaired and must be replaced if broken.
Signs of a malfunctioning fuel pressure regulator
If your car's engine stalls at idle or engine power drops while driving, these may be symptoms of a faulty fuel pressure regulator. Most often, a sudden increase in fuel consumption is a signal of RTD failure.
There are other signs of breakdowns:
- the engine runs unevenly;
- at idle speed the engine stops;
- the crankshaft speed suddenly increases or decreases;
- The cooling system does not work well;
- the engine noticeably loses power;
- when you press the gas pedal there is partial or complete response;
- the engine seems to choke;
- poor acceleration of the car when changing gears;
- vehicles begin to move frequently in jerks;
- rapid fuel consumption occurs.
The presence of even one of these signs requires checking the condition of this device.
How to check the fuel pressure regulator?
There are several simple ways to determine the causes of problems and defective components:
- Visual method. A simple inspection without the use of any fancy tools is fine for carburetor engines. Pinch or disconnect the valve and observe the flow of fuel. The intensity of the fuel flow will help identify the malfunction. This method of verification is effective in its own way, but one cannot count on absolute accuracy.
- Method using a pressure gauge. Place a pressure gauge between the fuel hose and the fitting. To do this, temporarily disconnect the vacuum hose. The pressure level should change from 0.3 to 0.7 Bar. If the pressure indicator has not changed, repeat the operation with another hose.
- Hose clamping method. The pressure regulator is checked by pinching the return hose. A pressure gauge connected to the fuel system should give an immediate response. If the motor does not develop normal speed, you can determine the inoperability of the RTD without the device. Start the engine and clamp the return hose. Then track the RPM and listen to the engine. If the engine starts to run smoothly, then the problem lies in a faulty control valve that needs to be replaced.
Installing a new valve
Installation of a new valve occurs in the reverse order. If an old valve is installed, it must be thoroughly cleaned. If it is new, just rub it in so that gasoline or air does not get out. Next we set the valve clearance. The process must be carried out on a cold engine with the valve covers removed. By the way, you can cool the engine with antifreeze. For dismantling you need:
- unscrew all fastening bolts;
- then remove the cover that covers the timing belt. Note that it is not necessary to touch the alternator belt;
- Next, you need to remove all the candles for greater convenience. You can also completely remove the oil from the head. You can use any syringe for this. If the camshaft has worn cams, we recommend replacing it completely;
- a device is screwed into the place where the cover is attached, which recesses the valve;
- then, using a special key, you need to turn the crankshaft until the marks on the pulley correspond to the marks on the belt cover;
- Finally, you still need to tighten it by 3 teeth. In this case, the piston reaches its dead center.
It is worth noting that an oil change is not required after this procedure. After this, it is recommended to check the valve clearances, as it may be necessary to change the washer somewhere. So, first you need to check the clearance on the first and then on the third cam. Check that the dipstick measures between 0.2 and 0.35 mm. If the stroke is large, you need to change the washer. All remaining elements are regulated according to this principle. If the valve was replaced correctly and using a special tool, then there will be no difficulties during operation. After the work done, the engine should run well. Note that after such work, the car owner can drive about 50,000 - 60,000 km without making adjustments.
How to repair an RTD?
As part of component repair, the following work must be performed:
- Look under the hood of the car where there is a fitting plug designed to control fuel pressure. Unscrew it, then using a special protective metal cap, carefully unscrew the spool inside the fitting.
- Connect the hose with the pressure gauge and secure it to the fitting using a clamp. After starting the engine, check that the pressure reading on the measuring device does not exceed 3.25 Bar.
- Disconnect the vacuum hose from the RTD. This operation should be accompanied by an increase in pressure. If nothing happens, repairing the fuel pressure regulator is useless; you will have to replace the element with a new one.
If the part cannot be repaired, we proceed to install a new device.
- Disconnect the vacuum hose. The pressure will begin to increase. Having reduced the pressure in the power system, proceed to remove the vacuum hose. You will need to unscrew the securing nut on the fuel drain pipe, where diesel or gasoline flows through the fuel filter to the RTD.
- After unscrewing the two bolts securing the device to the fuel rail, you can safely remove the regulator from the fuel discharge tube itself. The ring remaining in the ramp can be easily removed by hand and placed on the regulator before installation.
- Install a new regulator and perform all previous steps in reverse order. Make sure the new device is in working order, only then proceed with complete assembly. Upon completion of installation, perform a control check of the operation and serviceability of the device.
The pressure in the engine power supply system can be checked with a conventional pressure gauge (for example, from a tire pump)
We carry out the work on a cold engine.
Relieving pressure in the power system
We put an oil-resistant reinforced hose (with an internal diameter of 12 mm) onto the threaded fitting of the pressure gauge and secure it with a clamp.
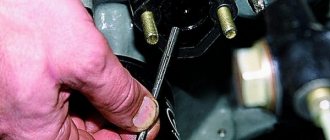
On the right side of the engine (in the direction of travel of the car), unscrew the plastic cap of the fitting on the fuel rail (for clarity, the plastic engine screen has been removed).
Using the wheel valve cap, unscrew the spool valve from the fuel rail fitting.
Remove the spool from the fuel rail
We put a hose pressure gauge on the ramp fitting and secure it with a clamp.
With the ignition off, for 3-5 minutes, using a wire, we supply “+” 12 V power from the battery to pin “11” of the diagnostic connector.
The electric fuel pump should turn on. Its operation can be monitored by ear.
Within 10 seconds we measure the fuel pressure, which should be equal to 3.6-4.0 bar. After turning off the pump, the pressure may decrease slightly and then stabilize for a while.
If the pressure in the system is more than 4.0 bar, the fuel pressure regulator is faulty.
Low pressure (below 3.6 bar) in the power system can be caused by a clogged fuel filter or fuel module strainer, as well as a malfunction of the electric fuel pump and fuel pressure regulator.
To check the fuel filter for contamination, you need to remove it, drain the remaining fuel from it and blow it through a piece of hose (you can use your mouth).
The resistance to air passage during purging should be insignificant. Otherwise, we replace the fuel filter with a new one, which we recommend always keeping in stock.
We check the condition of the fuel module strainer after dismantling the module. If the mesh filter is very dirty, clean and rinse it.
To check the serviceability of the fuel pressure regulator (at low pressure), connect a hose with a pressure gauge directly to the outlet fitting of the fuel module.
We supply power to the electric fuel pump as indicated above. If the fuel pressure is 3.6 bar or higher, the regulator is releasing fuel pressure too much. This regulator is faulty and must be replaced.
If the fuel pressure in the engine power supply system is low and continues to drop after the electric fuel pump is turned off, then this may be due to leaky connections of the fuel module, a malfunction of the pump, or leaking injectors.
To find the cause of the malfunction, turn on the electric fuel pump again for 10 seconds (supplying power to contact “11” of the diagnostic connector) and after turning it off, completely pinch the rubber hose supplying fuel to the fuel rail.
If the pressure stabilizes, then either the fuel module or the electric fuel pump is faulty. If the pressure continues to drop, one or more injectors are leaking.
A leaking injector can usually be identified by the dark color of its nozzle, which contains coked droplets of fuel.
Checking the tightness of the injectors is described in the article - “How to remove the fuel rail and check the injectors of the Lada Kalina.”