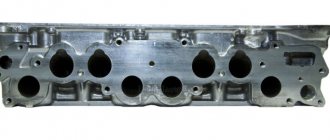
Installation
After removing the hydraulics, carefully remove any remaining oil and coke from the wells. Degrease the internal threads with something decent (gasoline, acetone, white spirit). Mount the screws into the cylinder head (tightening torque is about 7-8 kg). We kindly request. Technologies do not stand still. Use a medium-strength thread locker for this operation. The price list includes a product that I use during assembly, manufactured by Febi (Germany). There is nothing more disgusting than the moment when you start the operation - “adjusting the field valves”, and suddenly you see that the screw is rotating along with the lock nut. I'll tell you a secret, everything will have to be disassembled and reassembled)). After this operation, I recommend taking a short break; there will be enough time for lunch for the thread locker to polymerize. After this you can install everything else. Don't forget a few drops of motor oil or mounting paste on the working surface of the rocker and the soldier's ball.
Adjusting the Niva valves, process
zero position and offset mark
- The first task is to label everything. I will not describe this procedure. I will only say one thing: if you couldn’t do this or have no idea what it is, you definitely don’t need to climb any further. Don't be upset if the mark on the camshaft gear doesn't hit the center. This only happens in AvtoTAZ books and manuals. Or half a tooth forward or half a tooth back. Mark for mark, this is rather an exception to the rule. The photo shows very clearly that there is a clear vertical line on the gear and a dot that corresponds to the mark on the gear on the other side. Be careful with the mark on the camshaft. This is a small dot on the back of the gear near the teeth. When everything is according to the marks, we will call this position ZERO.
- Adjustment of valves. This operation can be complete, or it can be simplified. It all depends on the camshaft you installed. Why do I recommend starting with the 21213 camshaft in almost all articles? Because it can be adjusted simply and quickly in two steps. So, everything is on the marks, in the zero position. We adjust 8, 7, 6, 4 valves. Working tools, open-end wrenches 17 and 13 mm. Using a ratchet wrench, turn the crankshaft clockwise once until the mark on the crankshaft pulley matches. That is, we make a full turn, 360 degrees. We do not pay attention to the distribution mark; it will be vertically below. We adjust 1, 2, 3, 5 valves. Voila, the process is complete. This adjustment is only possible on full-base shafts.
- Fully adjustable. We wanted to install an Estonian shaft, the shaft is not full, and simple adjustment does not work here. We set the timing belt to the zero position and make a vertical line on the camshaft gear (I use an oil marker). We adjust valves 8 and 6. We turn the engine by the crankshaft so that our line points to “three o’clock”, this is the first position. We adjust valves 7 and 4. Turn it further, the dash is at “six o’clock”. We adjust valves 1 and 3. And finally, turn it one more time, the dash at 9 o’clock, 5 and 2 valve. The process is over.
Installation of adjusting bolts on a Chevrolet Niva
New hydraulic compensators, as has already become clear, are expensive, and the guarantees that they will not knock again are minimal. It is for these reasons and because of the price dispute that adjusting bolts can be installed.
The work is done the same, but you will have to adjust the valves separately and assemble the engine a little differently.
Video about replacing hydraulic compensators with bolts on a Chevrolet Niva engine
Assembly Features
- It is necessary to thoroughly clean all bolt wells.
- We mount the plates and tighten the new bushings.
- Next, tighten the bolts and install new springs with rockers.
- We install the camshaft in its place and tighten the chain. There is no need to install the oil ramp yet.
Now it is necessary to adjust the valves, and this is done in the same way as on any other car of the VAZ family.
- The valves are adjusted using a wide probe or indicator.
- When the mark on the camshaft is aligned, that is, in the fourth cylinder, we adjust valves 8 and 6, then rotate the crankshaft 180 degrees, adjust 7 and 4, then 3 and 1, and finish with 2 and 5.
Such work is inconvenient due to the fact that adjustment is required every 10-15 thousand kilometers.
Valve clearance
The valve clearance of 0.15 mm , which is set with a feeler gauge, must be carried out only on a cold engine. If this value is less, then they may simply burn out, and if it is more, they will start knocking.
- Posts: 29
- From: Kozmodemyansk
October 10, 2012, 10:46 pm #1 123
Hello guys! please tell me how to adjust the eight-valve valves on a Chevrolet Niva injector
- Posts: 19537
- From: Petrozavodsk
- Lada Priora
October 11, 2012, 10:00 #2 123
vova19, October 10, 2012, 22:46, #1
Hello guys! please tell me how to adjust the eight-valve valves on a Chevrolet Niva injector
Doesn't it have hydraulic compensators?
- Posts: 6865
- From: Tambov
October 11, 2012, 10:10 #3 123
Yes, it has hydraulic compensators
- Posts: 29
- From: Kozmodemyansk
October 11, 2012, 10:24 #4 123
Guys, I just did engines for VAZ 2101 2109 bus groove 3105 there I can easily adjust the valves by two turns of the crankshaft 0 and 360 and the valves are ready without problems, etc. But I’ve never encountered hydraulic compensators, for me this is the first on the Internet, I can’t find details on how to eliminate the cause of the valves knocking on my father’s Chevrolet Niva at a temperature when the engine heats up to 40 they stop knocking and when the temperature rises to 90 they ring. help with this problem, maybe you have a website, I can read everything there in detail, how to do it all?
- Posts: 6865
- From: Tambov
October 11, 2012, 10:39 #5 123
What year is the car?
- Posts: 6865
- From: Tambov
October 11, 2012, 10:40 #6 123
You need to install new hydraulics or adjusting bolts. One out of two
- Posts: 19537
- From: Petrozavodsk
- Lada Priora
October 11, 2012, 10:43 #7 123
vova19, October 11, 2012, 10:24, #4
Guys, I just did engines for VAZ 2101 2109 bus groove 3105 there I can easily adjust the valves by two turns of the crankshaft 0 and 360 and the valves are ready without problems, etc. But I’ve never encountered hydraulic compensators, for me this is the first on the Internet, I can’t find details on how to eliminate the cause of the valves knocking on my father’s Chevrolet Niva at a temperature when the engine heats up to 40 they stop knocking and when the temperature rises to 90 they ring. help with this problem, maybe you have a website, I can read everything there in detail, how to do it all?
They say this is a fairly common problem on the Chevrolet Niva. A guy I know had one too. As the specialists explained to him, the solution is either compensators or change to a conventional mechanism. He chose the second option. Now I'm happy as an elephant.
- Posts: 6865
- From: Tambov
October 11, 2012, 10:51 #8 123
Serega_karel, October 11, 2012, 10:43, #7
They say this is a fairly common problem on the Chevrolet Niva. A guy I know had one too. As the specialists explained to him, the solution is either compensators or change to a regular mechanism. He chose the second option. Now I'm happy as an elephant.
Tool
probe 0.15 mm
There are two ways to adjust according to the type of tool. By probes and by a dial indicator. For semi-professional use, the first option is suitable. The Fiat manual recommended the following clearances at an engine temperature of 20 degrees (that is, normal). Intake valves 0.15 mm. Graduation is slightly more than 0.17-0.20 mm. My personal opinion after 20 years of practice is the following. The set gap very much depends on the manufacturer and valve material . If this is a valve of average quality, then the gaps can be made according to the manual. If there are Kolbenschmidt valves on both the inlet and outlet, then you can do 0.15 in a circle. Now on to the probes. Of course, everything is determined by the word experience, and the first two or three times you can adjust this... “what you can’t say in a fairy tale, you can’t describe with a pen.” Therefore, I remembered one wonderful thing for mechanics, turners and milling operators, which was made in the USSR, for technical control. It was called a plug gauge. That is, it is a calibrated tool, with two “tails”, one passable, the other non-passable. By analogy with this miracle, I offer two tools. The first is a 0.15 mm gap adjustment gauge and a set of gauges that contains a 0.2 mm gauge. Now all the “miracles” of adjustment come down to a simple thing. One should get through, the other shouldn't. This way we get into the required tolerance range.
set of probes, “fan”
death to hydrikas, part 4
The topic of the article is installing a set of death hydraulics and adjusting the valves of Niva, Chevrolet Niva and classics. The previous series talked about the kit itself; this chapter will focus on installing it and adjusting the valves. I would like to thank two people who helped me finalize this article. Seryoga Urashin (Leningrad) and Denis Kosachev (Ryazan).
The horrors of our town
I was prompted to write a separate article by several letters. The essence of which was as follows. We understand that switching to bolts is good, but we don’t have people left who can adjust the valves properly. The nightmare is that this applies to cities with millions of people, where everyone has switched to foreign cars. But in small towns, people still remember how it’s done. I will try to write down step-by-step instructions with pictures and I hope that for someone it will help get rid of wetsuits.
Installation
After removing the hydraulics, carefully remove any remaining oil and coke from the wells. Degrease the internal threads with something decent (gasoline, acetone, white spirit). Mount the screws into the cylinder head (tightening torque is about 7-8 kg). We kindly request. Technologies do not stand still. Use a medium-strength thread locker for this operation. The price list includes a product that I use during assembly, manufactured by Febi (Germany). There is nothing more disgusting than the moment when you start the operation - “adjusting the field valves”, and suddenly you see that the screw is rotating along with the lock nut. I'll tell you a secret, everything will have to be disassembled and reassembled)). After this operation, I recommend taking a short break; there will be enough time for lunch for the thread locker to polymerize. After this you can install everything else. Don't forget a few drops of motor oil or mounting paste on the working surface of the rocker and the soldier's ball.
Adjusting the Niva valves, process
Tool
There are two ways to adjust according to the type of tool. By probes and by a dial indicator. For semi-professional use, the first option is suitable. The Fiat manual recommended the following clearances at an engine temperature of 20 degrees (that is, normal). Intake valves 0.15 mm. Graduation is slightly more than 0.17-0.20 mm. My personal opinion after 20 years of practice is the following. The set gap very much depends on the manufacturer and valve material . If this is a valve of average quality, then the gaps can be made according to the manual. If there are Kolbenschmidt valves on both the inlet and outlet, then you can do 0.15 in a circle. Now on to the probes. Of course, everything is determined by the word experience, and the first two or three times you can adjust this... “what you can’t say in a fairy tale, you can’t describe with a pen.” Therefore, I remembered one wonderful thing for mechanics, turners and milling operators, which was made in the USSR, for technical control. It was called a plug gauge. That is, it is a calibrated tool, with two “tails”, one passable, the other non-passable. By analogy with this miracle, I offer two tools. The first is a 0.15 mm gap adjustment gauge and a set of gauges that contains a 0.2 mm gauge. Now all the “miracles” of adjustment come down to a simple thing. One should get through, the other shouldn't. This way we get into the required tolerance range.
set of probes, “fan”
Question answer
How often are the Niva valves adjusted? I recommend carrying out the second adjustment, which I call final, after 500-700 km, after installing the kit and the first adjustment. As a rule, 2-3 valves “run away”. According to Soviet books and training manuals, it was recommended to CHECK the gaps once every 12-20 thousand km, that is, about once a year. Operational practice has shown that engines run without adjustment for 50 and 80 thousand km. Therefore, the following recommendation is factual.
A series of articles devoted to hydraulic compensators and bolts:
Part 4. Installing the “death to hydraulics” kit and adjusting the gaps
Question answer
How often are the Niva valves adjusted? I recommend carrying out the second adjustment, which I call final, after 500-700 km, after installing the kit and the first adjustment. As a rule, 2-3 valves “run away”. According to Soviet books and training manuals, it was recommended to CHECK the gaps once every 12-20 thousand km, that is, about once a year. Operational practice has shown that engines run without adjustment for 50 and 80 thousand km. Therefore, the following recommendation is factual.
A series of articles devoted to hydraulic compensators and bolts:
Part 1. Hydraulic compensators, review article
Part 2. New type hydraulic compensators
Part 3. Replacing hydraulic compensators with bolts. Set “death to hydrikas”
Part 4. Installing the “death to hydraulics” kit and adjusting the gaps
For normal engine operation, after a certain time the valves are adjusted. Chevrolet Niv is no exception. Of course, the manufacturer has provided everything to ensure that the engine works well, but the main task remains with the driver to ensure that the clearances between the valves are correct. The question may arise why it is necessary to maintain the correct gaps, and what will happen if they do not meet the standard.
- The first thing that will appear is an unpleasant noise that will come from the engine.
- If the valves are too tight, the engine will not be able to produce maximum speed, and fuel consumption will increase.
What is required for adjustment
In practice, correctly set gaps pass about twenty thousand, after which extraneous sounds appear, which become stronger at lower speeds, and in order to re-adjust the gaps the following set of tools is needed:
- Any rags preferably dry
- A set of keys containing a key for thirteen and seventeen
- Dipstick
This adjustment must be made when the engine has cooled down and the temperature does not exceed 25 degrees.
How to adjust valves yourself
After the engine has cooled down and all the necessary tools are at hand, you can start working:
- The first thing you need to do is disconnect the terminal from the battery.
- After the car is de-energized, unscrew the cylinder head cover and remove the distributor cap and unscrew the existing spark plugs
- Having gained access to the crankshaft, we begin to turn it as it rotates until the marks that are located on the bearing housing and the camshaft itself match; the shaft should be rotated with both hands, holding a ratchet, or with a special wrench
- Having set the marks, aligning them between the star and the protrusion on the body, we begin the adjustment on the sixth and eighth valves, take a feeler gauge, the thickness of which is 0.15 millimeters, and insert it between the rocker and the camshaft cam.
- If the dipstick comes out with little effort, then the work was done correctly. To begin the adjustment, you need to unscrew the lock nut with a 17 wrench, and the adjustment itself will be done with a 13 wrench
- After the adjustment has been made and everything is adjusted according to the standards, we fix the adjustment bolt and tighten the locknut.
- Once everything is fixed, we turn the crankshaft one hundred and eighty degrees and adjust the next pair four and seven, and then one and three.
Help by phone2, tariffs, questions
Valve location
| EXECUTION ORDER |
| 1. Remove the cylinder head cover. |
| 2. Draw a diagram of the engine on paper. Show the position of each valve along with the indicated valve clearance. Above each valve, draw two lines to record (1) the actual clearance and (2) the amount of adjustment required. |
| 3. Turn the crankshaft until the intake valve of cylinder No. 1 (from the flywheel side) is completely closed, i.e. The camshaft cam should point upward. Use a feeler gauge to measure the gap between the cam and the pusher and record it on line 1. |
| 4. Repeat the measurement for the remaining seven valves, turning the crankshaft as necessary so that the cam in question always points upward. |
| 5. Calculate the difference between each measured gap and the required gap and record it on line 2. |
| 6. If the measured gap does not correspond to the required one, adjustment must be made. |
Operating valve clearance (cold engine):
– inlet valve: 0.20 mm; – exhaust valve: 0.40 mm;
https://www.youtube.com/watch?v=Rtg7_Hmq068
– tolerance: ±0.05 mm.
One method for checking valve clearance sequence
Adjustment
| EXECUTION ORDER |
| 1. Check the valve clearance according to the method described above and record the measured clearance values. |
| 2. Remove the camshaft drive belt. |
| 3. Remove the camshaft bearing lubrication oil line, distributor, bearing mounting bolt No. 1 and camshaft flange. |
| 4. Insert a special steel rod with a diameter of 10 mm (length 70 mm) into the camshaft pulley and unscrew the bolt securing this pulley. |
| 5. Unscrew the bolt under the coolant pipe mounting bracket (the liquid from the cooling system should not be drained) and remove the sheet casing. |
| 6. Unscrew the nuts securing the camshaft bearing caps in order. |
| 7. Separate cover No. 1 (near the distributor) from its side seal and remove the remaining covers (covers No. 2 and 4 are marked). |
| 8. Remove the camshaft from the right side. |
| 9. Remove the pushers and install them in a row in order (the pusher is shown by the arrow). |
| 10. Remove the adjusting plates and measure their thickness. |
| 11. Determine the required thickness of the adjusting plates: – if the measured gap value is too small, then install a thinner plate to the value recorded on line 2; – if the measured gap value is too large, then install a thicker plate to the value recorded on line 2. |
| 12. Draw three more lines below each valve in the figure. |
| 13. On line (4) plot the measured thickness of the plates that were removed from the engine, then add or subtract the difference from line (2) to obtain the required thickness of the plates and record on line (5). Warning After replacing one of the parts of the gas distribution system or after grinding in the valves, 8 adjusting plates with a thickness of at least 2.15 mm should be installed. |
| 14. Install pushers with plates of the required thickness. |
| 15. Install the camshaft and bearing caps. The installation order must be followed. Tighten the bearing caps to 15 Nm. |
| 16. Rotate the camshaft using the pulley bolt and check the valve clearance. If an incorrect gap is detected, the adjustment must be repeated. |
| 17. Check whether the crankshaft is in the installation position of the gas distribution system. |
| 18. Replace the side seal of bearing cap No. 1, lubricate the two sealing surfaces and the lower connection with sealing paste. |
| 19. Install the camshaft mounting flange. |
| 20. Install a new camshaft seal on the drive side (tool 7.0153 E together with the bolt and pulley gasket). |
| 21. Install the sheet casing without tightening the fasteners. |
| 22. Center the housing using a 10 mm diameter rod. |
| 23. Install the camshaft pulley and insert the gas distribution system installation rod into the appropriate place. |
| 24. Tighten the pulley mounting bolt to a torque of 80 Nm. |
| 25. Screw in the casing mounting bolts. |
| 26. Install the camshaft bearing lubrication channel, distributor, cylinder head cover and connect the wires. |
| 27. Install the camshaft drive belt. |
| 28. Adjust the ignition timing. |
And also interesting: Construction and repair of the VAZ 2121 Niva transfer case
After a certain period of time, it is necessary to adjust the valves for each car. In this material we will analyze in detail how this procedure is performed, what tools are needed for this, and what you should pay attention to when adjusting Niva valves. This instruction is relevant for the following Niva models: 21213, 21214, 2121.
IMPORTANT! You should take on the job only if you already have experience in maintenance and simple repairs.
How to check gaps
To check, you need to take a 0.20 millimeter feeler gauge and place it between the camshaft cam and the lever, and if little effort is required, then the clearance between the valves is set correctly.
Every experienced Niva car owner probably had to independently perform such a procedure as adjusting valve clearances. The quality of this procedure directly determines how well the engine of your car will work. After all, if the gap is less than required, then, of course, the valves will be clamped and the engine will not develop maximum power, and this will affect the dynamic characteristics of the car. On the other hand, if the gap, on the contrary, is larger than permissible, then a rather unpleasant knock will be heard when the Niva’s internal combustion engine is operating.
To carry out this procedure yourself, you will not need many tools. I will list everything you need below:
- Open-end wrenches for 17 and 13
- Set of styli or one stylus 0.15 mm thick
Self-adjustment
After the tools are prepared and the motor has cooled down, you can proceed to self-adjustment. The operating procedure will be as follows:
- Disconnect the negative terminal from the battery. This action begins all manipulations with the engine or electronics of the car.
- Next, unscrew the cylinder head cover and proceed to dismantling the distributor cover. After this, you need to unscrew the spark plugs.
- Now access to the crankshaft has opened. It must be turned slowly in the direction of rotation, until the marks located on the bearing housing and the camshaft match.
- The marks are set, and you can proceed to adjustments on the 6 and 8 m valves. A feeler with a thickness of 0.15 mm must be inserted between the camshaft cam and the rocker.
- If the job is done correctly, the probe will enter with little force. In order to begin the adjustment, you need to press out the lock nut with a wrench 17. Adjustment is carried out with key 13.
- After the adjustment is completed, you need to check everything again. If it corresponds to the standard, you can fix the adjustment bolt and tighten the lock nut.
- Next, we turn the crankshaft 180 degrees and proceed to adjust the next pairs 4 and 7, and then 1 and 3.
Instructions for adjusting valves on Niva
Please note that this procedure is performed only on a cold engine, that is, its approximate temperature should be about 20 degrees.
The first step is to remove the valve cover from the engine. After this, you will need to align the crankshaft and camshaft to the marks so that the 4th cylinder is at top dead center. To do this, combine the mark on the crankshaft pulley with the central mark on the front engine cover. For clarity, all this is shown in the photo below:
You can rotate the shaft either using a suitable wrench using the ratchet, with both hands, grasping it tightly (with the spark plugs unscrewed). We set the position of the camshaft in the same way so that the mark on the sprocket aligns with the protrusion on the body:
After the marks are set, you can begin to adjust the 6th and 8th valves (counting is done from left to right). To do this, take a 0.15 mm feeler gauge and insert it between the camshaft cam and the rocker. It roughly looks like what is shown in the picture:
Please note that the dipstick should enter with little effort. If the gap differs from the recommended one, it must be adjusted. To do this, use a 17 wrench to slightly loosen the lock nut, and use a 13 wrench to make the adjustment:
It is also worth noting that when the lock nut is finally tightened, the clearance may decrease slightly, so you should check it again after the nut is tightened.
Now a little about the order in which adjustments should be made. Below are instructions that must be strictly followed.
- So, if the crankshaft is set according to the marks, then we adjust valves 6 and 8
- We turn the crankshaft 180 degrees (half a turn) - set the gap to 4 and 7 cells.
- Full revolution - at this moment we perform the procedure with valves 1 and 3
- 540 degrees (one and a half turns) - 2 and 5 valves, respectively
To make it more convenient to count crankshaft revolutions, you can divide it with a mark, for example, draw a line in the center of the pulley with chalk or a marker. Or, instead of the crankshaft, you can count the revolutions of the distributor slider. Only there, every two subsequent valves are adjusted after 90 degrees of rotation.
On injection systems, this type of maintenance is performed in almost the same way, and in general, following this guide, you can do everything without straining.
You will be interested in: Do-it-yourself replacement of the Niva Chevrolet camshaft Replacing the camshaft on a Niva Chevrolet car is a complex process and requires special attention if you are... Do-it-yourself disassembly of the VAZ 2121, 2131 Niva engine Disassembling the engine of the VAZ 2121, 2131 Niva car involves the removal of all components element...The gap on the spark plugs of the Niva VAZ 2121, what it should be. Both the engine power and stability depend on the correctly set gap on the spark plugs...Replacing the Niva Chevrolet fuel filter with your own hands In this material we will look at replacing the fuel filter in a Niva Chevrolet car with your own hands. That...27.08.201511:04 20004
Good day everyone! Today we’ll talk about how Niva valves are adjusted, what clearances need to be set, and discuss the nuances of adjustment.
In every car there are at least two exhausts for every dummy engine. They perform fundamental actions, without which the operation of the cylinders would be impossible. Niva valves provide access to the combustible mixture into the engine on one side, and exhaust gases from the spent mixture are removed from the other.
The valve gas distribution mechanism ensures the coordinated operation of the valves and regulates their operation. Many Niva owners don’t even realize how important it is to constantly check and, if necessary, adjust the system for supplying the combustible mixture and removing exhaust gases from the engine.
When heated, all substances expand and valves are no exception. Therefore, in a cold state, with an unheated engine , there should be certain backlashes. It is their position that needs to be adjusted in order to avoid premature breakdowns and wear and tear of the “heart” of the car.
Incorrect valve adjustment is fairly easy to diagnose. By leaving too small gaps, parts will wear out and wear out faster, and engine performance will decrease. Symptoms of too much Niva valve clearance will be metallic knocking, which will also lead to rapid wear of parts and the engine as a whole.
An incorrect clearance between the camshaft cam and the valve itself causes the engine valve to open too much. This will sooner or later lead to depressurization of the valve and can quite significantly reduce the service life of the Niva engine.
You can find out what the gaps should be from the Niva user manual. It is important to take into account that clearance requirements may vary not only for different brands and models of machines, but also for different structural parts.
Also interesting: Zero resistance filter: should I buy it?
Why is adjustment needed?
If you need to apply force to move the feeler gauge between parts, then the gaps are set correctly. Not all Niva models have a crankshaft divided into degrees.
In this case, it must be separated with a mark so as not to lose count and maintain order. Draw a line down the center and divide the pulley into four parts. Another option is to count the revolutions of the distributor slider.
Moving the ignition slider 90 degrees equals turning the crankshaft by degrees. When tightening the locknut, the gap becomes a little loose, so ideally the adjustment should be carried out twice, following the order indicated in the table. About the problems of starting gaps Niva
- Scientific comparison of copper and aluminum standard heaters :) - View topic :: diabloarea.ru
- Chevrolet Niva Surgut - 1 used Chevrolet Niva cars in Surgut - Mitula Cars
- Mitsubishi L () car review with photos & | diabloarea.ru
Adjusting the Niva valve clearance
Below are the requirements for Niva valve clearances.
It must be remembered that the gap is adjusted only when the engine has cooled down . Using a flat feeler gauge, the Niva valve clearance is measured. The position is changed by changing the direction of the screw rocker arms in the required direction. To begin adjusting the backlash, it is necessary to bring the cylinder damper to a position in which all its valves are closed and the adjusting bolts are in an arbitrary state. To do this, it is necessary to set the upper compression point of the valves.
It is critical that the metal of the motor is not heated. This is justified primarily by the fact that when making adjustments on a warm engine, it will ultimately be incorrect. After all, metal expands when heated.
Only after making sure that the engine has cooled down completely can you begin the adjustment itself. It is very important to correctly determine the top dead center of compression.
How to determine the upper compression point
The easiest way to identify it is by the position of the candle. It would be better to unscrew the spark plug and install a long screwdriver in its place as a guide.
You need to set the fifth gear and start rotating the raised wheel. With the help of this, not the most tricky, trick, it will be easy to determine the upper compression point. The top point will become clearly visible from the protruding screwdriver. Then you can stop.
The same is done with the remaining cylinders. When the cylinder is in the desired position, use the locknut to adjust the play so that the feeler gauge passes into it with slight pressure. It is worth considering that after changing the position of the mechanisms, the size of the Niva valve clearance may also change.
Next, you need to adjust the position of the valves of the remaining dummies. The Niva valves are adjusted according to the order of operation of the dummies. You can determine it by turning the crankshaft with the starting handle.
Also interesting: Niva 4x4 jungle camouflage – Auto Magazine
It is necessary to turn strictly clockwise, half a turn. Next, rotate the crankshaft clockwise until the mark on the gear matches the mark on the bearing housing exactly. It is now possible to adjust the clearances of the Niva valves that release exhaust gases, the fourth dummy, which allows access of flammable substances to the third cylinder.
While holding the adjustment bolt, it is necessary to loosen the locknut. By adjusting the position of this bolt, adjust the play to the required requirements. The criterion is still the same. The feeler gauge should not fit into the gap too easily, but not too hard either. The purpose of the adjustment is the harmonious operation of the motor.
Upon completion of the actions, you need to check how correctly the adjustment was made. To do this, you need to start the engine, warm it up, and listen to how it works. It is important that there is no unnecessary noise or hum. These symptoms indicate that parts in some places may be incorrectly adjusted, broken, or that the gap width does not correspond to the standard.

