Basics
The difference between supercharging and various types of turbines is that turbocharging uses the energy of exhaust gases to create pressure. In general, turbocharging can be used on both diesel and gasoline cars. Since we are interested in the VAZ 2110, the petrol version is also interesting. However, it is worth noting that the greatest positive effect is still achieved on diesel engines due to their inherent high compression ratio. On gasoline engines, it sometimes makes no sense to install a turbocharger, since unexpected detonation may occur due to a sharp increase in crankshaft speed. The temperature of the exhaust gases also rises sharply, and since the turbocharging of the VAZ 2110 car runs on exhaust energy, the supercharging itself gets very hot.
The entire supercharging system on the VAZ 2110 will consist of:
- Compressor.
- Safety valve.
- Pressure regulator.
- Intercooler.
The pressure regulator does the most important work. It corrects the pressure value and is a special type of bypass valve. That is, not all exhaust gases follow into the boost to ensure its rotation - some follow bypass, thereby changing the pressure. Depending on the type of boost selected for the VAZ 2110, the valve drive can be either electric or pneumatic. Its operation is also based on readings taken from special sensors.
Appearance
Currently, tuning for VAZ cars has a wide range of choices. Since Russian-made cars are quite inexpensive, which attracts their buyers. Tuning for Lada cars is also available and can be found in almost any city.
Tinted glass
To give your car a beautiful appearance, the first thing you should do is tint it. Car tinting is relatively inexpensive, ranging from 2,000 to 3,000 rubles. But after tinting, your car will shine with new colors. It is legally possible to tint car windows only from the rear. Since the light transmittance of the film is not so high, viewing in the evening will be difficult.
Lip installation
To give the car a stylish look, you can install a lip on the front instead of the standard fangs under the bumper. There are several types of lips. The rubber lip “Samurai” and the plastic lip from the Chevrolet Cruze fit perfectly on the Priora bumper. The lip should be secured under the bumper with self-tapping screws. Lip price is from 500 to 1000 rubles.
Guba Cruz
Lip Samurai
Lipspoiler
In the days of the nines, when our fathers raised the rear of the car by installing spacers under the rear shock absorbers and installing huge spoilers like in Need For Speed. Nowadays, it is stylish to lower a car; by the way, you can read how to properly lower a car on our website, and install a small spoiler that is glued to double-sided tape. The price of such a spoiler varies within 1000 rubles.
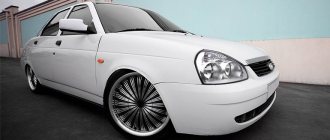
Alloy wheels
Everyone knows that the wheels of a car are the floor of the car, so the wheels of your car should be beautiful and you like them. On the fret, you can install disks with a radius ranging from R14 to R17. When installing R16 and R17 wheels, you will have to buy low-profile tires, which is very expensive and not practical, but it is beautiful. When installing discs with a large radius, comfort is lost and the chassis begins to work rougher since the rubber does not “eat up” minor road irregularities.
It is best to install R14 and R15 wheels. Such wheels are relatively inexpensive and the tires for such a radius are high profile. It follows that the comfort of traveling by car will not be lost.
SE caps and mirror repeaters
In order to give your car a little luxury, you can install turn signal repeaters in the mirrors of the Priors and turn caps in the wings on the SE. This modification is relatively expensive, but it significantly changes the appearance of the car and gives it a certain “richness.”
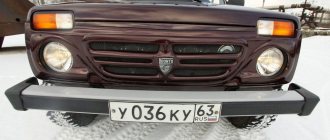
Sabers and bars
This modification is not for everyone and is most often suitable for cars with dark body colors. The rear chrome-plated trunk blade and the front chrome-plated hood blade are painted matte black. This modification is very cheap and simple, but it has its own zest and is relevant when the chrome on the sabers begins to swell, which is very common on Priors.
Antishildik
This modification consists of removing all nameplates from the car, but it also falls into the amateur category. Some car enthusiasts love it when everything on their car looks like it came from the factory. You need to remove the nameplates using a hairdryer; they are glued with double-sided tape. After removing the nameplate, any remaining tape must be removed with gasoline or solvent.
Principle of operation
The first thing we need to understand is that the operation of the compressor is based on the energy of the exhaust gases, that is, the differences from a mechanical compressor are very significant. A significant part of the exhaust gases does not enter the exhaust system, but is sent to the turbocharger in order to rotate the turbine wheel. The wheel, in turn, compresses the incoming air. Next, the already compressed air enters under pressure into the intercooler, where it is cooled before entering the engine cylinders. By cooling the air, it is possible to slightly increase the pressure and reduce the temperature of the fuel mixture in the cylinders so that the engine does not overheat.
Turbocharging for VAZ 2110 operating principle
As already mentioned, the turbocharging of the VAZ 2110 is not rigidly connected to the crankshaft of the car’s engine. The connection is indirect: the higher the shaft speed, the more fuel is burned and, as a result, more fuel is burned, that is, more exhaust gases are produced and the higher their pressure when the compressor wheel rotor spins. At this point, the boost is slightly inferior to a mechanical compressor. There, the connection of its moving parts with the crankshaft is absolutely direct: the turbine is driven from the shaft through a belt, that is, the faster the shaft rotates, the faster the pulley rotates, transmitting torque through the belt to the turbine wheel. And the acceleration of turbine rotation occurs instantly.
For very powerful V-shaped engines, a special system of two parallel superchargers has been developed.
Its advantage is that two superchargers for each bank of cylinders have significantly less inertia than one large turbine for the entire engine. Thanks to this solution, it is possible to achieve smooth operation and complete synchronization of operation with the engine shaft, and get rid of such negative effects as turbo lag and turbo boost. For cars participating in racing, supercharging systems of three or even four compressors have even been developed. There are also a lot of production cars that use combinations of a mechanical compressor and turbocharging. At low speeds the mechanics work, and when the speed reaches a certain value the turbine starts working. In this way it is also possible to remove the effect of turbo lag. On our VAZ 2110, it would be rational to use, of course, one supercharger, since building more complex systems would cost more than the entire car.
Turbines for VAZ engines
The Timeturbo online store offers a wide range of VAZ turbines. In stock and on order, elements of power plants of cars of various models and years of manufacture. The catalog contains original components at affordable prices. All spare parts are certified and have a long service life. They are fully suitable for the required unit, as they meet the requirements of the car manufacturer.
Turbo VAZ is a diesel engine that supplies air to the cylinders. In recent years, compressors have become quite widespread among those who like to modify the engine of their car. Due to the design of the Lada turbine itself, the part has become more popular than mechanical supercharging due to a number of advantages.
Using a turbocharger allows you to:
- increase the efficiency of the power plant;
- provide optimal torque at low speeds
- increase the environmental friendliness of the engine;
- reduce fuel consumption.
The store's assortment includes both ready-made assembled turbos for Lada and individual spare parts. Intercoolers, air ducts, drive compressors, wastegate valves, turbo manifolds, fittings, hoses and much more are available to order. They install without problems and do not require intervention in the design of the target system. The components are made of high-strength and reliable materials that are resistant to damage, aggressive chemical environments and temperature changes. This allows us to guarantee a long service life and complete absence of breakdowns.
To understand the wide range of spare parts and select the right part for your car model, use the search system by original code or product name. If necessary, our managers will help you select a part over the phone. To get a consultation, call us, we will answer all your questions and create a profitable commercial offer.
Cons of supercharging
The first and most repulsive is, of course, the price of supercharging for the VAZ 2110. This is followed by a significant increase in wear and tear on engine components due to an increase in power. And although the “ten” engine is extremely suitable for major repairs, it is still not the best that could be. You will also have to use expensive oil for the car’s engine and always carry out maintenance of the turbocharger and engine accurately and on time. You will also have to ensure that the compression value in the engine cylinder is always at the same level, since the appearance of crankcase gases in large quantities can quickly “kill” the turbine.
The second part of the turbo kit installation
Lada Priora turbo advantages and disadvantages
Like any modification, installing a turbo kit device on a Priora has its advantages and disadvantages.
| Advantages | Flaws |
| Relatively low cost of tuning. | Periodic interruptions in engine operation. |
| Increasing the power of the power apparatus by 2-3 times. | The motor may fail as a result of incorrectly installed turbo. |
| The ability to modify the engine yourself without resorting to the services of a specialist. | To install a mechanical inflation system, a set of measures is required, and strict adherence to their sequence. |
| You can tune engines with any characteristics with the turbo kit system. | Purchasing new parts not provided by the manufacturer will result in a power discrepancy. |
| The system is lightweight. | Some systems will need to be modified, which will entail additional costs. |
Day 13
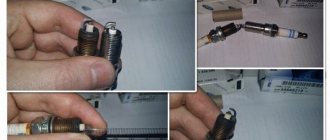
I decided to devote today's story to the fuel system for a turbo engine. When installing boost, it is recommended to switch to the old-style fuel rail (the so-called return rail). To make the transition, you will need to purchase the ramp itself, 2 tubes for supplying and draining gasoline from the ramp from an old-style VAZ 2112, a fuel regulator and injector mounting brackets. Here is a photo from the catalog with all the catalog numbers, what you need is highlighted in red squares.
There are two options for switching to such a fuel supply system. The first is to install a ramp and lay a return line to the tank. The second option is to use a ready-made adsorber line. I chose the second option, since relaying the lines under the bottom of the car while lying on the floor is not the most pleasant experience. And besides, why do this if there is a ready-made one. In the picture, I indicated in red squares what needs to be removed, and in green I highlighted the adsorber line, which goes under the bottom of the body.
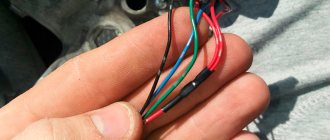
The process is quite simple, we disconnect the adsorber under the hood and remove it completely from under the hood, we won’t need it anymore)). There are 2 hoses going to the adsorber under the hood. One goes from the tank to the adsorber, the second from the adsorber to the purge valve and then from the valve to the throttle valve. I removed the second hose completely, along with the valve, and plugged the outlet on the throttle with a piece of silicone hose.
I was interested in the first one, the one that comes from the tank. To connect the ramp to the adsorber line, it was necessary to purchase a hose 21101-1104218-00 Fuel HOSE to the injector ramp 2110-2170 (collet nut). On one side of the hose there should be a nut (screwed to the fuel rail tube), on the other side there should be a collet (buster release, put on the adsorber tube).
The same hose is connected to the standard fuel rail. The line itself needs to be unscrewed from the fastenings to the body and repositioned differently. So that the end of it moves from the right side of the car to the left. Next, having removed the receiver, I removed the old ramp assembly with injectors and installed a new one, with new injectors and a pressure regulator.
Then I removed the back seat because access to the fuel tank is required.
It was necessary to pull out the fuel pump and remove the pressure regulator from it. Because the regulator now lives on my fuel rail, and I don’t need 2 regulators. I disconnected all the tubes and unscrewed all the bolts securing the pump module to the tank. The pump is pulled up, I had to work really hard to avoid spilling gasoline all over the car.
Having pulled out the pump, I disconnected it and pulled out the pressure regulator. I disassembled the standard regulator using a grinder, sawed off its lid and bottom, and removed the regulator membrane with a knife. The rest of the regulator was returned to its place. The pump was installed back into the tank.
All that's left is to connect the tubes. In the standard scheme, the pump pumps into a tube which goes through a filter to the pressure regulator and then from it goes into the line to the motor, since there is no longer a regulator in the tank, you need to connect the lines before the regulator and after into one. Having connected them, all that remains is to connect the adsorber tube to the connector where the regulator used to be. To do this, you need to disconnect the tube from the sump of the gasoline vapor recovery system (from the adsorber), it is located above the rear left wheel, move it to the tank and connect its connector to drain into the tank. The fuel system is ready.
Mounting kit:
– Supercharger series PK05D
(1 pc.)
– Supercharger bracket
(1 pc.)
– Drive belt
(1 pc.)
– Bracket for installing tension rollers
(1 pc.)
– Tensioner roller
(2 pcs.)
– Stud
(2 pcs.)
– Bushing for roller
(2 pcs.)
– Nut
(2 pcs.)
– Pipes
(3 pcs.) /one of the pipes has a fitting for installing the Blow Off valve/
– Corrugated pipe
(1 pc.)
– 90 degree pipe
(3 pcs.)
– Adapter pipe
(1 pc.)
– Clamps
(8 pcs.)
– Supercharger mounting bolt
(4 pcs.)
– Washer
(8 pcs.)
– Packing box
(1 pc.)
Contact via WhatsApp
Day 14
The turbo kit includes all the necessary spare parts, you just need to assemble them into one.
As for screwing the manifold to the engine, I think no one needs to explain anything, everything is simple, unscrew the old exhaust and screw the manifold on. Installing the turbine on the manifold is just as easy. We take a triangular gasket, put it on the manifold studs, take out the foam rubber plug from the turbine and put the turbine on the same studs. Then, using a 15mm wrench or socket, we pull the turbine to the manifold. The turbine is installed at its workplace.
The next step is to connect all the fittings and oil and antifreeze supply hoses to the turbine. It is better to do this when the manifold and turbine are connected, but not bolted to the engine. All fluids are supplied to the turbocharger through banjo bolts. These are bolts with drilled holes of a certain diameter.
On top of the turbine there is an oil supply, on the sides there is an antifreeze supply and drain. Below is an oil drain.
The oil supply hole is the smallest in diameter.
The antifreeze supply hole, exactly like this one, is located on the opposite side of the turbine for draining the antifreeze.
First, we connect the drain and antifreeze supply; for this, the kit includes 2 banjo bolts, 4 copper washers and 2 corner tubes with a banjo bolt.
Now let's move on to connecting the oil supply to the turbo compressor. Oil is supplied using a reinforced hose and 2 banjo bolts of different sizes.
One of them, the smaller one, is inserted into the hose banjo through copper washers and screwed onto the top of the turbocharger. The second end, again through copper washers, is connected to the cylinder head. To do this, unscrew the oil pressure sensor from the head. We screw in the oil intake bolt together with the hose, then screw the sensor into the oil intake bolt from the head. You should be very careful in this place, since you can break off the molding for the sensor from the cylinder head housing. Well, lastly you need to screw the oil drain tube to the turbine, the tube is screwed with 2 M6 bolts with a regular 10mm head. Don’t forget to put a gasket under the flange.
It is also included in the kit. That's all! The turbine is connected to all the fluids necessary for operation.
This is the end of the day.
Final part.
Fuel check valve AN6 for tank ventilation, blue Price:
Fuel check valve AN10-M12x1.5 Price:
Check valve AN6 Price:
A turbocharger, in other words, is a gas turbine supercharger. Its action was known at the beginning of the last century. And the initial research related to it was carried out even before the start of the First World War on aircraft-type engines by engineer Alfred Buchi from Switzerland. The obstacle at that time was the lack of inexpensive precision casting technology due to the shortage of high-strength material.
The first large-scale production of turbochargers for serial passenger cars started in 1973 at enterprises in Bavaria. By 1980, this push had helped to overcome all technological barriers, thanks to which a period of mass turbanization began in the vastness of mechanical engineering. In modern conditions, only a lazy or distant owner does not dream of installing a turbocharger. Domestic cars are also no exception.
Turbocharging VAZ 2112
Content
Improvements in the interior
Lux salon
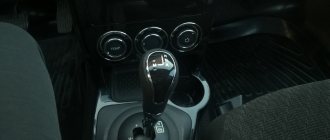
If your car is not luxury, then you can give it this manually by purchasing an additional interior lamp from the Priora Luxury, installing heated seats, sun visors from the Luxury with a mirror. All these spare parts and accessories are sold in any car spare parts for Lada Priora.
Cases
Every car owner would like his car to remain in new condition for as long as possible. During operation, seats are subject to a lot of wear and tear. In order to preserve the original appearance of the seats, it is best to put covers on them. There are a large number of different covers in taste and color. The cost of covers for a Priora varies from 1,500 rubles to 5,000 rubles, depending on the quality of the materials.
Steering wheel cover
With active driving, by 100,000 km, the steering wheel begins to wear out. In order to protect it from wear and tear and an unaesthetic appearance, it is best to put a braid on the steering wheel. There are two types of braids that are put on the steering wheel and that need to be sewn. Slip-on braids are easy to install, but do not completely cover the steering wheel. Stitched braids completely cover the steering wheel and protect it from damage, but are quite difficult to install.
Replacing Heater Switches
In the Prior, the interior heater switches are not very nicely designed. In order to give them a more modern and beautiful look, they can be replaced with switches from Ford Focus. Such switches are inexpensive and fit into the place of the standard Prior ones without any modifications. You can order them on AliExpress.
Rugs
Most of the time a person is in the car. Therefore, it is important to maintain the frequency there. To do this, we can use special EVA mats that perfectly retain moisture, unlike standard ones, and do not allow it to spill outside the mat. This is quite important in winter, since snow that gets into the car begins to melt and form puddles in the cabin that can spill and an unpleasant smell of dampness in the cabin cannot be avoided.
Side mats
You can also install side mats between the door and the seat to protect your carpet from dirt. Such rugs are expensive, around 400 rubles.
Principle of operation
Why is turbocharging so attractive to vehicle owners? Everyone knows the fact that the volume of fuel that can burn out in the cylinders is closely related to the amount of air absorbed by the engine during startup. And the mass ratio condition, which numerically represents approximately 1 kg of combustible mixture per 15 kg of air, must be fulfilled impeccably. After all, subsequent enrichment of the liquid implies a decrease in power. In order to remove this obstacle, more air must be supplied to the cylinder by pumping it with excess pressure. Thus, an increase in air pressure by 30% triggers an acceptable increase in power and acceleration dynamics.
The fundamental features of the operation of a gas turbine compressor are quite simple. Its body is fixed to the exhaust manifold. Inside the unit itself there is a turbine wheel connected to a compressor wheel. The work of the exhaust gas flow provokes the spin-up of the turbine. Then, using the shaft, the torque is transferred to the compressor impeller, which sucks in air through an air-type filter, delivers it to the carburetor under pressure, thereby increasing the saturation of the cylinders.
Thus, the same volume of cylinders pumps a larger amount of working mixture. A regular VAZ 2112 engine is characterized by 25 percent combustion of the fuel pumped into the cylinder due to lack of oxygen. An increase in air filling implies a proportional increase in the combustion of the gasoline mixture. This factor affects the increase in engine efficiency. As a result, turbocharging allows you to pump a larger volume of fuel in the same period of time. Torque characteristics also increase, affecting acceleration dynamics.
Tuning the headlights
When working on the front part, many people do their own tuning of Priora headlights. So, you can install eyelashes and lenses. All this has the best effect on the originality and uniqueness of your car.
And if you also replace the factory side lights with LED ones, this not only allows you to uniquely style, but also gives a brighter light. You can also convert your turn signals into parking lights. This will expand functionality.
Many people tint their taillights. This DIY tuning of a Priora hatchback, together with a set of original body kit, will make people turn around and stare after your car for a long time.
Installation result
During the research, a turbocharger installed on a conventional 1.5-liter carburetor of a VAZ 2112 engine yielded the following results: provided that the grip and tires are of high quality, the acceleration time to 100 km/h is reduced by 5 seconds (compared to the base engine). The same principle applies to elasticity: acceleration time in fixed 4th gear from 60 to 100 km/h is also reduced by 5 seconds.
Turbine for VAZ 2112
About replacing seats on a Priora
Priora seats are another element of the interior that many car enthusiasts prefer to get rid of. The reason is simple: the standard seats are not comfortable. And this feels very good on long journeys. Most often, instead of the standard ones, the Priora is equipped with seats from a Mazda 6 (second generation). These seats are distinguished by the highest comfort, and in addition, their dimensions are almost the same as those of the standard “Prior” ones.
The Mazda 6 is an ideal “seat donor” for the Priora
But these seats have serious problems with fastenings. It will have to be cut off almost completely, and then welded again, fitting it to the Priora mounting holes. It is impossible to do all this in the garage without a grinder, a welding machine and the skills to work with it. Therefore, there is only one option: take the car to a car service center, having previously agreed on a price. Now the cost of installing Mazda seats on a Priora starts from 20 thousand rubles.
Practical implementation
The idea itself is simple. However, it is difficult to implement it on the VAZ 212. The number of automobile companies that take on the production of gas turbine superchargers can be counted on the fingers of one hand.
The difficulties of installation and further adaptation are as follows:
- The exhaust gas temperature level that the turbine must withstand is theoretically between 900˚C and 950˚C.
- The working speed of the rotor with the impeller is calculated not just in tens, but in hundreds of thousands of revolutions per minute.
- The functionality of the volume of the engine compartment is limited, and therefore requires the manufacturer to place the unit within a specific framework.
Based on the above, the VAZ turbocharger must have high heat resistance, be compact, well-balanced, and at the same time inexpensive.
Technical improvements
Firmware or chip tuning
In order to improve the agility and agility of your car for not a lot of money, you can flash the ECU of the Lada Priora. This is done by qualified specialists. Using the firmware, you can customize the car as you please, whether it is an economical car or a high-spirited car.
Exhaust installation
As you know, a catalyst was installed on the Lada Priora. On cars with high mileage, it often gets clogged and malfunctions, which slows down and slows down the car; replacing it is quite expensive. But there is a way out: replacing the exhaust with a spider without a catalyst. After replacing the catalyst with a spider, the Priora ECU will need to be re-flashed. For a more complete tuning of the LadaPriora exhaust, you can lay out the entire exhaust route. Which is not a cheap activity.
Replacing camshafts
Replacing camshafts with sports ones will increase the speed of the car and make it easier to accelerate and improve dynamics. Such work should be carried out in trusted service stations with subsequent adjustment of the electronic engine control unit.
Lightweight flywheel
Installing a lightweight flywheel will allow the engine to spin faster, thereby gaining speed faster. It was noted that when installing a lightweight vehicle, the car has to move away at higher speeds.
Perforated brake discs
When replacing brake discs, it is best to immediately install perforated brake discs for the Lada Priora. These discs are very well ventilated, which allows them to heat up less and protects the pads from rapid wear.
Self-locking differential
A self-locking differential is installed in the gearbox, which allows both front wheels to spin simultaneously. As a result, a more reliable start from a place is ensured. Installing such a differential is quite difficult; the difficulty lies in its adjustment.