Method one: Sawn springs
This method of underestimation has found popularity among young people. This is due to the fact that most young people do not have large sums of money to spend on tuning their cars. This method of lowering a car is the cheapest and fastest, but far from the most reliable and safe.
So, let's take a closer look at how to cut springs on the Lada Priora and VAZ 2110.
Washed down the springs on the VAZ 2110
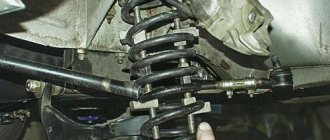
The suspension of the Priora and 2110 cars is slightly different in the design of the shock absorber strut. The Priora uses a barrel spring, while the VAZ 2110 uses a coil spring.
Coil spring VAZ 2110
In order to lower the car using the spring method, you need to decide on the amount of lowering of the car. It is not recommended to cut the springs more than 3 turns at the front, since the strut will compress and the upper cup of the shock absorber will rest against the bump stop, therefore, the shock absorber may not function properly.
The springs of the rear shock absorbers can be sawed up to 5 turns, after which the same thing awaits you as with the front shock absorbers, the bump stop will rest against the rear spar. It follows that the shock absorber will not work correctly and there can be no talk of any driving comfort.
Washed down the springs on the Lada Priora
You can file the spring on a Priora, but it is not recommended to saw the front springs. The front spring of the Priora, as described above, has a barrel shape, therefore, after washing it down, it will lose its shape and will not fit into the groove of the shock absorber cup. Some craftsmen, after washing down such a spring, heat it up and give it a similar shape.
It is strongly not recommended to use this method, since when heated, the spring loses its properties and elasticity, becomes more fragile and susceptible to rupture or breakage, which can lead to dire consequences.
Sawed barrel spring
The rear springs of the Priora can be cut in exactly the same way as the springs of the VAZ 2110, because they are absolutely the same.
Step-by-step instructions for cutting down a spring
In order to safely file down the spring, the strut must be removed from the vehicle.
The first step is to prepare the necessary tool. It's better to use a key set
Removing the front struts
To remove the front struts you will need the following tools:
- Open-end wrenches for “13”, “17”, “19”, “22”;
- Hexagon at "6";
- Socket heads or wrenches for “13”, “17”, “19”, “22”;
- Anti-rust liquid WD-40, etc. (by the way, if you don’t have WD-40, you can use kerosene, antifreeze or diesel fuel)
- Hammer, pry bar and pliers
- Steering wheel end remover.
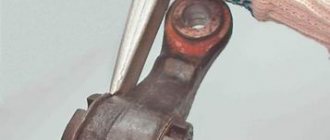
Tie Rod Remover
So, let's start disassembling the car.
- 1. It is necessary to jack up the side on which the spring will be washed down, having previously loosened the wheel mounting bolts 4 pcs. Do not forget to put chocks under the rear wheels of the car so that it does not roll forward or backward.
- 2. Remove the wheel from the car and place it under the threshold of the car. This action will help prevent damage to parts of the machine if it falls from the jack.
- 3. Next, you should loosen the nut securing the rod to the front shock absorber support in advance; for this you will need a hex socket set to “6” and a wrench set to “22”.
- 4. Unscrew the steering end mount with the head on “17”, having first pulled out the cotter pin. And we press it out of the rack axle using a puller or a hammer and a pry bar.
- 5. Pull out the brake hose and ABS wire from the seats in the rack.
- 6. Unscrew the bolts securing the strut to the steering knuckle using keys “17” and “19”.
- 7. Unscrew the three bolts securing the shock absorber support to the strut with a head set to “13”.
- 8. Take out the stand.
Next we should proceed directly to disassembling the shock absorber, here we will need spring ties
- 9. We tighten the spring with ties on both sides.
- 10. Unscrew the nut securing the support and remove it, then remove the spring and the bump stop with the boot.
The stand is disassembled, you can start cutting. The number of turns must be measured from the beginning of the turn on the spring. We saw the spring with a grinder.
We assemble the rack in the reverse order. You should pay attention to the washers under the rack support and install them in the correct sequence as shown in the photo.
The sawn spring must be installed with the cut coil down.
We carry out exactly the same action with the opposite side.
Removing the rear struts
To remove the rear struts you will need much less tools than to remove the front ones.
Tools required to remove rear struts:
- Keys to "17", "19"
- A special key for unscrewing the rear shock absorber rod.
Wrench for unscrewing the rear shock absorber rod
Step-by-step instructions for removing the rear shock absorber of Lada Priora and 2110
There is no need to use zip ties to replace rear shock absorbers
- Loosen the bolts securing the wheel to the hub.
- In the luggage compartment of the car, bend (unscrew if necessary) the trunk lining so that access to the rear spar is free. Loosen the nut securing the rear shock absorber rod to the spar.
- Jack up the side on which the spring will be cut. Do not forget to put chocks under the front wheels of the car so that it does not roll forward or backward. Remove the wheel from the car and place it under the threshold of the car. This action will help prevent damage to parts of the machine if it falls from the jack.
- Unscrew the bolt securing the shock absorber to the rear beam of the car.
- Unscrew the shock absorber rod from the rear side member of the vehicle.
- We take out the strut, you need to lower the strut all the way down, squeeze the shock absorber rod, pull out the spring with the boot and bump stop, and then the shock absorber itself.
That's it, the rear strut has been removed from the car, you can start cutting down the spring.
It is necessary to count the number of turns and cut the spring exactly opposite the beginning of the spring turn.
Reassembly of the rear shock absorber should be done in reverse order..
Examples of cars with sawn springs
Sawn springs front 3 turns rear 5 turns
Sawn springs front 2 turns rear 3 turns
Advantages and disadvantages of sawn springs
Disadvantages of lowering a car by filing down the springs:
- There is no comfort when driving such a car.
- There is no way to travel on a country road.
- The spring may fly out of the shock absorber cup.
- Immediate failure of shock absorbers.
Advantages of lowering a car by filing springs:
- Cheap and easy to use.
We start the process and do everything right
What type of pendant should I choose? At the moment, pneumatic is considered the best option, since at any time you can control the entire process and, if necessary, temporarily raise the body. As often happens, the best method also turns out to be the most expensive. Our case is no exception. And you won’t be able to carry out the reconstruction yourself if you don’t have a lot of experience working with electronics. Read on for simpler options.
Set with the ability to adjust ground clearance. It contains springs, conventionally designated as 50, 70 and 90. The racks in this version are adjustable in height, and the springs are stretched or compressed. The material of the products is very durable and reliable. In the summer you can lower the Priora and raise it in the winter, without damaging the parts.
Regular lowered suspension kit. Cheap and actively used option. It comes with 30, 50, 70 or 90 springs complete with shock absorbers. By the way, it doesn’t matter what kind of Priora you have - a hatchback or a sedan, this equipment will suit you. Having installed it, you will not be able to quickly increase or decrease the ground clearance. This option is already reinforced concrete, for a long time.
Method two: Short-travel struts
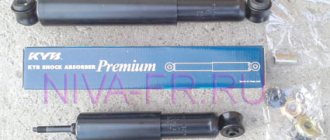
This method is currently used along with cutting down springs. On the streets of the city you can see a huge number of cars with such racks. It gained wide popularity due to its simplicity, reliability and comfort. Also, short-travel struts have a wide range of vehicle height options. Any car enthusiast can choose the optimal understatement for himself.
Lowering with the help of short-stroke struts practically does not change the design of the car and does not cause any harm to it, unlike silting of the spring. Lowering in this way occurs by changing the height of the rod itself and the strut cartridge, and by installing an already obviously shortened spring.
Types of short-travel struts and springs
There are a large number of short-stroke struts that have their own characteristics. Let's look at a few examples of racks.
Short-travel struts are classified by lowering height, that is, each strut has its own size.
For example: -30, - 50, -70, -90, -120
What do these numbers mean?! The number indicates the size in mm by which the stand rod and cartridge are shortened. Therefore, a rack with index -30 is shortened by 30 mm, a rack with index -50 is shortened by 50 mm, etc.
Racks are also classified according to their stiffness zone. Comfort and sport.
Comfort racks
Such struts have a softer degree of compression, which ensures comfort when driving. There is no shaking or knocking in the car when using such racks.
Sports racks
Sport struts are used for tuned cars with non-standard engines. Such struts provide positive dynamics when driving on the highway; the car experiences minimal roll when turning.
Springs
In combination with short-throw struts, shortened springs are used.
The classification of such springs is similar to the classification of struts. Springs are: -30, -50, -70, -120. The spring stiffness is exactly the same as that of the struts: comfort and sport.
Springs also come with variable and regular coils. Springs that use variable coil technology have less rigidity. Such springs should be installed on racks marked “comfort”.
Variable Coil Springs
Such struts can be installed in standard places with standard components; for example, to install short-stroke struts there is no need to change the support bearing and boots.
The most popular brands of short-stroke struts and springs: SS20, ASTON, TechnoRessor and Demfi .
Examples of cars with installed short-travel struts and springs
Lada Priora with lowering -50
Lada Priora with lowering - 70
Advantages and disadvantages of short-travel struts
Advantages of short-travel struts:
- Comfort while driving;
- There is no damage to the car;
- Large selection of rack heights;
Disadvantages of short travel struts:
- Inability to adjust vehicle height;
- Difficult traffic on a country road;
Why lower the Lada Priora?
On the roads of our country you can often find “Priors” with a low landing. The main reason why owners resort to this solution is to improve the appearance of the car. Lowering allows you to give the car a sporty look. In this budget way, the VAZ 2170 can be distinguished from the road traffic. When lowering work is carried out correctly, the following benefits can be obtained:
- reduce roll when cornering;
- improve the handling and behavior of the car at high speeds.
Method three: Air suspension.
Lada Priora with air suspension.
This method is the most expensive and difficult to install. To install the air suspension, the car must be completely disassembled. Install special equipment; besides, air suspension is not suitable for cold seasons. Quite often it happens that condensation appears in the tubes, which in cold weather can lead to a blockage in the air channel.
To install this method of understatement, qualified specialists will be required. Large set of tools and equipment. To install the air suspension you will need: a receiver, a compressor, hoses, pipes, special racks, sleeves, etc.
The installation of air suspension has not found much popularity due to its high cost and capriciousness. Due to the large amount of reagents on the road, air leaks often appear in the system, which makes it impossible to drive a car. Also, using a car in winter is quite problematic.
Advantages and disadvantages of air suspension
Pros of air suspension:
- Possibility of changing clearance
Disadvantages of air suspension:
- High cost and complexity of installation;
- Inability to move in cold weather;
- Taking away useful space in the trunk;
RESULT
Bottom line: to lower a car, it is best to use short-travel struts. Such racks are the most suitable option for everything in terms of price and quality.
It should be noted that with a measured lowering of -120 mm, it is necessary to saw the right spar. Due to the very low lowering, the right-hand drive wheel will touch the car body. The photo shows how the drive rests on the car body.
Also, when carrying out any actions, it is imperative to have the wheel geometry done at a service station upon completion of the repair.
We hope our article was useful to you.
