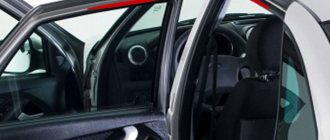
The front, rear, right and left doors on a Lada Vesta car consist of a frame with opening mechanisms and window lifters inside, with door stops on the side. This entire structure is covered with door cards. The outside of the door is equipped with protective moldings that protect against scratches.
The owner of a Lada Vesta may need to remove or disassemble the doors of his car, or their components for repair or replacement. In case of replacement, you must be sure that the replacement will be with original components. Manufacturer's doors have their own article number. Front right - 8450039385, left - 8450039379, rear right - 8450039383, left - 8450039380. Read the article to the end and close the questions for yourself: removing, modifying the limiters, the issue of moldings, you can remove the trim, also known as the door card. The battery is dead, no problem, the doors can be closed anyway.
How to remove the trim (door cards) of the front doors on a Lada Vesta
The casing is removed to repair the mechanisms that are installed under it, or in case of some modification. The tools you will need are a flathead screwdriver and a socket wrench with a T20 (star) bit.
The following sequence of actions is performed:
- Remove the side mirror triangle. The part is pryed off with a screwdriver and the latch is snapped off. Then disconnect the block with wires;
- The doors are pryed up from the bottom, then the lampshade is removed and the wires are disconnected from it;
- Using a wrench, unscrew the three screws securing the casing from below;
- They find a plug from the top end and take it out. Unscrew the fastening screw that is screwed in behind it;
- Another screw is found and unscrewed inside the door handle;
- Carefully pry up, remove the unit that controls the exterior mirrors, power windows and central locking, disconnect the wiring from it, unscrew the fasteners located perpendicular to the door part;
- Starting from the bottom, insert a screwdriver between the door and the trim until all the latches are released.
Tip: To avoid scratching the card, it is recommended to wrap the sharp parts of the screwdriver with electrical tape or a soft rag.
What else can be improved when disassembling cards?
Most often, this process is performed to repair electrical wiring, and not to improve the car. But gradually various recommendations appear on how to improve the car and make it more enjoyable to drive. And this is worth using, because otherwise you will face troubles with a gradual deterioration in comfort. Experience in operating a car is gradually accumulating, and you can already find many interesting recommendations.
Some tips for disassembling the card include the following:
- improving the acoustics of the car to get better sounding music - it is under the maps that the main speakers of the car are located, which are not the best from the factory;
- lubricating or modifying the window lift system in the rear, if you have mechanical means installed, this is a rather important point for lovers of the general comfort of car operation;
- improving sound insulation is the most necessary and useful advice, but to complete this task you need to buy high-quality and proven materials, so it’s worth reading reviews;
- tinting - it is much easier to perform high-quality pasting of the film by dismantling the card, this will allow you to gain access to the entire glass in order to evenly stick the lower part;
- sizing with anti-creaking and vibration-proof materials - this will significantly increase comfort in the car; various unpleasant sounds will no longer be heard from the doors.
As you can see, there are quite a few options for improving the car, and each of them deserves attention. But it is worth paying close attention to the question of the appropriateness of using funds. Since you can spend several thousand rubles on one door just to replace the speakers. So the investment in upgrading your car can be quite large. It is worth immediately considering how much such changes are worth the investment.
We invite you to watch a video with the process of dismantling the door card on Vesta:
How to remove the rear door door card
You will need the same set as for working with the front ones, plus a 10mm socket wrench. Instead of a flat-head screwdriver, you can use a set of spatulas for working with the interior. The sequence of actions looks like this.
Remove the window handle. To do this, insert a screwdriver or a spatula between its middle mount and the bottom washer, and pull the protrusion on the middle part outward. When the protrusion is pressed out, the middle part is pulled out. Then remove the handle from the slot of the window regulator, the base of the handle, and the round plastic washer. Insert the tool between the door handle and its trim, then remove the trim. There are two bolts screwed under it, which we unscrew with a wrench. At the very bottom of the card, find a self-tapping screw and unscrew it using an asterisk attachment. Now the covering is fixed only on plastic pistons and velvet. The card is pryed up, starting from the bottom, and all the latches along its perimeter are snapped off. Then remove the card from the velvet.
Attention: the pistons are quite fragile, so you need to have some spare ones to install the casing in place.
What tools will you need for the job?
To disassemble the Lada Vesta Cross panel card, inventory is required. To remove individual positions, the following tools are prepared:
- screwdrivers;
- knife;
- rags;
- cleaning agent;
- Silicone Grease;
- key to 8.
It is better to carry out repairs indoors, where there are no drafts and plenty of light.
Replacing door stops
Door stops are used to secure doors. If they do not work correctly, they have to be replaced. In their place, you can install both stoppers directly for the Lada Vesta, and stoppers for the rear doors of Ford Focus 3. The part number for the foreign car is 1726441. Their dimensions are almost identical to the standard ones. Except that the stud for the nut is a little wider. The replacement scheme looks like this:
- Remove the door card;
- Remove the mounting screw from the body side using a replaceable Torx T40 socket;
- Unscrew the nuts at the place where the limiter is attached to the door using a 10mm wrench;
- Install the new part in reverse order.
Complexity
The main problem faced by the owner of a sedan who decides to reupholster the Lada Vesta door trim inserts himself is that the door cards are not removable, although they successfully imitate them. This means that the classic version, when part of the door trim was removed, covered with overlap, and put back, will not work.
The map is not removable and this is the main difficulty
Moldings
The installation of moldings on the Lada Vesta was not provided for. During its development, it was believed that their decorative function would be performed by X-shaped stampings, which are also necessary for the recognition of this model. However, manufacturers of automobile accessories have started producing and selling moldings made for installation on this car. Before purchasing and installing them, you need to understand what they are for.
Initially, this is a decorative function. There is no point in disputing the installation of parts to improve the appearance, since it depends on the preferences and taste of the car owner.
The manufacturer claims the protective function of the moldings. It is believed that door moldings installed along the lower edge serve as additional protection for the car's paintwork. The buffer and shock-absorbing function of the moldings is also indicated. If, when opening, the door hits an obstacle, then they will protect the metal from damage and the appearance of dents. However, remember that such protection will work in the event of a minor collision with a low vertical object. A collision at an angle can still damage the door edge. And if the impact is strong enough, the molding and the metal underneath will still be damaged.
Another issue that must be considered before installing moldings is moisture drainage. Since they are hollow inside, condensation begins to accumulate underneath them over time. And although there are small cuts on the back side for its removal, their number and size are clearly not enough for this, which leads to the formation of areas with metal corrosion under the moldings.
If, however, it was decided to install these elements, then you can do it yourself. To do this, the surface of the part is thoroughly washed and dried. Then degreasing is carried out with anti-silicone and the activator, which is included in the delivery set, is applied to the gluing site. Next, remove the protective film from the mounting tape located on the back side. And carefully glue the moldings. If it is necessary to strengthen the fastening, then glass glue or sealant is used for this.
Important: The bulk of the moldings that are sold on the Russian market are made in black shagreen. Painting any other color will require additional investment.
Let's sum it up
The Lada Vesta car is gradually becoming popular and replacing many other options for inexpensive budget sedans. This is not the simplest or most budget car, but it is a quite confident horse for Russian roads. Of course, this is a VAZ, so you shouldn’t hope that everything in the car is perfect and nothing will have to be modified. Most likely, you will have to perform many different modifications yourself while using the machine, especially after it is removed from the warranty. However, there are far fewer problems and improvements needed here than in most other cars in this price class.
It is quite possible to remove the door card and perform the necessary work in your own garage. To do this, it is enough to carefully carry out all the work according to the instructions. Each stage should be performed with due caution, otherwise you will not avoid problems with the car. A broken mount or a scratched power window control unit will have to be replaced, and this costs some money. It is best to be as vigilant as possible so as not to break anything. In this case, doing it yourself will pay off and save you a lot of money. Have you ever disassembled a car door card with your own hands?
Seals
The seals from the manufacturer fit quite tightly in all places except the gap between the front and rear doors. This can be corrected by installing the RKI-19 seal, article number - 000017504293020.
Before installing it, the trailing edge must be cleaned and degreased. Before installation, it is recommended to warm up the seal for a couple of minutes at a temperature of 40 - 50 degrees. This is done to give it elasticity. Then, in an area of 5 - 7 cm, peel off the protective tape and fix the seal to the upper edge of the door flange. Then, removing the protective tape in areas of 5 - 10 cm, glue it along its entire length, avoiding stretching the material.
Sometimes, for better insulation, the rear part of the tailgate is also modified. To do this, use a universal D-shaped seal. Size 14x12 mm.
How to close the doors without an alarm - the battery is dead
There are situations when you cannot lock the car using the key fob. Often, this happens when the battery in it is low or the battery of the car itself is low. Naturally, in this case, the central locking will not work. Therefore, you will have to close the doors using the ignition key. For this purpose, the manufacturer provides some design features in their locks.
All doors, except the driver's door, have a groove with a lock button in the locks. The ignition key must be inserted into this groove and pressed down. The button should go down. Then the door is slammed, and it should already remain closed. Such actions will have to be repeated with each door except the driver's, which is closed last simply with a key. The lock on it is located to the right of the handle and is covered with a cap, which must be pryed off and removed.
Help: The same caps are also on the handles of other doors. But they cannot serve to close them. They are used when you need to open the car from the outside using just a key, without a key fob.
You can use the lock button. To do this, press it for a few seconds with the driver's door open. After clicking, the three doors will close back and forth. The lock indicator should be on. Then the driver's door is locked with the key.
Disassembly/assembly
Left door:
Remove trim 2, Figure 3-2, by pulling the upper corner away from the door, overcoming the resistance of the plastic holder. Unscrew the screws 4, self-tapping screws for the lower fastening of the upholstery 1 (replaceable Torx T20 head, knob).
Figure 3-2 – Fastening the left front door trim of the Lada Vesta Cross: 1 – door trim; 2 – inner lining of the exterior mirror; 3 – left front door trim handle; 4 – screws for the lower fastening of the door trim; 5 – handle fastening screw; 6 – screw for the upper fastening of the door trim; 7 – plug.
Unscrew the plug 7 and unscrew the self-tapping screw 6 for the upper fastening of the upholstery (flat screwdriver, replaceable Torx T20 head, wrench). Unscrew the self-tapping screw 5 securing door handle 3 (replaceable Torx T20 head, knob). Remove the handle from the door trim by pulling its edge away from the door to overcome the forces of the mounting clips. Disconnect the connectors 3, Figure 3-3, of the wiring harness from the driver's door module 4. Unscrew screw 2 of the middle fastening of the upholstery (replaceable head Torx T30, knob).
Figure 3-3 – Fastening the left front door trim of the Lada Vesta Cross: 1 – front left door trim; 2 – screw for the middle fastening of the upholstery; 3 – door wiring harness blocks; 4 – driver’s door module; 5 – left front door trim handle.
Overcoming the resistance of the holders, disconnect the trim 1 from the door (flat-head screwdriver).
Door right:
Remove trim 1, Figure 3-4, by pulling the upper corner away from the door, overcoming the resistance of the plastic holder.
Figure 3-4 – Fastening the right front door trim of the Lada Vesta Cross: 1 – inner trim of the exterior mirror; 2 – right front door trim; 3 – trim of the front right door trim handle; 4 – door handle fastening screws; 5 – plug; 6 – screw for the upper fastening of the door trim; 7 – screws for the lower fastening of the door trim; 8 – power window switch.
Unscrew screws 7, self-tapping screws for the lower fastening of the upholstery 2 (replaceable Torx T20 head, knob). Unscrew the plug 5 and unscrew the self-tapping screw 6 for the upper fastening of the upholstery (flat screwdriver, replaceable Torx T20 head, wrench). Remove the decorative plug 3 and unscrew the screws 4 securing the door trim handle, remove the handle. Overcoming the resistance of the holders, disconnect the trim 1 from the door (flat-head screwdriver). Disconnect the door wiring harness connector from the power window switch. Disconnect terminal 3, Figure 3-5, of the door wiring harness from the outside mirror. Unscrew screws 2 securing the exterior mirror to door 1, remove the mirror (replaceable Torx T20 head, knob).
Figure 3-5 – Mounting the exterior mirror of Lada Vesta Cross: 1 – front door; 2 – mirror mounting screws; 3 – door wiring harness block.
Move the edge of the outer 1, Figure 3-6, horizontal seal of the sliding window away from the door 3, so that the seal retainer 2 comes out of the hole in the door panel, then pull up to remove the seal from the door panel (flat-head screwdriver).
Figure 3-6 – Lada Vesta Cross door seals: 1 – outer horizontal door seal; 2 – retainer of the outer seal; 3 – front door; 4 – internal horizontal seal of the door sliding glass; 5 – upper door glass seal; 6 – sliding window door frame seal.
Remove the inner 4 horizontal and upper 5 seals of the sliding glass (flat-head screwdriver). Remove the seal 6 of the sliding window door frame (using a flat-head screwdriver). Turn 90° and remove holder 1, Figure 3-7, from the door panel, for the upper trim fastening screw. Unscrew screws 8 and remove the inner door lock handle, disconnecting the lock drive cable 3 from it (replaceable Torx T30 head, knob).
Figure 3-7 – Lada Vesta Cross door fittings: 1 – holder for the upholstery fastening screw; 2 – nuts for fastening the window lifter guides; 3 – cable of the internal handle of the door lock drive; 4, 7 – glass clamp bolts; 5 – nuts for fastening the window regulator; 6 – door trim handle bracket; 8 – screws for securing the internal lock handle; 9 – wiring harness seal; 10 – door wiring harness; 11 – rivets for fastening the loudspeaker.
Temporarily connect the power window control unit, connect the negative terminal to the battery, lift the glass until the glass fastening clamps appear in the door panel openings.
Loosen the tightening of bolts 4 and 7 of the glass clamps and remove the glass from the door cavity. Unscrew the four nuts 2 securing the window lifter guides (replaceable head 10, knob). Unscrew the three nuts 5 securing the window lifter electric motor, remove the window lifter from the door cavity, disconnect the wiring harness block 10 from the electric motor (replaceable head 10, knob). Unscrew the screws securing bracket 6 of the door trim handle, remove the bracket (replaceable Torx T30 head, knob). Disconnect the wiring harness block from the loudspeaker, drill out three rivets 11 securing the loudspeaker, remove the loudspeaker (drill, 5 mm drill bit). Disconnect the door wiring harness block from the door lock, the wiring harness attachment points from the door panel, remove the wiring harness seal 9 from the hole in the door panel (flat-head screwdriver). Disconnect block 2, Figure 3-8, of the rear wiring harness from block 3 of the door wiring harness. Unscrew screws 1 securing the door wiring harness block to the door panel, remove the harness from the door cavity (replaceable Torx T20 head, wrench). Unscrew screw 4 securing the door limiter 6 to the front pillar of the body (replaceable Torx T40 head, knob). Unscrew the nuts 5 securing the door stop to the door panel, remove the stop (replaceable head 10, knob).
The door does not open from the inside - what to do?
If the handle does not open from the inside, you must first check the locking system. looking at its indicator.
If everything opens normally from the outside, but it cannot be opened from the inside, then check the position of the “child lock” lever. This mechanism is designed to prevent children sitting in the rear seats from opening the door. Moreover, this does not depend on whether the car is moving or not. The door opens from the outside without any problems.
To disable the child lock, you need to find its lever, located next to the main locking mechanism. To unlock it, it must be moved to another position. Each door handle has its own lock; to fully unlock it, you need to disable the mechanism on each specific door. It cannot be disabled if the lock is enabled and the battery is discharged or disconnected.
How to repair
You can choose from several options:
- At a service station. It’s best to have one specialized in the brand of your car.
- From a “good specialist” on the advice of friends or by advertisement.
- With my own hands.
As you consider your choice, keep in mind that:
A service station is a specialized enterprise. A good body repair station has the appropriate equipment, personnel, and service. Once you have completed the troubleshooting for repairs, you will be informed of the amount you will have to pay. This is where the moment of decision comes - to agree or not? It's up to you, but don't forget that such work may be worth the money.
“A good specialist” is also an option. Find out how well he has already done work for someone else. Talk to this person about the problems when repairing doors and how they perform in operation. Take the time to look at the equipment of the workshop where the work will probably be done. The lack of necessary equipment, clutter and uncleaned dirt are signs that do not speak in favor of choosing repairs here.
Replacing a window regulator and mirror on a car door
With my own hands. If you are a skilled motorist, a good mechanic, welder, painter, have a set of tools, equipment, skills and desire, then this type of repair is your choice. However, notice how much you need to be able to, have and know! There may be savings, but the quality depends only on you.
