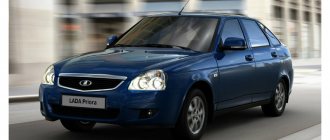
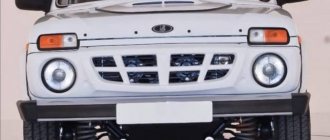
There are many benefits to tinting your car windows and headlights. But dimming becomes effective only when the percentage of light transmission is very small. Tinting has its drawbacks, so before you decide on a little tuning, you should weigh the pros and cons. Although what is there to think about? Did you see a car that wasn’t darkened today? Only for grandfathers. Without tinting, Priora looks like an aquarium. But the tinted Lada Priora, especially the black one, is a completely different matter. White Priora, in my opinion, does not look so beautiful, but tinting is needed with any color. Read the article to the end and find out the pros and cons of darkening glass, how it is allowed to be done according to GOST, types of film and what tools are needed for the job.
Some of the benefits of car window tinting include:
- the air inside the car in hot weather does not heat up to too high a temperature;
- The brightness of the picture decreases, the eyes do not get tired of sunlight;
- interior elements do not fade;
- tinting will keep glass fragments together in the event of an accident;
- the oncoming car will not be able to dazzle with its headlights on;
- no need to think about passers-by or other drivers looking at your car;
- forgotten things will be hidden from the eyes of thieves, who will not be able to see anything;
- The air conditioner won’t have to be turned on at maximum power, so you won’t catch a cold.
There are two significant disadvantages:
- Problems with traffic police inspectors who will measure light transmittance, even if the tinting is normal and the driver has nothing to fear - constant attention on their part is tiring.
- It is quite difficult to navigate in the dark, especially when reversing.
But for many owners, tinted windows have become a permanent attribute of their favorite car, which is updated time after time after its service life has expired, because without tinted windows it becomes completely uncomfortable. However, you should approach the issue carefully so as not to experience frequent problems with traffic police inspectors.
How can you tint a car according to GOST
GOST precisely defines the maximum coefficient of light transmittance of a car, with which it will be possible to pass a technical inspection, as well as drive the car itself. The standard clearly divides all car windows into two types:
- The first type is the front ones, through which the driver receives the main view.
- The second type is the rear ones, which make the rear view accessible to the driver.
The restrictions on the percentage of tinting are as follows:
- wind - up to 25% (more than 75% light transmission);
- the tinting strip on the windshield can be of any degree of light transmission, but strictly up to 14 cm thick;
- driver and passenger front windows – up to 30%;
- rear windows - there are no restrictions, the darkening can be any, even continuous.
Film tinting of headlights
The process of covering headlights with film, that is, the process of tuning Priora headlights with your own hands, begins with measurements. We need to know the maximum length and width. All you need for the job is:
- sprayer with solution for applying film;
- sharp knife (stationery);
- hair dryer;
- squeegee;
- alcohol;
- thick napkins.
When choosing a film, it is better to choose an anti-gravel tint film. It is worth giving preference to a special film for tinting and protecting car optics. It is radically different from window tint material.
We cut the film according to the dimensions, taking into account allowances of at least 2 cm on each side. The correct calculation for tuning the Priora taillights will help reduce the excess consumption of material by almost half.
Removable and regular tinting on Priora: pros and cons
The main options for tinting Priora windows are removable and non-removable film. Removable material is considered quite practical due to the following advantages:
- can be installed several times;
- If a traffic police officer stops you and then forces you to remove the film under the threat of an administrative fine, you can remove it without regret. After this conversation it will be possible to stick it back;
- the degree of darkness is not inferior to conventional film;
- quick installation.
The disadvantages include the relatively high cost, as well as the fact that the adhesive film material still has a “shelf life”. After several removals, installations and due to exposure to sunlight, it becomes deformed, light transmission will improve. You'll have to buy new film. It will have to be removed very often, because it is quite thick, and therefore does not fit GOST.
As for removable film, the only advantage we can name is the low price of the pieces. It will take a relatively long time to glue it, because it won’t be possible to re-glue it. If the inspector forces you to remove it, you will have to go specially for a new roll, or wait for delivery.
Removable tinting on a Priora is a long-term investment. It’s worth spending a large amount just once so you don’t have to think about finding tinting rolls for quite a long time. And you can devote your free minutes to other improvements to any car.
Installation of LEDs and overlays
A fairly simple way to transform your Priora is to buy ready-made “eyelashes” in specialized tuning stores. However, it will be much cheaper to make them yourself. To do this, just take tubes or a piece of plastic (an alternative is vinyl film) and cut them into thin lines with a stationery knife. You can curl future “eyelashes” with your own hands using a hair dryer and soap solution. They are then attached to the car body using double-sided tape, glue or sealant.
Some drivers believe that “angel eyes” tuning looks much more impressive and useful in poor lighting conditions of Russian roads. It involves attaching LEDs to the headlights or taillights.
The optics are painted glossy black, “angel eyes” are installed on the Priora.
For such a DIY upgrade you will need:
- disassemble the front or rear headlight, having previously dismantled the element;
- stick masking tape on the outer part of the glass of the optics, which will prevent it from being damaged;
- bend the plastic sides (brackets) of the optics, under which the reflector is located;
- heat the sealed adhesive with which the glass is fixed in the headlight using a household or construction hair dryer and remove the glass;
- remove the reflectors using a Phillips screwdriver. Don’t forget to cover the turn signal lens with tape for protection;
- Apply several layers of black paint to the reflector. This, combined with bright LEDs, will provide a greater tuning effect. Let the paint dry;
- take an LED strip with a cross section of 2.6 mm. Remove the reflector's metallic backing, bend the tape into a circle and attach it using fasteners or glue;
- After the glue has dried (about 2 hours), reassemble the headlight or lantern. Don't forget to re-apply the sealant to the glass.
How to tint a car: materials and tools
Based on your experience of how terrible the scratches on car windows look, you'll have to spend a little time finding the tools for the job. Before tinting a Lada Priora car, collect the following tools:
- spatula (it is better to find a soft or hard rubber one. A plastic one will leave “knots” on the film itself, and can also reach the glass, where it will leave white scratches);
- shampoo (you can use any shampoo, but ordinary clean water will be enough to install the removable film);
- knife (useful for cutting off excess part of the roll);
- blade;
- ruler (longer than the length of the glass surface that you are going to cover with tint);
- two rags.
Before gluing the film, you should remove the velvet covers; for ease of work, you can disassemble the door card - this must be done to drive the tint deeper. If it almost “sticks out”, its edges will be touched by moving parts, and then it will gradually begin to peel off. The procedure for tinting a Lada Priora is as follows:
- Wash the glass thoroughly to remove grease and dust.
- Wipe it off with a clean, dry cloth without pressing it with your hand, and then carefully run the blade around, brushing away any remaining drips.
- Gradually remove the protective films and spray them with water to keep the coating moist.
- Carefully check that the correct side is facing the glass surface. Once you have covered the entire area, take a spatula. “Drive out” the water with progressive movements from the center. Wipe the film with a rag.
- Use a knife to cut off most of the remaining roll. Leave the tinted glass for several hours, and only after that finally adjust the length of the coating by cutting off the excess with a knife.
Types of film
A modern car can be decorated using the following types of tint films:
- Colored. Can almost completely match the body color. It is glued in layers: the more there are, the less light transmission.
- Metallized. It is similar to a gradient, and the metal layer can be on the outside or inside. Such a surface easily reflects the sun's rays, but can reduce the quality of mobile communications because it interferes with the free transmission of radio signals.
- Infiniti. The outer part is coated with a layer of metal and also gets the best reviews. Does not reflect light well. The “picture” from the interior turns out to be quite pleasant and clear.
- Combined. This is a colored film coated with a layer of metal. The gradient with the transition from one color to another is more pronounced, and the film itself is quite practical. The dark part does not allow light to pass through, and the light part creates an overview.
- Spatternaya. This type is subject to little wear and tear, which is why marketers often describe it as “durable.” The cost of the material is high, but it looks very decent.
- Spatter-metallized. Another “hybrid” that gives a premium touch.
- Athermal blocks up to 90% of ultraviolet and infrared rays. This is achieved due to the peculiarity of the material - its outer layer is covered with nanoceramics.
- The “Chameleon” glass tinting for a Priora car has a purple tint, which will be combined with other colors when the temperature changes.
- Anti-vandal. They will hold the glass in place if it breaks.
- Carbon. Provides both strength and tinting of glass.
Adjusting headlights using a corrector
You can make adjustments without disassembling the head optics. On the back of the headlight you will find adjustment screws that can be used to lower and raise the light beam. To set it up, you will need to place the Lada Priora on a flat surface opposite a wall or garage - the distance from the headlights to the wall should be 5 meters. Also check whether the corrector is working or not. It is recommended that a person of similar build sit in the driver's seat during the inspection.
The Priora corrector should be set to “0” - only the driver is present in the car. Under the hood you will find the adjustment bolts. While the corrector is working, the second headlight must be covered with thick cloth. The adjustment can be considered complete if lines “A” and “B” pass through the intersection of the inclined and horizontal beams of light, and the upper limit of the light coincides with line “2”.
Tinting the rear dimensions of a Priora car
Tinting the Priora's taillights is bad because the car following you may not see the brake lights, and therefore will not have time to brake. But such tuning looks strict and impressive, done with varnish or film.
Varnish
Varnish or, as it is otherwise called “paint,” is applied in two layers. First, the dimensions are wiped well, cleaned of dust and grease. Only after this can you apply the first layer, holding the can 30 cm from the lantern. After two hours the next layer can be applied. Repeat the action until you reach the desired shade.
What is needed for tinting
To tint rear lights with film you will need a certain set of materials and devices. Without them, you should not start work, as you will not be able to achieve a good result. The most commonly used is the following:
- Film for tinting. It is better to buy a special version suitable for headlights.
- Microfiber cloth or any other lint-free cloth. It is important that even small fibers do not remain on the surface, as they will worsen the gluing result.
- Degreasing composition . This can be either a special version or alcohol or compositions based on it. Some types of solvents can be used, but they should be used with caution; some will dull the glass.
- Construction hair dryer . Allows you to warm up the film and improve its fit in difficult areas. Instead, you can use fairly powerful household options with a narrow diffuser, which also heat the surface well.
- Construction or stationery knife for neat and precise cutting.
- Rubber spatula . Special small-sized options that do not damage the film are best suited. Most often they are sold in the same place where the tint film is sold.
High-quality film ensures perfect results.