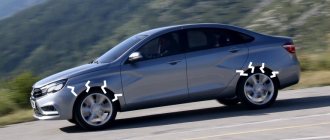
It happens that in a new, great-looking car, an unpleasant squeak is suddenly heard during a variety of movements. The sound is such that both other motorists and pedestrians will pay attention to your car. What is this and how to deal with this situation?
In reality, there is nothing irreparable in the squeak, since it is just a high-frequency vibration. And vibrations, as we know, almost constantly accompany the operation of mechanisms. Undoubtedly, machine designers are constantly taking effective measures by designing all connections in such a way that they function slowly and smoothly. In our situation, it is imperative to solve the problem with squeaking and for the reason that it is often an indicator of an unexpected position of parts and assemblies. The same problem applies to Lada Vesta cars.
Steering creaking in Lada Vesta
Creaks when turning, both on the spot and during a trip, can have different causes:
Steering column
A creaking steering column is easy to spot. The sound will be shallow, and at the same time you will often feel impacts on the steering wheel and shaking. It may squeak due to problems with certain parts, as well as due to insufficient lubrication. In addition, it is necessary to check the steering couplings and other elements of the steering column. All you need to do is replace the column.
Steering rack
The cause of a squeak when turning the steering wheel may be a defect in the steering rack. This includes damage to the anthers, leaking seals, wear of rack parts, and other violations. For example, a squeak may occur due to dynamic contact with steering rods. And if there is a serious accident or other road problems, the rack body may become distorted. It can cause squeaking if the car's steering wheel rotates. The steering rack, as a complex mechanism, should only be repaired by specialists.
Stabilizer bushings creaking
Not so long ago, the creaking of stabilizer bushings on the Lada Vesta was considered one of the most common problems: 9 or even 10 car owners will complain about boring sounds when driving on uneven surfaces. Replacing domestic bushings, similar ones from other brands were used, polyurethane replaced rubber, “non-native” rubber bands were trimmed and completed locally. Often this worked for a certain time, but after several thousand kilometers traveled, the sound was often made again.
The noise was caused by a small amount of lubricant and the low quality of the bushings themselves. Official dealers had the opportunity to lubricate or replace parts under warranty, but this, most often, gave short results. But both dealers and manufacturers claim that the solution has already been found: the composition of the bushing material has improved, and squeaking can already be eliminated on new machines.
Loose wheel bolts
For various reasons, personal carelessness, including insufficient tightening of bolts, contributes to the appearance of extraneous sound. If you detect an uncharacteristic sound, check the tightening of the bolts yourself. If you do not have a wheel wrench, contact a service station for help.
After tightening, be sure to check that the wheel does not knock and make sure that the cause has been eliminated.
We do not recommend doing your own repairs while the machine is under warranty. Otherwise, it may be classified as a breach of contract by the consumer. It is not uncommon for a factory warranty to be voided prematurely.
Brakes squeak
When the brakes squeak, the brake pads squeak. Experienced drivers and car service workers claim that the brakes squeak only partially due to the quality level of the pads. Let's find out all the reasons for squeaking brakes and how to eliminate the defect.
Low quality pads
If a squeak is heard during braking, and the pads were recently replaced with new ones, then their quality level does not coincide with the norm. During friction with the disk, they fall off and are covered with dust. In this situation, it is permissible to say that the material of the pads does not harmonize very well with the material of the brake discs.
Pads are made from various friction materials. The layer that participates in friction has absorbed such shavings from metals: steel, copper and brass. These elements contribute to the occurrence of this unpleasant squeaking noise when the car is braking.
As a rule, it disappears if the pads are replaced with high quality products. It is unacceptable to state with certainty that the sound in the form of a squeak is the source of defective friction linings. They are only different in composition from drums or discs. Such pads must be replaced with high-quality ones.
Lapping the pads
Occasionally, even new pads may make a squeaking sound when the car is braking, but after a certain time the squeaking may disappear. After driving a little, the squeak will disappear. This is the pads grinding in. The reason is a thin layer of different elements on the surface of the pads that forms during their production. This appears during a process failure.
Brake lining wear
There can be two reasons for brake lining wear:
- The linings became completely worn out, and friction between the disc and the metal of the brake pad occurred.
- The lining wear sensor is attached incorrectly. After installing new bars and driving the car for a short time, a creaking noise begins to occur during braking.
All of the above is the result of low quality spare parts. Buy spare parts from reliable stores of well-known brands.
Brake system defects
It is also possible to consider vibrations of the pads as the suspected cause of the whistling noise. These are minor fluctuations that appear due to defects in other elements.
The main malfunctions that cause squealing brakes:
- a shoulder appeared along the outer diameter of the disk;
- the caliper jams during braking - the guide is not lubricated, the caliper piston moves poorly;
- the friction linings fall off and the caliper becomes covered with dust, which jams;
- The caliper guide bushings have become rusty due to corrosion.
Other causes of squeaking
The drum brakes also occasionally squeak. Rear brakes are usually drum brakes. When creaking occurs in this design, the reasons are the same as in the disk design. But there are also differences due to the qualities of the adaptation.
If the disk system linings are very dusty, then in this situation the dust is removed outside and is not on the surface of the linings. And in the case of a drum structure, dust falls off inside the drum and parts. If you clean the elements from dust, the squeaking of the brakes will disappear.
Creaking of handles, door trims and door seals
Even if your car is new and under warranty, contacting an official dealer most often does not yield any results. For this reason, you will need to solve this problem yourself. If you notice that you hear a squeaking sound from your car doors while driving on an uneven road, you need to think about eliminating it. The noise emitted from the door cards inside the car can be created simultaneously by the passenger door handles (this does not apply to the door handles) and the decorative door trims.
Door handles and doors themselves
First of all, you need to determine which specific element is creaking. If door handles do this, you need to purchase madeleine and a set of plastic spatulas that remove the trim. Madeline is a special material. It is often used at the junction of elements to eliminate the likelihood of friction against each other. You can purchase it at all automobile stores.
The door handle linings are retained with latches and do not have an additional holding device. For this reason, they are removed using careful bending of the element. It is advisable to do this using plastic spatulas. They will not cause damage to the element and its fasteners. After removing the door handle trim, it is necessary to glue the place where it touches the door card with Madeleine.
In addition, it is possible to get rid of squeaks by using material created by the spunbond method. In this situation, a piece should be cut out of the material with a shape slightly larger than the problematic element. Then the spunbond is placed between two fastened elements. After installing the element on top of the material, the remaining material must be trimmed using a stationery knife for this purpose. To ensure that the material is not visually noticeable in the opening between the elements, it is tucked inside using thin objects such as a toothpick, screwdriver or plastic spatula.
Creaking sounds coming from the doors can occur not only due to door handle linings, but also due to decorative bezels. In this situation, eliminating the squeak will be more difficult. This is explained by the fact that these linings have one negative quality: the fasteners on them will not snap back into place.
Removing the decorative trims is just as easy as removing the door handle trim. After they are removed, you need to glue the place where the two elements touch. Difficulties may arise when trying to return the pads to their original places, their latches do not turn on. As a result, you will need to completely remove the door card.
If, as a result of the inspection, it was discovered that after removing the door panels and gluing all joints with carpet or madeleine, the creaking sound will remain, you should check whether the door seals are creaking. If you turn them out a little, you will notice small round holes every 20 centimeters. As it turned out, it is necessary to pour lubricant specifically into these holes, and in this case the creaking will stop sounding.
It is quite possible that in dry weather dust accumulates over time, which is why the creaking begins. Classic silicone grease will be useful for the job. In addition, in rare cases situations arise when the door lock makes a creaking sound. In this situation, it is also advisable to lubricate it.
Panels creak
One of the most important and popular problems with the Lada Vesta car is its dashboard, and more precisely, the squeaking noise it creates. Creaking may appear already in the first months of using the machine. You can get rid of this problem by eliminating dashboard creaks with your own hands.
To do this, you will need specialized madeleine material. Often it is sold ready-made in the form of a meter tape. Its thickness is 1 mm. For convenience, one of its sides was coated with special glue. This material is sold in all stores selling car accessories.
To eliminate dashboard creaks, first of all, you will need to disassemble it. This is easy to do and will not require you to waste a lot of time. First, unscrew the two Torx bolts. It is thanks to them that the panel wells do not leave their correct place.
Then the wells will be secured using latches installed on the inside. To unhook them, you just need to carefully move the wells by their bottom.
The dashboard itself is also attached thanks to two Torx bolts located along its edges. After removing the fasteners, you only need to separate the cable that powers your dashboard. After this, you will see a completely empty area where the panel was previously located. This is where you have work to do.
It is noticeable even to a non-professional that all the mounting points and the wells themselves are generally made of low-quality plastic. Actually, thanks to this plastic, creaking occurs in the dashboard, and to eliminate it, it is necessary to reduce the contact between these plastic elements. You can solve this problem using the previously described tape. Cut it into small pieces. Its length is 3-4 cm. Then paste it over all permissible places of contact of the plastic.
Glovebox creaks
Unusual unpleasant sounds, namely creaking, may occur in the glove compartment of a Lada Vesta car. This may be caused by duct problems. It is attached to the glove compartment in the lower part on one side.
Eliminating problems in the glove compartment design is not at all difficult. The air duct is attached to the glove compartment using two bolts. You just need to disconnect the glove compartment and the air vent from each other. First you need to remove the bolts. The air duct removed from the glove compartment must be turned over, since this side of the air comes into contact with the glove compartment and causes a squeak. To prevent this from happening, you need to buy an anti-creak. It is a material with special qualities. When installing the glove compartment in the place required by the state, you need to take special care. A slight shift of the glove compartment from its normal location can cause problems with the flow of air into the cabin. The latch, located directly in the glove compartment, must fit onto the mount. Next you will need to install the bolts and side panel hook.
Clutch actuator creaking
The Lada Vesta robotic gearbox has two actuators in its design: shift and clutch. In general, there are no difficulties with the first mechanism, but the second one causes a lot of trouble for most car owners. This is explained by the fact that after some time it creaks. This problem can be solved by an authorized dealer. If the car's warranty has already expired, you will need to pay for the spare part. But in addition, car owners can replace the unit by repairing an old copy. It should be borne in mind that it is unlikely that it will be possible to complete the repair. This is due to the fact that the company producing actuators that are installed on Lada Vesta cars does not supply repair kits for their own products, and the appropriate types do not exist at all.
How to remove the clutch actuator with your own hands
Dismantling work is done in the engine compartment. To get an approach to mounting the clutch actuator, first of all, you need to remove the air filter. To do this, it is necessary to separate the pipes from the filter housing and unscrew the two mounting bolts. Then take the air filter aside. Once the filter housing is removed, you should begin directly dismantling the clutch actuator. To do this, you need to unscrew the mounting bolt of the wire block.
Now we are unscrewing the three bolts securing the actuator unit. Then we remove the clutch actuator by pulling it up. In this case, you must first disconnect the cable block.
When unwinding the assembly body at this stage there are usually no problems. When disassembling them, it is necessary to carefully inspect the working surfaces of the actuator for possible defects. If this is necessary, the white compensator must be removed.
The plastic actuator parts are the weak point of the mechanism. This is due to the fact that they operate at high temperatures, and the lubricant gradually evaporates. As a result of this, an increase in load is observed, the plastic cannot cope with this and cracks appear on it. The result of the mechanism's operation, the appearance of creaks, is observed. To correct the situation, you can lubricate the actuator. This will significantly increase the service life, and in addition, squeaks will be eliminated. It is not necessary to completely lubricate the entire actuator mechanism. Pay attention to its working surfaces. First of all, this is the internal hinge, the white compensator and the spring.
Recommendations from repairmen
Reliability and long service life of the suspension are among the priority characteristics of the car. Even at the design stage, engineers set the task of developing a suspension that would be maximally adapted for domestic roads.
The result turned out well; the design even caused delight and surprise among some car enthusiasts. The average resource of suspension elements exceeds 100,000 km. Despite a number of positive aspects, there is always a fly in the ointment.
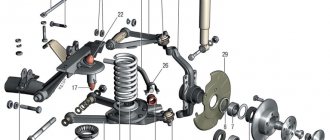
The rear and front suspension are components that cannot be repaired, they need to be monitored. The suspension of a Lada Vesta car is almost the first parameter after the engine by which a car is selected. Its design is simple, maximally adjusted for broken roads. But it also happens that the front suspension of the car rattles, creaks and knocks - the reason for this is either wear of parts or defective parts.
Read the article below on how to diagnose and solve suspension problems. With careful driving, the Lada Vesta car has a service life of 90,000 km. For daily trips, it is not permissible to take a low car, because its advantages will be destroyed by snow-covered courtyards and potholes on the roads. These units must be strong to withstand long-term use.
The design of the new suspension, which is included in the design of the Lada Vesta, is strikingly different from previous generations. The front chassis has become more complex and soft. This does not mean that a speed bump can be passed at high speed - driving at normal speed will be smoother, because the mechanism “absorbs” some of the vibrations. Read the article to the end and find out why knocking occurs in the front suspension
The chassis is the link between the wheels and the body. The wheels take all the impacts - from speed bumps, holes, potholes, curbs, and other irregularities that are on the way. The task of the mechanism is to soften the blow, reduce the rolling amplitude, while maintaining the integrity and functionality of the internal traces and assemblies - if they hit each other, this will lead to their unsuitability.
The more advanced representatives of the family's model range also distinguished themselves - the rear suspension of the Lada Vesta SV Cross is stronger than that of the standard version, it can withstand heavier loads, which allows it to carry more luggage.
Suspension creaks
Front suspension creaking
If the front suspension creaks, you should seek help from a service station specialist. Our technicians will determine the cause of the breakdown as accurately as possible. Self-identification does not always give the expected result, due to the lack of special equipment.
Remember that play in the chassis of the car can also be taken as a violation in the suspension. Carry out thorough diagnostics and take a joint approach to finding out the cause of the malfunction.
Rear suspension creaking
When identifying a breakdown, distinguish between knocking (dull) and creaking, rubber friction. One of the most vulnerable areas of the rear suspension is the upper shock absorber mount. There is a gap between the body and the mount. As a result, on uneven surfaces the rod hits the metal surface. This defect is common to all Lada Vesta car models. This is a factory design.
To eliminate knocking, it is necessary to place an asbestos or rubber gasket between the body mount and the upper support.
In addition, creaking may occur due to:
- poorly tightened discs that squeak at speed;
- cargo, equipment, suitcase with tools located in the trunk;
- metal cable of the parking brake lever;
- trunk lid dampers;
- locks of the rear sofa, seat backs.
Problem with stabilizer links
The problem with squeaks in the front suspension can be solved by replacing the stabilizer bushings with polyurethane.
What else could be wrong with stabilizers? The design has a strut that is attached to the shock absorber body and the cross member of the stabilizer itself. It has two fingers as fastening. Without diagnostics at a service station, it will not be easy to figure out whether there is a breakdown in this unit, but you can try.
Dealers replace stabilizer links free of charge. But sometimes you have to butt heads!
The problem with the struts is not far-fetched, since in April 2021, official representatives of AvtoVAZ reported that they knew that after just a few thousand kilometers Vesta was already detecting knocking and creaking noises from this particular unit. This important element experiences special stress and wears out prematurely.
Replacement of squeaking elements at the dealer should be free of charge. All questions can be resolved by calling the hotline!
However, all car owners who complain about the performance of the struts during the warranty period will have them completely replaced at the dealership free of charge.
So, if the warranty has expired, you will have to try to solve the problem yourself. The replacement process is simple. After inspecting the removed parts, you can decide whether to replace the entire mechanism or limit yourself to a repair kit.
The first sign of “fatigue” of the stabilizer sealing bushings is a dull knock when overcoming a speed bump. Even in Lada Vesta, the manufacturer saves on materials and uses the cheapest ones. As a result, the service life of the bushings is short; creaking of the Lada Vesta suspension appears after several tens of thousands of mileage.
Other signs of bushing wear:
- knocking in the area of the front axle when the car rolls;
- beating in the steering wheel at speeds over 60 km/h;
- play in the steering wheel when maneuvering;
- arbitrary deviation of the machine from a given course. Car enthusiasts say that it “takes away” to the side.
The final conclusion will be given by a mechanic after conducting a comprehensive diagnosis.
Catalog number - 8450006748, cost of original spare parts - from 350 rubles/piece. As an alternative, use polyurethane bushings from Chevrolet Niva (17012680).
- TORX 40 wrench, heads “13” and “16”;
- knob;
- extension wrench;
- torque wrench;
- new bushings, preferably polyurethane ones, as they have a longer service life.
- We hang the front part of the car with a jack and use a hydraulic lifting mechanism.
- Unscrew the steering gear casing (head at “10”).
- We unscrew the steel brackets that secure the rubber bushings (the key is set to “13”).
- Unscrew the front bolts (T40 key) and remove the bushings.
- We insert new ones and assemble the structure in reverse order.
Tighten the bolts with a force of 2.0 kgf/m.
Catalog number of the original stands (bones) - 8450006750, length - 283 mm. Due to poor-quality road surfaces, pins (hinges) often fail prematurely.
Replacing the “bones” yourself is not at all difficult if you follow the instructions for using the technical device.
- wrench 16, 19, Torx 30;
- a set of new “bones”.
- Jack up the car and remove the wheel on the right.
- Unscrew the upper and lower fastenings of the “bone”.
- We insert a new one, tighten the nuts, and screw the wheel.
- By analogy, we repair on the left.
Driver's seat creaking
To prevent the driver's seat from squeaking, remove it and coat all areas of permissible friction with silicone lubricant. If your car has airbags, you must disconnect the battery before disassembling the seat.
Pay special attention to areas where paint has been removed and where there are abrasions. In the process of processing the seat lift mechanism, it is necessary to raise and lower the microlift. This is done to penetrate the lubricant into hidden areas.
Often the cause of a squeak is the fastening of the seat belt buckle, located on the right side of the driver's seat. However, most drivers first believe that the creaking comes from the seat itself. You can check this by holding the lock with your hand while traveling. If it turns out that this is the case, the creaking should stop. To solve the problem, you need to move the chair as far back or forward as possible in order to make it easier to get to the fastening, and spray lubricant on the area connecting the plate where the lock is located with the base of the chair.
It often happens that the chair makes a squeaking sound when it is in only one position and a slight movement back and forth or up and down will eliminate this problem.
Knocks, crunching in the rear suspension
Photo rear beam
At the initial stage of wear, the noise is practically inaudible. The appearance of extraneous sound in the cabin is a sign of moderate wear.
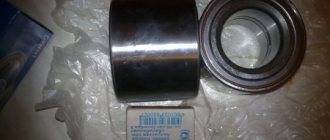
To verify that the bearing is faulty, it is enough to drive onto an open highway and accelerate to 50 km/h. Gradually rotate the steering wheel left and right. When turning to the left, the right bearing is worn out, and when turning to the right, the left bearing is worn out.
It often happens that a hum or rumble is heard on both sides, then the left and right bearings must be replaced, respectively.

