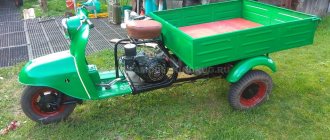
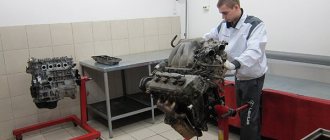
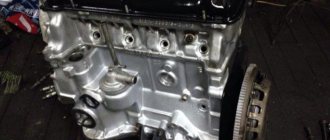
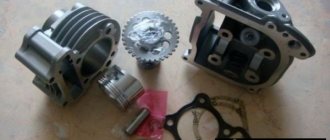
Photo report: Motor scooter engine repair “Ant”
In the article: Disassembling the engine of the Ant scooter, the process of completely disassembling the TMZ engine was shown in detail, after which all parts were carefully inspected and checked for acceptable wear and damage.
All the oil seals and bearings of the engine did not pass the test for suitability for further operation, the cylinder - it had to be bored to a repair size, the motor chain, and the first gear gear - due to wear on the bushing, and some other small things. Not so much if you take into account the age and “quality” of service of our “ant”...
We managed to buy all the worn-out parts without any problems, so all that was left was to collect all this “Soviet junk” to the heap. What exactly are we going to do today?
Before assembly, all planes and parts of the engine are thoroughly washed and cleaned of dirt, oil and remnants of old gaskets and sealant. We pay special attention to the condition of the crankcase and threaded connections, the main work on repairing the crankcase is described in detail in the article: Repairing the crankcase of a scooter engine, we prepare ourselves a clean workplace, and proceed to a very interesting and exciting activity...
We lay the right half of the engine on the blocks, clean and blow out the oil channel (marked with an arrow), degrease the plane of the dynastarter mounting flange, lay a new gasket and be sure to cut it a little along the contour of the oil channel in the place where it is marked with an arrow.
It is not advisable to apply sealant to this connector, since there is a danger that the sealant will get into the oil channel and cut off the oil supply to the oil seal and the crankshaft main bearing. What this leads to is written in the article: Repair of the dynastarter of the Ant scooter
We install a new oil seal in the dynastarter stator mounting flange, degrease the surface, apply “blue” thread locker to the fastening bolts and finally tighten the bolts. The bolts must be tightened very well, as they are constantly unscrewed, which leads to serious engine damage.
We turn the half over, heat the seat of the main bearing with a heat gun and, using a mandrel, install the new main bearing (in our case) into the crankcase.
We take the other half of the crankcase, be sure to clean and blow out the oil channel (marked with an arrow), insert a retaining ring into the seat of the main bearing and, in the same way, install the second main bearing in its place.
We are looking for a sheet of metal of suitable thickness (7-8 mm), insert our sheet between the cheeks of the crankshaft and in this position, using a mandrel, press the inner race of the main bearing onto the axle.
The crankshaft of this engine was carefully checked for faults and correct geometry; the main work on diagnosing the crankshaft is described in detail in the article: Methodology for determining faults in the crankshaft of a scooter or motorcycle
Also, on this crankshaft it was necessary to replace the bushing of the upper head of the connecting rod; this work is described in more detail in the article: Replacing the connecting rod bushing of the motorcycle “Izh-Planet”, “Jupiter”, “Ant”
We insert the crankshaft into the left half of the crankcase, we carry out the final installation of the crankshaft into the crankcase using a simple device; details of the correct installation of the crankshaft into the crankcase can be found in the article: Repairing the Voskhod-ZM motorcycle engine, not with a sledgehammer. As they often like to do on “collective farms”...
After the final installation of the crankshaft into the crankcase, we assemble the gearbox in the correct order, how to assemble the gearbox is written in the article: Repair and assembly of the gearbox (box) of the Ant scooter,
We lay the crankcase half with the assembled gearbox on planks so that the shafts hang freely in the air and do not interfere with work, degrease the crankcase planes, install the guide bushings (marked with arrows) in their places so that they extend slightly above the crankcase plane (5-6 mm) , apply sealant to both halves and place a new gasket.
Lubricate the lip of the oil seal and the main bearing of the crankshaft with engine oil and place the second half of the crankcase on top.
We fill the tendril of the gearbox shaft retainer spring inside the crankcase.
Using a wooden mallet, tap the halves until they come together completely and tighten the crankcase mounting bolts.
Lubricate the main bearing and the edge of the second crankshaft oil seal with engine oil, then use a mandrel to install the oil seal in its place.
We put the locking ring in its place.
We also install the crankshaft support bearing there and secure it with the second retaining ring.
Now all that remains is to install the piston group on the engine, check and assemble the clutch parts and install the kickstarter mechanism. After which you can install the engine on the frame.
Source
Engine assembly
Unlike a dynastarter, repairing an Ant scooter engine with your own hands is difficult to do according to the operating book. Therefore, it is worth seeking the advice of experienced motorcycle owners. Most often, the engine has to be disassembled when there are problems with the clutch mechanisms, the operation of the gearbox, as well as wear on the crankshaft, bearings or oil seals. The most important rule is not to be afraid to disassemble the engine yourself. Using these instructions, disassembling and assembling the engine of the Ant scooter will not be difficult.
So, the procedure for disassembling the engine:
You can see how to assemble an Ant scooter engine in more detail in the visual video at the end of the article. The essence of assembly is in the reverse order, but it is important to tighten the parts with a certain force and synchronize the parts with the marks. Under no circumstances should you assemble an engine without detailed instructions written by the manufacturer.
With frequent breakdowns, owners think about what engine can be installed on the Ant scooter. Instead of a native motor, you can use Chinese analog motors . Since the Ant has many copies in Asian countries, replacing the engine can be a great option to save money in case of irreversible damage. True, you will have to make the fastenings yourself and, in some cases, remake the bridge for the left-hand arrangement of the chain. This is not very difficult, considering that the Tula plant provided for the possibility of rearranging the bridge.
[sc:ads5]
Removing and checking the piston (CPG)
Remove the cylinder head (cylinder head).
The cylinder head gasket held up well, as evidenced by the absence of oil leaks.
In the upper part of the cylinder opposite the exhaust window, we feel the groove with our finger. If it feels a clearly perceptible so-called “wave”, “step”, that is, a drop, then such a cylinder is no longer subject to further use. It needs to be either bored to repair size or bought a new one.
The wear can be easily felt in the place where the piston rings do not reach the end of the cylinder. In the place where the piston rings do not work, the nominal factory size is maintained, but in the place where they work, the metal wears out. That is why a transition is formed at the boundary of these two sections, which is larger the greater the wear of the cylinder.
In my case, as expected, the wear was clearly palpable and the cylinder mirror was covered in nicks and scratches.
A bunch of hay that blocked the flow of cooling air, in my opinion, did not add efficiency to the cooling system... How can you even drive like that?
The piston turned out to be burst and, moreover, according to the good old collective farm tradition, it was treated with sandpaper. As indicated by numerous risks on its surface.
After removing the clutch cover and removing the kickstarter shaft, the reason for the freezing of the winding lever was found - the return spring had burst in half.
The motor chain turned out to be stretched, but not critically.
Removing the clutch
Unbend the lock washer, insert a tin rod or stick under the tooth of the motor transmission sprocket and unscrew the nut on the crankshaft journal (right-hand thread).
Unbend the lock washer, fix the inner clutch drum with a puller, which is a clutch disc with a welded piece of tire, and unscrew the nut (left-hand thread).
We take out the discs and drum.
Remove the basket from the shaft along with the chain and sprocket.
Removing the dyno starter
We remove the cooling casing and then, if the engine is not converted to a magneto, remove the ignition breaker cam. Hold the dyno starter rotor by the fan and unscrew the nut. If you cannot hold the rotor in this way, fix the crankshaft with something and unscrew the nut.
We pull off the rotor with a puller. The rotor can be pulled off either with a standard puller or with a homemade one. Depending on the situation, I use both standard and homemade ones.
Engine assembly
Unlike a dynastarter, repairing an Ant scooter engine with your own hands is difficult to do according to the operating book. Therefore, it is worth seeking the advice of experienced motorcycle owners. Most often, the engine has to be disassembled when there are problems with the clutch mechanisms, the operation of the gearbox, as well as wear on the crankshaft, bearings or oil seals. The most important rule is not to be afraid to disassemble the engine yourself. Using these instructions, disassembling and assembling the engine of the Ant scooter will not be difficult.
Analysis of previous repair errors
We remove the flange on which the stator is mounted and carefully inspect the connector plane for interference by “drop-dead handles”.
No matter how many times I repair Ants, I come across the fact that all sorts of “drop-dead little hands” seal the oil channel through which oil flows to the crankshaft main bearing and oil seal. I'm already tired, honestly - how much can you? Why cover it up?
It doesn’t matter to me, but how do you think the bearing and oil seal should work without lubrication? Admire what happens to the main bearing when it runs dry.
We unscrew the bolts and half the crankcase.
What's the result?
The crankshaft has been taken away - to say that it is worn out is to say nothing... The gearbox bearings, like the main bearings, have gone to the same place - to the crankshaft: in the trash. The gearbox, with the exception of one fork, did not cause any complaints. By the way, the clutch too.
Now the question is: what to do with all this junk? Buy a “plasticine” crankshaft from no one’s making and mold it into the engine. I was initially against this idea. In general, we found a used engine for a ruble and removed the crankshaft from it. Of course I had to tinker with him. Since the thread was clogged, I sharpened it and straightened it with a sharpening tool.
We decided to buy everything else: CPG, cylinder head, gaskets, seals, bearings, motor chain, etc. in the store. Although, by and large, the cylinder could have been bored out and that would be enough. But the owner did not want to wait, but in vain.
Source
Quality of parts
The “quality” of parts for Soviet motorcycles that are currently on sale does not correspond to even the worst Soviet models. The Soviet one was not ideal either - believe me. The only thing there were no complaints about was the quality of the metal, but the manufacturing accuracy of Soviet manufacturers was lame and very, very bad
Rings
When purchasing new rings, insert them into the cylinder (new or after boring) and check for clearance
- If the rings fit tightly, we buy
- If the rings do not fit the mirror, try others
An example of a perfect fit of a ring to a mirror (“Ant”)
After checking for fit, we put the rings on the piston and measure the gap between the ring and the piston groove with a feeler gauge.
- If the gap is greater than 0.01-0.02 mm, try another ring
- If after several tried rings the gap is larger than expected, we try another piston
Voskhod piston with a gap clearly exceeding all conceivable standards
“Ant” piston with permissible clearance
Piston
One of the most dangerous and common problems in new pistons is the incorrect position of the ring stoppers. Customers have already brought pistons several times that had problems with the location of the stoppers
- Before purchasing a piston, use some pliers to tug on the stopper
- If the stopper is wobbly, we debug this piston and take the next one for check
Consequences of a flying stopper (“Ant”)
If the stopper fits tightly, place marks opposite the stoppers and insert the piston into the cylinder so that it does not reach the windows. Afterwards, we turn the piston so that it becomes exactly the same as in the engine. That is, the arrow is forward, and the axis of the finger is strictly along the axis of the crankshaft and look:
- If at least one risk has become opposite the windows or next to the window, we debug the piston and take another
- If there are risks between the windows, we buy
