04/27/2021 2,519 Ignition system
Author: Ivan Baranov
In modern bikes, the starter is installed “by default”, but the Ural bypassed this action. When this bike was first manufactured, this part was unique and considered a luxury, so you had to fork out the cash to afford it. Fortunately, you can install the starter on a Ural motorcycle yourself.
[Hide]
Installing a starter on a Ural motorcycle with your own hands
Equipping a motorcycle with a starter in most cases is determined by the owner’s desire for convenience and practicality, less often - by urgent need.
In some cases, for example, when the technical feature of the unit does not allow it to be equipped with a crank, installing this module is the only way out. A starter is an electromechanical device designed to start an internal combustion engine.
The device is a powerful mixed-excitation electric motor powered by direct current provided by the on-board battery.
About the starter Ural 4320
The more massive the engine, the harder it is to start it.
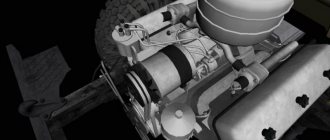
And especially, diesel engines, like in the Urals 4320. The starter for this car is quite heavy - up to 25 kg. It is a commutator DC electric motor. It contains a gear drive and a bendix to transmit rotation to the engine flywheel. The functioning of the starting device is supported by several relays: a powerful retractor, starter and blocking relay. The retractor sits directly on the starter, and the other two are separate blocks. One of the main characteristics of the Ural 4320 starter is the rotation speed. To start a diesel engine, the crankshaft needs 2-3 revolutions with an amplitude of 130 rpm. The rotational speed of the electric motor intended for the Ural 4320 is 1500 rpm. Due to the action of the drive gear, this high value is normalized and only then transmitted to the flywheel crown.
Other important characteristics:
- supply voltage of the on-board network and, accordingly, the starter - 24 V;
- device power - 6-9 kW, depending on the model;
- current consumption - 130 A (idling) and 800-1000 A (during engine startup);
- Battery capacity is not less than 190 A/h.
Due to the fact that the components of a diesel car starter are subject to heavy loads, the device can last slightly less than the engine itself. The manufacturer himself recommends replacing the starter every 5-6 years.
Choosing a starter
Before installing an electric starter on a Ural motorcycle, you should familiarize yourself with the technical parameters of the motor of this vehicle. The latest models of the two-wheeled legend are equipped with a four-stroke flat-twin engine with a displacement of 745 cm3 and a power of 40 hp.
For installation, both on the specified engine and on other creations of IMZ and KMZ, models ST-353, ST-367, ST-369 or “donor” ones from VAZ 2109, 21099, 2110 and 21011 are most often used. Their characteristic feature is rotation of the drive clockwise, widespread and low cost. This component can also be taken from foreign cars (Skoda, Mitsubishi, Toyota, etc.), but due to the relative high cost, their use is less common.
You should also pay attention to the crown of the device. If its diameter or tooth pitch differs from what we need, then this part must be modified. Its implementation is achieved by disassembling the starter and removing the axial shaft with the gear attached to it. The teeth of the latter are ground off, while the inner part remains intact. The inside diameter of a suitable gear is bored enough so that it can be pressed onto the outside of the ground part. After pressing, both components are welded, and the seams are ground together.
Features of installing an additional relay on the starter
To install a relay on the starter, you will need:
- wires 1.5 mm2;
- flat female connector - 5 pieces;
- flat male connector - 1 piece;
- 4-pin relay with metal. ear (from 30 to 40 A);
- 2 ring tips for 6 and 8 mm.
Having secured additional relay at a convenient point for you, connect the wiring to the starter. Pull off the red wire from the flat input of the traction relay and insert the “folder” with the wire of the new relay into the connector. Place a wire with an 8 mm tip onto the + terminal and tighten it with a nut. And put the wire from contact 30 with the “female” onto the free contact. Tighten the new and standard wires with a clamp. Then screw the short wire from the new relay to ground. After finishing the work, be sure to hide all the wiring in the corrugation to protect them from moisture.
Installation process
Assembly drawing of the electric start system:
- starter mounting part;
- crown;
- starter;
- clamp;
- starter rear mounting bracket;
- flywheel.
Do-it-yourself installation of the starter on a Ural motorcycle is done at the gearbox (often in the upper part). Installation can also be done on the left side , but in this case you will have to sacrifice the kick starter foot, or reconsider its design.
The first step is to mark the sample of the starter housing and gearbox. Then cut out the marked areas using a grinder or milling machine. Among the possible options for mounting the starter, the three most popular are:
- Using a solid steel or duralumin plate. Purchased or made independently, it must have a central hole and fastenings to the engine housing. The standard gearbox fixing spokes are replaced with elongated ones. When installing a starting device with a plate, washers and nuts should be selected of such thickness that when turned on, the bendex gear fully engages with the flywheel ring and similarly comes out of the clutch when turned off.
- Using two separate or one continuous (semi-monthly) lower duralumin clamp welded to the gearbox. In this case, to avoid deformation, all rubber parts from the gearbox housing must be removed.
- A solid duralumin plate is secured with 2 bolts and welded to the gearbox housing.
Why do you need a starter?
Some models of modern motorcycles are equipped with starters due to the lack of a crank. Here, the presence of a starter is assumed initially. However, in other cases it serves only for the convenience of the rider. There is no need to practice every time before a trip, especially if the valves or ignition are not adjusted.
The Ural, due to its archaic nature, did not even imply the installation of a starter. At the time of the release of the first motorcycles, the starter was a luxury that a Soviet citizen could not afford, and then the design was preserved because of its reliability.
Installing an electric starter on a Ural motorcycle will save you from an overinflated right leg and sudden injuries to the kneecap, so the procedure can be considered as simplifying the life of the rider.
Installing a starter on a Dnepr motorcycle
As standard, Soviet motorcycles such as the Dnepr or Ural start only with a kickstarter. And if the engine runs normally, starts with two or three pokes, a kickstarter is enough. But still, many motto owners would not mind modernizing their horses by adding such a unit as an electric starter to their design. It gives the motorcycle a more modern look and makes starting the engine easier. Moreover, the design changes to the crankcase are minimal and the modification itself is not so complicated.
List of parts: — Starter from a Vikhr motor boat or a Zaporozhets car; — Crown under the starter; — Metal plate for mounting the starter; - Drill, grinder.
Also, to operate the starter you will need a more powerful battery than the standard one. It is recommended to use batteries with a capacity of at least 18 ampere hours.
You need to start by installing the crown.
To do this, the box is removed from the engine and the six bolts holding the clutch discs are unscrewed. The crown is installed instead of the last disc. The size of the crown is slightly larger than the size of the disk and it will interfere with the installation of the box in its place. There are two ways to fix this: The first is to shorten the pins that hold the clutch discs by 3mm, the second is to cut off the box guides protruding from the crankcase.
Second stage
will manufacture the starter mounting plate. This plate will be attached to the two upper studs that hold the gearbox. Three holes are drilled in it - two for fastening the starter, one for fastening to the studs. It would be better to drill the second hole when accurately fitting the starter to the ring gear teeth. This is roughly what it should look like:
How to install a starter
- First, you need to determine its location in your car. As a rule, it is located at the bottom, at the junction of the gearbox and engine. But in some front-wheel drive models it is more convenient to operate the starter through the hood. It’s worth mentioning separately about Ford cars: here it is not adjacent to the engine and is often located near the battery.
- Before crawling under the car, be sure to block the wheels. Raise the car to the desired height and secure it using strong stands or a support jack.
- Whenever working on the starter, be sure to remove the terminals from the battery.
- To facilitate access, remove the winter corrugation and disconnect the interfering hoses.
- Connect the correct terminals to the new (tested) starter.
- Carefully place the starter in contact with the flywheel.
- Connect the wires to the retractor plug and return the positive terminal to its place.
- Tighten the two upper starter bolts (use a 13 or 15 wrench).
- Climb under the car and screw in the last third bolt.
- Connect the negative terminal.
- Check that all bolts are tight.
- Using a tester, verify the integrity of the wiring insulation.
- Remove the vehicle from a jack or stands.
- When starting the engine, listen for any extraneous sounds during startup. Any interference may indicate that the starter is in contact with the engine or is not engaging.
Electric starter
Well, I finally started writing this post. I’ve long wanted to install an electric starter on my Bolivar, but either I’m not up to it, I don’t want to disassemble the engine, and during the rebuild I want to quickly assemble it and drive it. However, after an unsuccessful trip to Rostov, on the birthday of the Olen bike house, when I turned the crankshaft in Yaroslavl with all the consequences, I decided to finally give myself an electric start during this capital campaign. Despite the fact that the Internet is full of articles on this topic, they are all quite vague, plus I have not seen a single video where a “live” 650cc Ural was started with an electric starter. No, the video is complete, but they show some intermediate stages, like: “here I attached the starter, here I connect the wires to the Akum and it seems like something is turning, but the engine is still half disassembled.” Somehow I got distracted, closer to the topic.
In order to install an electric starter, you need to buy a ring gear for the flywheel. Someone is remaking a crown from Buran (in my opinion), but I took a ready-made one, which is installed instead of the last clutch disc.
Ring gear
Together with the ring gear, a bracket for mounting the starter on the box was purchased. There are two such brackets, on top of the box and on the side. But, since I have a Ural gearbox, and the starter from the side looks, in my opinion, much more aesthetically pleasing, my choice fell on the side mount.
Starter mounting bracket
A tens starter with a 9-tooth Bendix was recommended as a starter. But I had a starter from Oka lying in my garage, which, as it turned out, is almost identical to the ten starter, the only difference is in the starter cover. After going around several auto parts stores, I finally found the cover I needed, so with a slight movement of the hand (and unscrewing a couple of screws) the starter from the Oka was turned into a tenth starter, and at the same time, preventive maintenance was done and the gearbox was lubricated.
Starter from Oka
Difference in starter caps
The starter we need
Then the fun begins. Using the starter mount as a guide, a window is marked on the engine crankcase and gearbox, after which it is roughly cut out (not to size, of course), followed by a file adjustment to the required dimensions.
Example window
After that, only the ring gear was placed on the flywheel, the flywheel was attached to the crankshaft, a mark was made on the crankcase (taking into account that the flywheel would sit deeper) where the ring gear ends and the flywheel begins. A mark was also made on the starter cover where the bendix ends if it is pulled out to the end, after which the flywheel was removed and the holes were adjusted to finish.
Replacing and dismantling the starter yourself
In order to save budget, a faulty starter in the Urals 4320 can be disassembled at home - this procedure is simple and does not require specialized skills. To carry out the starter removal procedure, you will need the following set of tools:
- Set of wrenches or sockets with extension;
- Long slotted screwdriver;
- Liquid for removing traces of corrosion;
- Pliers for fixing terminals;
- Rags for wiping parts.
The entire scope of work is carried out according to an intuitive algorithm of actions and will take no more than half an hour to directly dismantle the part and about an hour to disassemble the case and replace damaged components. You can remove the problematic starter from the Ural 4320 as follows:
- To begin, remove all terminals from the battery;
- Then, using a wrench or socket set to “10”, unscrew the lower fastening of the engine thermal insulation protection shield;
- Next, take the tool at “13” and unscrew the thermal insulation shield itself;
- After ensuring free access to the car starter, use the same tool to unscrew the fastenings of the device that secure the electric motor to the motor housing;
- Now we move the electric motor to the side in relation to the power unit of the car and disassemble the terminal block that leads out the wiring to the pull-out relay;
- Next, the starter can be carefully removed from the car for disassembly.
Reinstalling the electric motor on the car is similar to this instruction, but in reverse order. During installation, it is important to correctly center the part along the axes, otherwise problems with engine ignition may occur.
The actual repair of the starter in the Urals 4320 consists of disassembling the body of the part, testing the main channels with a multimeter for short circuits and installing new brushes, or the rotor or stator assembly.
The manufacturer strictly does not recommend disassembling and independently re-soldering the rotor or stator - due to the technical complexity of these components, they require specialized equipment and an appropriate level of experience. Otherwise, when you try to start the engine with a homemade starter, an electrical short circuit of the engine's technological systems or even a fire in the engine compartment is possible.
Installation
There are several options for attaching an electric starter to a boxer motorcycle engine:
On foreign motorcycles, installing a starter is complicated by the lack of serious developments in this area. Therefore, you will have to show some engineering savvy and make an appropriate mount or adapter plate that will not interfere with other components.
Before installation, you need to carefully sand the surface of the electric starter stop with a grinding machine to achieve a perfect fit of the part. To properly secure the starter flange, you need to remove the solenoid relay, and also move the bendix fully forward to understand what its operating position will be. The unit is fixed using a flange, after which it is necessary to check the tightness of its fit and the stability of the position. Now you need to set the optimal gaps that will allow you to achieve stable operation of the device.
Between the gear located on the starter and the flywheel ring, you should leave a distance of 5–7 mm - to set it, you can use foil folded many times. You also need to leave a gap of 2–4 mm between the ring and the roller clutch, which is located immediately behind the gear. It should be measured in the rest position, and not in the operating state of the starter, which will allow the unit to achieve stable operation. If you purchased a used starter, make sure that its bronze-graphite bushings are not worn out and also match the diameter of the axle shaft - otherwise the reliability of the part will be significantly reduced, and starting the engine will be accompanied by unpleasant sounds.
Starter fastener
First of all, we determine the place of attachment of the element. The most popular is the upper left side above the flywheel. In this case, we will only be faced with the need to cut out a window for engaging the starter gears. It is difficult to install the starter in the center or on the right side, due to the need to redo a number of engine elements.
For installation, a hole is cut out under the Bendix casing. Next, measurements are taken, and the starter mount is cut out of a 4mm thick sheet of steel. This thickness is necessary to withstand the loads that the fasteners experience during operation of the starter mechanism. In a similar way, you can make not one solid, but a pair of fasteners. This way you can simplify the process of making fasteners, but adjusting the gaps will become much more difficult.
Advice. For greater solidity of the structure, it is best to secure the starter tail rigidly to the motor or grab it with a clamp.
The finished plate is secured with bolts or pinched with argon, then a trial assembly is carried out. Now you need to make sure that the gaps are set:
Next, the flywheel is rotated, observing the coincidence of the pitch of the bendix and the ring. In this case, rotation of the flywheel is ensured using a kickstarter. Once you are sure that everything is working as expected, you can perform a test turn by unscrewing the spark plugs. If the starter rotates the flywheel without any extraneous sounds, then the plate can be permanently welded with argon.
Important! Welding of the gearbox housing is possible only after dismantling all rubber parts, installing the primary and secondary shafts and securing the cover with 4 bolts.
Selecting the ring gear and starter
First of all, we pay attention to the flywheel of the motor, it is the key for further work. Its rotation, when viewed from the gearbox, occurs counterclockwise, which means you need to select a starter that rotates in the opposite direction (clockwise). Here are the models that suit us:
It is also possible to install a starter in the Urals from a number of models suitable for imported cars. The problem with such starters is their high cost, which also applies to modern VAZ car models. Here, choose for yourself what is your priority - the cost of the part or the service life.
Pay attention to the presence of the casing and its orientation. The method of fastening the part and further ease of maintenance will depend on this parameter. Rotating the starter relative to its own axis is not advisable and can lead to its breakdown.
Now you need to pick up the crown. The crown is a gear lining on the flywheel that transmits the rotation of the starter to the engine through a gear transmission. The problem is that purchasing the part is quite problematic. A spare part from the Buran snowmobile, as well as more modern domestic motorcycles “Voyage”, “Cobra”, “Wolf” can be suitable for the size of the flywheel. The size of the teeth of the first ring is 2.5, and the modulus of the last three is 2.2. This parameter must be related to the starter module.
If the modules do not match, there are several options to solve the problem:
- We change the starter ring/gear to one that matches the module.
- We adjust the teeth of the existing starter ring or gear to the module.
- We make the starter ring or drive gear from scratch.
Effortless: installing an electric starter on a motorcycle
Equipping a motorcycle with a starter in most cases is determined by the owner’s desire for convenience and practicality, less often - by urgent need. In some cases, for example, when the technical feature of the unit does not allow it to be equipped with a crank, installing this module is the only way out. A starter is an electromechanical device designed to start an internal combustion engine. The device is a powerful mixed-excitation electric motor powered by direct current provided by the on-board battery.
Choosing a starter
Before installing an electric starter on a Ural motorcycle, you should familiarize yourself with the technical parameters of the motor of this vehicle. The latest models of the two-wheeled legend are equipped with a four-stroke flat-twin engine with a displacement of 745 cm3 and a power of 40 hp.
For installation, both on the specified engine and on other creations of IMZ and KMZ, models ST-353, ST-367, ST-369 or “donor” ones from VAZ 2109, 21099, 2110 and 21011 are most often used. Their characteristic feature is rotation of the drive clockwise, widespread and low cost.
You should also pay attention to the crown of the device. If its diameter or tooth pitch differs from what we need, then this part must be modified. Its implementation is achieved by disassembling the starter and removing the axial shaft with the gear attached to it. The teeth of the latter are ground off, while the inner part remains intact.
Installation process
Assembly drawing of the electric start system:
Do-it-yourself installation of the starter on a Ural motorcycle is done at the gearbox (often in the upper part). Installation can also be done on the left side, but in this case you will have to sacrifice the kick starter foot, or reconsider its design.
The first step is to mark the sample of the starter housing and gearbox. Then cut out the marked areas using a grinder or milling machine. Among the possible options for mounting the starter, the three most popular are:
With any of the above types of fastening, the load from the connecting plate is removed by fixing the rear part of the starter to the motorcycle body. Next, with the device fixed, the gaps of both the roller clutch with the ring and the ring with the starter gear are set.
Conclusion
Having installed the starter on the Ural motorcycle with your own hands and adjusted the gaps, you should attach the flange to the gearbox. After checking the uniformity of all joints, the device is connected to the battery. Having removed the spark plugs, carry out a series of test runs, listening during the process for the absence of extraneous noise, irregularities, jamming and scrolling in the operation of the starting system.
Read more: Changing the cylinder block gasket on a Chevrolet Niva: instructions with photos
When installing this device, be aware of increased energy consumption. To ensure full operation of the motorcycle, the standard battery is replaced with a more powerful one. There are two options here: resort to using batteries, either large in size or imported models.
The first case entails a slight change in the design of the motorcycle to accommodate a powerful battery, the second - the installation of a more productive generator, since the basic model G-424 cannot fully cope with charging a capacious foreign-made battery.
In any case, replacing the standard battery, although it will take some time, will only benefit the motorcycle.
Starting a motorcycle with a kickstarter can require a lot of effort, which is why many owners of domestic equipment often abandon it in favor of inexpensive foreign analogues. However, Russian motorcycles have their advantages, represented by ease of tuning, low cost of spare parts, as well as low sensitivity to fuel quality and the reliability of most components.
That is why experienced owners of two-wheeled domestic vehicles often install an electric starter on a motorcycle - such an operation can make the Ural or Dnepr much more convenient. This also applies to small-capacity budget-class foreign motorcycles, which are also often equipped only with a kickstarter. Let's look at the procedure for installing an electric starter using domestic technology as an example.
Selection of parts
The best option is electric starters from the Kherson plant, which are used in tractor starting engines, as well as in small-class boat engines. However, you need to be very careful in choosing components - components marked ST353, 367 or 369 are suitable for the Ural. You should not purchase the ST366 starter, which was installed on the Zaporozhets - it has a reverse direction and a different shape of the Bendix casing, incompatible with a motorcycle engine .
It is also possible to install an electric starter from a VAZ-2109 car or a more modern unit from a VAZ-2110, but in this case you will have to make the crown yourself, using a professional metalworking machine. To create a spare part, it is better to use steel grade 40-X or another that meets the hardness standard 35-42 HRC/E.
For imported motorcycles, the electric starter must be selected especially carefully - many owners of two-wheeled equipment say that components from industrial generators or powerful garden equipment are a suitable option. However, you will definitely have to grind the crown for the starter yourself, since unification is a distinctive feature of domestic motorcycles.
Installation
There are several options for attaching an electric starter to a boxer motorcycle engine:
Read more: Description of the Lada Priora ignition switch, replacement, repair and wiring diagram
On foreign motorcycles, installing a starter is complicated by the lack of serious developments in this area. Therefore, you will have to show some engineering savvy and make an appropriate mount or adapter plate that will not interfere with other components.
