As you can see, no new connection points will be added. The only thing is that you have to stretch the cord from ground to pin 86.
The last paragraph does not apply to any equipment produced in China. Simply, Nexus, Racer, Tachilla and many other scooters use a 4-pin ignition.
Subtleties of connecting to the switch
Let us immediately note: this chapter only talks about the first circuit, that is, the 4-pin ignition. As you remember, to connect the signaling you need to break one wire going to the switch:
Electrical diagram of the ignition system
The cord in question is marked with an arrow. Finding it in most cases is not difficult:
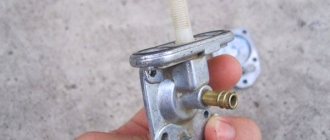
Ignition switch module
Installing an alarm system on a scooter with your own hands
An alarm is one of the most effective ways to scare away a thief who is trying to steal your scooter, moped or parts thereof. But even despite this precaution, scooters and mopeds are subject to theft quite often.
Previously, very little had been heard about alarms on scooters, and even less people used them. Most likely this was due to the high cost of the kit, if we compare the total cost of motor vehicles.
In other words, previously it was completely pointless to install an alarm system on your device, because it could cost the owner almost half the cost of his vehicle.
It is for this reason that many Japanese used scooters and mopeds do not have alarms, like European ones in particular. Today on the market you can buy a budget, but fairly well-made alarm system for motor vehicles - motorcycles, scooters, mopeds. These inexpensive alarm devices can be afforded by almost any segment of the population.
A little about the Chinese alarm kit
According to statistics, scooters and mopeds are stolen much less often if they are equipped with an alarm. However, it should be clear that you cannot be 100% sure that equipment cannot be stolen with an alarm system.
But still, if your scooter or moped is located in an unguarded parking space or in the open air, then most likely an alarm will not hurt in such cases.
Some find a way out and use a special lock on the disc brake, while others use a simple chain with a lock.
to install alarm systems on scooters and mopeds, both Japanese and Chinese, but when choosing, you need to be careful to understand which option is right for you.
Will a particular option be suitable for your transport? Today, many alarm systems are sold in online stores and prices are more affordable than market ones.
These are mainly kits made in China, which are intended for the installation of motorcycles, scooters and mopeds.
Often the kit contains standard parts - a central unit, siren, key fobs, wiring harness and contact block, and an instruction manual should also be an integral part.
Below is the alarm diagram for Chinese scooters:
Preparing a place for a scooter alarm
To properly install the alarm on your scooter, you need to dismantle the front plastic in order to get to the connectors and contacts we need. How close or far away the battery is installed does not matter. Well, the plastic is removed by unscrewing the bolts and screws that secure it to the central plastic (it all depends on your model).
There is practically no difference in installing alarms on Chinese-made scooters and Honda scooters. Today we will delve into the installation process specifically for these units. If the kit contains instructions, then you need to mark in it the places in the wiring where the wiring of your alarm will be connected.
The first thing you need to do is disconnect the chip from the ignition switch, thereby securing the installation process. After this, you need to find the main wiring harness in the scooter; it is often located in a casing (tube) or isolated in a special tape. In a more suitable place in the wiring harness, you need to remove the insulation in order to have access to all wires without exception.
You will need orange, blue, and yellow/red wires, among others. Each of these wires must be stripped of up to 7 mm of insulation and the wiring must be carefully exposed without cutting the wire. In another method, damage to the insulation is not required and here it is possible to connect the alarm wiring to the contacts of the chip. You have the right to choose a more suitable option in your case.
For beginner scooter riders, it will be easier to make a simple connection to the wiring.
The next step is the ignition switch. Once the chip is no longer connected to the lock, you can safely do the work without fear that the slightest mistake will cause a short circuit.
Having marked a distance of approximately 5 mm from the chip on the red wire, you need to expose its section to 7 mm and do the same on the black wire. The black and white wire goes to the ignition switch; it needs to be cut and the edges cleaned.
At this point, the work with all the preparation of the scooter wiring is completed, the next stage is the alarm harness.
Preparing the alarm wiring
First of all, we determine the place for the central block. There is always an opportunity to place a block under the front plastic. It is better to glue the central block with a double-sided adhesive piece (often included in the kit) on the inner side of the central plastic (which can be parts of the glove compartment from the inside.
If there is no adhesive part, it can be replaced using double-sided tape. Before gluing, the plastic must be cleaned of dust and dirt and degreased for better adhesion.
It is worth checking that there is no contact between the alarm unit and cables, scooter wiring harnesses, or other elements when turning the steering wheel.
Once you have determined the location of the main unit, you need to calculate the length of the wires that come with the alarm kit. They are mainly provided with a margin, so it is better to shorten them rather than lengthen them under plastic.
You don’t need to do anything with the black alarm wire, since it is attached to the ground of the scooter (sometimes there is no such wire). The mass is not difficult to find, because its location is often in the presence of a plastic mount or on the frame. All wires except black need to be measured to length and cut, but do not forget to leave some extra for laying.
All ends of the wiring of the alarm unit are stripped to 1.5 - 2 cm and twisted between them. Now, we connect the alarm to the scooter.
How to properly connect an alarm system to a scooter with your own hands
After you have completed all of the above steps, the last step remains - connecting the alarm to the scooter. In the harness we take the red alarm wire and make a connection with the red wire, which is located near the ignition switch using a twist method.
In the same harness we take the orange wire and connect it to the black wire located near the lock.
We connect the pre-cut black and white wire near the ignition switch with the gray and pink wires from the alarm harness, but connect the pink one to the end that goes from the side of the lock, and the gray one from the side of the chip (very important!). Exposed contacts should be well insulated with electrical tape.
Next, we find three pre-stripped wires in the main harness of the scooter - orange, blue and yellow-red. In the alarm harness we find two yellow wires and connect them with the orange and blue wires of the scooter, and connect the blue from the alarm to the yellow-red.
Don't forget to insulate exposed contacts. If there is a black wire, attach it to the ground of the scooter. After this, for ease of installation and protection from all kinds of damage, the bundles are wrapped with electrical tape. At the end of the operation, we connect the ignition switch, alarm and siren.
The scooter is equipped with a loud siren, which can be triggered by even slight vibration of the plastic. It is possible to start the engine from a button on the remote control or turn off the ignition. The alarm is turned on and off using the remote control.
Installing an alarm on a scooter, moped | Theory, recommendations, practice
An alarm is one of the most effective ways to scare away a thief who is trying to steal your scooter, moped or parts thereof. But even despite this precaution, scooters and mopeds are subject to theft quite often. Previously, very little had been heard about alarms on scooters, and even less people used them. Most likely this was due to the high cost of the kit, if we compare the total cost of motor vehicles. In other words, previously it was completely pointless to install an alarm system on your device, because it could cost the owner almost half the cost of his vehicle.
It is for this reason that many Japanese used scooters and mopeds do not have alarms, like European ones in particular. Today on the market you can buy a budget, but fairly well-made alarm system for motor vehicles - motorcycles, scooters, mopeds. These inexpensive alarm devices can be afforded by almost any segment of the population.
A little about the Chinese alarm kit
According to statistics, scooters and mopeds are stolen much less often if they are equipped with an alarm. However, it should be clear that you cannot be 100% sure that equipment cannot be stolen with an alarm system. But still, if your scooter or moped is located in an unguarded parking space or in the open air, then most likely an alarm will not hurt in such cases. Some find a way out and use a special lock on the disc brake, while others use a simple chain with a lock.
It is very easy to install alarm systems on scooters and mopeds, both Japanese and Chinese, but when choosing, you need to be careful to understand which option is right for you. Will a particular option be suitable for your transport? Today, many alarm systems are sold in online stores and prices are more affordable than market ones. These are mainly kits made in China, which are intended for the installation of motorcycles, scooters and mopeds.
Often the kit contains standard parts - a central unit, siren, key fobs, wiring harness and contact block, and an instruction manual should also be an integral part.
Below is the diagram for Chinese scooters:
Preparing a place for a scooter alarm
To properly install the alarm on your scooter, you need to dismantle the front plastic in order to get to the connectors and contacts we need. How close or far away the battery is installed does not matter. Well, the plastic is removed by unscrewing the bolts and screws that secure it to the central plastic (it all depends on your model).
There is practically no difference in installing alarms on Chinese-made scooters and Honda scooters. Today we will delve into the installation process specifically for these units. If the kit contains instructions, then you need to mark in it the places in the wiring where the wiring of your alarm will be connected. The first thing you need to do is disconnect the chip from the ignition switch, thereby securing the installation process. After this, you need to find the main wiring harness in the scooter; it is often located in a casing (tube) or isolated in a special tape. In a more suitable place in the wiring harness, you need to remove the insulation in order to have access to all wires without exception. You will need orange, blue, and yellow/red wires, among others. Each of these wires must be stripped of up to 7 mm of insulation and the wiring must be carefully exposed without cutting the wire. In another method, damage to the insulation is not required and here it is possible to connect the alarm wiring to the contacts of the chip. You have the right to choose a more suitable option in your case. For beginner scooter riders, it will be easier to make a simple connection to the wiring.
The next step is the ignition switch. Once the chip is no longer connected to the lock, you can safely do the work without fear that the slightest mistake will cause a short circuit. Having marked a distance of approximately 5 mm from the chip on the red wire, you need to expose its section to 7 mm and do the same on the black wire. The black and white wire goes to the ignition switch; it needs to be cut and the edges cleaned. At this point, the work with all the preparation of the scooter wiring is completed, the next stage is the alarm harness.
Preparing the alarm wiring
First of all, we determine the place for the central block. There is always an opportunity to place a block under the front plastic. It is better to glue the central block with a double-sided adhesive piece (often included) on the inside of the central plastic (which can be parts of the glove compartment from the inside. In the absence of an adhesive piece, it can be replaced using double-sided tape. Before gluing, the plastic must be cleaned of dust and dirt and degreased for better grip.It is worth making sure that there is no contact between the alarm unit and cables, scooter wiring harnesses, or other elements when turning the steering wheel.
Once you have determined the location of the main unit, you need to calculate the length of the wires that come with the alarm kit. They are mainly provided with a margin, so it is better to shorten them rather than lengthen them under plastic. You don’t need to do anything with the black alarm wire, since it is attached to the ground of the scooter (sometimes there is no such wire). The mass is not difficult to find, because its location is often in the presence of a plastic mount or on the frame. All wires except black need to be measured to length and cut, but do not forget to leave some extra for laying. All ends of the wiring of the alarm unit are stripped to 1.5 - 2 cm and twisted between them. Now, we connect the alarm to the scooter.
How to properly connect an alarm to a scooter
After you have completed all of the above steps, the last step remains - connecting the alarm to the scooter. In the harness we take the red alarm wire and make a connection with the red wire, which is located near the ignition switch using a twist method. In the same harness we take the orange wire and connect it to the black wire located near the lock. We connect the pre-cut black and white wire near the ignition switch with the gray and pink wires from the alarm harness, but connect the pink one to the end that goes from the side of the lock, and the gray one from the side of the chip (very important!). Exposed contacts should be well insulated with electrical tape.
Next, we find three pre-stripped wires in the main harness of the scooter - orange, blue and yellow-red. In the alarm harness we find two yellow wires and connect them with the orange and blue wires of the scooter, and connect the blue from the alarm to the yellow-red. Don't forget to insulate exposed contacts. If there is a black wire, attach it to the ground of the scooter. After this, for ease of installation and protection from all kinds of damage, the bundles are wrapped with electrical tape. At the end of the operation, we connect the ignition switch, alarm and siren.
The scooter is equipped with a loud siren, which can be triggered by even slight vibration of the plastic. It is possible to start the engine from a button on the remote control or turn off the ignition. The alarm is turned on and off using the remote control.
www.motopedy.ru
Alarm for a scooter: how to choose the best alarm
If you want to protect your motorcycle, then we recommend that you familiarize yourself with the basic anti-theft mechanisms, as well as electrical means.
Alarm for scooter
ATTENTION! A completely simple way to reduce fuel consumption has been found! Don't believe me? An auto mechanic with 15 years of experience also didn’t believe it until he tried it. And now he saves 35,000 rubles a year on gasoline! Read more"
Anti-theft systems on motos are of the mechanical type - something like a lock on the wheel like a cable, U-shaped brackets that are very long in length for fastening through the comfort area, and a mechanical type of lock on the brake discs. In addition, there are electronic anti-theft systems.
This is a signal on a motto that turns on during mechanical impact and can produce a fairly loud sound of a siren-type warning.
The alarm system on the motto also has additional capabilities - remote engine start from key fobs, immo, feedback and an additional power source.
If you need to protect your scooter or moto from the unwanted influences of an intruder, then it is recommended to purchase a special alarm system or an alternative is an anti-theft lock. Or you can purchase everything together in order to be one hundred percent sure of its intact condition.
Features of installing an alarm on a motto
Let's look at the process of installing an alarm system on a motto: the practical part is installing an alarm system - this is the most effective way to resist robbery.
However, if a couple of years ago, in rare cases, expensive parts were effectively sold in motorcycle parts stores, today Chinese versions of alarms have proven to be in demand.
Of course, no alarm system can provide a 100% guarantee, but the chances for scooters will increase significantly.
Installing an alarm system on a motto is not such a difficult process. It is important to correctly identify the option, and finding the necessary model by visiting a motorcycle parts store will be quite easy.
For a moto, you can choose an alarm system from Chinese manufacturers who are focused on the global market.
Now let’s move on to consider the process of installing an alarm on a motorcycle:
First, we prepare the place for installation of the alarm system on the motto and provide the wiring.
For these purposes, we remove the plastic from the front, under which there are all the necessary contacts along with the connectors.
The remoteness of the battery in this option is not so important, so you don’t even need to look at it. We fasten the plastic with bolts - just unscrew them and it can be dismantled.
In some cases, depending on the motorcycle model, the mount may be different. In this case, it is recommended to read the manual.
In terms of technical characteristics, the installation of an alarm system on both a Japanese-made motorcycle and a Chinese-made motorcycle is almost identical. Therefore, this article does not have any connection to specific models of motor vehicles.
Any of the alarm system kits with instructions that detail the areas in the wiring where it needs to be connected.
First, we disconnect the ignition switch chip, since no one can be immune from errors, and when igniting it can ruin your life.
Then you need to find the main motorcycle wiring, which is designed as a harness and is located mainly in a polyvinyl chloride pipe. In rare cases, but the main wiring is simply wrapped with insulating tape.
We get to each wiring and select blue, orange and yellow-red. Then we remove the insulation and expose the wiring. You can do it another way and, without damaging the insulating tape, connect the alarm system directly to the chip.
Now you can return to the ignition switch and you need to expose the area of the wire at a distance of approximately 5 centimeters from the chip. You can consider the preliminary work completed.
We carry out wiring of the alarm system
First you will need to find an area where you can install the central unit. It is recommended to place it under the front plastic if you glue it to the inner area using the special tape that is included in the kit.
For a more durable fastening, we carefully wipe the plastic and then degrease it. When choosing a location, you immediately need to find out the length of the wiring, which is recommended to be cut off rather than hiding the entire mass under plastic. One tourniquet, which is recommended to be left long, is black. And for all others, after determining the length, it is recommended to cut it.
You should definitely leave a couple of centimeters for laying, and expose the ends of any wire by 2 centimeters.
Connecting the alarm system
The red wire must be connected to the red ignition switch wire by winding one end to the other. We connect the orange wire to the black one in the same way. Then we connect back the ignition switch and alarm system.
Tired of paying fines? There is a way out! Forget about fines from cameras! An absolutely legal new product - NANOFILM, which hides your license plates from IR cameras (which are installed in all cities). More details at the link.
- Absolutely legal (Article 12.2.4).
- Installs independently in 2 minutes.
- Invisible to the human eye, does not deteriorate due to weather.
- 2 year warranty
Hides from photo and video recording.
Connecting a Chinese alarm system to a moped
2 318
An alarm is one of the most effective ways to scare off a thief who is trying to steal your scooter , moped or parts thereof. But even despite this precaution, scooters and mopeds are subject to theft quite often. Previously, very little had been heard about alarms on scooters, and even less people used them. Most likely this was due to the high cost of the kit, if we compare the total cost of motor vehicles. In other words, previously it was completely pointless to install an alarm system on your device, because it could cost the owner almost half the cost of his vehicle. It is for this reason that many Japanese used scooters and mopeds do not have alarms, like European ones in particular. Today on the market you can buy a budget, but fairly well-made alarm system for motor vehicles - motorcycles, scooters, mopeds. These inexpensive alarm devices can be afforded by almost any segment of the population.
A little about the Chinese alarm kit: According to statistics, scooters and mopeds are stolen much less often if they are equipped with an alarm. However, it should be clear that you cannot be 100% sure that equipment cannot be stolen with an alarm system. But still, if your scooter or moped is located in an unguarded parking space or in the open air, then most likely an alarm will not hurt in such cases. Some find a way out and use a special lock on the disc brake, while others use a simple chain with a lock. It is very easy to install an alarm on scooters and mopeds, both Japanese and Chinese, but when choosing, you need to be careful to understand which option is right for you. Will a particular option be suitable for your transport? Today, many alarm systems are sold in online stores and prices are more affordable than market ones. These are mainly kits made in China, which are intended for the installation of motorcycles, scooters and mopeds. Often the kit contains standard parts - a central unit, siren, key fobs, wiring harness and contact block, and an instruction manual should also be an integral part.
Below is the alarm diagram for Chinese scooters:
Preparing a place for an alarm on a scooter: To properly install an alarm on your scooter, you need to dismantle the front plastic in order to get to the connectors and contacts we need. How close or far away the battery is installed does not matter. Well, the plastic is removed by unscrewing the bolts and screws that secure it to the central plastic (it all depends on your model). There is practically no difference in installing alarms on Chinese-made scooters and Honda scooters. Today we will delve into the installation process specifically for these units. If the kit contains instructions, then you need to mark in it the places in the wiring where the wiring of your alarm will be connected. The first thing you need to do is disconnect the chip from the ignition switch, thereby securing the installation process. After this, you need to find the main wiring harness in the scooter; it is often located in a casing (tube) or isolated in a special tape. In a more suitable place in the wiring harness, you need to remove the insulation in order to have access to all wires without exception. You will need orange, blue, and yellow/red wires, among others. Each of these wires must be stripped of up to 7 mm of insulation and the wiring must be carefully exposed without cutting the wire. In another method, damage to the insulation is not required and here it is possible to connect the alarm wiring to the contacts of the chip. You have the right to choose a more suitable option in your case. For beginner scooter riders, it will be easier to make a simple connection to the wiring. The next step is the ignition switch. Once the chip is no longer connected to the lock, you can safely do the work without fear that the slightest mistake will cause a short circuit. Having marked a distance of approximately 5 mm from the chip on the red wire, you need to expose its section to 7 mm and do the same on the black wire. The black and white wire goes to the ignition switch; it needs to be cut and the edges cleaned. At this point, the work with all the preparation of the scooter wiring is completed, the next stage is the alarm harness. Preparing the alarm wiring First of all, we determine the location for the central unit. There is always an opportunity to place a block under the front plastic. It is better to glue the central block with a double-sided adhesive piece (often included) on the inside of the central plastic (which can be parts of the glove compartment from the inside. In the absence of an adhesive piece, it can be replaced using double-sided tape. Before gluing, the plastic must be cleaned of dust and dirt and degreased for better grip. It is worth making sure that there is no contact between the alarm unit and the cables, scooter wiring harnesses, or other elements when turning the steering wheel. After you have determined the location of the main unit, you need to calculate the length of the wires that come with the alarm kit . They are mainly provided with a margin, so it is better to shorten them rather than lengthen them under the plastic. You don’t need to do anything with the black alarm wire, since it is attached to the ground of the scooter (sometimes there is no such wire). The ground is not difficult to find, because its location is often in the presence of a plastic mount or on the frame.All wires except black need to be measured to length and cut, but do not forget to leave a margin for installation. All ends of the wiring of the alarm unit are stripped to 1.5 - 2 cm and twisted between them. Now, we connect the alarm to the scooter.
How to properly connect an alarm to a scooter: After you have completed all of the above steps, the last step remains - connecting the alarm to the scooter. In the harness we take the red alarm wire and make a connection with the red wire, which is located near the ignition switch using a twist method. In the same harness we take the orange wire and connect it to the black wire located near the lock. We connect the pre-cut black and white wire near the ignition switch with the gray and pink wires from the alarm harness, but connect the pink one to the end that goes from the side of the lock, and the gray one from the side of the chip (very important!). Exposed contacts should be well insulated with electrical tape. Next, we find three pre-stripped wires in the main harness of the scooter - orange, blue and yellow-red. In the alarm harness we find two yellow wires and connect them with the orange and blue wires of the scooter, and connect the blue from the alarm to the yellow-red. Don't forget to insulate exposed contacts. If there is a black wire, attach it to the ground of the scooter. After this, for ease of installation and protection from all kinds of damage, the bundles are wrapped with electrical tape. At the end of the operation, we connect the ignition switch, alarm and siren. The scooter is equipped with a loud siren, which can be triggered by even slight vibration of the plastic. It is possible to start the engine from a button on the remote control or turn off the ignition. The alarm is turned on and off using the remote control.
0
Do you like the diagram? Share with a friend.
Installing an alarm system on a scooter with your own hands competently and effectively
Some may consider security features for small mopeds to be overkill. Practice shows that it is small dimensions and light weight that attract the attention of thieves. The compact vehicle is very easy to steal and transport.
Choosing a suitable alarm
Video on how to install an alarm on a scooter yourself
Modern security systems, even for small-sized equipment, allow you to use such practical bonuses as a remote control, starting the engine from a distance and some other advantages.
Security systems for mopeds and scooters are almost as diverse as those for cars. Installing an alarm on a scooter traditionally begins with selecting a suitable model. You can choose a security guard based on different criteria:
- manufacturer;
- price;
- degree of protection;
- set of functions.
Retail chains offer security systems from the most primitive and inexpensive made in China to expensive ones that have decent functionality and are also protected from outside interference.
In order not to make a mistake in your choice, evaluate your financial capabilities and recommendations of manufacturers, and also communicate on specialized forums. The best criterion for selection is reviews from owners who have been using alarms for some time. Advice from sellers and service center specialists will also not be superfluous.
When purchasing, you must check the completeness. The average alarm kit consists of:
Particular attention should be paid to the installation instructions and wiring diagram, because... in their absence, connecting the alarm to the scooter will be quite problematic. Although the principle of operation and the procedure for installing the system into the design of a moped of different models are not fundamentally different, it is better to use the factory instructions and manufacturer’s recommendations.
Alarm for scooter
One of my friends recently returned from a long trip to Thailand, and what especially struck him there was that almost no one installed alarms on cars. In all that time, he only heard the beeping sound of the alarm system being activated by the key fob twice, since theft is practically never seen among them.
But given our terrain and customs, we have to equip not only cars with alarms, but also scooters (motorcycles). In these turbulent times, leaving a vehicle unattended is a dangerous game.
That’s why you have to make it yourself or buy various alarms, especially since the copy about which the review was written costs only $10-20 (depending on the online store).
This security device is the size of a pack of cigarettes and is intended for installation on bicycles, scooters and other small vehicles. Of course, you can install such an alarm on a car, but to protect such an expensive object, we advise you to pay attention to more serious devices.
Alarm control panel
Control is carried out via a radio channel, with a frequency of 433 MHz, from a key fob with two buttons - turning the alarm on and off. The range of the radio remote control is standard – a couple of tens of meters, which is quite enough.
The receiver operates on the principle of a super-regenerator. Next, the signal is decoded and controls the operation of the siren on a piezo emitter. Don't be fooled by its small size. The sound voltage is supplied to the piezo through a step-up transformer, causing it to squeal at a volume of a hundred decibels!
The same element also works as a shock sensor. This is what triggers the alarm. A light pulse from the ZP is amplified by the LM358 operational amplifier and triggers the siren for 5 seconds. This time is enough for the thief to change his plans and quickly disappear. And you, attracted by the noise, ran out into the street with a wrench :)
Power supply for scooter alarm unit
The device is powered by a 9 volt battery, “Krona” type. Since in standby mode the alarm consumes very little current, it will last for a long time. However, it would be a good idea to replace it with a more capacious battery. Moreover, the current in sound mode reaches 50 mA.
There is only one button on the body of the security device - On-Off. The box is secured with a screw, tightly pressed against the body of the protected object. This is necessary to transfer vibration from the motorcycle to the piezo sensor. Naturally, you can install it on any object – even on a door or a showcase. Considering such a low price, an entire store can be equipped with them.
Security Systems Forum
How to install an alarm on a scooter - theory, practice, recommendations
An alarm is the most effective and one of the main methods to scare away a thief from trying to steal your scooter or its parts. Despite this, scooters are stolen, and quite often.
Alarms on scooters have been quite rare in the past, often due to the high cost of the kit compared to the total cost of the entire scooter.
That is, before there was no point in installing an alarm on a scooter if it would cost the owner half the cost of the vehicle.
In this regard, most Japanese used scooters are not equipped with an alarm, like European ones in particular.
The modern technological revolution in China has brought to the world market low-cost and fairly high-quality alarm systems for motorcycles that absolutely all segments of the population can afford. The only question is, do you need it?
Statistics show that scooters equipped with an alarm are much less likely to be stolen than those without one. However, you should understand that this is not a panacea for theft and no one is immune from it. If your scooter or moped is often left in an unguarded parking lot, or on the street, you should most likely think about installing an alarm.
Even better results can be achieved by combining other passive safety methods, for example using a special disc brake lock or a simple chain with a lock.
Installing an alarm on a scooter, both Japanese and Chinese, is quite simple, but when choosing, it is quite difficult to decide which option you need. Is a particular option suitable for your scooter? Today, a huge range of alarms for scooters can be found in online stores.
As a rule, prices there are somewhat lower than market prices, but the range is huge. Usually these are Chinese versions for installation specifically on motorcycles, scooters and mopeds. You can buy an alarm for a scooter, for example, here: Alarm for a scooter.
The store offers a large assortment of similar products, and also describes in detail installation options for each specific brand of scooter.
Often the kit consists of a central unit, a siren, key fobs, a wiring harness with a contact block and an instruction manual, where you can usually find installation instructions, but not always. Here is one of the diagrams for Chinese scooters and Honda devices:
So, let's move on to the installation process. In order to install an alarm on a scooter, it is enough to remove the front plastic. All the connectors and contacts we need are located right here. The distance of the battery does not matter. To remove the front plastic, it is enough to unscrew the front bolts and screws that fasten it to the central plastic (not always, depending on the model).
As a rule, the technical process of installing an alarm on Chinese scooters and Honda scooters is no different. Let's consider the process of installing the kit on these devices.
According to the instructions that can be found in the kit, it is necessary to mark the places on the wiring where the alarm wiring will be connected. First, you need to disable the ignition switch in order to protect the entire installation process from the negative impact of a possible error.
Now we find the main wiring harness of the scooter, usually it is located inside a PVC tube or wrapped with a special insulating tape.
At a convenient location in the wiring harness, usually close to the chip, you need to move the general insulating material to get to all the wires. Here we need a yellow-red, orange and blue wire.
On each of the wires it is necessary to remove a small gap of insulation (6-7 mm is enough) and expose the wiring (no need to cut the wires!). There is another method that does not require damaged insulation, where you can connect the alarm wiring directly to the contacts of the chip.
Everyone can choose for themselves which connection option is easier. Usually, for inexperienced scooter riders, it is easier to just “bump” into the wiring, as indicated here.
Let's move on to the ignition switch. The chip is already disconnected from the lock, so all operations can be carried out without the risk of an accidental short circuit.
At a distance of about 5 cm from the chip, we expose a section of the red wire (as mentioned above, no more than 6-7 mm) and the black wire, without cutting the wiring. The black and white wire that goes to the ignition switch must be cut and both ends exposed.
All manipulations with the preparation of the scooter wiring are completed, let’s move directly to the alarm harness.
First, you need to prepare a place for the central unit. You can always find a convenient place under the front plastic.
It is convenient to glue the central block using a double-sided adhesive element (usually included) to the inside of the central plastic (usually to the elements for the front glove compartment on the inside). If there is no such element, you can use double-sided tape.
The plastic must be cleaned of dust and degreased. It is also necessary to make sure that there is no contact between the central alarm unit and the cables, wiring harnesses of the scooter, as well as its other parts when turning the steering wheel.
After choosing the location for installing the main unit, you need to decide on the length of the wires that come with the alarm. Usually they come with a reserve and it is more convenient to cut them off rather than hide them under plastic. There is no need to cut the black wire of the alarm harness; it will be connected to the ground of the scooter (sometimes it is not provided).
You can find the mass there; it is often located on the lower mount of the front plastic or welded to the frame. Select the required length of each wire (except black) and cut off the excess piece, leaving a small margin for installation. The ends of all wires of the alarm unit must be exposed by 1.5 - 2 cm and twisted.
Let's move on to connecting the alarm to the scooter.
After all the above operations, all that remains is to connect the alarm to the scooter. To do this, we connect the red wire of the alarm harness to the red wire near the ignition switch by winding. The orange wire from the same harness must be connected to the black wire near the lock.
We move on to the previously cut black and white wire near the ignition switch. Here you need to connect the gray and pink wires from the alarm harness, however, taking into account that the pink one must be connected to the end from the lock side, and the gray one from the chip side (required!).
All open contacts must be insulated with heat shrink or electrical tape.
Next, we are left with three previously cleaned wires in the main harness of the scooter (yellow-red, blue and orange). We connect two yellow wires from the alarm harness to the blue and orange wires of the scooter, and the blue from the alarm to the yellow-red. Again, cover all contacts with electrical tape.
Connect the black wire (if available) to the ground of the scooter. Now all the harnesses need to be wrapped with electrical tape for ease of further installation and protection from damage. All that remains is to connect the ignition and alarm switch chips, as well as the siren.
For the siren and antenna (usually the antenna included is a short wire), you also need to determine the free space.
Everything is ready, now our scooter is protected by a loud siren, which is triggered by even a slight vibration of the plastic. Also, the engine can be started from a button on the remote control or the ignition can be turned off. The remote control turns the alarm on and off.
The variety of Chinese kits allows you to choose both inexpensive models with minimal functionality and models with a display on the remote control with feedback. However, as practice shows, an inexpensive alarm system is sufficient for a scooter, which will properly fulfill its intended purpose.
A little about the Chinese alarm kit
According to statistics, scooters and mopeds are stolen much less often if they are equipped with an alarm. However, it should be clear that you cannot be 100% sure that equipment cannot be stolen with an alarm system. But still, if your scooter or moped is located in an unguarded parking space or in the open air, then most likely an alarm will not hurt in such cases. Some find a way out and use a special lock on the disc brake, while others use a simple chain with a lock.
to install alarm systems on scooters and mopeds, both Japanese and Chinese, but when choosing, you need to be careful to understand which option is right for you. Will a particular option be suitable for your transport? Today, many alarm systems are sold in online stores and prices are more affordable than market ones. These are mainly kits made in China, which are intended for the installation of motorcycles, scooters and mopeds.
Often the kit contains standard parts - a central unit, siren, key fobs, wiring harness and contact block, and an instruction manual should also be an integral part.
Below is the alarm diagram for Chinese scooters:
Preparing a place for a scooter alarm
To properly install the alarm on your scooter, you need to dismantle the front plastic in order to get to the connectors and contacts we need. How close or far away the battery is installed does not matter. Well, the plastic is removed by unscrewing the bolts and screws that secure it to the central plastic (it all depends on your model).
Scooter alarm: is it worth spending time and money?
Some scooter models can compete in cost with more respectable motorcycles, proudly displaying five-zero price tags.
As usual, the most popular are the creations of Japanese manufacturers, in particular, Honda, a leader in all areas. The “Japanese” have more powerful engines, and they look more impressive.
But the lightness of a scooter in itself is more of a minus than a plus in terms of safety. So, a scooter alarm can only delay the theft, but not prevent it.
In most cases, thieves send stolen scooters for dismantling and then for resale. But already in the form of separate spare parts. Reselling stolen motorbikes is a pure gamble. And the revenue clearly does not cover the risk of being caught stealing.
Of course, if your bike is equipped with a scooter alarm, which on occasion gives the thief a concert at the request, the likelihood of theft is reduced, but... Considering that in many cases people with “bad imagination” decide to steal a scooter, the volume of the scooter alarm will only provoke them. And in retaliation for the noise they made, they will not hesitate to simply damage your bike and leave it at the scene of the crime.
How is a beacon different from an alarm on a scooter?
Anti-theft is an unusual thing, but it enjoys a certain reputation among scooterists. At the same time, it acts more like a “talisman” than as a remedy against theft. Indeed, an alarm installed on a scooter will not be able to detain a thief or neutralize hacking devices. And the worst thing is that you may never see your scooter again.
In this regard, the lighthouse is much more versatile. Its advantages over the alarm system include:
- Compact and lightweight, because the device’s appearance is not much different from a standard bank card
- Reliability and reliability. It is thanks to this combination that a once fully charged device does not need to be recharged for 9 months
- Availability and reasonable price. You spend one time to purchase the device, there are no subscription fees
- Installing a beacon, unlike an alarm on a scooter, does not require any special skills - you just need to know how to use a phone
- Possibility of personal customization provided by the manufacturer