Making a plastic body kit (on your own)
Then, we cut out pseudo-ventilation holes in the foam, where the grilles will subsequently be inserted.
When the foam matrix is completely adjusted and has taken the desired shape, we begin to cover the outside with fiberglass and coat it with epoxy resin. The procedure is as follows: coat the matrix with a brush, and cover it with small strips of fiberglass. Dry for 15 minutes, coat, and apply the next layer of fiberglass. In this order we lay 4-5 layers of fiberglass.
You need to try to ensure that the fiberglass flaps do not bulge and lie as evenly as possible, without lumps. Also, cavities and air bubbles should not be allowed, as they will then affect the strength of the structure.
Next: after 24 hours of drying in a warm room, remove the foam from the sidewall. It turns out to be a real plastic part of our scooter.
After adjusting the body kit parts, we attach it to the scooter. As fastening elements, you can use metal strips with holes from an old children's construction set. We attach them in several places to the SCOOTER flush with the intended installation location of the part. Next, both parts, fitted at the end, are puttied with APP putty with the addition of aluminum to give elasticity to the part. After the putty has dried, its excess layers are removed with sandpaper.
We attach both parts of the body kit to the scooter! Next comes painting, choose a color and paint. We install the painted, polished and varnished parts in their places. First the sidewalls, then we make fastenings for the tank, drill the tank, and fasten it with M5 screws.
This way you can make a tuning body kit for absolutely any scooter.
Source
Hot air soldering
To repair the plastic of a motorcycle with heated air, you will need a hair dryer, but not just any hair dryer, but one with a temperature regulator. You can use the cheapest device, but then there is a risk of overheating the plastic, which will lead to the loss of its basic properties. Overheated material will be brittle and may break due to vibrations from driving on normal roads. You will also need a special nozzle with a thin nozzle, approximately 5-8 mm.
In addition to the hair dryer, you will need a large piece of plastic identical to the one being welded. To do this, you should pay attention to the markings of the part; most likely, you will see a product of the PP, RA or ABS brands. Polypropylene PP, for example, melts at 300 degrees and begins to burn at 350, so it should be welded at a temperature of 300 - 340 degrees. Polyamide or RA should be welded at 410 - 460 degrees, ABS at 360 - 400. Soldering process:
- For greater convenience, remove the part from the motorcycle and wash it from dirt and oils.
- We clean the edges of the parts with medium-sized sandpaper, level the edges, and try to make a hollow in areas close to the surface.
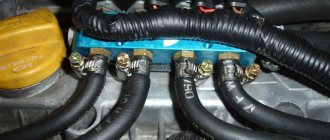
- If we weld broken parts, then we lean the pieces against the base and use a heated hairdryer to grab them in several places (from the inside). Otherwise, if you weld the parts one by one, some areas may twist and it will be impossible to achieve a flat surface without leveling with additional materials.
Advice. If the plastic initially twists a lot, then to make it easier to work with, you can fasten it with staples.
Plastic for a scooter - instructions for those who are not lazy
You can, of course, drive until it falls off, and then buy a new part and put it in place of the old one. But this is a recipe for the lazy. A real rider must put his soul into a scooter and, if something can be fixed, then he must do it with love and with his own hands. The most damaged plastic, unless it has crumbled into dust, can be restored.
Reading the forums, you might believe that it is best to glue it with dichloroethane, using internal linings from the “donor” material. But this option is suitable for Chinese-made plastic - polystyrene. And the Japanese and Europeans are mostly ABS; dichloroethane will not work for them. Only good old epoxy will help. How to mix it with a hardener is written in the instructions.
First, we remove the plastic parts, wash them with powder in hot water and dry them, and then inspect them and are surprised that there is more damage than it seemed before. It is better to immediately mark microcracks with a marker, then they may become invisible. We go over everything that is damaged with fine sandpaper and wipe it with acetone.
We cover the chips along the edges with vinyl tape, now there is a “formwork” for their restoration. If the part is broken, then the large fragment should be glued with tape on the outside. We collect little things, like puzzles, on tape, and then we find a place for them.
We don’t bother too much with chips around the edges. Where there is underfilling, where there is overfilling, then everything will be corrected with the help of a file and putty. You should be careful with “puzzles” on tape so that they don’t fall apart; they are also covered with resin and fiberglass in several layers. The main thing is to understand that this is not gluing, but the creation of a monolithic plastic part. Then everything should stand for a day at room temperature. If it’s not colder than +18 degrees outside, you can put it on the balcony or bring it into the barn.
If before this we were working on the inside of the plastic, then tomorrow we will have to deal with the outside - the front. Everything should be perfect here.
You should stock up on sandpaper of different sizes, a file, a knife and don’t forget about a respirator; if necessary, moistened gauze will do. We process very convex parts by sitting them on a crumpled, rolled old coat or blanket, so that we don’t accidentally push them through with excessive zeal. We change the sandpaper from coarse to finer. We clear everything to zero. And only then do we use automotive putty, wait for it to harden, and sand again. We notice defects, use putty to fix them in some places, and remove them in others. Work for a sculptor.
When you are confident that everything is in perfect condition, leave the plastic alone for 10-12 hours, after this time the putty will completely harden.
It is better not to carry out repeated restoration in the future. Most of the splits will occur at the gluing points.
Source
Gluing plastic
Repairing the plastic of a motorcycle can be done by gluing parts together. For this we need:
- epoxy resin and hardener;
- fiberglass;
- gloves;
- Castor oil.
The gluing process: First of all, we remove the defective part, wash it thoroughly with hot water, then we clean the areas around the cracks and the ends of the chips, and finally we degrease the parts being processed. Next, we dilute the resin with the hardener; keep in mind that the material will remain in a plastic state for 2-4 hours, so it is better to prepare it in small parts. If you add a little castor oil to the mixture, it will become more flexible, which is especially important for flexible plastics. Apply the finished resin on the inside of the part with a brush in one layer. Next, we place a layer of fiberglass no more than 5 cm wide and cover it with another layer of glue. In total you should get 3-5 layers of mesh, and the final layer is glue. Remember! All work with epoxy resin should be carried out with gloves and safety glasses. Upon completion of the work, leave the part to dry for a day at room temperature. A sign of hardening of the material is the lack of adhesion and structural strength. You can apply light pressure to the seam to test its strength and make sure the material is curing. If everything is satisfactory, the repair is completed, otherwise we completely remove the layer and apply a new one. There is still an outer part left, but it should be treated with putty to prevent damage and then painted over. Gluing is needed to create a strong base, and final work is best done with materials that are more amenable to processing.
DIY scooter fender
Payment for goods and downloading of the book in electronic form (PDF format) is made on the website.
To do this, you need to find the book you are interested in and click on the “Buy” button. The price of the book is indicated on the button.
For convenience, the price on the website for residents of Russia, Belarus and Kazakhstan is presented in rubles.
For residents of Ukraine in hryvnias, and for all other countries - dollars.
After clicking on the “BUY” button, a payment window will open where you can select a payment system with which you can pay for the selected book using any bank card (Visa, MasterCard, MIR, etc.)
When you click on the “Pay by bank card” button, the Portmone payment system will open, which is the easiest way to make a payment.
In addition, the website offers four payment systems for payment:
Scooter tuning, making a plastic body kit online instructions
Payment for goods and downloading of the book in electronic form (PDF format) is made on the website.
To do this, you need to find the book you are interested in and click on the “Buy” button. The price of the book is indicated on the button.
For convenience, the price on the website for residents of Russia, Belarus and Kazakhstan is presented in rubles.
For residents of Ukraine in hryvnias, and for all other countries - dollars.
After clicking on the “BUY” button, a payment window will open where you can select a payment system with which you can pay for the selected book using any bank card (Visa, MasterCard, MIR, etc.)
When you click on the “Pay by bank card” button, the Portmone payment system will open, which is the easiest way to make a payment.
In addition, the website offers four payment systems for payment:
- Yandex (payment from any bank cards, Yandex Money account, QIWI Wallet, terminals, etc.);
- Portmone (payment from any bank cards, Portmone account);
- PayPal (payment from any bank cards, PayPal account);
- WebMoney (payment from any bank cards, payment from WebMoney wallets).
Payment via Yandex Cashier
After selecting payment via Yandex, the Yandex Cashier payment system will launch, where you need to select a convenient payment method (bank card, QIWI, Yandex Money account, etc.)
After specifying payment details and confirming payment, payment for the goods will occur.
[/su_box]
If you have a bank card in a currency other than the ruble, then the money will be debited from the card at the rate of the Central Bank of Russia at the time of the purchase.
This payment method is optimal for residents of Russia, Kazakhstan and Belarus.
Official website of the Yandex Kassa payment system https://kassa.yandex.ru
Payment via Portmone
After selecting payment through Portmone, the payment system will launch, where you need to select the payment method: bank card or Portmone account.
The price in the Portmone payment system is converted into dollars at the exchange rate of the Central Bank of the country where you are located.
If you have a bank card in a currency other than the dollar, then the money will be debited from the card at the rate of the Central Bank of your country at the time of the purchase.
After specifying payment details and confirming payment, payment for the goods will occur.
[/su_box]
Official website of the Portmone payment system https://www.portmone.com
Payment via PayPal
After selecting payment via PayPal, the PayPal payment system will launch, where you need to select the payment method: bank card or PayPal account.
If you already have a PayPal account, then you need to log into it and make a payment.
If you do not have a PayPal account and you want to pay using a bank card via PayPal, you need to click on the “Create an Account” button - shown with an arrow in the picture.
PayPal will then prompt you to select your country and provide your credit card information.
After specifying the information required to make the payment, you must click on the “Pay Now” button.
Official website of the PayPal payment system https://www.paypal.com
Payment via WebMoney
After selecting payment via WebMoney, the payment system will launch, where you need to select the payment method: bank card or WebMoney wallet.
If you already have a WebMoney wallet, then you need to log into it and make a payment.
If you do not have a WebMoney wallet and you want to pay in another way, you need to select any of the methods that WebMoney offers and make the payment
After specifying payment details and confirming payment, payment for the goods will occur.
[/su_box]
Official website of the WebMoney payment system https://www.webmoney.ru/
Downloading a book
After successfully completing the payment (by any method) and returning to the KrutilVertel store from the payment system website, you will be taken to the successful payment page:
On this page you need to indicate your e-mail, where access to download the book will be sent.
If you are already registered on our website, then simply follow the link to your personal account.
The book you purchased will be in your personal account, from where you can always download it.
Please note that after making the payment, you need to return back from the payment system website to the KrutilVertel website.
If for some reason you did not return back to the site and closed the payment system tab with a message about the successful completion of the payment, please let us know - we will send you a letter indicating access to download the book.
Problems when paying with bank cards
Sometimes difficulties may arise when paying with Visa/MasterCard bank cards. The most common of them:
- There is a restriction on the card for paying for online purchases
- A plastic card is not intended for making payments online.
- The plastic card is not activated for making payments online.
- There are not enough funds on the plastic card.
In order to solve these problems, you need to call or write to the technical support of the bank where you are served. Bank specialists will help you resolve them and make payments.
That's basically it. The entire process of paying for a book in PDF format on car repair on our website takes 1-2 minutes.
If you still have any questions, you can ask them using the feedback form, or write us an email at
Source: https://krutilvertel.com/tjuning-skuterov-glava3-izgotovlenie-plastikovogo-obvesa-svoimi-silami
Payment via Yandex Cashier
After selecting payment via Yandex, the Yandex Cashier payment system will launch, where you need to select a convenient payment method (bank card, QIWI, Yandex Money account, etc.)
After specifying payment details and confirming payment, payment for the goods will occur.
If you have a bank card in a currency other than the ruble, then the money will be debited from the card at the rate of the Central Bank of Russia at the time of the purchase.
This payment method is optimal for residents of Russia, Kazakhstan and Belarus.
Official website of the Yandex Kassa payment system https://kassa.yandex.ru
Payment via Portmone
After selecting payment through Portmone, the payment system will launch, where you need to select the payment method: bank card or Portmone account.
The price in the Portmone payment system is converted into dollars at the exchange rate of the Central Bank of the country where you are located.
If you have a bank card in a currency other than the dollar, then the money will be debited from the card at the rate of the Central Bank of your country at the time of the purchase.
After specifying payment details and confirming payment, payment for the goods will occur.
Official website of the Portmone payment system https://www.portmone.com
SCOOTER UNDER ROOF
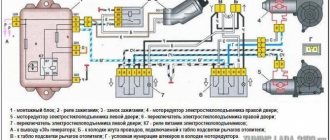
The seat and back are homemade, identical in design. Both consist of a plywood base (12 mm thick), a cushion made of porous rubber (two layers of 20 mm each), foam rubber (one or two layers of 40 mm each) and artificial leather covering. Fastening the back and seat to the frame using brackets bent from a steel sheet 2 mm thick. The front brake drive is standard, manual, using a cable in a Bowden sheath, the rear brake is a foot drive, from a homemade pedal mounted on the scooter frame, on its right side; The pedal is also connected to the rear wheel braking device by a cable in a Bowden sheath
Payment via PayPal
After selecting payment via PayPal, the PayPal payment system will launch, where you need to select the payment method: bank card or PayPal account.
If you already have a PayPal account, then you need to log into it and make a payment.
If you do not have a PayPal account and you want to pay using a bank card via PayPal, you need to click on the “Create an Account” button - shown with an arrow in the picture.
PayPal will then prompt you to select your country and provide your credit card information.
After specifying the information required to make the payment, you must click on the “Pay Now” button.
Official website of the PayPal payment system https://www.paypal.com
Buy in the online store, best prices, inexpensive delivery
Author: Tomsk scooter club
Oh, how cool the scooter looks, all wrapped in plastic splashing with paint! And how bitter and offensive it is if you rip off all this multi-colored beauty at high speed. The consequences of falls are almost always disastrous: broken or scuffed linings, torn mirrors, damaged clothing and “asphalt disease” all over the body. An even deeper melancholy will overwhelm you when you inquire about the prices of broken plastic parts. These are three-digit numbers, but not in rubles, but in conventional units. In this article I will show what high-tech repairs using available materials are.
For repair you will need:
— A device for softening (before melting) plastic with narrowly targeted action. Most often they use a heat gun: air from the compressor passes through a heater with a handle and a narrow nozzle. But this thing is quite expensive, and if you don’t have it at home, then it’s better to find a manual gas burner that is refilled with lighter gas. In Moscow they are easy to find in large stores selling imported tools. Price - from 80 to 150 rubles. depending on the set of nozzles. Apparently, propane burners, which used to be sold everywhere in a set of 5 pieces, will also work;
- Additional pieces of the same plastic your part is made from. The easiest way to pick it up is at a landfill or near a car service center;
— An assistant or a hand vice, if the cracks are large or the plastic is broken into pieces;
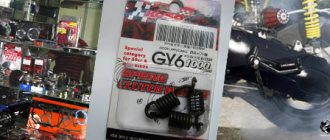
— Fittings for welding (clips from a stapler, metal spiral or mesh).
Let's start fixing it.
1. Wash the plastic part from dirt;
2. The most important operation. Using a sharp knife, trim the corners of the edges to be welded, both on the outside and on the inside. In other words, if initially the edges of the crack in the section looked like “] [“, then after cutting it should become “”. Molten plastic will be placed into the resulting triangular grooves;
3. From pieces of additional plastic, cut “sticks” of rectangular or square cross-section with a width approximately equal to the width of the grooves;
4. We fuse the spiral with a soldering iron. You can heat the wire by passing current through it (LATR is suitable for this - a laboratory autotransformer with smooth voltage regulation). But a spring that is too elastic will not fit well into the seam, so on complex bends it is still better to be gradual. If you do not have such a transformer, then do not try to experiment with the outlet. Instead of wire, you can also use stapler clips with already bent ends. We fuse them across the seam in increments of 10-20 mm. Fine mesh is also suitable as reinforcement - the frame from the air filter of almost any car. In the case of a mesh, then, having secured the crack with a vice, we simply weld it to the plastic with spot welds. Here you need to be very careful - not to boil the plastic through, but also to make enough strong seams so that the mesh holds and adheres to the plastic;
How to make a motorcycle fairing with your own hands
Today's motorcycles not only look much more stylish than they did half a century ago, but they are also more functional. Modern components and systems of “bikes” continue to be constantly modernized. One example of motorcycle equipment upgrades is a motorcycle fairing.
It is understood that this useful accessory is produced at the factory of the manufacturer of the iron horse, but not all concerns support this policy and motorcyclists have to think about making wind protection themselves.
Payment via WebMoney
After selecting payment via WebMoney, the payment system will launch, where you need to select the payment method: bank card or WebMoney wallet.
If you already have a WebMoney wallet, then you need to log into it and make a payment.
If you do not have a WebMoney wallet and you want to pay in another way, you need to select any of the methods that WebMoney offers and make the payment
After specifying payment details and confirming payment, payment for the goods will occur.
Official website of the WebMoney payment system https://www.webmoney.ru/
Do-it-yourself painting and repair of motorcycle plastic
[sc:ads1]
The modern design of ATVs, motorcycles and scooters contains a large number of plastic parts. Their purpose differs for different types of vehicles. For example, sports plastic is installed on a motorcycle in order to improve its aerodynamic properties and handling, and for ATVs, plastic becomes an inexpensive and functional element that is easy to repair.
Unfortunately, motorcycles tend to fall over. The question is not if this will happen, but when. You can injure your bike at high speed, while driving around the city, or even in your own garage. Restoring motorcycle plastic is not a very complicated procedure that allows you to reduce the cost of maintaining and repairing your bike.
In any case, the health and life of a motorcyclist are more expensive than iron and polymers, and if you want to preserve the condition of the motorcycle along with them, you should not accelerate to prohibitive speeds and be childish, unnecessarily exposing yourself to risk.
Most common problems
The more plastic there is on a motorcycle, the more expensive it is, the more expenses and problems the owner will have. Plastic for Chinese motorcycles can be purchased in good condition, used or new, but it is not always possible to quickly select suitable parts for a specific model. Replacing and installing new components will not take much time; more effort will be spent on finding good deals.
The cause of damage may be:
- An accident - serious or not, large-scale or not, the main thing is that the motorcyclist is not injured;
- Loss of control on the highway, resulting in the motorcycle falling and sliding on the asphalt;
- Performing tricks, complex figures, jumping - hitting the ground, pillars tangentially;
- Sports events - plastic for a motocross motorcycle is always in demand due to frequent damage and extreme riding conditions;
- Falling of a parked motorcycle, including in a garage. It's an unpleasant thing.
Recovery methods
The two most commonly used methods for restoring minor damage to plastic are gluing or soldering. Gluing is done with epoxy resin, polymer and synthetic compounds. The hope that a tube of ordinary glue will correct the situation evaporates after the first attempts.
The fact is that while driving a motorcycle encounters a large number of factors affecting the plastic. This includes a headwind, engine vibration, vibration of the entire body due to surface unevenness, mechanical damage from gravel, and pieces of dirt.
Repairing the plastic of a motorcycle with glue also involves the use of fiberglass. The main task is not only to eliminate the breakage site, but also to reinforce the breakage site of the base material, making it flexible and ductile.
The same applies, by the way, to soldering plastic with a soldering iron, only a fine mesh stainless steel mesh is used as a reinforcing base. Gluing usually occurs from the inside. Aerobatics masters manage to make a special groove for fiberglass with a grinder or sandpaper, so that later, after puttying, an ideal surface remains.
In this case, the painting of the motorcycle plastic will be even, smooth, without visible flaws. However, the owner cannot be insured against the appearance of a crack or chipping of the new coating. The solution is to attach a sticker or a fashionable label, which is often used by novice bikers.
Soldering is the level of reliability that can be achieved as much as possible when working with plastic on motocross and sports motorcycles. Of course, this type of work will not prevent cracks from appearing under a strong impact, but if you want to save money and have a couple of extra hours of free time, you can try it. A common mistake is trying to do everything “in a hurry” without following technology.
The boots used are usually very powerful, and the stainless steel mesh is very rigid. The result is poor-quality soldering, seams filled with burnt plastic and the same tear as when using fiberglass.
Step-by-step instruction
Before starting work, prepare:
- It is necessary to remove the plastic part and conveniently place it on the table for future soldering;
- Find a soldering iron with power adjustment, preferably a powerful one;
- Test the operation of the soldering iron on a piece of plastic (many people have fragments or pieces of plastic, for example, from a previous body kit);
- Clean the soldering area with a grinder or sandpaper so that there is no debris, paint residue, or chips left there;
Next, a metal mesh , quite strong but elastic, is applied to the plastic. The soldering iron is placed on top and heating begins. You should be able to fuse the metal structure into the plastic so that the part is securely fixed.
Be careful and attentive, because there will be no second chance. If the body kit “walks”, it is necessary to fix it on the machine with a clamp or at least with electrical tape or tape.
There is another method that is often used by more experienced plastic restoration specialists for motorcycles of any type - soldering with a jet of hot air. The essence of the method is to weld plastic using a hair dryer and a special nozzle. This results in a monolithic joint, a diffusion type of welding and a reliable connection.
You can repair plastic on a motorcycle with your own hands using special kits and mixtures for gluing, but the quality of processing and their price cast doubt on the feasibility of such processing.
[sc:ads5]
We recommend reading:
[sc:ads6]
Source: https://MotoHolder.ru/remont/remont-plastika
Downloading a book
After successfully completing the payment (by any method) and returning to the KrutilVertel store from the payment system website, you will be taken to the successful payment page:
On this page you need to indicate your e-mail, where access to download the book will be sent.
If you are already registered on our website, then simply follow the link to your personal account.
The book you purchased will be in your personal account, from where you can always download it.
Please note that after making the payment, you need to return back from the payment system website to the KrutilVertel website.
If for some reason you did not return back to the site and closed the payment system tab with a message about the successful completion of the payment, please let us know - we will send you a letter indicating access to download the book.
Motorcycle plastic repair
From the editor: Every mechanic has his own working methods, and every master has his own secrets.
We have already paid attention to plastic repair on the pages of our publication, but today you will learn about another method of restoring the beautiful appearance of your motorcycle’s “facing”. Motorcycles tend to fall over. Moreover, they fall regardless of whether you want it or not. It’s good if the consequences of the fall are minimal – both for the equipment and for the pilot. But even with a slight slip, which occurred, say, due to some unexpectedly jumped out bastard, the plastic suffers. And the more plastic, the greater the damage. There are three possible scenarios here: buying new or used plastic (damaged elements), removing it and turning the motorcycle into a naked, and finally, repairing the fairing. The first two options are extremely clear, but the last one should be discussed in more detail. There are several popular ways to repair plastic: gluing with a “special composition for plastic”, gluing with epoxy resin and fiberglass, soldering with a metal mesh. “Superglues” are a way to “deceive” naive and greedy people who think that “with this jar for 100 rubles you can fix all my plastic, and there will still be a little left.” Epoxy and fiberglass aren't much better. Having glued it from the inside, people forget that the crack still remains. Then this crack appears in the fresh paint. Aerobatics - soldering with a metal mesh - a panacea for all ills and the plastic will be “like new”. This is wrong. The metal mesh almost does not bend - try bending it in your hands. And the soldering iron, which is usually used to solder the mesh, heats up to a temperature much higher than the melting point of the plastic. This causes destruction of the plastic structure and contamination of the seam with combustion products. As part of this article, I would like to talk about a little-known, but nevertheless very reliable method for repairing plastic fairings. This is hot air jet welding. A stream of air uniformly heats the part being repaired; its temperature (air) is equal to or slightly higher than the melting point of the plastic. Welding is performed using filler rods, which are made from the same grade of plastic as the part itself. These two conditions ensure the homogeneity of the material, and therefore high strength. To repair plastic, we will need: I use a professional Steinel hair dryer - it has the necessary set of functions: temperature control 50-650 degrees in 10-degree steps, smooth adjustment of air flow, memory for several modes (for different brands of plastic). I tried to use a small-sized hair dryer for soldering radio components, but experience showed that it is only suitable for performing delicate work, such as, for example, welding torn lugs and fasteners.
Long seams, especially if the plastic is thick, are very difficult to weld and the result will be, as they say, “not ice.”
It must be powerful enough to handle tough plastic. 120-150 W is quite enough. Drill attachments come in different shapes and designs. Mills and cutters are used for cutting the seam, emery wheels are used for stripping the paint before welding and the seam after it. Cutting circles are needed to cut out missing pieces from the donor plastic.
Rods are a scarce item due to low demand. Especially ABS, although most of the elements of motorcycle fairings are made from it. And they have to be “extracted” in the literal sense of the word. As I already said, the most commonly used plastics are ABS (acrylonitrile-butadiene-styrene) and PP (polypropylene). PA (polyamide) is used very rarely, it is usually used to make the lower parts (fangs) that are located in close proximity to the exhaust manifold. This is explained by the increased heat resistance of RA. Because The bottom of the plastic rarely suffers from falls; I exclude it from the RA review. First you need to determine the brand of plastic from which this part is made. In most cases, on the reverse side there is an inscription like >ABS PP customoto.com
Problems when paying with bank cards
Sometimes difficulties may arise when paying with Visa/MasterCard bank cards. The most common of them:
In order to solve these problems, you need to call or write to the technical support of the bank where you are served. Bank specialists will help you resolve them and make payments.
That's basically it. The entire process of paying for a book in PDF format on car repair on our website takes 1-2 minutes.
If you still have any questions, you can ask them using the feedback form, or write us an email at