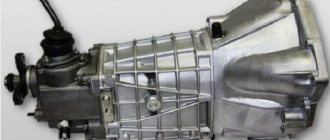
Gearbox seal VAZ 2107 - description and purpose
An oil seal is a special seal in a vehicle that is necessary to seal gaps and cracks. For example, in a gearbox, the oil seal plays a vital role - it is fixed at the junction between the moving and stationary mechanisms, preventing oil from leaking out of the gearbox.
The oil seals in the VAZ 2107 gearbox are not made of rubber, as most drivers believe. In fact, this product is constantly in the transmission oil, and to keep production to a minimum, manufacturers make oil seals from CSP and NBR composite materials. At the same time, the gasket feels equally “good” at any temperature - from -45 to +130 degrees Celsius.
Box seal dimensions
The gearbox itself on the “seven” is designed for many years of service. However, the service life of the device directly depends on how often (and in a timely manner) the driver changes the seals. Indeed, during the operation of the machine, it is the oil seals and sealing joints that are the first to fail (tear, wear out, squeeze out). Therefore, timely replacement of the oil seal will help prevent expensive repairs of other gearbox mechanisms.
For proper replacement, you need to know the dimensions of the VAZ 2107 gearbox seals:
- The input shaft seals have a weight of 0.020 kg and dimensions of 28.0x47.0x8.0 mm.
- The secondary shaft seals weigh a little more - 0.028 kg and have the following dimensions - 55x55x10 mm.
Which ones are better
The main question for any VAZ 2107 driver when repairing the gearbox is: which oil seal is best to put on the shafts to avoid rapid wear? In fact, there is no universal option.
The standard equipment of the shafts involves the use of Vologda oil seals, but if necessary, you can install any others, even imported ones.
Industry leaders can be considered:
- OJSC "BalakovoRezinoTekhnika" (main materials of manufacture - composites and alloys);
- (the main manufacturing material is thermoplastic elastomers);
- (made from rubber compounds with various additives).
The most affordable oil seal for a box shaft costs 90 rubles; the more modern the manufacturing technology, the more expensive the product will be valued.
Photo gallery: selection of the best oil seals for the VAZ 2107 gearbox
Signs of oil seal destruction
The seals are located directly on the shafts inside the box, so their wear can be visually determined only when disassembling the gearbox. However, any driver can quickly detect oil seal damage by eye, because there are obvious symptoms:
- Transmission oil leaks under the car.
- Constantly low oil level in the box.
- Problems with shifting gears while driving.
- Crunching and grinding in the gearbox when changing gears.
There are plenty of options. If there is an oil leak at the junction of the clutch bell and the engine, then it could be either the engine crankshaft rear oil seal or the gearbox input shaft oil seal. If there is a leak at the junction of the clutch bell and the gearbox body, the gasket is kaput. If it is wet at the rear end of the box - the gasket or oil seal of the secondary shaft
Electrician
https://www.vaz04.ru/forum/10–4458–1
It would seem how the performance of such a complex unit as a gearbox can depend on a small part. However, loss of tightness for the box is fraught with big problems, because even minor losses of transmission oil will immediately affect the lubrication of moving elements.
It is recommended to change the oil seals in the VAZ 2107 box every 60 - 80 thousand kilometers. The replacement is associated with an oil change, so it will be convenient for the driver to perform these works at the same time. Before this period, it is necessary to change the oil seal only when there are clear signs of its destruction.
Replacing the rear crankshaft oil seal of a VAZ 2101-2107 with your own hands
We know that it is time to replace the rear crankshaft oil seal by the leakage of engine oil from the gap between the clutch housing and the protective shield. Loss of tightness of the sealing lip threatens engine contamination and the need to replenish the lubricant level. Once on the flywheel, engine oil splashes to the sides and coats both the inner surface of the clutch housing and the driven disc lining. A strong leak can cause it to slip, which is why the transmission begins to “slip.” At the same time, the dynamic characteristics of the car are reduced - it picks up speed worse and stops pulling uphill. There is no pleasure in driving a car, and in addition, there is a risk of wear on the clutch and gearbox parts.
The cause of damage to the working edge of the oil seal can be either natural wear or manufacturing defects, or other factors - engine overheating, the use of low-quality oil, or initially careless installation. At the same time, leaks through the crankshaft sealing elements are also possible due to increased crankcase gas pressure, so you should check the engine ventilation system and the cleanliness of the breather.
When starting to replace the crankshaft rear oil seal, disconnect the driveshaft, remove the gearbox, clutch and flywheel. For this reason, it is better to perform the work in a pit or overpass. Read this article for details of disassembling and replacing the front crankshaft oil seal.
Input shaft oil seal
The input shaft oil seal is located directly on part of the input shaft and is in contact with the clutch housing. Therefore, to replace this product, you will need to remove the casing.
To work you will need to prepare:
- nut heads;
- hammer;
- puller;
- flat screwdriver;
- knife (they are most convenient for removing the old gasket);
- new oil seal;
- transmission oil;
- new input shaft seal.
The procedure for replacing the seal can be carried out either on the removed box or directly on the car. However, it is easier and faster to change the product on a dismantled gearbox:
- Disconnect the gear shift fork from the box.
- Remove the release bearing by clamping it with a puller.
- Unscrew the six nuts securing the clutch housing.
- Remove the casing from the box.
- Use the tip of a knife or screwdriver to pry up the old oil seal on the input shaft and remove it.
- It is good to clean the landing area so that there are no traces of the seal, spraying or oil leaks.
- Install a new oil seal, having previously lubricated it with transmission oil.
- Next, assemble the box in reverse order.
Video: replacement instructions
Secondary shaft oil seal
This gasket is located on the secondary shaft and disconnects it from the box flange. In this regard, replacing the secondary shaft oil seal proceeds according to a different scheme and is very different from working on the primary shaft.
To replace you will need:
- spanners;
- screwdriver with a flat thin blade;
- puller;
- pliers;
- transmission oil.
The work progresses according to the following algorithm on the removed gearbox:
- Firmly fix the box flange so that it does not move.
- Turn the nut securing it with a wrench.
- Using a screwdriver, carefully pry up the metal ring and pull it out from the secondary shaft.
- Place the puller against the end of the shaft.
- Press out the flange together with the fixing washer.
- Use pliers to grab the old oil seal.
- Clean the seating area and install a new oil seal.
- Next, assemble the structure in reverse order.
Video: operating instructions
Thus, replacing oil seals on a VAZ 2107 gearbox does not present any serious difficulties. However, inexperienced drivers are advised to seek help from professionals to avoid problems with the car, since working with the gearbox requires knowledge and experience.
Replacing the secondary shaft oil seal of a VAZ 2107 gearbox
The need to replace the secondary shaft oil seal in the gearbox of a VAZ 2107 car arises when oil leakage is detected from the gearbox. The presence of oil drops on the gearbox housing is not allowed, but oil sweating is acceptable, which is not a sign of oil seal damage. To perform the work of replacing the oil seal in the gearbox, you will need a three-jaw puller and fixing glue.
Removing the gearbox seal of a VAZ 2107
1. We install the VAZ 2107 car on an inspection hole or overpass (see “Preparation of the VAZ 2107 car for maintenance and repair”). 2. On VAZ 2107 cars with an injection system, remove the heat shield (see “Drivetrain - removal and installation”). 3. Disconnect the driveshaft from the rear axle gearbox and unscrew the two bolts securing the intermediate support of the driveshaft to the cross member (see “Driveshaft - removal and installation”). 4. Disconnect the elastic coupling of the cardan drive from the flange on the secondary shaft of the gearbox (see “Drivetrain - disassembly and assembly”) and move the cardan drive back. 5. Using pliers, remove the thrust ring.
6. Secure the elastic coupling flange from turning by inserting bolt A into its hole. Using a 30 mm wrench, unscrew the flange fastening nut and move the centering ring B of the elastic coupling along the shaft.
7. After tightening the nut a few turns, use two slotted screwdrivers to pry up the centering ring and remove it from the secondary shaft of the gearbox.
8. Unscrew the nut.
9. Remove the bolt from the flange hole. 10. Place the screw of the three-jaw puller against the end of the secondary shaft and press the flange off the shaft.
11. Remove the flange along with the washer.
12. Using sliding pliers, remove the damaged oil seal from the gearbox.
Installing the VAZ 2107 gearbox oil seal
Attention
Before installing the oil seal, check the condition of the inner cylindrical surface of the flange in contact with the oil seal.
There may be signs of corrosion and wear that should be removed by polishing. Before installation, lubricate the surfaces of the new oil seal with a thin layer of grease. 1. Press in the oil seal with a mandrel of suitable diameter.
For clarity, we show the following operation on a gearbox removed from a VAZ 2107 car. 2. Use a hammer to press the flange onto the shaft. Having installed the washer, apply fixing glue to the threaded surface of the shaft (according to the instructions for use) and tighten the nut.
Which gear oil is best for the VAZ 2107, oil change, how often should it be changed
Oil changes are required not only in the car engine. Although much less common, oil changes should be done in the gearbox. According to the regulations, transmission oil is changed approximately once every 40 - 60 thousand kilometers, and is different for each specific car manufacturer. If you do not change the oil in the gearbox, it, like in the engine, will begin to lose its qualities and properties useful for the units, which will lead to breakdown of the mechanism.
https://youtube.com/watch?v=jpzO7iyGtpk
In this article we will take a closer look at the process of replacing transmission fluid in the gearbox of VAZ family cars, namely the so-called “Classics” or “Zhiguli”. These cars include 2107 (seven), 2105 (five), 2106 (six), 2101 (kopek), and 2103 (three). All these cars manufactured by VAZ have rear-wheel drive. They are valued and respected for their simplicity and low cost of both consumables and spare parts, and the cars themselves. And also, of course, we will consider what kind of oil to fill and how much, or rather, what volume of it needs to be poured into the box.
WHAT IS NEEDED TO CHANGE THE OIL IN THE VAZ 2107 AND 2106 Gearbox
Of course, you need to approach changing the gearbox oil with all responsibility and care, and you also need to have the following tools and consumables with you:
- Hexagon at “12”;
- Key to "17";
- Capacity of five liters - for example, it could be a plastic bottle;
- Special syringe for filling oil;
- Rag.
OIL CHANGE FREQUENCY IN VAZ 2107, 2106 manual transmission
Speaking about how often you need to change the oil in a Zhiguli transmission, first of all, of course, you should refer to the technical documentation accompanying the car. The regulation clearly states the manufacturer's recommended replacement frequency, namely three years of vehicle operation or 60,000 kilometers, whichever occurs first.
Of course, there are many other factors that influence these numbers. For example, this is the quality of the liquid poured into the box. By pouring low-quality lubricant, you not only significantly reduce the interval between maintenance, but also destroy the gearbox from the inside. It is also worth remembering that transmission oil should be poured into the gearbox, not engine oil, and of course, do not forget about the markings, this also needs to be taken into account.
A few tips for proper oil changes:
Firstly, the replacement process must be carried out on a hot engine brought to operating temperature. This will ensure quick and complete removal of the gearbox from old fluid and wear products; Carry out all work with rubberized gloves - this will protect you from burns
Also take care of your face and eyes; Replacement is best done either on an overpass or in a viewing hole; When changing the oil, pay attention to the presence of metal shavings - they indicate that the car needs to repair the gearbox as soon as possible; The five-speed “Classics” gearboxes have a certain peculiarity - they need to be filled with a little more oil (approximately 250 milliliters), this is due to the fact that, due to the design features, if this factor is not taken into account and the required amount of oil is not poured, this will lead to its failure building and will require its repair; Changing the oil is quite easy, the most important thing is to decide what kind of oil to fill. First, you just need to check how much oil is currently in the gearbox and what quality it is.
THE PROCESS OF CHANGING THE OIL IN THE TRANSMISSION OF A VAZ 2107
Having prepared the tools, warmed up the car and driven it to the required site, you can begin the process of replacing the fluid:
- We move under the car and carefully clean the gearbox pan from dirt with a rag;
- Using a key set to “17”, unscrew the filler plug;
- Then, take a 12" hexagon and use it to unscrew the drain plug;
- We place a pre-prepared container under the drain hole (you need to cut off the top of the bottle and that’s it);
- Using a rag, we clean the plugs themselves and the entire space next to them;
- Screw the drain plug back on;
- Now you need to use a special syringe filled with new oil and inserted into the filler hole to pour fluid into the gearbox;
- You need to add oil until it starts pouring back out;
- Screw the filler plug back in;
- With this, the replacement process has come to an end.
In conclusion, it is worth noting that the volume of oil in the gearbox should be at the same level. The replacement must be done efficiently, because changing the oil is a very important process.
If you find an error, please select a piece of text and press Ctrl+Enter.
The meaning of the primary and secondary shaft oil seals
The direct and main purpose of these small parts is to reliably seal the metal parts and connections of the gearbox housing and other parts of the vehicle system to prevent transmission oil from leaking. Oil seals are made of durable polyurethane alloy using special compounds, since they are constantly in an aggressive environment. Oil is constantly present inside the parts, which negatively affects the condition of the part over a long period of time. Externally, these parts can be damaged as a result of mechanical stress due to breakdown or under the influence of an aggressive natural environment. The average resource or lifespan of units largely depends on operating conditions.
The manufacturer does not provide a specific guarantee for these parts; accordingly, it does not limit their service life; planned replacement is not required at certain mileages. However, in most cases, under normal operating conditions, the service life of the parts is sufficient for runs of up to 200 thousand kilometers. When used in harsh natural conditions, reliability decreases accordingly, and with it the service life of up to 100 thousand kilometers.
These parts are located at the junction of the transmission with the clutch in the case of the primary shaft, and the secondary one is located directly inside at the junction of the flange and the gearbox housing. Sealing of pipes and hoses, as well as metal parts, is achieved by tightly connecting two parts directly to the seals, which is a circle with several layers of polyurethane material. It is precisely because of the unsatisfactory condition of these small parts that transmission fluid often leaks outside the box. Therefore, responsible owners, when the first signs of malfunction appear, replace the part with a new one. Due to their simple design and the absence of any moving parts, these units cannot be repaired; they are simply replaced with new ones. However, their failure can cause major consequences in the form of failure of the entire gearbox as a result of oil “starvation”. Therefore, preventing the condition of oil seals is one of the important procedures in the daily maintenance of the VAZ 2107.
Gearbox secondary shaft - replacing the bearing and oil seal with your own hands
The vehicle's transmission helps transmit the required torque to the vehicle's wheels in accordance with the vehicle's speed. In this article we will look at what a gearbox secondary shaft is, and also touch upon such important parts as the bearing, secondary shaft oil seal and their replacement.
Operating principle and design of the secondary shaft of the gearbox?
The gearbox consists of many parts that are connected to each other, allowing them to interact and ensure reliable transmission of torque. Initially, the torque is transmitted from the clutch disc to the gearbox input shaft. The primary shaft has a short length and a common fastening device with the secondary shaft. However, there is no rigid mechanical connection between these two parts, and they rotate independently of each other. The third element of the transmission is the intermediate shaft, which is located under the primary and secondary shafts.
All these elements have a large number of gears, each of which, paired with the other, forms a gear ratio, and the pair, in turn, forms a gearbox stage. The intermediate shaft provides connection between the primary and secondary shafts through certain gear ratios. It is on it that the gear ratios change and, as a result, the gear changes when driving.
The output shaft plays a concluding role in the gearbox. It transmits the converted torque to the shank, and then it goes to the driveshaft of the car. Thus, the secondary shaft provides connection between the gearbox and the chassis of the car, and the level of its operation determines whether the car will move or not.
Replacing the bearing and oil seal of the secondary shaft of the VAZ 2107 gearbox
The bearing of the secondary shaft ensures free rotation of its end in the place where the shaft already leaves the gearbox. From the inside, the bearing is filled with a lubricant, which facilitates the rotation of the part.
The gearbox secondary shaft oil seal is installed in the same place. The oil seal is a rubber O-ring that fits onto the shaft and fills the gaps between the shaft and the transmission housing. The oil seal is designed to prevent oil leakage and ensures the tightness of the system.
Over time, both the seal and the bearing are subject to natural wear. Parts of the bearing are destroyed and begin to loosen the shaft. Gradually, the friction between the parts increases, and the bearing begins to disrupt the shape of the shaft. The balancing of the shaft becomes unbalanced over time and it begins to vibrate. The very first to suffer is the oil seal, which will lose its shape and will no longer be able to hold oil in the gearbox. The oil gradually disappears and the lubrication of gearbox parts is disrupted. In addition, the oil seal may fail due to wear, which occurs in any case. The fact is that a rubber product has a certain service life, which is determined by mileage and the oil seal begins to crack and also lose its sealing properties.
You can diagnose a seal malfunction visually. To do this, it is enough to look from time to time at the junction of the cardan and the secondary shaft. If traces of transmission oil are found there, then we can confidently say that the oil seal has become unusable and needs to be replaced.
Bearing failure is quite difficult to determine. To do this, you need to have good hearing and know your car perfectly. When driving in gears, a hum and vibration may appear from the gearbox; when the clutch is depressed or the gear is disengaged, the hum disappears, but this sound should not be confused with the sound of a faulty clutch release bearing or gearbox input shaft.
Video - How to change the gearbox seal of the VAZ secondary shaft
Step-by-step replacement instructions
- The car must be driven onto a pit or overpass. The most important requirement will be that he must be immobilized for safety reasons. To do this, install wheel chocks under the wheels or block the wheels using the hand brake.
- Prepare the gearbox for removal. Without this operation, replacing the oil seal and bearing is impossible. First, disconnect the ground or negative terminal of the battery. Now find the shift lever inside the car, push it down and use a screwdriver to release the locking sleeve. The lever should come out. After this, release the remote plastic sleeve using two screwdrivers, which need to be used to release the special fastening tabs. Then, go down under the car and remove the exhaust pipe, as it will interfere with further removal of the gearbox.
- In the same place, on the gearbox, disconnect the special block of the two wires that are responsible for turning on the reverse lights. Unscrew the universal joint drive mount, the starter mount, release the clutch release hydraulic cylinder, but do not unscrew the hose from it to avoid subsequent bleeding of the clutch, and remove the flexible speedometer cable.
- Now the most important thing: unscrew the fastenings of the cross member holding the box at the back, and place any support under the gearbox so that it does not collapse when unscrewing the fastenings to the engine. Unscrew the corresponding fasteners and remove the gearbox from the support.
- Disassemble the gearbox, but before doing this, all the oil must be drained from it. Once the transmission is completely disassembled, locate the bearing mounted on the shaft and press it out using a puller. After this, install a new bearing in the same way and change the oil seal.
By the way , the oil seal can be replaced without removing the gearbox; to do this, just unscrew the crosspiece and simply replace the rubber seal with a new one. Don't forget to also drain the oil before carrying out repair work.
- Reassemble the gearbox in reverse order and install it on the car.
At this point, the replacement of the oil seal and bearing of the secondary shaft of the VAZ 2107 gearbox is completed. If you are not fluent in tools and do not understand the structure of a car transmission at all, then it is best to entrust this task to professionals from the field of car maintenance.
Dimensions of oil seals in the VAZ 2107 gearbox
To correctly replace VAZ 2107 gearbox seals, precise geometric dimensions are required, as well as the weight of the product. Otherwise, when installing other parts, the operation of the entire gearbox may be impaired, which may also lead to breakdown. The manufacturer has established clear dimensions for the VAZ 2107 gearbox seals; these parts must fit under them, regardless of the company that will produce them for installation on this model. For the secondary one, the length is 55 mm, the circumference height is also 55 mm, and the width/thickness is 10 mm. The secondary seal weighs 28g, although weight may vary by supplier and is not particularly significant.
VAZ-2107 input shaft bearing: number, price, which one is better to buy, size (5 mortar, 4 mortar)
In the “Classics” manual transmission, the designers provide a radial open single-row ball bearing of class 6 accuracy, which takes up 90% of radial loads
To select this spare part, you need to pay attention to the radial and axial clearance, ease of rotation, appearance of the product (no corrosion, cracks, nicks, cavities). Before you buy a gearbox input shaft bearing for the “seven”, check out the list of recommended manufacturers
The listed manufacturers produce high-quality products at reasonable prices with exact dimensions in accordance with GOST 520-211.
- Open: 6-50706AU (replaceable without disassembling the gearbox)
- Closed: 6-180502K1US9 (replaceable with disassembling the gearbox)
Table of costs and recommended manufacturers
| No. | Manufacturing plant | Number (article/markings) | Price 2021, rub. | Set | |||
| Retaining ring | Bearing | Pressure ring | Installation instructions | ||||
| 1 | VBF (VPK) Russia Analogue | 50706АУ.P6R10.20Q6 | 270 | — | + | — | — |
| 2 | GPZ Russia Analogue | 6-50706AU | 200 | — | + | — | — |
| 3 | SPZ (3 gas processing plants) Russia Analogue | 6-50706AE1USH | 450 | — | + | — | — |
| 4 | SPZ-4 Russia Analogue | 6-50706AU | 220 | — | + | — | — |
egoST
I drive a Ford Focus ST in Moscow
The engineers did a great job. 15 devices in 1 housing.
An entire car on-board computer with FULL HD footage. I'm pleased with the clear rear view camera and navigator with 32 satellites. The new generation signature detector is simply a BOMB.
I've been using it for 3 months and forgot about the fines
List of a complete set of gearbox bearings for the VAZ 2107
| Shaft | Numbers according to GOST / ISO |
| Primary | 6-50706AU / 6706N |
| 6-180502K1US9 / 62202.2RS | |
| Secondary | 6-205KU / 6205 |
| 6-50306KU / 6306N | |
| 464904E / AR-491298A | |
| Intermediate | 6-92705K / 613441 (SKF) |
| 6-156704 / 616073 (SKF) |
Bearing size table 6-50706AU
| Characteristic | Unit | Value according to GOST (TU) |
| Hole diameter, d | mm | 30 |
| Outer diameter, D | mm | 75 |
| Nominal height, B | mm | 19 |
| Diameter of groove for snap ring, D1 | mm (min-max) | 71,32 — 71,83 |
| Groove position, a | mm (min-max) | 3,07 — 3,28 |
| Groove width, b | mm (min-max) | 1,6 — 1,9 |
| Radius of mounting chamfers, r | mm (min) | 1,5 |
| Dynamic load capacity, C | kH | 32,8 |
| Static load capacity, C0 | kH | 17,8 |
| Nominal speed | rpm | 10000 |
| Radial clearance | mm | 0,01-0,024 |
| Steel type | — | SHH-15 |
| Hardness of steel and balls | H.R.C. | 61-65 |
| Contact angle | hail | |
| Torque | kN*M | — |
| Ring roughness | Ra | 0.32 |
| Number of balls | PC. | 7 |
| Ball diameter | mm | 14,288 |
| Weight | G. | 400 |
| Working temperature | degrees | +/-50 |
Diagnostics of VAZ 2107 gearbox seals
A responsible car enthusiast, owning a domestic rear-wheel drive car, is obliged to constantly monitor the condition of many units and components. One of these are oil seals. There are simple but quite labor-intensive means of checking and preventing these parts. To do this, you need to lift the car on a lift or drive it into a pit and conduct a visual inspection of the box body. In the places where the seals meet the parts of the clutch or rod there should be no fogging in the form of oil stains or drips of this substance. Fogging at the place where the part is attached is the first sign of failure; even if there are small spots, it is necessary to replace it, since the leak will only increase in the future.
It is also necessary to wipe and clean the parts from dirt and dust and inspect them for cracks, which may subsequently leak.
The simplest method of prevention without using a lift is to periodically check the oil level in the crankcase using a dipstick.
In addition, one of the signs of failure of parts and the subsequent need to replace the seal of the VAZ 2107 five-speed gearbox is a crunching sound when shifting gears both down and up. Also, this situation may be accompanied by a parasitic hum, which is not inherent in this type of box. At the first signs of malfunctions, it is necessary to urgently carry out a visual inspection, either yourself or go to a specialized service.
How to change the oil seal on a VAZ 2107 gearbox
The procedure for replacing the rear oil seal of a VAZ 2107 gearbox differs from that on the front part due to the design features of the fasteners, as well as the very location of the parts and their design. In general, both procedures are divided into several stages.
Replacing the input shaft oil seal in a VAZ 2107 gearbox
Replacing the front oil seal of a VAZ 2107 gearbox occurs in several stages:
- First you need to disconnect the parts of the clutch with which this part interacts by dismantling the clutch fork, housing and release bearing, which are secured with several bolts.
- Then it is necessary to dismantle the casing itself, thereby freeing up space for removing the oil seal itself.
- After this, you should remove the used part by removing it from the seat using a knife. The vacated seat must be carefully processed to remove any remaining waste oil from the part, as well as other contamination.
- A new unit is installed in its original location, lubricated with transmission oil, and the entire system is reassembled in the reverse order.
Replacing the secondary shaft oil seal in a VAZ 2107 gearbox
The secondary oil seal is changed in another way:
- Fix and dismantle the gearbox flange, since it is this part that is fixed to the secondary oil seal.
- After dismantling, it is necessary to press it out using a special puller and gain access to the oil seal itself.
- Next, use a screwdriver or other tool to remove the used part, and also treat the landing site.
- Install the new element and reassemble in reverse order.
Replacing gearbox seals: how to do it
So, as an example, let’s take the VAZ 2109 gearbox. Often transmission oil leaks on this gearbox, as well as on units from other domestic and foreign manufacturers, occur due to the fact that the gearbox rod seal, CV joint seals, and input shaft seals fail . We will not consider the last case within the framework of this article, since removing the gearbox without experience and tools can be quite a difficult task.
To eliminate problems and restore the tightness of the unit, you need to know how to remove the oil seal from the gearbox if it is worn out, after which it is replaced with a new element. In this case, you should immediately take into account that if the input shaft oil seal leaks, the box must be removed, while the CV joint or box rod seals can be replaced without removing the gearbox.
- Let's look at how to change the gearbox rod seal. To do this, after carrying out diagnostics and determining that the gearbox rod oil seal needs to be replaced, you need to prepare 2 awls (one regular and the other in the form of a hook), two keys (at “10” and at “13”), as well as a plastic plug, which Can be unscrewed from a regular bottle.
- The car also needs to be driven into a pit or raised on a lift. If this is not possible, you can find an overpass or a pair of spare wheels by laying hard wooden boards on them. Then you need to drive the front wheels onto a hill, placing the wheels with boards under the car. The only thing is that in the latter case you will have to lie under the car, which is inconvenient. Next, you need to secure the car with the handbrake, additionally installing wheel chocks under the wheels for safety.
Having set the lubricant level, you can make a short test drive, during which the quality of the gearbox is assessed. When finished, check the oil seal installation location again for leaks.
- Now let's move on to how to change the CV joint oil seal. To replace the CV joint oil seal, you first need to drain the oil from the gearbox. Next, you need to disconnect the front axle wheel drives from the box by removing the protective cap and also “unlocking” the hub nut. Next, the bolts that secure the wheels are loosened and the hub nut is unscrewed. The hub nut is tightly tightened (to facilitate removal, a piece of pipe is often used as a lever).
Also, the vehicle must be on the ground while unscrewing the hub nuts. The same rule applies to the moment of tightening (pulling bolts). Recommended force is 65-95 Nm. Next, you need to secure the car with the handbrake and install the wheel chocks. Then you need to lift the front part, remove the front wheel from the car, unscrew and remove the hub nut.
Now use a screwdriver to remove the thrust washer and pull out the cotter pin securing the nut. Next, you need to unscrew the nut that holds the steering linkage ball joint in place. Now, using a special puller, you will need to press out the ball joint pin, which is located in the strut arm. Next, unscrew the 2 bolts and remove the lever hinge from the steering knuckle.
The steering knuckle is then retracted to the left or right along with the strut for convenience. At this point, the outer joint shank can be removed from the hub. At this stage, the shank of the inner part of the CV joint is squeezed out of the gearbox using a pry bar.
After all the work has been completed, you can begin to remove the front wheel shaft. Then, using a flat-head screwdriver, the CV joint oil seal is removed. After removal, you can begin pressing in the new oil seal. To press the oil seal, you need a mandrel with a suitable diameter.
The oil seal must be pushed into place as far as it will go. When installing, it is important to ensure that the working edge of the oil seal is in the direction of the gearbox. After installing the oil seal in place, the hinges are installed back, and further assembly is carried out.
Tips and recommendations for replacing the oil seal in a VAZ 2107 box
There are many manufacturers of spare parts for VAZ cars on the market. These are both domestic and foreign enterprises. A lot of these also produce seals. However, the negative side of diversity is the unstable quality of spare parts. There are frequent cases of defects, regardless of the country of origin. Therefore, responsible drivers should carefully examine the unit when purchasing it for quality of workmanship, the presence or absence of cracks.
In general, despite the low cost of the part itself, the installation process takes quite a lot of time, so the best option would be to purchase the part from the car manufacturer itself, which complies with the design dimensions, as well as the production technology of original spare parts.
Also, when installing new parts, it is always necessary to have a drain container on hand to remove excess parts of the transmission fluid, as well as new fluid for subsequent topping up.
