Electric cooling fan for Niva 2131
The water pump circulates antifreeze in the engine cooling system. Its failure can lead to serious problems, including major engine repairs. Timely detection of a pump malfunction and knowledge of the algorithm for replacing it will help you avoid problems.
Purpose of the pump
The power unit of any car and its components become very hot during operation. More than others, this concerns the combustion chamber, cylinder head and piston group. To maintain an operating temperature of about 90°C, the engine design provides a cooling system. As part of this system, a pump (water pump) circulates antifreeze through the cooling jacket of the engine, thereby reducing its temperature to operating levels.
The water pump has a simple device
If the water pump fails and forced circulation stops, the engine will overheat. Aluminum pistons will expand inside the steel liners and will initially severely scratch the ground walls. In the worst case scenario, the pistons will jam, causing the connecting rods to bend, and the engine will have to be overhauled.
The VAZ 2121 pump is a separate unit consisting of a housing on a flange with a shaft installed inside. On the shaft there is an impeller for pumping coolant (coolant) and a mounting mount for the pulley. The shaft rotates on two bearings, protected from the inside by a seal that prevents coolant leakage.
In a VAZ 2121 car, the water pump is located on the front of the engine above the crankshaft and generator pulleys. It is not attached to the cylinder block directly, but through an additional housing. Most often, the shaft with the impeller fails and must be replaced, but the housing remains in place.
The water pump shaft is rotated by the alternator belt
Troubleshooting
The main reason for water pump failure is severe wear of the bearings. Oil seal leakage is also a consequence of worn bearings. Cases when the oil seal began to leak coolant on its own are very rare.
The symptoms of these malfunctions are as follows.
- A suspicious noise is heard in the belt drive area, the intensity of which depends on the degree of wear of the bearings. In the early stages it manifests itself in the form of a hum, and then turns into knocking and grinding. The generator shaft can also make similar sounds - therefore, in this case, additional checking is required.
- There is play on the water pump shaft. You can determine it by shaking the shaft with your hand. The shaft play is felt when the pulley is rocked by hand.
- The belt and the area around the pulley are splashed with antifreeze. This also needs to be further checked - a similar effect is observed when the crankshaft front main oil seal loses its tightness. In the latter case, the front of the engine becomes covered with a layer of oil and dirt.
- With a high degree of wear, the pump shaft moves to the side along with the pulley. As a result, the impeller breaks the housing, the shaft jams and breaks into two parts, and the generator belt jumps off.
If the bearings are severely worn, the shaft may break into two parts.
If pump problems are not detected in time and the consequences described in paragraph 4 occur, the engine instantly overheats and the coolant quickly leaves the system. In such a case, immediately turn off the engine.
Diagnosing a faulty water pump is quite simple. It is necessary to open the hood and inspect the space around the pulley. If traces of liquid are found, you need to make sure that it is antifreeze and not oil. Then, in order to detect play, you should rock the pump pulley by hand. It should be taken into account that play can occur without coolant leakage through the oil seal. With a small (1–2 mm) play you can drive from 1 to 3 thousand km. After this, repair or replacement of the pump is necessary.
The impeller broke the housing wall and antifreeze leaked out
Replacing the water pump
The process of replacing the pump on a VAZ 2121 car of various modifications consists of the following steps.
- Purchasing a new pump.
- Preparation of tools and workplace.
- Disassembling the unit and dismantling the old pump.
- Installing a new pump and checking its functionality.
The specified sequence of work may change. If you are not completely sure that the pump will fail (perhaps the antifreeze is leaking due to wear on the gasket), you should buy a new pump only after dismantling and diagnosing the old one.
Pump selection
In addition to the standard product from AvtoVAZ, the following pumps are installed on the VAZ 2121 car:
To cool the engine of an all-wheel drive vehicle, the new impeller is more efficient
The listed brands offer pumps with plastic and cast iron impellers. Despite the prejudice of car enthusiasts towards plastic products, it is better to choose plastic - the material is durable, lightweight and does not corrode. You should pay attention to the dimensions of the impeller so as not to buy a fake or an old-style product, the efficiency of which is much lower.
When purchasing, carefully study the packaging and trademarks made on the elements of the unit by casting, embossing or laser engraving. The paper seal sealing the lid of the package must contain a barcode and part number 2123–1307011–75.
The original pump can be identified by the manufacturer's marks on the body
On VAZ 21213-21214 cars you can install a pump with catalog number 2107-1307011-75 from classic VAZ models. However, the standard Niva pump has a reinforced design, so such a pump will last noticeably less, and it can only be installed in extreme cases.
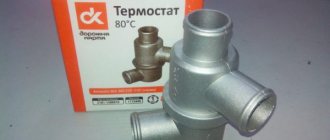
Thermostat VAZ 21214 injector which is better
Add to Basket
| Brand | HQ-mech |
| Cat N | HQ-2121-1306010 |
| OEM N | 2121-1306010 |
| Applicability | VAZ 2121 |
| vendor code | 2006904758519 |
| Name | Thermostat VAZ 2121 |
| Unit measurements | PC |
| Amount in a package | 1 |
| Frequency of shipment | 50 |
| Price with VAT | 285 |
| Group | Auto parts |
| Length, mm | 120 |
| Width, mm | 90 |
| Height, mm | 107 |
| Unit weight | 0.34 |
| Certificate | RU C-CN.AD75.B.01105 |
Show all characteristics
Today, the auto parts market in Russia and the CIS offers a sufficient number of thermostats and thermoelements from various manufacturers - from “renowned” suppliers to the assembly lines of auto giants, to unknown brands and, unfortunately, obvious counterfeits of low quality. With this wide selection of auto parts, the difference in price can be tens and hundreds of rubles. How to buy a good “Thermostat VAZ 2121, 21213, 21214, NIVA URBAN, OEM 2121-1306010”
and not run into a fake? How to choose a truly high-quality spare part for a car that will serve reliably and for a long time? How not to overpay and get a part with an optimal price-quality ratio?
It's simple!
Buy a thermostat or thermostatic element of the HQ-mech brand
from Vistaservice LLC.
Why here?
- More than 10 years of experience in auto parts production and sales
- We work only with proven factories and use only high-quality materials and raw materials (we place orders for the production of thermostats at factories focused on the European auto parts market and manufacturers of famous European brands)
- Use of modern high-tech equipment in production and mandatory quality control in production
- Well-thought-out and streamlined logistics (we do not overpay for storing goods at the port or in temporary storage warehouses)
- No bloated advertising budgets or overly large staff
- AND THE MOST IMPORTANT: we place orders, import to Russia and sell car parts without intermediaries.
Spare parts for cars under the HQ-mech brand have proven themselves well in the harsh climate of northern Russia, in the hot climate of the southern regions of the country, Africa and Latin America, as well as in the central European part. Vistaservice LLC is interested in long-term partnerships with service stations, retail stores, wholesale organizations and retail chains in the field of supply of automobile spare parts. We offer to buy thermostats, left and right wheel drives, wheel bearings, CV joints for LADA and GAZ, Daewoo and CHEVROLET cars, and more than 100 inexpensive but high-quality
Why do you need a thermostat?
We will not organize courses on eliminating automotive illiteracy, because every self-respecting driver knows that the thermostat directs the coolant either in a large circle (including the engine cooling radiator) or in a small circle (bypassing the radiator).
Thermostat for VAZ-2114 injector
The operating algorithm of the device depends on the thermodynamic valve, which closes one pipe in the thermostat and opens the other. Before changing the thermostat, it must be checked.
To refresh your memory of its structure, we have provided a diagram of the VAZ-2114 thermostat and attached it below.
Scheme of operation of the cooling system (thermostat)
Thermostat operation diagram
As can be seen from the diagram, this is a simple device with a thermal valve, which, when a certain temperature is reached, is activated, thus directing the antifreeze in a small or large circle.
In most cases, it has three pipes - one inlet and two outlets , through which the coolant flows either directly from the pump into the heater and further through the cooling system, or into the radiator if its temperature has reached the required value. It is the temperature value at which the device operates that determines the use of the thermostat on a particular VAZ model, although there are still some nuances that specifically concern the VAZ-2114 injector.
Video about the operating principle
With drain
If you do not want to test the hoses for strength, then you will have to drain all the antifreeze that is located above the thermostat. To do this, you need to use the drain plug in the cylinder block. You must act carefully so that liquid does not get on the generator. After draining the liquid, we clamp the hose and proceed to dismantling the thermostat. Next you need to follow
consistency:
- Using a Phillips screwdriver, loosen the clamps. You need to start with the conductive one and only then move on to the outlet hose.
- We perform the same action with the heater hose going to the cylinder block.
- Carefully remove all hoses so that coolant does not get on the generator.
- We remove the old unit and install a new one.
Installation of the new element is carried out in the reverse order. If the old thermostat is non-separable (this is the classic version in most cases), and the valve on it does not work, you can safely throw it away.
Replacing the thermostat in the field | Niva Repair
An internal combustion engine is designed to operate at a certain temperature. Only within a certain range of heating of the coolant are the correct temperature gaps of the rubbing parts and the factory-set characteristics observed. To speed up warm-up, the coolant first passes through a small circuit (bypassing the radiator). Then, as it heats up, the flow is redirected along a large circuit through the radiator. If necessary, the cooling fan is also forced to turn on. Thanks to this three-stage system, heating occurs more evenly and operating temperature is reached faster.
To switch antifreeze between cooling circuits, a special valve is provided - a thermostat. It opens under the influence of a certain temperature and is a regulator of engine cooling.
This item is actually a consumable. If a breakdown occurs, the thermostat must be replaced, since it cannot be repaired. Correct operation of the thermostat is especially important on vehicles operated in difficult conditions: for example, SUVs. NIVA 2121 falls into this category. When driving off-road, the engine works under heavy load and gets very hot. And external cooling by air flow is not effective due to the low speed. It is in such a situation that a broken thermostat can lead to overheating of the internal combustion engine and deformation of the cylinder block.
Signs of valve failure:
The malfunction can be determined independently, without special diagnostics. During normal operation of the thermostat, the internal circuit pipe heats up first. As the temperature rises, after the valve is activated, the external pipe also becomes hot. The engine overheats, even if the cooling fan is working and the antifreeze level is normal. External signs: after warming up the engine, the internal circuit pipe is hot, the external circuit pipe is cold. Malfunction - the valve is constantly closed.
The antifreeze slowly warms up to operating temperature. Particularly noticeable at low ambient temperatures. External signs: immediately after the engine starts running, on the pipes of both cooling circuits, the temperature rises equally slowly. Malfunction - the valve is constantly open. Circulation between the cooling circuits does not occur according to the factory algorithm. The flow switches randomly. Malfunction - the thermostat is not working properly.
If such malfunctions are detected, it is necessary to dismantle the thermostat and check its functionality in a container with hot water. A thermostat is placed in the pan, the water is heated (constant stirring is required).
When the valve opening temperature is reached (checked with a thermometer), a working thermostat should work.
Replacing the thermostat - step-by-step instructions:
In the NIVA 21214 car, the valve is conveniently located; there is no need to dismantle adjacent elements. No special tools are required - just a Phillips screwdriver is enough. You may also need a flat blade screwdriver to pry up stuck hoses. Drain some coolant to a level below the connection of the tubes with the valve. Cover the generator with plastic wrap. If antifreeze gets inside the generator, this will entail a labor-intensive operation to clean and dry it. It is even possible that electrical equipment may fail, and the generator will have to be replaced.
Main element device
As for the cooling radiator, it is impossible to imagine the operation of the engine as a whole without it. It is represented by these components:
- upper and lower tanks;
- core;
- fastening parts.
Its main purpose is to cool the mixture coming from the water jacket to the required temperature standard. Good thermal conductivity is facilitated by the fact that it is usually made of brass. The core contains transverse plates. Once here, the reagent is divided into many streams - this allows you to get a more effective result.
The principle of operation goes like this:
- The pump constantly “moves” liquid into the VAZ 21214.
- The system operates in such a way that water circulates in a circle, washing the heated walls of the blocks and cylinder.
- In this case, engine overheating can be avoided, and heat will be guaranteed to be removed from important parts.
- Then the mixture goes through the radiator, and after that it is released into the environment.
- Thus, the cyclicity is completed - now the cooled liquid will have to repeat it again for the VAZ 21214.
Articles and prices
To make it easier for you to decide which one is best to install on your car, the table below shows the article numbers and prices for the previously discussed models.
| Model | vendor code | Price, rub |
| Thomson | TA2123-1306010 | 390 |
| Zommer | 2123-1306010-06 | 420 |
| Metal Inkar (polyamide) | 10.0300.01 | 515 |
| Pramo | 2123-1306010-02 | 600 |
| WEEL | 181-0034 | 630 |
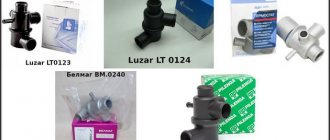
| Luzar | LT0123 | 605 |
| Herzog | HL36010 | 520 |
| Vkt | VT29003 | 480 |
| Fenox | TS009E7 | 490 |
| Finord | 21231306010 | 510 |
| Baker | 21231306010 | 450 |
| Finwhale | FinwhaleT123 | 520 |
| Gallant | GLTH14 | 500 |
| Hofer | HF 445 730 | 550 |
Replacement frequency, how much and what kind of fluid is needed
According to the manufacturer's recommendation, it is necessary to replace antifreeze or antifreeze on VAZ-21214 cars every 3 years or after a mileage of 60 thousand kilometers.
If the car is used in more severe conditions, then it is advisable to replace it more often - every 30-40 thousand kilometers. In addition to the recommended coolant change intervals, there are other reasons why it is necessary to change the fluid in a car's cooling system:
- loss of coolant properties. You can check the quality of the antifreeze used using a test strip, which is sold in the same places where the liquid itself is sold. Place the strip in the expansion tank, then pull it out. The strip comes with a color scale, according to which you can understand how much longer the car can be used before replacing the coolant;
- change in color of the coolant to tan or red. This means that rust has appeared in it;
- the appearance of sediments, flakes and dense formations in the liquid.
The coolant for the VAZ 21214 Niva injector should have a freezing point no higher than -40 degrees. Typically, the manufacturer fills in TOSOL TS-40 (manufacturer in Dzerzhinsk). When replacing antifreeze, it can be replaced with antifreeze with G12 approval; it is safer for the entire cooling system. You can also use original Lada G12 antifreeze, which is suitable for all cars of this manufacturer.
Antifreeze volume table
| Model Niva | Engine capacity | Antifreeze volume | Original/recommended fluid |
| VAZ 21214 | 1.7 | 10.7 | Lada G12, TOSOL TS-40 |
| VAZ 21213 | 1.6-1.7 | 10.7 | |
| VAZ 2121 | 1.4-1.8 | 10.6 | |
| VAZ 2131 | 1.7 | 10.7 |
Manufacturers and types
Standard sizes of thermostats, which by their design are suitable for installation in the engine of a Chevrolet Niva car, are produced by a number of global companies. The table below presents a list of products.
| Model | Product serial number | Opening temperature |
| Thomson | 21230-1306010-05-0 | 80° |
| Zommer | 2123-1306010 | 80° |
| Metal Inkar | 2123-1306010-01 | 80° |
| Pramo | 2123-1306010-02 | 80° |
| WEEL | 182-0114 | 80° |
| Luzar | LT0123 | 80° |
| Herzog | HL36010 | 80° |
| Vkt | VT29003 | 80° |
| Fenox | TS009E7 | 80° |
| Finord | 21231306010 | 80° |
| Baker | 21231306010 | 80° |
| Finwhale | FinwhaleT123 | 80° |
| Gallant | GLTH14 | 80° |
| Hofer | HF 445 730 | 80° |
There is an opinion among car owners that the highest quality, reliable and durable thermostats are products produced by Russian factories. There are currently three such enterprises:
- City of Stavrovo, Vladimir region, ATO plant;
- City of Rzhev, Tver region, PRAMO plant;
- City of Vladimir, Thomson LLC.
Among foreign models, car owners have good reviews of the Metal Inkar model from the Polish manufacturer.
These products work great in the Chevrolet Niva cooling system, the engine warms up quickly, there are no complaints.
The only negative is that the body is made in two versions - plastic and brass. The second option is not very popular among drivers, although it also works well in a circuit.
Zommer, Luzar, WEEL thermostats should only be selected from approved manufacturers. There are a lot of fakes on the market and on the Internet. Retailers seek to sell their dubious products under the guise of original ones to newcomers in the automotive business. To avoid getting burned, when purchasing, you must require licenses, certificates and supporting documents from sellers.
Reasons for failure
There are two main thermostat failures:
- The car does not warm up normally and quickly;
- The engine overheats quickly.
The malfunction can be identified by a characteristic sign - the needle of the instrument indicating the engine temperature drops sharply down when the car accelerates and jumps up if the car slows down.
A sensitive valve is installed inside the thermostat. It can become clogged with dirt, oil, and foreign bodies. Then it gets stuck in the open or closed state.
How to check the thermostat on a Niva
The removed thermostat should be lowered into a container of water and the water should be heated, controlling the temperature. If the valve does not open at the temperature indicated on its surface, or does not open at all, the thermostat should be replaced.
You can also check the thermostat without removing it, right on the car. To do this, you need to start a cold engine and monitor the behavior of the lower radiator pipe. It should stay cold at first and then warm up quickly. This will indicate the opening of the thermostat valve and the start of coolant movement in a large circle.
Performance test
The most effective way to check is diagnostics using diagnostic equipment, in common parlance – a “car scanner”. This is the most accurate way to identify any car malfunctions, and there are 2 options - go to a service center or purchase a scanner for personal needs. At the moment, the second option will be the most preferable, because... will save you a lot of money in a short period of time. There are a very large number of diagnostic devices on the market for every taste and color.
If your budget is limited or you simply do not want to spend large sums on purchasing a device, then we can recommend you an adapter from the Korean manufacturer Scan Tool Pro Black Edition.
The adapter is compatible with 99% of cars manufactured in 1993 and connects via Bluetooth or Wi-Fi to any device on Android, iOS and Windows. It is noteworthy that, despite its low cost in the region of 2 - 2.5 thousand rubles. the device sees not only the engine, like most budget adapters, but also other components and assemblies of the car. It also shows the operation of all available sensors in your car in real time.
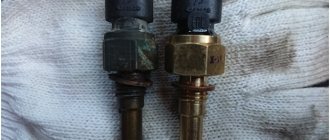
To check the thermal sensor, it will have to be removed from the car. To do this, follow these steps:
- Allow the engine to cool to 40-50 °C to avoid burning your hands during operation. Partially or completely drain the antifreeze from the cooling system.
- Disconnect the battery from the on-board power supply by removing the negative cable.
- Disconnect the block with wires from the thermoelement.
- Unscrew the part using a wrench of the appropriate size.
If the device is installed at the top point of the system, then it is not necessary to empty it entirely; it is enough to drain a third of the liquid into the container. All antifreeze must be drained when the thermocouple is located at the bottom of the radiator.
To carry out the tests you will need:
- a multimeter or other device capable of measuring circuit resistance;
- a small container for water (you can use a regular glass);
- thermometer with a scale up to 100 °C.
A thermometer is essential if you want to make accurate resistance measurements by referring to the reference chart for your vehicle. When there is no table, the serviceability of the part is checked without a thermometer according to its operating principle: the hotter the water in the glass, the lower the resistance at the contacts should be.
If the multimeter shows a certain resistance, then immerse the thermocouple in a glass of cold water and record the readings. Then add hot water and watch the resistance change, it should decrease. If there are no changes, purchase and install a new temperature sensor.
Also interesting: Rain sensor DDA15 for VAZ 2108-21099, 2113, 2114, 2115, 2110, 2111, 2112, Chevrolet Niva
If the tests were successful and the device changes resistance when heating the water, then it is worth checking the connecting wires and cleaning the contacts. Little things like this often cause major problems.
Which thermostat should I install on the Niva, and when should I change it?
Original number 2121-1306010 (temperature 80), average price 534 rubles.
- Ween 182-0214 — 360 rub.
- Master-sport 2121-S-PCS-MS — 364 rub.
- Vernet TH6596.80 — 379 rub.
Replacement frequency - according to the maintenance regulations, check every 20 thousand km.
You will need to unscrew the bolts securing the clamps that securely connect the pipes and terminals of the Niva thermostat. In total you will have to unscrew three bolts.
After this, we disconnect the pipes one by one from the thermostat outlets, which is clearly shown in the photo below.
After this, we buy a new thermostat and install it in the reverse order.
Replacement
Before removing the thermostat, it is imperative to lower the antifreeze level. The disassembly itself is carried out on a cold engine to avoid burns from the hot coolant.
The regulator is attached to the cooling system with sealing clamps on each of the five supply pipes. The unit is dismantled by unscrewing them.
After installing the new thermostat, the fasteners return to their original place. Before replenishing the antifreeze level, disconnect the cooling system pipe leading to the engine throttle assembly. The latter is done to bleed off excess air when filling the liquid.
Operating principle
The Niva's cooling circuit operates under pressure, since in normal mode it does not communicate with the atmosphere. The coolant is antifreeze with a freezing point of -40 °C. It is a solution of water with ethylene glycol, the amount to fill the system is 10.7 liters. It also boils at an elevated temperature, +110 °C.
The key element in the operation of the system is the thermostatic valve, which distributes fluid flows depending on the heating of the engine. Inside the thermostat there is a damper controlled by a temperature-sensitive element. When heated, it moves the damper, opening another path for the flow. In general, the scheme works according to the following algorithm:
- When the engine is not warmed up to operating temperature (90 ° C), antifreeze, stimulated by the pump, circulates through a small cooling circuit: engine, thermostat, interior heater radiator.
- When the power unit heats up, the thermostat damper begins to open slightly, allowing part of the liquid to flow into the large circuit into which the main radiator enters. The movement of the damper begins at a temperature of about 80 °C, and when it reaches 92-94 °C it is completely open. Almost all the antifreeze now moves in a large circle, cooling in the main radiator.
- The small circulation ring does not close, because the stove must also function. But much less liquid flows there due to the small diameters of the pipes. The carburetor or throttle valve heating is connected to the same line.
- On the Niva VAZ-2121, the fan is installed on the axis of the water pump and constantly drives air onto the cylinder block. In the VAZ-21214 and 2131 models, 2 electric fans are turned on alternately or together, obeying the command of the controller, which is guided by the readings of the temperature sensor. The switching threshold is approximately 100 °C.
- The excess volume of antifreeze that occurs during heating goes through the hose into the expansion tank. At the same time, the pressure in the system increases, which makes it even more difficult for the liquid to boil. When cooling, the reverse process occurs: antifreeze returns to the system.
In the summer and transition period in VAZ-21213 and 21214 cars, the passage of coolant through the heater radiator is limited by a tap. There is no such tap on the Chevrolet Niva; the heating is turned off by redirecting the air flow past the heat exchanger.
Operating principle and design
Purpose of the device: depending on the temperature of the coolant, smoothly switch its circulation from the “small” circle, inside the “water” jacket of the engine, to the “large” one, through the cooling radiator.
The thermostat housing contains two valves, a bypass (overflow) and a working one, as well as a temperature-sensitive filler cylinder with a rod, and springs that hold the valves in their original position.
The filler used is graphite, artificial wax mixed with copper powder.
When the engine is not warmed up, the coolant pumped by the pump passes through the thermostat and returns through the open bypass valve to the water jacket of the block and the head channels. When the set temperature is reached, in our case 80-82 o C, the filler begins to melt and, increasing in volume, pushes the rod out of the cylinder. The rod acts on the working valve and, compressing its spring, moves the valve, gradually opening the movement of coolant from the pump to the radiator. In this case, the bypass valve also gradually closes the pipe leading to the engine block.
A fully operational valve will open, and the bypass valve will close, accordingly, at an operating coolant temperature of 95 o C, for engine 2123.
If the temperature of the antifreeze (antifreeze) may be exceeded, the ECU will turn on the electric fan for additional cooling of the radiator.
The valves, stem and filler cylinder are made of brass and copper, the thermostat body is cast from aluminum alloys or stamped from brass. Products in plastic casings have become very common lately.
Experienced auto mechanics consider metal cases to be more reliable.
In a Chevrolet Niva, the thermostat is located to the right of the engine - in the direction of travel. The lines of the pump, radiator, cylinder block, throttle valve and interior heater are connected to its pipes.
Technical specifications
All indicators are given for the product included in the Chevrolet Niva 2123 car and its modifications.
(Part number 2123-1306010).
| Valve opening temperature, o C | 80+/-2 |
| Temperature of full opening of the valve, o C | 95+/-2 |
| Full valve stroke, mm | 7,6 |
| Full opening time, sec | 60 |
| Maximum operating pressure, kPa | 149+/-14,9 |
Other additions from this review
In order for the thermostat to become like its original one and not cling with the lower pipe to the generator bar and there are no bends, we need to lengthen the pipe from the pump body to the thermostat. I bought a set of new pipes. The standard pipe is on top, its length is about 5 cm, at the bottom there is a piece of 9 cm that I cut off from the old pipe.
On the standard one, one part is larger for the pump body, on the one I cut off less so that it fits, heated it with a hairdryer and put it on. The plug, thermostat and extended pipe are in place. The lower pipe to the radiator stands exactly, does not touch anything anywhere and has no bends.
I screwed a long pipe with a side of 20mm to the thermostat, it rests against the receiver spacer, I wrapped a little electrical tape just in case, so as not to fray. I connected the 16mmmm pipe from the figure eight and the classic one through an adapter.
Each one cut a little in place so that the pipe from the figure eight would not rest on the fuse block and wires.
Comments
General view of what happened. The pipe from the figure eight does not touch or catch anything anywhere.
There is more than a cm to the intake pipe. And also a drop of epoxy, pliers, duckbills, a drill, a set of drills and taps M5 and M8x1, Bolts M5, M8, nuts M5, M8 made of stainless steel, a galvanized washer from roofing iron screws. Below is a conversion of a Metal-Incar thermostat. To begin, drill a 4 mm coaxial hole in the center of the M8x12 bolt and use a tap to cut the M5 thread.
We drill and cut carefully, with lubricant - stainless steel is very malleable, the tools are easy to break. The hole is drilled and threaded.
Original thermoelement rod stop. We need to change it: Using long duckbills, we move the thermoelement rod to the side: On the thermostat cover we mark the center, core and drill a 6.5 mm hole and cut an M8 thread.
We drill a 5 mm hole in the original rod stop: The holes are drilled, the thread is cut: We return the thermoelement rod to its place: We drill the end of the M5 cm bolt.
New rod stop assembly: Screw it into the thermostat cover and check the alignment with the rod.
Lada 4×4 3D Niva “Blue Elk” › Logbook › Installing the thermostat 2123
As part of the fight for heat in the car, I installed the 2123rd thermostat. I decided to stick with Luzar for now, it seems to be working fine. For installation you needed: -The thermos itself -Upper radiator pipe 2105 -Lower radiator pipe 2123 -Hose 18x26 EPDM -Crankcase ventilation tube ZMZ, article number 40624.1014190 -A piece of silicone hose -A bunch of clamps of different sizes.
The lower radiator pipe from the shnivy, trimmed in place, took the place of the original one, all the other pipes are made of long 2105.
The stove supply remains unchanged, the return requires changes. The rubber pipe remains in place, but the metal tube requires removal.
The remaining original heater outlet pipe was connected to the thermostat with a crankcase ventilation tube and an 18x26 hose. There is a small side outlet on the ventilation tube, onto which I put a short piece of silicone hose, it turned out to be a cool gadget for bleeding air from the system when pouring antifreeze. Now you no longer need to pour in a thin stream, everything fills perfectly, the bubbles come out.
Since the stove blew suspiciously weakly for the 08th snail, I carried out preventive maintenance, disassembled, cleaned, changed all the seals, filled the cracks with foam rubber, cut off the excess from the heater body, the snail body (there is a nivdush-2 stove), blew out the heater radiator with a pistol (it was summer very dusty).
The result was what I expected. The car warms up much faster, the stove starts blowing warm air from 40 degrees and the air flow has become even more powerful than when first installed.
