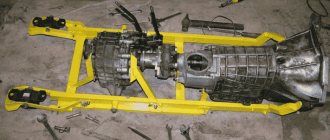
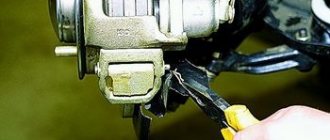
Which silent block is better for Niva?
Changing the silent blocks of the front levers on a Chevrolet Niva
When disassembling the front suspension of a VAZ 2121 and its modifications, many car enthusiasts are faced with the question of how to remove the bolt of the Niva lower lever. The fact is that this bolt is the axis on which the lever rests and turns. Therefore, when repairing the chassis, this unit cannot be bypassed; the bolt still has to be removed. Sometimes solving a problem can be quite complex and time-consuming, which is something that motorists who service their Niva themselves would do well to know.
The silent blocks of the front suspension of a VAZ 2121 or Chevrolet Niva are able to withstand any abuse over a period of 80-100 thousand kilometers. If the operation is mainly asphalt, even more. Today we will replace the silent blocks of the upper arm on the Niva (2121, 21214, 21213, 2123) and choose the best one in terms of quality.
To replace the silent blocks of the upper arm we will need:
- 22mm socket wrench.
- Hammer.
- Penetrating lubricant WD-40.
- Puller for silent blocks or hydraulic press.
- A set of new upper arm silent blocks.
Puller for silent blocks
Perhaps, in difficult cases, a gas burner will come in handy. If there is one, you don’t have to think too much about how to press the silent block out of the lever, but simply burn out the rubber and knock out the remains of the silent block from the seats. If you have all this, you can start working.
- We park the car on a level surface, tighten the handbrake and jack up the front end.
- We install a stand under the lower arm, lower the car onto the stand to unload the upper arm. This is a must!
- We remove the wheel and clean the nuts securing the silent blocks from dirt, and also clean and lubricate the nuts securing the upper arm axle with penetrating grease.
- We unscrew the three nuts securing the upper ball joint and at the same time check the condition of its boot. Raise the lever on the axle.
- Without forgetting about the adjusting washers and without losing them, we remove the entire lever assembly.
- Using a 22 wrench, unscrew the nuts securing the silent blocks and thrust washers.
- We tighten all the nuts only after the suspension is loaded, that is, with the car lowered onto a stand under the lower control arm. After replacing the silent blocks, it is advisable to check the camber/toe of the front wheels.
Front suspension Niva 2121, VAZ 2131, Lada 4x4
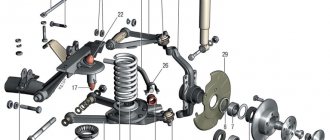
Front suspension elements
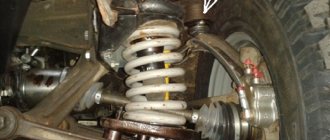
1 – brake disc; 2 – wheel hub; 3 – hairpin; 4 – lower ball joint; 5 – cap; 6 – housing of the external drive hinge; 7 – adjusting nut; 8 – conical bushing; 9 – hub bearings; 10 – oil seals; 11 – mud ring; 12 – rubber cushion of the stabilizer bar; 13 – clip for fastening the stabilizer bar; 14 – steering knuckle; 15 – body; 16 – stretching; 17 – protective cover of the ball pin; 18 – upper ball joint; 19 – shock absorber rod mounting pads; 20 – upper lever; 21 – cross member; 22 – adjusting washers; 23 – axis of the upper arm; 24 – rubber-metal hinge (silent block) of the upper arm; 25 – rebound buffer; 26 – bracket for rebound buffer; 27 – upper spring support cup; 28 – upper insulating gasket of the spring; 29 – spring; 30 – bolt securing the brace to the cross member; 31 – washers of the lower arm; 32 – axis of the lower arm; 33 – rubber-metal hinge of the lower arm; 34 – lower arm; 35 – lower insulating gasket of the spring; 36 – lower spring support cup; 37 – compression stroke buffer; 38 – shock absorber; 39 – bracket for fastening the stabilizer bar to the body; 40 – stabilizer bar.
When creating a domestic SUV, engineers planned a car for a comfortable ride, which each owner could maintain independently. At the same time, I wanted to create something new so as not to be inferior to competitors.
In 2002, the first SUV equipped with an independent front spring suspension rolled off the assembly line. This design ensures a comfortable ride:
- The upper and lower suspension arms of the Niva Chevrolet are mounted on silent blocks and connected to the steering knuckle with ball joints. They ensure the movement of the right and left wheels in a vertical plane independently of each other. This design allows you to confidently drive the car on uneven roads.
- Shock absorbers and springs work together to smooth out bumps and prevent the vehicle from rocking. For less vertical runout, there is a rebound and compression stroke buffer.
- The anti-roll bar consists of a transverse beam and rubber seals. It provides tight traction at high speeds on sharp turns - when one side of the car leans, the other side also presses to the ground.
The front suspension is very ergonomic and well thought out - it allows you to confidently feel the road in any weather. During constant use, you must not forget to check the wheel alignment, which is adjusted by washers between the lever axis and the bracket, and also pay attention to the front hub bearing.
When to change the upper arm silent blocks
The service life of the upper silent blocks of the front suspension on the Niva is quite high. However, signs of wear may appear already after a mileage of 70-80 thousand km, or even earlier if the car is operated on a dirt road. The first sign of a worn silent block is a creaking and knocking sound when driving over uneven surfaces.
In the most advanced cases, a worn silent block will affect the car's handling and ability to keep a straight line; increased uneven tire wear and yaw along the road in a straight line are possible. The easiest way to determine the condition of the silent block is visually - there should be no cracks or chips on the surface of the rubber, and there should be no delamination or play.
Adjusting the front axle gearbox Niva video
Repair of the front gearbox of VAZ 21213 Niva
ABOUT NIVA! Faults in the transmission and play in the front drives of the VAZ Niva 21213! Elimination!
Chevrolet Niva Luvt in the front axle
Front axle Chevy Niva on Niva2121
Adjusting the rear axle gearbox. Tutorial. Part 1
Adjusting and assembling the gearbox
Workshop: my method for adjusting the differential
Replacing the front axle gearbox and drives on a NIVA 2131 NIVA 4×4
VAZ gearbox adjustment
VAZ gearbox adjustment
Which silent block is better for Niva?
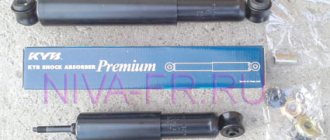
There are two dozen different silent blocks on sale, ranging from factory VAZ ones to polyurethane ones of various hardnesses. It is not advisable to install polyurethane silent blocks that are too hard - all the vibration will be on the body, and in cold weather a squeak is guaranteed.
- BRT, Balakovo, article 2121-2904040 and 21210-2904040, price about $9;
SEVI, Kedr, BZAK (Belebey) at about the same price and about the same quality, the price per set is about 12 dollars;
The quality and characteristics of polyurethane silent blocks strongly depend on the rigidity of the material, so they must be installed with the expectation that vibrations on the steering wheel and body will be inevitable, and the service life is unpredictable. According to the owners' reviews, the best option for the Niva is VAZ rubber silent blocks, which have proven themselves well over many years of operation.
There are two dozen different silent blocks on sale, ranging from factory VAZ ones to polyurethane ones of various hardnesses. It is not advisable to install polyurethane silent blocks that are too hard - all the vibration will be on the body, and in cold weather a squeak is guaranteed.
Passability, controllability and safety
It is impossible to say that these are safe cars. The cars didn't even get headrests for rear passengers. What can we say about various kinds of modern systems, a wide range of airbags and electronic assistants. All this is not in cars.
Crash tests are also unimpressive. Getting into an accident with such a car is scary, even at a relatively low speed. Despite the robust body, the driver and passengers usually suffer serious injuries.
The handling of the Niva 2121 and the Niva Urban is almost identical. The usual version of the Russian SUV is more rigid and does not respond well to active steering wheel operation. Still, Niva Urban is conditionally more urban. But this is achieved to a greater extent due to a different steering wheel setting. The suspension is not pleasantly soft when driving over uneven surfaces. But the Niva Urban, like the Niva 4x4, is designed for off-road use.
It is in such conditions that cars show their best side. There is no point in making comparisons in this component. Although the 2121 certainly feels a little more confident due to the simple bumpers at the front and rear. Urban's modified appearance did not greatly affect the cross-country ability, but touching such a bumper would be more offensive than in the case of a classic compact SUV.
Also interesting: Brake fluid on Niva Chevrolet: selection, replacement
Purpose and design of the product
The main purpose of a silent block or, in simple words, a rubber-metal hinge is to connect suspension parts and dampen oscillatory movements due to the rubber filling inside the product. A truly useful product that has the simplest design. It is a silent block, a metal double bushing with rubber or polyurethane filling inside. This filling plays the main role of damping vibrations and vibrations. The photo below shows silent blocks.
These parts are installed mainly in the front suspension of the Niva Chevrolet vehicle. With their help, the connection between the front suspension arms and the anti-roll bar is ensured. A similar connection is provided in the vehicle's rear suspension, gearbox and engine.
Location of the upper silent block
Pros and cons of chassis
Significant advantages are:
- Components for the Chevrolet Niva chassis are always available at most dealers. The cost of these spare parts is much lower than that of competitors' cars.
- High maneuverability in all conditions.
- The chassis has a large departure angle of 350 degrees and entry angle of 370 degrees. The presence of such characteristics allows you to overcome any obstacles on the road.
- Smooth and easy movement on the highway.
- Soft ride in off-road conditions thanks to reduction gear and forced locking of the center differential.
Video process of installing silent blocks
Tools:
- Straight box spanner 22 mm
- Puller for removing and installing silent blocks
- Chisel
- Small hammer
Parts and consumables:
- Upper arm silent block (4 pcs.)
Replace silent blocks when they are worn or damaged.
1. Remove the upper arm assembly with silent blocks and axle from the vehicle as described here.
2. Using a 22mm wrench, unscrew the two axle nuts.
3. Remove the thrust washer.
4. To press out the silent blocks, install a puller on the lever so that its cup rests on the end of the lever eye, and screw the puller bolt with an internal thread onto the axle.
5. Tighten the nut of the puller bolt (while holding the bolt from turning).
6. Press the silent block out of the lever.
7. Having removed the silent block from the axle, install it in the eyelets of the lever and use a puller to press out the second silent block.
8. If there is no puller, pry the outer bushing of the silent block with a chisel.
9. Press it out.
10. To install new silent blocks, use a cup puller to press one silent block into the eye of the lever.
11. Before pressing in the second silent block, clamp the lever in a vice, insert the axle with thrust washers into the eyelets of the lever and screw the nut onto the axle from the side of the pressed silent block. We insert the second silent block into the eyelet.
12. Insert a mandrel made from a suitable piece of thick-walled pipe (length 160 mm, internal diameter 42 mm, slot width 32 mm) between the lever eyes.
13. We rest the puller cup against the end of the outer bushing of the silent block.
14. Screw the puller bolt onto the lever axis and press the silent block into place.
Some pullers for removing and installing silent blocks have a half-cylinder that helps tighten the second silent block of the upper arm. The half-cylinder rests on a bolt that is inserted into the axle. Then the pipe section is not needed, skip steps 12,13,14.
15. If there is no puller, we rest the end of the lever eye on the jaws of the vice. We press in the silent block with a tool head of a suitable size (a piece of pipe).
16. Install the lever in the reverse order.
The upper arm axle nuts are finally tightened in the “car on wheels” position. After replacing the silent blocks, check and, if necessary, adjust the wheel alignment angles. Use the services of workshops with special equipment.
The article is missing:
- Photo of the instrument
- Photos of parts and consumables
- High-quality photos of repairs
Rubber-metal hinges of the front suspension have a service life of no more than 80-100 thousand km. Depending on operating conditions, the lifespan before replacing silent blocks on Niva 2121 and Urban is reduced significantly. Diagnosis should be made for the following symptoms:
- Loss of straightness of movement, the car “moving” to the side at a constant speed or braking; Spontaneous changes in wheel alignment angles, uneven tire wear; The presence of booming sounds, rattling when working out irregularities; Body rocking VAZ 21214; The appearance of cracks, scuffs, and tears in rubber and metal structural elements.
Lack of timely attention to the problem leads to damage to adjacent suspension parts, deterioration of controllability and driving safety.
Unscrew the wheel bolts, remove the wheel, having first installed a reliable support.
This is what a spare part looks like, not suitable for further use.
Loosen the bolted connection of the upper ball joint (3 pcs), and then move the part up. Attention, an insufficiently unloaded element can cause injury.
Remove the upper arm assembly using 2 19mm wrenches. If soured, use WD-40.
Place the element in a vice, unscrew the 22 mm nuts from the ends, and remove the thrust washer.
Armed with a puller, press out the silent block.
In the absence of a specialized device, it is permissible to use a chisel. In this case, use a hammer to pry up the edges and remove the hinges.
To install a new part, a puller and a spacer or a tool head are required. When you first set up tools, secure one of the silent blocks in the eyelet.
Secure the lever, insert the complete axle, and secure the installed rubber-metal hinge with a nut. Install the remaining silent block in its place, as well as a 160 mm piece of tube (mandrel) between them.
Place the puller cup against the free end.
Tighten the nuts until the elements are completely installed in their original position.
In the second case, placing the eye on the support, hammer the silent block with a pipe of a suitable size or a tool head.
The second stage using improvised means.
After installing the part on the car, lower the car so as to fully load the structure. Tighten the nuts completely.
In addition to hanging the car, removing the wheel, disconnecting it from the lower ball joint, remove the shock absorber from the lower mounting to the spring cup.
Disconnect the stabilizer clip from the link.
Lower the lever and pull out the spring.
After securing the lever axis with a 19 mm wrench, unscrew the 24 mm nut and remove the washer.
Carefully knock out the axle using a metal rod.
Remove the thrust washers.
Remove the lower arm; do not remove the spring cup.
Using a puller or a heavy hammer, press out the silent block.
Replacing the silent blocks of the front and rear levers with new ones is carried out in a similar manner to the disassembly process. For pressing, use a puller or tool head.
Perform final tightening and adjustment with the machine on its wheels. At the end of the process, do not forget to visit the stand to adjust the wheel alignment parameters.
There are often situations when the silent block, despite efforts, does not give in. In addition to the universal lubricant WD-40 and kerosene, a hacksaw or a torch (blowtorch) will help you change the element. In the first case, try to cut the rubber element without touching the lever, then remove the fragments with a screwdriver or other suitable tools. In the second, heat the polymer until it burns out, then knock out the clip with a sledgehammer and a screwdriver.
The service life of the upper silent blocks of the front suspension on the Niva is quite high. However, signs of wear may appear already after a mileage of 70-80 thousand km, or even earlier if the car is operated on a dirt road. The first sign of a worn silent block is a creaking and knocking sound when driving over uneven surfaces.
In the most advanced cases, a worn silent block will affect the car's handling and ability to keep a straight line; increased uneven tire wear and yaw along the road in a straight line are possible. The easiest way to determine the condition of the silent block is visually - there should be no cracks or chips on the surface of the rubber, and there should be no delamination or play.
Repair of the front axle gearbox. Selection of RPM
Reg.: 12/06/2004 Threads / Messages: 4030 / 23189 From: Moscow Age: 66 Car: 21214M, 2013
In general, the rear gearbox did not change; the stocking, axle shafts and oil seals were changed.
Alexey aka ALER.
Reg.: 01/08/2005 Threads / Messages: 3 / 1090 From: Krasnodar Age: 41 Car: VAZ-2131 Louse 7.9.7, 2009; VAZ-21214 2008, LOS 7.9.7. (phasing forward) Prestige 12V214. T-MAX
Reg.: 12/06/2004 Threads / Messages: 4030 / 23189 From: Moscow Age: 66 Car: 21214M, 2013
Alexey aka ALER.
Reg.: 01/08/2005 Threads / Messages: 3 / 1090 From: Krasnodar Age: 41 Car: VAZ-2131 Louse 7.9.7, 2009; VAZ-21214 2008, LOS 7.9.7. (phasing forward) Prestige 12V214. T-MAX
Reg.: 03/09/2006 Threads / Messages: 2 / 408 From: St. Petersburg Auto: Chevrolet Niva-15
Reg.: 03/14/2005 Threads / Messages: 2 / 405 From: Chelyabinsk Age: 46 Car: UAZ-Patriot classic, was a VAZ 2131-10 (1.8i)
Reg.: 12/06/2004 Threads / Messages: 4030 / 23189 From: Moscow Age: 66 Car: 21214M, 2013
The stocking blanks are the same after the change in 21214 (see FAQ). They differ in the place where the shock absorber mounts are welded.
Vovan
I did not understand your question. It turns out that you were replaced at the RMP service with a broken (!) Shniv one. How can this be? I can't figure it out either.
Alexey aka ALER.
Reg.: 03/09/2006 Threads / Messages: 2 / 408 From: St. Petersburg Auto: Chevrolet Niva-15
Reg.: 03/14/2005 Threads / Messages: 2 / 405 From: Chelyabinsk Age: 46 Car: UAZ-Patriot classic, was a VAZ 2131-10 (1.8i)
Reg.: 12/06/2004 Threads / Messages: 4030 / 23189 From: Moscow Age: 66 Car: 21214M, 2013
Is the lower cover of the RPM long and attached to the anti-roll bar? This is the main or even the only difference between RPM Shniva and Nivsky today. I don’t know what exactly they installed on the OPP VAZ in the crocodile in 2005, but I fully admit that they carried out such a modification.
If the bottom cover of the RPM is long, then know that this is a sore spot of the ShN, they constantly break. You can order a steel one somewhere, exactly the same shape. In Moscow, they said it was available in Kemp chain stores, but I only heard about it.
Alexey aka ALER.
Reg.: 03/14/2005 Threads / Messages: 2 / 405 From: Chelyabinsk Age: 46 Car: UAZ-Patriot classic, was a VAZ 2131-10 (1.8i)
Name: Alexey Reg.: 03/05/2005 Threads / Messages: 78 / 4235 From: Moscow, Northern Administrative Okrug Age: 40 Car: Shniva 2021 80 tkm
I’ll post here my report on yesterday’s REM repair
We have: the hum of the rear axle when moving “half-coasting” at speeds of 80 and above, i.e. when the car neither accelerates nor brakes with the engine. A kind of edge. The cardan is not to blame for this problem - it was removed and repaired (replacing the crosspieces + balancing), it did not help, although without the cardan the hum appeared only at 120 and was weak.
Necessary: replace the main pair. (gearbox - 140 tkm)
Purchased: - main pair 3.9 in Dozhda for 1,700 rubles. - spacer sleeve - adjusting rings from 2.55 mm to 3.35 mm in increments of 0.1 mm - 8 pieces in total, bought in Rus' (you need to go there with a micrometer) - shank oil seal - gasket + sealant - (needs replacement I didn't see any bearings)
I will not describe how to remove the gearbox and disassemble it; you can read this in any book. I will only describe the selection of the adjusting ring for the drive gear of the main pair. As you know, there are two ways - using a mandrel and using a contact patch.
I had one more option - I use an old pair (let me remind you once again that I did not change the bearings). On my drive gear it was written -12, and on the new one -20, i.e. I needed to replace the old adjusting ring with a new one 0.08 mm thinner ((-12)-(-20)=08) But I decided to do the whole operation from beginning to end (besides, I don’t know if the factory did it correctly installed the old gear 8 years ago)
Why is the node disassembled?
There are several objective reasons why it is necessary to disassemble the entire front suspension and remove the lower arms. They are associated with the following circumstances:
- most often the unit is disassembled to replace the rubber-metal articulated bushings - silent blocks;
- the lower arm needs to be replaced due to its damage or breakage;
- It is necessary to remove the front beam to replace it or carry out other repair work.
The problem is that on about 50% of Niva cars, the bolt, which is the axis of the lower arm, does not want to voluntarily leave the front beam bushing. In other words, the axle becomes so sour that it is not only impossible to pull it out, but even to turn it. Moreover, on Nivas produced back in the Soviet era, this problem does not exist.
This raises another reason why it is very advisable to disassemble the lower part of the suspension in the first year of operation of the machine - prevention.
Before the axis of the lower arm has time to firmly stick to the bushing, it must be removed, cleaned and lubricated with graphite lubricant. This will save you from many problems in the future, since dismantling a stuck bolt will take a huge amount of time at the most inopportune moment.
Compatibility of springs from Niva and Shnivy
The time comes when the springs on a Chevrolet Niva need to be replaced. First you need to figure out which suspension elements are best to install so that they provide the expected properties.
The springs on the Chevrolet Niva from the regular Niva VAZ-2123 are not suitable. The reason for this is the differences in length. Let's consider the main technical parameters of these elements.
| Parameter name | VAZ-2121 Niva | VAZ-2123 Chevrolet Niva |
| Front | ||
| Bar diameter | 15.2 mm | 15.7 mm |
| Length | 278 mm | 313 mm |
| Rigidity | 74.42 kg/cm | 75 kg/cm |
| Load | 815 kg | 815 kg |
| Rear | ||
| Bar diameter | 13 mm | 13.9 mm |
| Length | 434 mm | 410 mm |
| Rigidity | 22.44 kg/cm | 30 kg/cm |
| Load | 483 kg | 483 kg |
From the comparison table it is clear that the free length of the parts in question does not correspond, which is the reason for the impossibility of installation, since the springs from the Niva are shorter.
Source
Pre-disassembly procedure
To get to the axle, remove it and change the silent blocks, you need to prepare the tools:
- jack with wheel wrench;
- open-end and ring wrenches of standard sizes;
- set of heads and knobs;
- To dismantle rubber-metal hinges, it is advisable to have a puller;
- powerful hammer;
- mount;
- other locksmith tools.
It is not necessary to carry out work on removing the lower arm axis from an inspection hole or on a lift; an open, flat area is sufficient. But some operations are more convenient to perform from a ditch, so its presence is desirable. It is better to wear cloth gloves on your hands so as not to bruise your fingers. Having secured the car in place using wheel chocks under the rear wheels, you can begin disassembly, which is carried out in the following sequence:
- Raise the car on a jack, unscrew and remove the front wheel. Place a block under the lower lever and lower the car onto it.
- Unscrew the 3 lower ball joint fasteners and separate the hub assembly from the arm.
- Unscrew the 2 nuts of the bracket that holds the end of the anti-roll bar to the side of the arm. Use a spatula to remove it from the studs.
- Disconnect the shock absorber from the spring support pad by unscrewing its lower mount. Raise the car with a jack and remove the spring. There is no need to remove the support pad from the lever, unless it is in the way.
- While holding the head of the long bolt that holds the lower arm, unscrew the nut on the other side and remove it along with the washer.
- Using a hammer and a round brass socket, carefully knock the axle out of the bushing. There are several adjusting washers inserted between it and the lever; when knocked out, they will fall out. You can't lose pucks.
The adjusting washers located between the lever and the front beam bushing are installed on the Niva 2121 at the factory. During assembly, they must be returned to their place in the same quantity. Once disassembly is complete, you can begin replacing the silent blocks using a puller. If this is not available, the old rubber-metal bushings are knocked out in a vice, and new ones are carefully pressed into their place using an extension from a piece of pipe.
When assembling the unit, it is very important to treat the entire surface of the lower arm axis with graphite lubricant.
This will save you from suffering and wasting a lot of time during the next disassembly if the bolt becomes tightly stuck.
Lada 4×4 3D “Moonshine” › Logbook › Repair of the Niva front beam - replacement of lower arm bushings
In between the construction of the frame zombie-niva, I am engaged in the restoration of the chassis. Sometimes this process can be described as violent metalworking methods :)))
This time my hands reached the front beam. When dismantling the lower arms, I used a grinder, since it was impossible to remove the axles from the beam bushings. So, pieces of the axles were left sticking out in the beam, and upon inspection, I ordered the bushings themselves to be replaced due to elliptical wear.
What can I tell you? It's just some kind of PPC. First, I watched YouTube to see how people do it. I understood in advance that it would not be easy, but so be it! This is real tough!
I brought two friends into this business; it’s impossible to do it alone! They extracted it like this. We heated the beam with an acetylene cutter, then knocked out the old bushings with pieces of the axles with a sledgehammer. They heated it red hot, the bushings were watered and beaten. It took about three hours, they beat him for a very long time and tediously, like a personal enemy.
