We independently replace gearbox bearings on a VAZ 2121 Niva
03/09/2019 mr.Podshipnik 0 Comment
HOME »
- Car brands » Replacing gearbox bearings
»
You need to read the article carefully, and you will be able to replace the gearbox bearings on a NIVU with your own hands without outside help.
Sometimes a car owner has to discover that the gearbox is not working properly.
Faced with such a problem, many are faced with the choice of where to make repairs?
Reasons why gearbox bearings fail
You can determine for yourself that your gearbox has started to act up:
— extraneous noises and whistles are heard when the engine is running and at neutral speed. If you rev the gas, you'll hear it all perfectly;
- when you drive in any gear, a knock will still be heard;
— automatic switching off or switching on of speed gears occurs;
- if the bearing is jammed, you will not be able to turn on the speed.
When you discover at least one of the above problems, you must immediately replace the bearing. Otherwise, the entire box may be damaged.
And this is already a big problem and a lot of money spent on repairs.
The reasons for bearing failure can be various.
The main ones are:
— the car is stored outside. If the car is parked in a garage, there are fewer problems with the gearbox;
- abnormal driving. You accelerate sharply, brake instantly, and also do not take into account the presence of potholes and potholes when speeding;
— obviously installed low-quality bearing during a previous repair;
— you did not carry out the vehicle maintenance recommended according to the technical passport;
— the car was overloaded beyond normal limits.
The information above is provided to you so that you can operate your vehicle correctly.
When replacing a part, I advise you to carry out the repair yourself.
Of course, you can contact a service station.
Required for this. Money.
If your budget allows it and you are not in a hurry, go there.
Save money.
Decide to renovate your garage.
It's not complicated.
And this article will help you with this.
For quality repairs, you need to be prepared.
First, purchase a new bearing.
Replacing the rear bearing
Replacing the rear wheel bearing of a Niva Chevrolet is impossible without the following tools:
- Pullers;
- Flat screwdriver;
- Pliers;
- Socket head with size 24 .
The work involves several preparatory stages:
- The wheel and brake drum are removed;
- The axle shaft is dismantled;
- The axle shaft is disconnected from the bearing and ring.
This sequence is used when removing a bearing with a ring with your own hands:
- The second jack is used to raise the second part of the bridge. This prevents oil leakage;
- The four fastening nuts are unscrewed;
- The ring and bearing are pressed off the axle shaft.
The condition of the oil seal deserves special attention. A screwdriver and hammer are used to remove the oil seal from the housing.
Then you can proceed to the procedure with the shank bearing itself:
- First you need to make sure that there is enough lubricant. If not, then add it if necessary.
- The appropriate mandrel size is the main element when pressing a bearing onto an axle shaft. You can use a pipe with a suitable diameter, at least half the length of the axle shaft itself.
- The retaining ring is installed next. It is recommended to preheat this part to at least 200 degrees. Then it is connected to the axle shaft. The operation does not cause problems if there are pipes or mandrels of the appropriate size.
- The installation of the axle shaft follows the reverse algorithm.
Removing the bearing, dismantling the bridge from the assembly
The procedure is largely similar to what was described in the previous paragraphs.
- First remove the wheel;
- To dismantle the brake drum mechanism, unscrew the bolts securing it;
- The bearing assembly is checked for play. The axle shaft moves;
- The four axle bolts are unscrewed using a 17mm wrench;
- Before unscrewing the axle itself, it is better to place a special stop under the bridge. This protects the gearbox from transmission oil leaks;
- Two plates or wide keys are installed under the flange. Two bolts M2 and M10 are evenly screwed into special holes;
- We observe the gradual detachment of the bearing from the seat;
- The axle is clamped in a vice to remove the lock washer. The locking element is being dismantled. A chisel and hammer are indispensable tools during this process. But such a simple option is not always feasible due to the fact that the parts stick;
- The element needs to be heated if it cannot be dismantled by other means;
- It is acceptable to use a grinder with small discs. It is also suitable for the steering shaft bearing.
After disassembly, a new bearing is installed in place. Assembly involves performing the steps in reverse order.
Also interesting: Overheating of VAZ-21213 and VAZ-21214 engines on Lada Niva and Lada 4x4
Below, watch a video review of breakdowns and malfunctions of the Niva axle shaft, as well as how to replace the rear bearing on a Niva.
Bearing selection
You can buy a new part at a specialized automotive store or order it online.
When you remove the old bearing and buy it in a store, just show it to the seller and he will select the one you need.
When ordering online, tell the online store manager the car make and year of manufacture. He will quickly select the necessary product.
Don't buy expensive bearings.
Focus on the average price.
Famous manufacturers are not cheap, and the quality and service life of the part is almost the same as that of conventional brands.
However, do not buy cheap Chinese parts either.
There will be more problems and in the end you will also spend a lot of money.
So, you have purchased bearings.
Now assemble the tools and accessories needed for the repair.
How to replace a bearing in a gearbox
Follow the instructions below to replace the gearbox bearing:
— place the car on an inspection hole or overpass;
— first you need to dismantle the gearbox;
- remove the battery;
— put the car in neutral;
— you need to disable the HANDBRAKE. Raise and remove the rear axle;
— unscrew the bolts that secure the cardan and the gearbox flange;
— disconnect the driveshaft;
— Unscrew the bolts securing the exhaust pipe to the exhaust manifold;
— it is necessary to disconnect the oxygen sensor;
— dismantle the starter;
— it is necessary to remove the console and gearshift knob while in the cabin;
— remove the box protection;
— unscrew the clamp connecting the catalyst and the receiving pipe;
— unscrew and remove the working clutch cylinder to the side;
- Unscrew the speedometer cable. We remove the boot and the electrical wire that goes to the rear speed sensor;
— remove the cardan shaft;
— unscrew the traverse that holds the box;
— carefully remove the gearbox with an assistant;
We proceed directly to replacing the bearings.
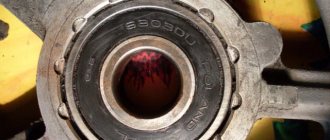
You should know that on your VAZ 2121 NIVA the bearing is located on the secondary shaft. And covered with an oil seal.
You need to remove the bell and retaining ring from the gearbox. There are two of them.
Next, do not disassemble the box.
To remove the bearing, do the following:
— use a large screwdriver to hook the bearing by the groove;
— it is necessary to extend the primary gearbox shaft. We use the bearing part as a support;
— carefully remove the bearing from the primary shaft, while doing this you need to hit it with a small hammer. The time to dismantle the part can be up to forty minutes. Do not hurry. Do everything correctly, paying attention to the bearing misalignment. It shouldn't exist. Don't forget to rotate the shaft;
The bearing to be replaced must be installed using the press-fit method.
You need to carefully tap the inner race of the bearing with a light hammer and pull the shaft towards you.
Having pressed in the new part, begin assembling the unit.
It is performed in the same sequence as dismantling, only in reverse.
Replacing the Main Shaft Bearing of the Niva Chevrolet gearbox
Content
Bearings for the input shaft of the Niva / Shniva transmission
NIVA Chevrolet. RCP and transmission repair
Replacing the bearing in the Niva VAZ 21213 box
Replacing the bearings of a manual transmission of the primary and secondary shafts with Logan
Replacing the primary gearbox shaft of GAZ 53
Removing the Chevrolet Niva gearbox and replacing the clutch
how to remove a bearing from the input shaft (super method)
Removing the gearbox and replacing all cuffs in Chevrolet Air (Chevrolet Aveo)
5-speed gearbox assembly (Gearbox) NIVA Chevrolet
- Chevrolet Captiva body with or without galvanized coating
- Chevrolet Cruz Humming Timing Roller
- Chevrolet Niva car weight
- Chevrolet Lanos Autoclass
- Mirror repeaters Chevrolet Aveo
- How to change the rear suspension on a Chevrolet Aveo
- Gasoline sparks Chevrolet M300
- Find a Chevrolet Captiva
- Timing belt for Chevrolet Lanos 8 valves
- What kind of headlight bulbs does the Chevrolet Tracker have?
- Chevrolet Cruze rear left side glass
- Error p0700 Chevrolet Captiva
- Chevrolet Cruz rope behind the scenes
- Front left door part number Chevrolet Cruz
- The new Chevrolet Niva will be released next year
Home »Video» Chevrolet Niva input shaft
When the clutch is pressed, the transmission noise is lost when it is released, what is the reason? (Chevrolet Niva 2008 in car)
Release is unlikely. it will cover itself, and there will be no noise except the wax. Most likely, the input shaft bearing, which rotates with the crankshaft in neutral and the clutch, and when it engages, the free rotation of the input shaft stops due to a worn bearing (in the box), it stops and the noise appears naturally lost. More precisely, you can find it by comparing the first and direct noise. The direct noise should be less because the bearing does not carry a circular load and simply supports the shaft. But this is best done at approximately the same engine speeds (for example, 2000 in first and straight, then the tone of the engine will be the same and it will be easier to distinguish the noise of the gearbox). About the input shaft bearing in the flywheel. it doesn't actually wear out because 99% of the main shaft rotates with the input/output, meaning the bearing (needle) doesn't work. This is it!
Replacing the bearing in the Niva VAZ 21213 box
exhaust bearing; see; lubricate or change
1. There is no oil in the gearbox. 2. Wearing gearbox bearings. 3. Wear of the gears of the permanent gearbox.
READ Lada Granta Strut Support Bearing Replacement
Yes, it's a bearing =) I've been traveling for a year now)) I'll remove the gearbox) Khonezh as such) Well, I'm used to it, I'll change the clutch earlier and at the same time give it away
What the. Yen release?! Literacy. The bearings rattle on the input shaft. Often a guide at the end of the crankshaft
compress or bearing on input shaft
Well, not the clutch. or bearings or input shaft bearings.
The clutch release and the input shaft bearing located on the flywheel are only shaken when the clutch is depressed. If the noise remains constant until it is pressed, then it is either the input shaft bearing or the output shaft bearing. If you change, that's it! But in general, the five-speed VAZ transmission transmits such noise.
if it's movable it means it gets closer to the basket and drives it, and when you see the clutch the load on it increases and the noise is lost. because of this, in most cases it is covered. have to take
The noise is coming from the clutch disc. The springs on the disc are weakened.
noise. noise, but there was a crack while driving after engaging the gear. crackle crackle. but when the clutch is tight, all is lost. the bearing can't crack so it will come out when the noise falls apart. here's a crack that can tell me who stumbled.
When the engine is on, the ratchet rattles, the clutch invariably clangs, it warms up, everything is lost
1. Replaceable gearboxes
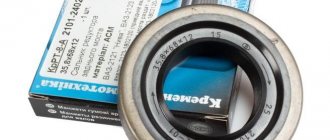
750706 (2123-1701033). Input shaft bearing 750306 (2123-1701190). Secondary shaft bearing 92705 (2107-1701073). Intermediate and secondary shaft bearing 157070 (2101-1701068). Intermediate shaft bearing 464904 (2101-1701108). Bearing 1701031). fifth gear 180502 (2101-1701031). input shaft bearing (rear end of crankshaft) 2123-1703360. connection between gear lever and gearbox
830803AK10E (2123-1041056). Roller generator 180202 (24940220). Side straightener bearing (KATEK s/o, not specified) 180103 (24940220). Rectifier bearing (spark) 180302 (24940230). Drive side bearing (“KATEK”) 180303 (24940230). Drive side bearing (“KATEK”, “Iskra”)
750706 (2123-1701033). Bearing bearing shaft 750306 (2123-1701190). intermediate connection, and conductive shaft bearing 12507 (21213-1802092). Intermediate shaft bearing 50209 (2121-1802168). differential bearing (front bearing) 20921 (21213) (212189))). differential bearing (rear bearing)
5. Rear axle bearings
180508 (2121-2403080). bearing axis 2007807 (2123-2303036). differential bearing 7705 (2101-2402025). gear (front bearing) 7807 (2101-2402041). gear (rear support) 305 (21213-1802208). drive shaft bearing
6. Front axle bearings
50306 (2107-1701190). inner hinge body 20077 (2123-2303036). differential bearing 7705 (2101-2402025). gear (front bearing) 7807 (2101-2402041). gear (rear support) 305 (21213-1802208). drive shaft bearing
READ Replacement Silent Blocks of the Rear Beam Golf 4
2007108 (2121-3103020) in dual-row DAC version 40x74x40
8. Gear bearings
996805 (2101-3401123 xo; 2101-3401129 sr). lower bearing 996905 (2101-3401122 kso; 2101-3401129 sr). top bearing
9. Clutch clutch bearing
520907 E1C23 (2123-16011180)
We work on a ditch or on an elevator.
Remove the box (see “Removing the box on the UMPO-331 engine”). It is more convenient to determine the condition of the bearing when removing the gearbox with the clutch housing (for example, when replacing clutch units). If you dismantle only the gearbox and do not remove the clutch housing, the condition of the bearing can be assessed by making a simple wooden mandrel with a diameter of 16 mm and a length of 200 mm. We carry the mandrel through the clutch housing to the bearing bore. With light blows of a hammer, hammer the mandrel into the bearing hole to a depth of 10-12 mm.
Input shaft noise
By rotating and shaking the mandrel, we assess the condition of the bearing (the clutch housing has been removed for clarity).
In normal bearing condition, the inner ring rotates smoothly relative to the outer ring without binding or noise.
To replace the bearing, remove the clutch housing or clutch housing box (see “Replacing the housing and clutch disc on a VAZ-2106 engine”).
A cup puller can be used to remove the bearing. Insert a 60-80mm long M8 bolt with a head into the hole of the inner race of the bearing so that it engages the edge of the race ring. We secure the bolt with a rod that is at least 7mm wide (an M8 bolt or a stud machined or smoothed to 7mm can be used). We put a puller cup, washer and nut on the bolt and tie the nut.
. we compress the bearing into a cup.
The bearing can be removed in another way:
with an impact puller with a hook attached to the inner ring.
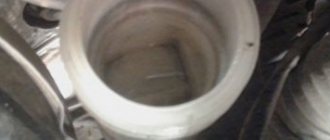
Loosen the leather slightly to clean the bearing surface in the crankshaft flange bore.
We press the corresponding section of the pipe against the bearing, emphasizing the outer ring of the bearing.
Reinstall the disassembled parts in the reverse order of disassembly.
Replacing the front bearing of the Chevrolet Niva transmission shaft
- Flat head screwdriver
- Small hammer
- Centering spindle for driven drive
- Impact bearing
Spare parts and consumables:
- Litol-24 lubricant
- sawdust
- Thin skin
- Main shaft bearing
- rags
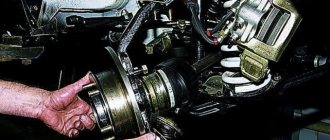
The front bearing of the gearbox input shaft is functionally connected to the gearbox and plays the role of supporting the front shaft. But this bearing is located at the output of the engine crankshaft, so its replacement is described in this section.
If this bearing is worn or stuck due to lack of lubrication, the "clutch" effect of the steering makes shifting difficult.
There are a huge number of pullers (inertia, pin, etc.) available to press out this bearing. But they are not always at hand.
READ Audi A5 Sportback 2012 Reviews
Perform work on the control channel or overpass.
1. Remove the box from the car as described here.
2. Remove the coupling as described here.
3. Remove the flywheel as described here.
4. Squeeze the bearing, there are three ways to pull this part out, you see. Lower.
5. Using fine sandpaper, clean the surface of the seat under the bearing in the crankcase flange hole.
6. Slide the new bearing onto the tool head or pipe of the appropriate size, focusing only on the outer race of the bearing.
The bearing should not be pressed when force is applied to the inner ring. In this case, the bearing will inevitably be damaged.
7. Replace the removed parts and components in the reverse order.
Disassembling the box; changing bearings; VAZ 21213 Fields.
Disassembly, defect and assembly. Join the Ontakte Autoscientist group: project.
The proposed method with the introduction of improvised means almost always leads to the desired result, since the fit of the bearing in the crankshaft seat is relatively weak.
1. Prepare a mixture of lubricant and Litol-1 saws in a 1:1 ratio to mix the bearings to a uniform consistency.
The volume is the consistency of at least a three-liter polyethylene lid, completely filled.
2. Fill the mixture into the internal cavity behind the bearing.
3. To center the driven disk, press the offset, adding mixture periodically as the bearing comes out.
4. Until it completely leaves the nest.
Once this method is implemented, the bearing is no longer suitable for future use and must be replaced.
5. Clean the consistency from the bearing housing.
You can use a regular puller to remove the bearing.
1. Insert an M8 bolt 60-80 mm long into the hole of the inner bearing race so that it engages the rear edge of the ring.
2. Secure an M8 bolt to at least some 7mm diameter rods (an M8 bolt or pin retracted or tapered to 7mm can be used).
3. A suitable piece of pipe (internal diameter 36-40 mm), a huge washer and a nut are put on the bolt.
4. After tightening the nut, press down on the bearing.
5. Extruded bearing and puller.
The bearing can also be knocked off the seat with a hook remover.
1. We are engaged to the cone.
2. As the weight moves back and forth, the puller pushes the bearing until it leaves the seat.
- Photo tool
- Photos of spare parts and accessories
- Repair of high-quality photos
Source