There are a lot of videos of the same type on YouTube on how to make footwell lights with your own hands, where the wires lead from the door limit switches or the ceiling lamp, but my laziness found a new and quick way to make footwell lights on a VAZ-2114. I may not be the discoverer of this method, but I have never seen anything like it anywhere. So, let's look at the contacts of BI BSK.
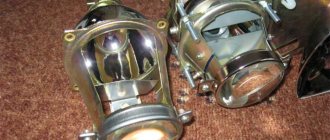
Contacts BI BSK VAZ 2114
In my car, the footwell lighting is implemented through an open door indicator, the signal of which comes to the BI BSK, so this method can be considered the fastest and simplest. Operating principle: when the driver's door is opened, the signal comes to pin 6, and when the other doors are opened, the signal comes to pin 7. If you look at the signal table (below), pins 6 and 7 are ground. To make the backlight quickly, you will have to “work around” the car electrician a little. We power the positive wire of our backlight from wherever it is convenient, even from the cigarette lighter, and connect the ground wire to pins 6 and 7 of the BI BSK chip. Everything is ready, all that remains is to power the LED strip to the connected wires. In the end, we spent about half a meter of wiring and saved a lot of time.
It is worth noting that in order for the footlights to work correctly, you will have to connect pins 6 and 7 to each other, this did not affect the operation of my car in any way, at least I personally did not notice any changes. You can also theoretically consider other conditions under which the foot lighting will work; if interested, read after the signal table.
Signal table BI BSK VAZ 2114
BACKLIGHT DOESN'T WORK
In cases where the light in the interior of a VAZ 2114 does not turn on, drivers who do not understand the electrical equipment of the car and its repair immediately begin to go to the Internet and try to find some advice or a solution to the problem there. But, no matter how strange it may be, you can fix the interior lighting of a VAZ 2114 yourself, you only need a minimum of tools for this and a detailed action plan, which we will analyze today.
INITIAL CHECK
It is better to start repairs by checking the functionality of a specific lamp - perhaps the light bulb has simply burned out and will simply need to be replaced. If the light in the interior of the VAZ 2114 does not go out or, on the contrary, does not turn on when the doors are opened, then you need to check the door switches for functionality, you need to see if the contacts are in order, if they have oxidized, then it is better to clean them and wipe them with alcohol.
There are also certain nuances if there are LEDs. Typically, drivers prefer to replace conventional lamps with LEDs as quickly as possible, this is due to the following factors:
- Cost-effective;
- Longer service life;
- Light brightness is much higher at low cost.
So you need to check the plus and minus, and if so, turn the light bulb the other way and see if it lights up after that. In any case, it is better to convert the lampshade of the individual lighting of the VAZ 2114 to LED lamps so that it produces more brightness.
Also, on all light bulbs you need to check the voltage at the contacts and find out whether current is flowing there. If it is not there, then you will have to look for a broken wire somewhere in the wiring. This will require disassembling certain parts of the car, but there is no getting around it - if the interior lighting of the VAZ 2114 no longer works, then it needs to be repaired
The greatest attention still needs to be paid to the limit switches; often the problem with breaking the circuit lies precisely in them; a wire can easily break there, and you won’t even notice it
How interior lighting works
All electric interior lighting can be divided into the following components:
- dashboard lighting (we have already talked about it, as well as its malfunctions, earlier, so today we will not dwell on it in detail);
- main interior lamp of VAZ 2114;
- lamps for individual lighting;
- illumination of glove compartments and cigarette lighter.
The most important and basic light source of all the elements listed above is the VAZ 2114 lamp. It is mounted on the ceiling of the passenger compartment in the front part and is turned on using limit switches located in all doors of the car. When you open even one door, the light instantly lights up, and when all doors are closed, it turns off.
In addition, it is also possible to force the lamp to be turned on/off using special buttons located on the side pillars.
Diagnostics
If problems arise with the vehicle's lighting equipment, the cause of the problem should be identified as quickly as possible and eliminated. The search should begin with the simplest and at the same time the most common causes. So, if one headlight on your VAZ 2114 does not light up, then most likely the reason is that the bulb of this headlight has burned out.
The simultaneous burnout of two light bulbs in both headlights also happens, but is extremely rare. As a rule, this occurs during sudden changes in voltage in the network and is accompanied by serious damage to other electronic equipment. Checking the serviceability of the light bulbs is very simple - you just need to replace them with new ones.
Burnt out light bulb filament
If, after replacement, the new light bulbs also refuse to work, then you should move on to the next stage - checking the condition of the sockets themselves. They very often become covered with a layer of oxides and stop transmitting current to the lamp. In order to fix this, you should carefully clean the nests with fine sandpaper or wipe them with a hard cloth soaked in kerosene or VD-40. If this also does not help, then move on to checking the circuit.
Inspection of sockets and contacts of headlight bulbs of VAZ 2114
In order to check the integrity of the electrical circuit, you should “ring” the wires leading to the headlights from the fuse box with a tester. If there is a signal, then the wires are working; if not, then there is a break and the wires should be replaced with new ones.
The next step of the test (although it can be done first) will be to check the fuses located in the common block. In this case, two 7.5 ampere fuses, labeled F12 and F13, are responsible for protecting the headlights. The first of them is in the right headlight circuit, and the second is in the left one.
The failure of one of them will lead to a breakdown of the light on only one side (this feature, along with the burnout of one light bulb, may be the reason why only one headlight is on). Solving this problem is extremely simple - you just need to replace the fuses with others designed for the same current strength.
Low beam elements on the fuse block
After all the methods described above have been tried, and you still have not been able to figure out why the low beam is not on and the high beam is on on the VAZ 2114, then you should check the last possible reason - the headlight switch button. First, you should check how the wires are attached to it - they have not come loose or oxidized. If everything seems to be working fine, then you need to check the button itself. The easiest way to do this is to replace it with a new one (fortunately, it costs a little more than a hundred rubles).
Finishing the conversation about possible malfunctions, it is worth mentioning an extremely rare but possible reason - a breakdown of the K9 relay (it is located in the common block). If a complete check of all electronic elements and replacement of the power button do not produce results, then this relay should also be replaced. Such a replacement should help correct the situation and return both headlights to operation.
Damage to the VAZ 2114 light switch button
Replacing the backlight
In analysis
To improve the quality of your dashboard lighting, it is advisable to install new LEDs in place of the old ones. They provide excellent illumination, consume minimal energy, and guarantee a high level of data reading.
- Buy a set of LED lamps, having previously calculated the number of devices needed for each sensor.
- After removing the block, install the resistors and lamps in specially designated places on the VAZ 2114 - in the sockets. To dismantle the cartridges, they are carefully unscrewed counterclockwise. New sockets are installed in their place and light bulbs are inserted. Respect the polarity and position the LED heads. They will have to be carefully ground off.
- Connect the power and check how the new backlight works.
- Reassemble step by step. Be sure to route the wiring to the board and carefully secure it to it. This way, the backlight components will not interfere with the reassembly process.
- Make sure the instrument panel arrows are positioned correctly. When trying to quickly complete a job, they often become deformed and bent.
- The backlight structure is fixed with screws.
- The power for the LEDs is connected to the power supply for the light bulbs, the arrows are put on and set to zero.
- Using the on-board computer, check the operation of each sensor and device. If the IDs are functioning correctly, return the instrument panel to its original condition. That is, assemble the entire assembly.
Loading …
The filament in the light bulb has burned out
The first thought that comes to mind if any light source does not turn on is that the light bulb has burned out. Car lamps are designed in such a way that the low beam filament can burn out while the high beam filament is working. That is, in halogen lamps there are two separate filaments, and the breakage of one of them has no effect on the performance of the second.
To replace a light bulb, it is not at all necessary to contact the services of an auto electrician. All you need to do is follow these steps:
- open the car hood;
- remove the protective cover on both sides of the headlight;
- disable contact group;
- remove the spring clips;
- remove the burnt out light bulb;
- insert new one;
- Carry out all preparatory steps in reverse order.
At the same time, we should not forget to follow some rules:
- It is recommended to wipe the surface of the flask with alcohol before installation, otherwise it may immediately burn due to the presence of greasy or dirty stains;
- Do not touch the flask with unprotected hands, as this may lead to contamination of its surface. This is best done with cotton gloves, but you can also use a napkin or rag.
Checking and replacing lamps
Now it’s time to arm yourself with a tester (the simplest Chinese one will do) and start ringing the light bulbs. To do this, put the device in resistance measurement mode (for LED light bulbs, the tester must be put in diode testing mode), and the lamps are removed one by one and dialed.
A tester is necessary for the reason that some light bulbs do not always light up and it is visually impossible to determine their serviceability. We won’t drain brake fluid or fuel from a VAZ to check the low level indicators of one or the other. If it is reliably known which light bulbs are working (for example, the illumination of dial gauges is normal), then these lamps can be left alone.
Nevertheless, I would recommend changing them all, especially if the VAZ modification has incandescent light bulbs (and this is almost always the case). Since it is unknown how long the old ones will last, and disassembling the instrument panel again, say, in a week is irrational.
After installing the new lamps, we connect the shield, without installing it in place yet, and check what can be easily checked visually: turn on the ignition, handbrake, turn indicators, etc. If everything is in order, then the dashboard can be assembled.
Solution
The stores offer several options for light sources for replacing lamps in the instrument cluster:
- traditional incandescent lamps,
- LED in a plastic socket,
- SMD LED is a more expensive and reliable option, a super-bright diode.
The number of backlight and control lamps is up to 19 pieces. It varies slightly depending on the design of the instrument cluster and the modification of the vehicle. Many car owners choose LEDs due to lower energy consumption and longer service life. This backlight is brighter and gives an interesting bluish color instead of the standard green. But due to the design of the diode, the brightness control of the instrument illumination will not work, always turning it on at full power. On a long road trip at night, this can be distracting and irritating to the eyes. But in any case, the choice of light sources is yours.
Backlight options
The modern car accessories market offers two lighting options: neon and LED. These lighting options are installed either separately or combined with each other, illuminating part of the interior with neon and part with LEDs.
Neon lighting is found in the form of lamps or flexible cord. The lamps emit bright, even light, but are susceptible to mechanical damage and often burn out with intensive use. Flexible tape is more practical, it is easily installed in the car, is suitable for illuminating uneven and embossed surfaces, does not break and consumes little electricity.
LED backlighting is becoming increasingly popular, which has the following advantages:
- flexible design;
- compact dimensions;
- ease of installation;
- convenient form of purchase (by footage);
- low sensitivity to mechanical damage;
- increased service life;
- the ability to change the color of the light flux (in RGB strips).
Thanks to its compact size, the LED strip can be glued to small interior elements: handles, cigarette lighter, steering wheel trim. With its help, you can get interesting lighting effects, ranging from smooth switching on and off of the backlight, ending with transitions between several colors.
IMPORTANT! The color of the lighting should be in harmony with the color of the interior. The result and quality of the glow depend on the correct choice of color.
Why there is no light in the VAZ 2114 interior: the secrets of an electrician
The electrical equipment system of the VAZ 2114 car includes a whole range of different lighting devices.
It's good when it's light in the cabin
Conventionally, they can be divided into the following groups:
- Headlight;
- Tail lights;
- Lighting in the cabin.
To make it easier for the driver to navigate the road at night, halogen low and high beam lamps are installed in front of the car in the headlight unit. Turn signal lamps are also installed in one unit with them, so that when repairing the car the entire unit can be removed. At the rear there is one block on each side, which includes brake lights, turn lamps and reverse lamps.
What do VAZ fuses protect?
In order to quickly identify the causes of malfunctions in the VAZ 2114 electrical system, it will be useful not only to know the color codes. Knowing the purpose of each of them, the process of identifying a breakdown is accelerated.
Rated currents of the Lada electronics:
ZE F1 and F2 are designed for a rated current of 10 A. The first protects the rear fog light bulbs from burning out. The object of protection of the second is the light direction indicators, emergency lights and relay-breakers of these devices.
Protective elements F3, F4, F8 - F15 are manufactured for a maximum amperage of 7.5 A. They are designed to protect interior light bulbs and trunk lighting, and the engine start light on the instrument panel. One of them protects the rear window heating circuit. Individual elements prevent a short circuit from occurring in the circuit of the left and right fog lamps. F10 is responsible for breaking the circuit of the license plate lighting bulbs, the dashboard and the lighting under the hood. The remaining 7.5-amp protective elements protect the head optics lamps (dimensions, low and high beam headlights).
An element with a current of 15 A is necessary to protect many elements, the main ones of which are: the generator winding, oil pressure lamps, and brake fluid temperature. The 20-amp fuse F5 is responsible for the sound signal and the electric motor that rotates the cooling fan.
The most powerful, 30-amp electrical circuits protect the contacts of power windows, electric heater motors, windshield washer and headlight cleaners.
Installation of new equipment
Now let’s figure out how to install an LED lamp on a car; for this we will definitely need a VAZ 2114 interior lighting circuit.
This is done in the following sequence:
- Remove the lampshade;
- Unscrew the base of the case;
- We connect the new lampshade;
- Screw the LED lamp into place.
First we need to remove the original lampshade and disconnect the wires from it, all the contacts, we also need to remove the diffuser. The housing is screwed to the roof sheathing with four self-tapping screws; they are simply unscrewed and the housing is removed. Next, you need to take a new case and connect all the plugs in accordance with the diagram to the contacts that go to the battery. The new housing is screwed in exactly the same way onto the same four self-tapping screws, and the lens is snapped into place.
The light in the interior of the VAZ-2115 does not work: possible reasons
Lighting in the VAZ-2115 is one of the most important components of comfortable movement by car at night. If the interior light does not work, the driver faces a lot of inconvenience.
The light emitted by street lamps will not help you find the desired item in the glove compartment, therefore, it is best for the driver to take care in advance that all the light bulbs and other components of the car’s electrical equipment work stably and reliably. But what to do in a situation if the lighting fixtures in the interior of a VAZ-2115 for some reason refuse to fulfill their duties?
The main reasons for the lack of lighting in the cabin
Inside the VAZ-2115, the manufacturer often installs one lamp located directly on the ceiling and individual lamps. It is attached using fasteners and is activated when the doors are opened. Drivers have been familiar with this principle of operation of a lighting device since the “classic” times. The lamp can also be turned on and off manually using a switch located on its body.
The lampshade and other lighting fixtures are part of the electrical system, therefore, if any malfunctions occur with the light, you should start looking for the problem from the electrical circuit diagram. Most drivers prefer to have their car electrically repaired, but such a nuisance can be fixed on your own. To do this, you need to arm yourself with a minimum set of tools and the circuit itself.
The main reasons for the lack of lighting inside the car are:
- Burnt out light bulbs;
- Breakage inside the lampshade;
- Relay or fuse problem;
- Breakdowns in the wiring.
When the reason why the lighting fixtures have stopped functioning properly has been determined, you can safely move on to fixing the problem yourself. As a rule, such work does not cause any particular difficulties for novice drivers. All you need is basic knowledge of how automotive electrical equipment works.
Repairing light in VAZ-2115
The first step is to make sure the light bulbs are working. Often the driver goes into the real jungle, looking for a breakdown when it is on the very surface. Using a screwdriver, unscrew the fastening elements of the lamp cover and remove the light bulb. You need to make sure that there is a filament, or simply connect the lighting element to the battery. If the light comes on, you should proceed to the next stage of searching for the problem.
Very often, in cars of the VAZ family there is no light due to a breakdown of the lamp itself. There are often cases when the contacts inside the element melted, resulting in a short circuit. The lampshade can be easily removed using a screwdriver. It is possible to check its functionality by ringing the contacts. It is also recommended to conduct a thorough visual diagnosis, which very often provides answers to all the driver’s questions.
The consequence of a short circuit is the breakdown of the relay or fuse. It is enough to replace failed elements with new ones, after which the light in the VAZ-2115 interior will light up again. Breakdowns that occur in a car's electrical wiring are perhaps the most unpleasant and frightening malfunction for drivers. Not many people have the skill and experience to operate this car system. Therefore, if the reason for the lack of light lies precisely in the wiring, it is best to leave your “iron horse” in the experienced hands of an electrician. The difficulty in handling wiring is due to the fact that diagnostic operations involve ringing the wires from the power supply to the lamp or button.
Step-by-step instructions for replacing light bulbs in the dashboard of a VAZ-2114
- We release the decorative cover of the front panel. For this we need screwdrivers: a short Phillips and a flathead one. Lower the steering column to the lower position using the height adjustment lever to keep it out of the way. The photo shows the mounting locations for the casing:
- There are four screws on the bottom of the visor and above the steering column. Unscrew them with a short Phillips screwdriver.
- Using a flathead screwdriver, pry off the decorative cap to the right of the row of switches. There is another fastening screw under it.
- Also, remove the handles from the heater switch and damper control sliders by pulling them towards you.
- If you have a car radio, you will also have to remove it. Unfortunately, you cannot do without complete dismantling. Arrows indicate locations for removal
- Pull the front panel cover towards you. He must move. You don’t have to remove it completely - there will be enough space to access the fastening screws on the sides of the instrument cluster. Carry out the actions carefully
- Unscrew the fastening screws with a long screwdriver. The combination will be released and you can tilt it towards yourself. Pull out the two blocks with wires. Don’t be afraid to mix them up - there is a color marking, and the asymmetrical shape of the connector will prevent you from connecting it incorrectly. The arrow indicates the location of the cartridge handle
- On the back cover of the instrument cluster there are cartridge handles. Arm yourself with small pliers. This will make it easier to unscrew them. To release the cartridge, half a turn counterclockwise is enough. You can safely take out all the cartridges - they are the same. Next, you can check the lamps with a tester and replace the burnt ones, or replace them all with LEDs at once. Try to ensure that they fit tightly in the cartridge, otherwise the contact will be unreliable.
- We reassemble in reverse order. We insert the cartridges into the seats so that the antennae fall into the grooves, carefully turn them with pliers until they stop. We connect both blocks to the connectors of the instrument cluster.
- Let's check if all the lamps are working:
- raise the handbrake and turn on the ignition: so let’s check the handbrake, generator, oil pressure and check lamps,
- turn on the hazard warning lights - check the warning lamp and direction indicator lamps,
- pull the headlight switch lever towards you - temporarily turn on the high beams, check the warning lamp,
- turn on the dimensions - see if the scales are evenly illuminated, and if the warning lamp, if any, is on.
If everything works correctly, we fix the instrument cluster and the front panel casing, and replace the heater switch handles and damper controls.
Check the brightness and functionality of all devices
Congratulations, now the instrument lighting and warning lights are working properly, and you will always be aware of what is happening with the car. The overall aesthetics of the front panel will also improve - the evenly lit front panel looks beautiful.
We fix the lights and get acquainted with electrics
Since the main fault locations have been identified, you can safely move directly to methods for solving the problem. It is worth noting that with automotive electrics, not everything is so simple, but since this is a VAZ-2114, everything can be said very clearly here. Let's move on to methods for solving the problem.
The first thing that needs to be checked is the lighting lamp, since its burnout can cause the light to go out in the car interior.
In order to get it out you will have to remove the lamp cover. After this, you need to check whether there is a filament, and insert the lamp into the control device or simply connect it to the battery. If the lamp lights up, then it is not the cause of the malfunction.
More than once, the cause of the malfunction was the lamp itself, where the contact group simply melted and closed, which caused a burnout or a blown fuse.
To diagnose it, you will need to remove it from the car and visually inspect it. It is also recommended to ring the contacts going from the lamp to the wiring.
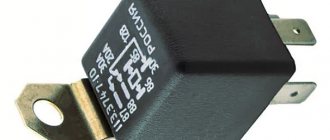
Fuse and relay for VAZ-2114
The next reason is a blown interior lighting fuse. This part can burn out due to a short circuit, which for various reasons occurs in the on-board circuit. Often the short circuit is caused by a malfunction of the lampshade.
Electrical wiring is every car enthusiast's nightmare. For some, everything is clear, but for others, it’s a “dark forest.” So, during diagnostic operations, it is necessary to ring the wires going from the lampshade to the power supply or button.
There are few reasons for the malfunction of the interior light in the VAZ-2114, and every novice car enthusiast will be able to determine the cause of the malfunction. It is worth remembering that if a car enthusiast is not sure that he can deal with the problem, then it is best to contact a car service center.
If you find an error, please select a piece of text and press Ctrl+Enter.
Privacy Overview
This website uses cookies to improve your experience while you navigate through the website. Out of these cookies, the cookies that are categorized as necessary are stored on your browser as they are as essential for the working of basic functionalities of the website. We also use third-party cookies that help us analyze and understand how you use this website. These cookies will be stored in your browser only with your consent. You also have the option to opt-out of these cookies. But opting out of some of these cookies may have an effect on your browsing experience.
Necessary cookies are absolutely essential for the website to function properly. This category only includes cookies that ensures basic functionalities and security features of the website. These cookies do not store any personal information.
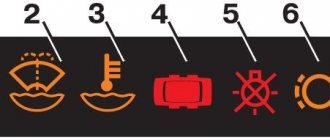
Why change the backlighting of individual buttons on the VAZ 2114 dashboard
On the VAZ 2114, the illumination of the buttons for controlling the dimensions, low beam, front and rear fog lights, as well as the rear window heating is green from the factory. Over time, many owners get tired of this glow and there is a desire to replace it, make it non-standard. After making a decision about such modifications, you need to decide: do this work yourself or contact the service. Since the process of replacing button backlighting is not a complicated procedure, in most cases, car owners carry out such an upgrade with their own hands.
The standard green backlighting of the buttons gets boring over time.