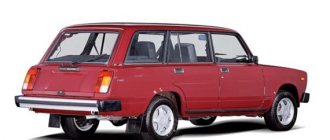
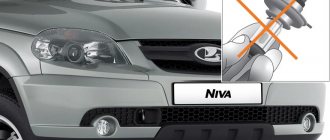
The VAZ 2114 is a restyling of the five-door hatchback VAZ 2109, the model was produced until 2013 by the Volzhsky Automobile Plant and continued the Samara-2 family. Unlike its predecessor, the fourteenth model received an update in the front part of the body: a modified radiator grille, bumper, and moldings. The power unit was supplemented with a new engine from the VAZ 2111 line.
The rear wing of the VAZ 2114 is not a frequent consumable; the part must be replaced after mechanical damage during an accident, if there is a metal rupture. Unlike the front fender and sills, the rear wheel arch and fender as a whole are not so affected by corrosion; the element is more protected from water and dirt. The first repairs using the VAZ 2114 rear wing repair insert begin three years after purchasing a new car.
How to prepare a car and what tools are needed
Before starting a full-fledged repair, it is necessary to prepare the cars, select the necessary tools for dismantling, installation and related work. The rear fenders are installed on the body by spot welding; to replace them, the part must be cut out from the car. The front part is installed with self-tapping screws from the manufacturer's factory.
- The car is installed on an overpass or other flat surface, preferably above floor level. If this is not possible, then you need to jack up the car.
- The battery is removed.
- When replacing, the bumper and trim are removed.
- Before removing the front bumper, the fog lamp terminals are disconnected.
To dismantle the bumper you will need the following tools:
- Phillips screwdriver, flat;
- set of wrenches;
- knife;
- pliers;
If repairs are required, you should prepare an anti-corrosion kit, automotive primer, and auto enamel. To dismantle the rear wing you will need:
- chisel with a sharp edge;
- Sander;
- sandpaper R-80;
- semi-automatic welding;
- anti-corrosion mastic, primer;
- putty, set of spatulas;
- auto enamel.
Rear wings are considered difficult to repair and replace parts for the VAZ 2114. When replacing an element, it is recommended to carefully inspect the part and replace it partially if there is a small defect. Original repair kits offer both a solid element and repair inserts. The price of an original complete replica of the front wing starts from 2,500 rubles, the rear from 7,000. Replacing part of a replica with a complete element is easier and cheaper.
Preparation for wing replacement and necessary tools
First you need to prepare the car itself. To do this, he should drive the VAZ 2114 into a technical pit or overpass. If this is not possible, then it will be enough to simply lift it with a jack on the side from which the wing will be replaced and securely fix it in this position. Next, you need to remove the wheel and remove all interfering parts. These include:
- front bumper;
- facing linings;
- thresholds;
- wheel arch liners
This is interesting: What is power steering fluid and is it possible to mix different brands?
Before removing the bumper, you need to disconnect the contacts of the fog lights. To do this, simply remove the terminal with “minus” polarity from the battery. Such a simple procedure will significantly reduce the risk of damage to all vehicle electronics, saving the owner from unnecessary financial costs.
Front bumper
For independent work you will need the following materials and tools:
- socket wrench with 8, 10 head;
- flat-head screwdriver;
- ratchet, extension;
- rags;
- pliers or pliers;
- knife;
- anti-corrosion lubricant WD-40;
- new part.
It should be noted that in the process of replacing a wing, not all of the above tools may be needed. It will be enough for an experienced master to have only a few of them on hand. However, if this is your first time deciding to remove the wing yourself, then it is better to prepare the entire kit so that during the work you will not be distracted by searching for the missing tools.
After completing all the preparatory work, you can begin replacing the old VAZ 2114 wing and installing a new one.
Algorithm of actions
Dismantling and subsequent insertion of the front wing takes up to 1 hour, even for inexperienced craftsmen. It is important to perform the entire sequence of actions correctly:
- Unscrew the two nuts in the bumper fasteners and lower the edge of the bumper down.
- Remove the outer part of the sill trim.
- Remove the headlight cover.
- Remove the turn signal from the headlight.
- Remove the side turn signal.
To quickly remove the side turn signal, you need to squeeze the latch, disconnect the block, pull out the block with the socket and the light bulb, and push the socket inside.
- Using a 10mm wrench, unscrew the self-tapping screw that secures the part to the bracket.
- Unscrew the screws under the threshold, two bolts that secure the part to the rack, they are located on the inside.
- Unscrew the 4 bolts that connect the element and the front part of the body.
- Using a knife, cut off the sealant on which the wing is mounted on its top shelf on the body.
Useful video
You can get additional interesting information from the video below:
Use our recommendations, step by step repeating all the points in the instructions for replacing the wing, and you will be pleasantly surprised that the whole job will take you no more than a few hours.
1200 rub. for the photo report
We pay for photo reports on car repairs. Earnings from 10,000 rubles/month.
Write:
The VAZ 2114 car of the Samara 2 family is a restyled version of the VAZ 2109. The model differs from its predecessor in the original design of the front part of the body, headlights, hood, design of bumpers and moldings. During the operation of the car, damage to the body occurs, this is facilitated by corrosion, minor accidents, and the external environment. Wings are also susceptible to these negative influences, which is why they sometimes require replacement. This photo report shows how the front wing of a VAZ 2114 is replaced.
Repair kit
If you need to replace the rear left wing of a VAZ 2114, which has significant deformation, it is recommended to purchase a complete repair kit, which includes two sidewall panels, moldings, bolts, and inserts. The number that the AvtoVAZ manufacturer uses for its repair kits for 2114 is 21090-5401065-00. In addition to the main enterprise, parts for the Lada are produced by companies and experimental workshops:
- Nachalo software;
- Kamaz (Naberezhnye Chelny).
All replicas are supplied in original packaging; parts are made from black steel up to 0.8 mm thick. The part must be covered with transport primer.
Repair insert
If there is a need to replace not a whole wing, but a part of it, then it is recommended to use repairs: the wheel arch of the front and rear wing, moldings. Repair inserts are installed in factory locations. The replica parts are made of industrial steel, with a maximum wheel arch thickness of 1 mm.
Original body parts are manufactured by AvtoVAZ and Kamaz, they are treated with shipping primer and are intended for painting. The cost of a repair insert for one wing is from 120 rubles. The price of the rear side panel starts from RUB 3,000.
DIY car repair and maintenance
The front fender of any modern car is very easy to dismantle. In relation to the VAZ, it is even simpler, however, removing the front wing of the VAZ 2114 is complicated by “collective farm tuning”.
The door sill covers for the VAZ 2114 are designed to complicate the dismantling process and make the car's sills rot more quickly, even if it was presented as a restyling of the Nine, the above-mentioned outcome is inevitable. Ugly, harmful and cheap, in general, AvtoVAZ has in its repertoire...
We begin work by fixing the wheels of the car, jacking it up and removing the wheel. Then, remove the fender liner. Removing the VAZ 2114 fender liner is not difficult. To do this, you will need an 8 or 10 socket wrench. We look for the screws and unscrew them, disconnecting the fender liner from the side member and the front bumper.
As a rule, the mudguard is screwed together with the fender liner using through screws to the wing and spar.
The threshold trim for the VAZ 2114 is in the second stage. You need to remove it by unscrewing four self-tapping screws using a shaped screwdriver. The bottom screws are always clogged, so immediately take an awl and pick out the heads of the screws.
Open the front door (from the right side) and unscrew the internal screws of the threshold molding. By the way, the door sill trims for the VAZ 2114 and Lada 2115 consist of 4 pieces, two for the front and rear doors, and each molding is unscrewed separately.
We unscrewed the screws and let the plastic hang in place... The so-called front wing shield of the VAZ 2114 is the next obstacle. Let's consider it...
The front fender trim of Lada 2114-2114 is a plastic petal with a protrusion at the bottom, which is inserted into the groove of the fender trim. And in the middle of the shield there is a plastic clamp that secures it into the hole on the wing...
We squeeze the antennae of the latch from under the wing and remove the trim. Now, remove the sill trim retainer...
How to remove the turn signal, I think you know... Squeeze the turn signal latch, remove it, pull out the base with the light bulb and push it inside under the wing.
And now, the stupidity that distinguishes the old fours from the new ones (it even sounds funny). We open the hood and find, instead of the normal 8 bolts, self-tapping screws for an asterisk...
Next, unscrew the screw from the threshold.
There remains the last screw, which can only be removed by unscrewing the side of the bumper. To do this, we need a 10mm wrench, use it to unscrew the two nuts under the side of the front bumper.
Pull the rear part of the fender towards you (outward from the door) and back if you don’t want to remove the turn signal repeater from the headlight and you’re done!
When installing the wing, monitor the gaps relative to the hood and door, both vertically and horizontally...
How to replace the front fender on a VAZ 2114 (2113, 2108, 2109, 21099) in a garage with your own hands. Good day to all!
In this article I want to share my experience of replacing the front wing on a VAZ 2114. I have a 2004 car, I bought it a year and a half ago.
When buying, they didn’t measure it with a thickness gauge, and there’s no point in measuring a car of this year.
Upon inspection, everything seemed to be normal, but as it turned out, the wing was then foamed with foam, putty on top and painted - I realized this a month later when washing the car with a high-pressure washer!
The fender was purchased and was lying in the garage waiting for a replacement, but somehow I couldn’t get around to it, but just the other day I drove over frozen snow and tore out the fender liner because... on top it was held on slightly by mounting foam, and on the bumper by self-tapping screws.
This incident prompted me to immediately replace the wing and plastic fender liner!
The old fender looked like this after the fender liner was torn out.
How to remove the rear wing
The rear wing on the VAZ 2114 is attached to the load-bearing parts of the body by spot welding. Dismantling and replacement require skills in welding and the presence of a semi-automatic welding machine to install a new element. If the rear fender has a significant dent from an impact, the metal will need to be pulled out before dismantling and cutting. Dismantling process step by step:
- Prepare the car: remove the battery, bend the carpet.
- Empty the trunk.
- Unscrew the rear bumper and disconnect the headlight unit. If the right rear is to be replaced, then the fuel tank must be removed.
- Remove the seal.
If you are making a cut for a repair insert, then you need to remove the side glass: pull out the rubber seal and press out the glass. During installation, the seat is processed and the old sealant is cut out.
- Using a thin chisel or machine, cut out the old part, retreating 1-1.5 cm from the joint.
- Drill out the welding points with the frame cross member.
- Disconnect the part.
- Cut off the remaining metal, grind it, straighten the edge.
- Attach a new part, secure with spot welding, check the gaps.
- Weld by contact welding, in increments of 4-5 cm.
At the final stage, the part is primed, treated with anti-corrosion agent and painted to match the body color.
Replacing the front wing on a VAZ 2113-VAZ 2115
Note! First you need to remove the screws and bolts that secure the excess parts to the car. Superfluous in today's context, this includes wheel arch liners, the front bumper (namely, the side bolts for attaching to the car fender and facing trims), and the sill.
Important! Before starting work, be sure to disconnect the negative terminal from the battery so that when working with electronics you do not damage anything and inadvertently get electrocuted.
Removal
1) At the beginning of the operation, carefully, without damaging the paint, use a screwdriver to pry up the front piston securing the molding and remove it. Next, move the molding slightly to the side and remove the rear fastening piston. Now remove the front molding completely from the car fender.
2) Then, using pliers (shown in the small picture below), completely remove the piston securing the upper part of the threshold (the place where the threshold is attached is indicated by a green arrow). Then take a screwdriver in your hands and use it to unscrew the five upper screws securing the threshold (these screws are indicated by red arrows). Remove the three bottom screws (indicated by blue arrows) securing the front of the car sill. After unscrewing all the screws securing the front part, remove it from the car.
Repair parts
Replacing the rear wing of a VAZ 2114 in 70% of cases is associated with straightening out a dent from an impact. When there is no metal rupture there is no need for replacement. They straighten, putty and install back. The rear wing can be repaired without dismantling it from the car if there are small dents. Repair methods:
- reverse hammer;
- PDR method;
- vacuum suction cups.
If there are small pockets of corrosion in the area of the wheel arch, then use the method of welding metal patches and sealing through holes with epoxy glue.
Regardless of which repair method is chosen or whether a full replacement of the part is carried out, it is recommended to simultaneously check the condition of the sills and the general geometry of the body along with the fenders.
In what cases will it be necessary to remove the wing?
The front fenders of any car, including 2114, are one of the most vulnerable elements of the body. It is they, along with the front bumper, that are primarily subject to mechanical damage as a result of the car being involved in various accidents. In addition, due to the extensive treatment of the road surface in winter with salt and chemicals, the parts begin to rust intensively.
In some cases, it is not necessary to replace the element with a new one; it will be enough to restore it.
Typically replacement occurs when:
- Severe mechanical damage as a result of an accident.
- Mechanical wear as a result of long-term use. This refers to numerous small mechanical irregularities that can no longer be completely eliminated by straightening.
- Numerous extensive areas of corrosion. In particularly advanced cases, it “eats” through the metal.
