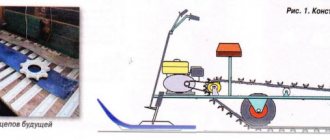
Do-it-yourself snowmobile from a cultivator: features of the conversion
A snowmobile is the most suitable winter transport for our winter climate. It is distinguished by its high cross-country ability and decent maneuverability. In addition, it does not require a large amount of fuel. The domestic market is always ready to provide various models of snowmobiles, but not everyone can afford them. However, if you have a cultivator and some tools at your disposal, you can make winter transport yourself. Below we will learn how to make a snowmobile from a cultivator using improvised materials.
How a walk-behind tractor is converted into a snowmobile
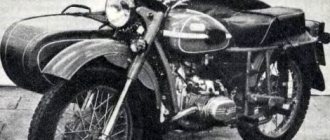
The basis of the snowmobile is the walk-behind tractor, since many land owners have this unit. At the same time, walk-behind tractors are usually not used in winter. Having built a simple snowmobile, you can install an engine from a walk-behind tractor on it, which can be returned after the end of winter.
The snowmobiles created usually have a power of about 7 hp, which allows them to transport two people with a small load.
In order to assemble an all-terrain vehicle from a walk-behind tractor with your own hands, you need to have the following basic parts and tools:
- welding machine;
- engine;
- pipe bender
You will also need additional details, which you can learn about by taking a more detailed look at the design of the snowmobile. Before making a snowmobile, it is worth drawing up a detailed drawing.
Features of converting a cultivator into a snowmobile
Almost every farmer has a cultivator at his disposal.
In winter, it essentially sits idle, so for the winter you can equip it with a motor for a homemade snowmobile. To manufacture the vehicle, as a rule, engines from middle-class cultivators are used. The motor must be equipped with a towing device and manual control. For example, the Neva cultivator is equipped with such elements. It is made from high-quality Japanese parts, and costs relatively little money. The engines of these cultivators are equipped with a forced air cooling system, which is sure to come in handy during regular use of the snowmobile. As a result of the work done, you will receive a passable snowmobile or snowplow with a capacity of approximately 7 hp. With. It can support no more than two people, or one driver and a small load.
To make a snowmobile you will need the following elements:
- Motor;
- Welding machine;
- Pipe bender;
- Some purchased items.
Below we will look at step-by-step instructions for making a snowmobile from a motor cultivator.
How to choose a motor for a snowmobile?
Before you start creating a snowmobile, you need to choose a motor for it.
There are three key options:
- The optimal solution is an engine with a towing device and manual control. It is worth paying attention to the motors of the Neva, MB-1 and MB-2 walk-behind tractors. They are reliable, able to cope with high loads in severe weather conditions, and can withstand extremely low temperatures;
- Engines from Japanese manufacturers are also suitable. These are four-stroke single-cylinder engines, complemented by an air cooling system. They have excellent technical parameters, are resistant to overheating, and the elements do not corrode;
- Two-stroke engines made from walk-behind tractors have a simple design and low weight. They can be easily and quickly repaired.
Converting a cultivator into a snowmobile - execution algorithm in detail
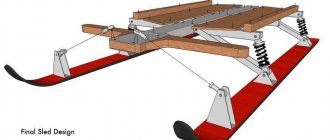
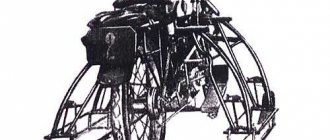
Before making a snow blower or snowmobile from a cultivator, you need to prepare an approximate drawing in which you will need to indicate the main structural elements, the method of connecting them and the sequence of work. The entire structure will consist of two main units - slave and master. The driven part includes shock absorbers, steering column and skids.
Before starting work, you need to decide which parts you have ready-made and which you need to make yourself. The further algorithm of work is as follows:
- First, let's start creating the frame. To make a reliable snow blower with your own hands, you need to try to connect the components of the frame as tightly as possible. Welding is suitable for this. The basis of the frame will be pipes. As a rule, ordinary water pipes are used for welding, but sometimes craftsmen use parts of motorcycle frames. In order to avoid gross mistakes, the pipes are first secured by spot welding. After this, if the structure has the correct shape, the pipes are connected with a continuous single seam;
- Next, you need to weld brackets to the frame that will hold the motor, runners, seats, steering column and other structural elements;
- Next according to the plan is the manufacture of runners. For a snowmobile, one or two wide skis are suitable, which must be connected to the steering column via a hinge mechanism;
- After this, you need to install shock absorbers - they can be taken ready-made from any motorcycle;
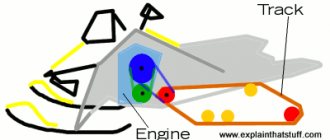
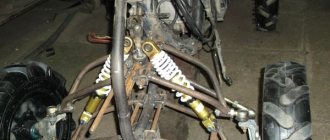
Next we install the engine and gearbox. They must be mounted on the leading part of the structure;- In order for a self-made snow blower from a motorized cultivator to move, it must be equipped with wheels or tracks. The option with wheels will help make the unit more maneuverable. However, if you want to avoid wheel slipping, you should choose tracks. This option will make the snowmobile more passable, but it will no longer be as maneuverable due to its heavy weight;
- It’s quite possible to make tracks for the unit yourself. To do this, you can use conveyor belts or motorcycle chains.
- In any case, the main thing is that the design is sufficiently reliable, durable and lightweight;
- If desired, the front part of the snowmobile can be equipped with a hitch for attaching a bucket - it will help quickly remove large piles of snow or scrape off ice;
- Having connected the tracks to the rest of the structure, it is necessary to test the machine.
A self-made snowmobile will be able to reach speeds of 60–70 km/h. Be sure to follow safety rules when moving, as the terrain of the area will constantly change, especially if you go into the forest.
We make it ourselves - a snowmobile from a walk-behind tractor, video and description, drawings.
READ How to Make a Go-Kart From a Chainsaw With Your Hands
Snowmobile skids and engine
Skids are one or two wide skis, hinged to the steering column. Shock absorbers are the best solution when making a front suspension. Lever shock absorbers, such as those used on motorcycles, are best suited for this purpose.
The engine and gearbox are installed on the drive part of the assembled snowmobile. Here you need to decide in advance whether to use tracks or wheels for movement. Both types of drives contain both advantages and disadvantages.
The rear drive wheels installed on the snowmobile allow it to be more maneuverable due to its light weight. But in order to avoid wheel slipping on loose snow, they must be equipped with chains. When using a caterpillar track, the cross-country ability of the snowmobile increases, but its weight increases significantly, which reduces maneuverability.
How to make a snowmobile from a walk-behind tractor?
Interestingly, until the eighties, the walk-behind tractor was called a pedestrian or small-sized tractor. It is an indispensable universal tool that makes the work of a gardener and gardener easier. So universal that craftsmen have come up with many ways to use the “iron horse”, in addition to cultivating the land. For example, as a snowmobile in winter. It is quite possible to make such a snowmobile based on a walk-behind tractor yourself in a few days in a garage or at the dacha. The technical capabilities of a homemade snowmobile are not inferior to analogues purchased in stores. The financial savings are obvious.
What it is?
A snowmobile is a mechanical vehicle. The most famous are small-sized models, equipped with track skis and controlled like motorcycles. However, in fact, there are many varieties of all-terrain vehicles with low-pressure pneumatics and caterpillar tracks, snowmobiles. Walk-behind tractors are also divided into wheeled and tracked. You can make a snowmobile with your own hands from a walk-behind tractor with any chassis, only different methods and materials are used.
Caterpillars
You can make tracks for a snowmobile with your own hands using the following materials:
- conveyor belts;
- motorcycle chains;
- water pipes.
Read also: Physical properties of copper substance
The speed of a homemade snowmobile can be about 60 km/h, so you need to follow safety precautions while riding.
For light snowmobiles, tracks are usually created from a walk-behind tractor from a conveyor belt and a roller chain. To create such tracks you do not need to have any skills or have specialized equipment.
To extend the life of the tape, its edges are stitched with fishing line. In this case, the step between stitches should be 1 cm. This will prevent the tape from fraying. To form a ring, the tape is sewn from the ends.
The choice of the thickness of the tape used depends on the power of the unit being created. The higher it is, the thicker the tape should be.
Self-production
Let's consider step by step how to make different types of snowmobiles with your own hands.
Snowmobile made from a walk-behind tractor on wheels
To turn a walk-behind tractor on wheels into a snowmobile you will need to take:
- iron connecting structure-trailer;
- wheels for winter use, capable of overcoming snow obstacles.
A strict condition of the whole idea is that the trailer must be rigidly coupled to the frame of the snowmobile. A metal channel about half a meter long must be welded parallel to the axis of the snowmobile. To do this, two holes are drilled at the edges of the channel. Clamps with holes along the edges provide additional fastening and structural rigidity. They are attached to the snowmobile axle with bolts and a locknut, using a crosspiece welded to the structure.
Crawler snowmobile from a walk-behind tractor: the manufacturing process at home
The snowmobile, the picture of which is presented below, is based on the motor of the Neva cultivator. Its production begins with the frame.
DIY snowmobile frame
The frame is made of metal pipes with a diameter that is used for motorcycle frames. Water pipes are also suitable. A pipe bender is used to give the desired shape.
To simplify the task and reduce design time, we suggest using ready-made drawings.
Designations according to the drawing:
- frame;
- intermediate type shaft sprocket;
- intermediate shaft;
- sprocket with teeth;
- gear parts;
- track drive elements;
- track shaft;
- ski support stands;
- tensioner rollers for tracks;
- axis for tensioning rollers;
- towbar;
- tensioner;
- drum flanges;
- steering column
After welding the frame elements to the established dimensions, a subframe is made in its front part - the motor is localized on it. To do this, a stand with holes for it is welded. The same holes should be in the traverse itself. Through these slots it will be convenient to tension the drive chain and adjust the position of the traction unit.
In order to ensure that the device can be started with a handle, the underframe frame is moved to the rear of the unit. Equipping the original walk-behind tractor with a forced cooling function will be an invaluable bonus. This will reduce wear on the carburetor and traction mechanism.
Recommendations for safe movement
Do not forget that any vehicle, even one made independently, requires attention and caution. You should not overestimate your capabilities and move in the dark or in bad weather conditions. If visibility is poor, you may not notice changes in the topography of the ground, holes, ditches covered with snow. Low stability of a snowmobile when hitting any obstacle (stones, stumps, metal objects) can lead to capsizing, throwing off the rider and/or crushing it with its weight, causing injury, even death.
Care must be taken when overcoming slopes and when driving a snowmobile under any overhanging obstacles: sagging wires, guy wires, fallen trees. The impact will fall on the rider's chest, so if there is a backrest, injury is inevitable. You must be aware of possible obstacles on the roads and take safety precautions seriously.
Motorized dog from a cultivator - preparation for assembly
In the case of self-assembly of equipment, preparation for its manufacture should begin with studying the diagram. The drawing must indicate the dimensions of all parts used. It is important that the diagram also indicates how the elements are attached to the structure.
In addition to the drawing, for the work you will need to prepare a list of certain elements.
A homemade snowmobile should consist of the following components:
- supporting frame;
- engine with fuel tank and exhaust system;
- transmission mechanism;
- brake system;
- controls;
- handles, driver's seat;
- skis, caterpillar mechanisms.
To adjust the parts and install them into the equipment design, the manufacturer will need to prepare the following tools:
- welding machine;
- grinder;
- pipe bender;
- drill and drill bits for it;
- set of wrenches and screwdrivers.
The materials you will need when working are sheet metal, steel pipes and angles, rubber gaskets, as well as 2 pieces of thick plywood.
Preparing to make a snowmobile
To make a snowmobile from a walk-behind tractor with your own hands, you will need to prepare materials and equipment in advance.
To work you will need:
- Welding machine;
- Pipe bender;
- Bulgarian;
- Drill;
- Wrenches and screwdrivers;
- Set of fasteners;
- Pipes, 1 cm in diameter;
- Steel sheets, 5 mm thick;
- Clamps;
- Vise;
- Lathe;
- Wheels.
In addition to preparing equipment and materials, it is extremely important to carefully study the drawings. They will tell you how and in what order to mount the elements of the snowmobile.
It is best to assemble a snowmobile based on a walk-behind tractor in a warm, dry place, for example, in a garage. In such conditions, the sealant and paint that you will use to decorate the unit will dry faster.
How to make a snowmobile from a cultivator with your own hands?
Homemade equipment will consist of two main parts: slave and master. The first part includes the steering column, skids, and shock absorbers.
The snowmobile is assembled in the following order:
- First you need to make a strong supporting structure. Medium-thick water pipes and corners that need to be fastened together by welding are suitable for this. First, the frame parts must be fixed using spot welding. If the structure is created correctly, then its elements must be completely welded to each other. When connecting them, you need to calculate the locations for mounting the engine, as well as other equipment components. The welds will need to be cleaned. The frame parts must be primed. After it dries, all metal elements of the frame must be painted to protect them from rust;
- Then you need to weld the brackets to the painted frame. They are necessary for fixing the engine, seat, runners, steering column, and other parts. The stability of parts in the overall design of the equipment depends on the quality of fastening of the brackets;
- The next step is to make the runners. To do this, take 2 pieces of thick plywood and cut two identical skis from them. They will be installed at the front of the structure and must be connected to the steering via a hinge joint;
- You will need to install 2 track mechanisms at the rear of the snowmobile. You can take them ready-made, or make the elements yourself from a conveyor belt;
- Next you will need to install shock absorbers. Parts from an old motorcycle are suitable for this;
- Then the engine, gearbox and brake system must be installed into the finished structure. You will need to lay a rubber mat between the engine and the frame, which will dampen the vibrations of the internal combustion engine. The engine and transmission should be pre-positioned so that the driver has direct access to the drain and fill holes. The motor and gearbox must be secured to the front of the vehicle. The pipe from the exhaust system will need to be routed away from the driver and passenger;
- Next you need to install the seat. For convenience when using a snowmobile from a cultivator, it is better to take an old sprung seat from an old mini tractor;
- You will need to install gas, brake and clutch pedals under the steering wheel. The video will show the results of assembling the snowmobile.
The finished snowmobile from the cultivator should be tested. To do this, it is necessary to fill the appropriate tanks with fuel and lubricants. Next, you need to start the engine and let it idle for a few minutes. After this, you can start driving the snowmobile. It is important not to start too quickly so as not to burn the engine. It is best to start slowly and gradually pick up speed.
How to convert a walk-behind tractor into a snowmobile
Why a walk-behind tractor? This is the most used unit, which is available to almost every owner of a personal plot. In winter, there is no need to use it for cultivating the land and caring for plants. Therefore, in winter the engine from a walk-behind tractor can be installed on a snowmobile, and in the spring it can be returned to the walk-behind tractor.
When manufacturing a snowmobile, engines from middle-class walk-behind tractors are usually used, with a rear towing device and manual control. As an option, you can use the Neva walk-behind tractor to make a snowmobile. The cost of such a unit is average, and the installed engines are assembled in Japan.
Also, such engines are equipped with forced air cooling, which is a plus for the manufacture of a snowmobile. The result of all the work will be an excellent snowmobile with a power of 6-7 hp. This will allow you to transport one or two people and a small load; below we will describe in more detail how to convert a walk-behind tractor into a snowmobile.
To assemble a snowmobile yourself, you need the following parts: an engine, a welding machine, a pipe bender and some purchased spare parts. Several stages of making a snowmobile from a walk-behind tractor.
Design for converting a walk-behind tractor into a snowmobile
First, you need to depict the design of the future machine in the form of a drawing. For this, analysis of manufactured homemade snowmobiles will help. The structure itself will consist of two parts: driven and driven. The driven part consists of shock absorbers, skids, and a steering column. To manufacture the driving part you will need a frame, drive and power unit.
When developing a DIY project, you should identify in advance the parts of the structure that are made yourself and identify those parts that need to be purchased.
After creating the drawing, we move on to making the frame. It is advisable to use pipes for this. Sometimes ordinary plumbing is used, but for greater strength you need to use pipes from motorcycle frames. To give the frame the desired shape, you need to bend the pipes using a pipe bender. They are secured by welding.
To avoid serious mistakes when assembling a snowmobile, frame parts must first be secured by spot welding. After checking the correctness of the design, the joints are welded with a single, continuous seam. After this, brackets are welded to the finished frame for installing the engine, runners, seat, steering column and other parts.
Read also: Carbide chains for chainsaws
Snowmobile skids and engine
Skids are one or two wide skis, hinged to the steering column. Shock absorbers are the best solution when making a front suspension. Lever shock absorbers, such as those used on motorcycles, are best suited for this purpose.
The engine and gearbox are installed on the drive part of the assembled snowmobile. Here you need to decide in advance whether to use tracks or wheels for movement. Both types of drives contain both advantages and disadvantages.
The rear drive wheels installed on the snowmobile allow it to be more maneuverable due to its light weight. But in order to avoid wheel slipping on loose snow, they must be equipped with chains. When using a caterpillar track, the cross-country ability of the snowmobile increases, but its weight increases significantly, which reduces maneuverability.
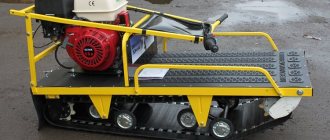
Snowmobile tracks
You can also make tracks for your snowmobile yourself. In this case, you can use various materials: conveyor belts, motorcycle chains, water pipes, etc. The main thing is to make them reliable, light and of high quality, so that the tracks have good adhesion to the surface.
The developed speed of the snowmobile is 60-70 km/h. But even at this speed, a snowmobile remains a rather dangerous form of transport. Since the movement occurs on snow, the driving surface will change repeatedly, even during a short trip. Particular danger arises when driving recklessly in the forest at high speeds. You should also move carefully in open unknown spaces after fresh “light snow” has fallen.
To have fewer problems when driving, you need to wear special clothing. The higher the speed of the snowmobile, the more demanding you need to be when it comes to clothing. Nowadays, felt boots and quilted jackets are no longer suitable. Clothing must be designed specifically for snowmobiling. You also need to use a specialized helmet.
How to use a snowmobile from a cultivator?
There are a number of rules that, if followed, will help extend the life of homemade equipment.
Their list includes:
- regular replacement of lubricants. The condition of all rubbing elements of equipment depends on this. If a vehicle is used intensively, the oil in its tanks should be changed at least twice a month. Before removing the engine and installing it back on the cultivator, you need to completely drain the fuel and clean the carburetor from carbon deposits. The same must be done before installing the motor on the snowmobile;
- thorough inspection of metal parts. Homemade equipment is regularly used in conditions of high humidity. Because of this, rust can appear even at the site of the slightest abrasion of paint. To prevent this, all defects must be painted over immediately after they are discovered;
- timely repair of snowmobile breakdowns. If you start a malfunction, it will develop into a much bigger problem. Dealing with it will be much more difficult than dealing with a small breakdown.
By following these rules, the owner of a cultivator snowmobile will avoid typical problems and will be able to use the equipment for a long time.
Do-it-yourself snowmobile from a walk-behind tractor
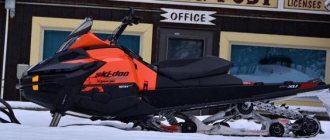
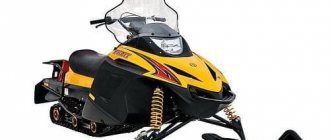
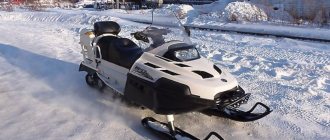
A snowmobile is a universal technical means of transportation in the winter season. Thanks to the peculiarities of the chassis, it is able to overcome kilometers of deep snow, while developing up to 50-70 km/h. Economical fuel consumption, maneuverability and extraordinary ease of control are all that make it indispensable where winter snowstorms and snowdrifts occur almost all year round. True, the cost of such machines ranges from several to tens of thousands of dollars, which complicates the purchasing process.
In a situation where purchasing a factory snowmobile is an unrealistic dream, and circumstances require its availability, homemade products come to the rescue, ready to solve it in a less expensive way. One of them is the conversion of a walk-behind tractor into a snowmobile, to which we will devote the article.
Do-it-yourself snowmobile from a walk-behind tractor: reasons for choice and selection criteria
A walk-behind tractor is a worthy technique for transformation, which is in the arsenal of almost every resident of our country.
In the list of homemade devices that can be adapted from it, the snowmobile occupies one of the first places, competing with the caracat and the all-terrain vehicle. This is due to the fact that in winter, when a snowmobile is needed, the farm does not need the standard tasks of plowing, hilling or mowing the grass. Therefore, it makes sense to remove the engine in the winter and make a snowmobile based on it, and in the summer to return it to the walk-behind tractor and operate it in the standard way. Not every modification of a walk-behind tractor is suitable for a snowmobile. It is best to use for this purpose those that have:
- rear towing device;
- possibility of manual control;
- medium-power motor, cooled by air.
The Neva walk-behind tractors, which are available in eight models, are considered ideal for a homemade snowmobile from a walk-behind tractor. All of them represent a group of tillage machines with average traction potential (6-9 hp). Despite their low cost, the motor systems are assembled and tested in Japan, which makes them extremely durable.
Taking all these points into account, such walk-behind tractors make snowmobiles with good power. This means that it will be able to carry not only the driver, but also at least one passenger.
Making a snowmobile with your own hands
By following a certain algorithm for installing a homemade machine from a motor unit, you can avoid numerous mistakes. Snowmobile equipment from a walk-behind tractor must be assembled in a certain sequence. Let's look at the step-by-step process of making a snowmobile yourself from a Neva walk-behind tractor.
First, a sketch of the future design is drawn up:
- homemade frame (1);
- second intermediate shaft sprocket (2);
- intermediate shaft (3)
- first intermediate shaft sprocket (4);
- track shaft driven sprocket (5);
- track drive sprocket (6);
- track drive shaft (7);
- two supports of the support ski (8);
- two track tension rollers (9);
- tension roller axis (10);
- tow bar (11);
- tension device (12);
- four drum flanges (13);
- four drive sprocket flanges (14);
- steering column (15).
We digest the frame
First you need to weld the frame. For this, steel sheets and round pipes are used. Using a pipe bender, the parts are given a certain shape; before this, the metal is heated using a gas burner. The parts must be connected to each other by welding. After this, the frame is painted so that the metal does not corrode and lasts longer.
First you need to study the design diagram, drawings of an all-terrain vehicle or snowmobile attachment to a walk-behind tractor. Self-assembled transport must be functional. Typically the circuit consists of a driven and a driving part.
The driven part includes the following elements:
- steering column;
- runners;
- shock absorbers.
Snowmobile based on a walk-behind tractor: various design options
Among the varieties of walk-behind snowmobiles available today are:
The wheeled snowmobile has a primitive design. The only element that is replaced is the wheels - they are replaced with larger tires or even low-pressure wheels. They are made with all-wheel drive so that the equipment can easily turn to the sides. Among the disadvantages of wheeled snowmobiles made from a walk-behind tractor is their suitability only for shallow snowdrifts.
A homemade snowmobile on skis is also considered one of the simplest options for replacing branded motor sleighs. If you take a ready-made sled as a basis, the assembly process is simplified as much as possible. Another method is also possible, when skis are made independently from plastic.
A tracked snowmobile based on a walk-behind tractor engine is considered the most labor-intensive to recreate. Considering its versatility, excellent cross-country ability and maneuverability, we will dwell on it in more detail.
Manufacturing a caterpillar snowmobile
This method is suitable if you want to get a more passable unit that can easily overcome not only snow drifts, but also swampy areas.
It should be borne in mind that the tracked unit will be heavier, which will negatively affect its speed and maneuverability. In addition, such a walk-behind snowmobile will require a fairly powerful engine producing at least 9–10 hp. With. Do not forget that, as in the first case, in addition to the engine from the walk-behind tractor, the snowmobile will need to be equipped with an ignition system, clutch, throttle position switches, a starting device, handbrake levers, and, if possible, a headlight. In this case, there is a risk that wires and hoses may become wrapped around the tracks as the snowmobile moves. To avoid this, securely secure all hoses and wires to the frame using clamps. It’s even better if before that you equip them with rubber or silicone tubes that will protect the wiring from moisture.
How to make a snowmobile from a walk-behind tractor yourself?
The process of manufacturing a future homemade snowmobile begins with competent design and execution of drawings - a strong point in any homemade product.
For convenience and better understanding, the design of the machine can be divided into two parts:
Leading members include:
- traction unit (motor from a walk-behind tractor);
- frame;
- drive elements.
- steering column;
- shock absorbers;
- caterpillar mechanisms.
Before making a snowmobile from a walk-behind tractor, the auxiliary devices and material resources are determined. Electric welding and a pipe bender are a must, without which the assembly would not be complete. It is advisable to purchase parts that are not on hand in advance.
How to choose an engine for a snowmobile?
Before you make a snowmobile from a walk-behind tractor yourself, you need to choose an engine for the unit.
The best option would be to use a motor equipped with a towing device and a manual control mechanism. The engines of the Neva MB-1 and MB-2 walk-behind tractors have these components. They are quite reliable, can withstand high loads in severe weather conditions, and do not fail at extremely low temperatures. In addition to engines from Russian walk-behind tractors, you can also use engines from Japanese-made units. It is best if you choose a 4-stroke single-cylinder engine equipped with an air cooling system. This engine also shows excellent performance, practically does not overheat, and its parts do not corrode.
The third option is to use a 2-stroke engine for a snowmobile from a walk-behind tractor. It has a simple design and low weight. It is very easy to repair such a motor from a walk-behind tractor, having only wrenches and a screwdriver on hand.
Step-by-step instructions for assembling a snowmobile from a walk-behind tractor
- assemble the frame;
- install the engine, which should fit in the center of the machine for increased stability, and fix it;
- install an intermediate shaft to reduce angular speed and increase traction potential;
- adjust the steering column;
- aggregate caterpillars;
- choose a seat and equip it with an old car seat.
After successful testing to protect the external metal parts from corrosion, the snowmobile is cleaned and painted.
Snowmobile design
To correctly assemble an all-terrain vehicle from a walk-behind tractor, you first need to depict it on a diagram. Typically the design consists of two parts: driven and driven. The first named part consists of the following elements:
- shock absorbers
- steering column;
- runners
The driving part consists of a power unit, drive and frame. After creating the drawing, you can begin welding the frame. For greater strength, it is worth using pipes that are used to create frames for motorcycles. But you can also use products that are used to construct water pipelines. You can give the pipes the desired shape using a pipe bender.
To avoid mistakes when creating a frame, you should first secure the system elements by spot welding. Only after this can the joints be welded with a continuous seam.
After creating the frame, brackets are welded to it, which are necessary to secure the engine, runners and seat.