Do-it-yourself repair of generator breakdowns
A car generator is a device consisting of three main parts:
1. Stator. 2. Rotor. 3. Brushes.
The stator is characterized by a stationary winding, which receives direct current when the engine starts. It creates a magnetic field in the stator, which in turn acts on the rotor (the moving part of the winding). When the engine is running, the rotor is driven by the crankshaft. The rotational force is transmitted via a belt drive. Thus, during the rotation of the rotor, a current arises in it, which is transmitted to the stator through brushes. The current in the stator winding induces an electromotive force, which is converted into alternating voltage. To convert the alternating components of the generator power, a diode bridge rectifier is used.
The generator is designed to charge the battery. If it is faulty, then it is possible to drive the car, but the battery will be drained by all the electronics, which will ultimately lead to the battery becoming unusable. The result of a generator failure will be disastrous, since you will have to shell out a considerable amount of money to buy a battery.
How to detect a generator failure on a Chevrolet Niva
The exact cause of the malfunction can only be determined using special equipment. Determining this at home is more difficult. But you can find out the malfunction by the following signs:
1. On the instrument panel, after starting the engine, the warning light in the form of a red battery should go out. If the lamp does not go out, this indicates that the battery is not receiving a charge. 2. With the engine running, the headlights became less bright. This is evidence that the headlights are draining the battery, which is not being recharged. 3. Noises in the motor. When, with all of the above, you still hear extraneous noise in the form of a clattering or whistling sound, then you should obviously remove and check the device.
The Chevrolet Niva is equipped with electronics that consume a lot of power. In addition, to start such a powerful engine, it is necessary to use a battery with a capacity of at least 60Ah. Which puts a lot of stress on the battery. Therefore, it is important to control its charging from the generator. What are the causes of Chevrolet Niva generator breakdowns?
The most common cause of failure is a broken belt. The belt has the shortest service life compared to other structural elements. You can detect a broken belt visually by opening the hood and looking at the belt pulley. If the belt is intact, but you hear extraneous noise in the form of a metallic ringing, then most likely the bearings need to be replaced. It can only be detected after removing the device.
The reason why it is easier to buy a new generator rather than repair an old one is because the windings are damaged. If this happens, you need to rewind it or buy a new one. It’s cheaper, of course, to have it repaired, but there is no guarantee that the rewinding will be of high quality and will deliver the “correct” current to the battery. Therefore, the decision which is better is up to you. Brushes periodically fail due to constant friction against the rotor. Brushes can be replaced at home. Replacing the belt on a Chevrolet Niva
Replacing a belt is carried out not only when it breaks. To prevent it from breaking along the way, it is necessary to carry out periodic inspections. If the following damage is detected, the belt must be replaced immediately:
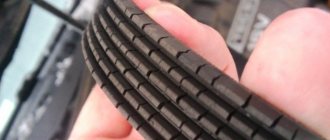
1. When traces of cuts or wear and cracks are found; 2. If the belt begins to peel off and the threads are visible from it; 3. The presence of oil and ruffled appearance indicate its unsuitability.
To replace the belt, it is important to arm yourself with the following tools:
1. mount; 2. screwdriver; 3. jack; 4. a set of keys.
Having purchased a new belt, you can begin installing it:
Chevrolet Niva
Tighten the nuts securing the tension roller bracket. We start the engine, stop it and check the belt tension again.
Attention! Do not overtighten the belt! Excessive belt tension leads to premature failure of the alternator belt and bearings, coolant pump and power steering pump.
We replace the drive belt for auxiliary units when cracks, ruptures and detachments of rubber from the fabric base are detected on it. On a car with air conditioning, remove the air conditioning compressor drive belt.
Loosen the nuts securing the tension roller bracket (see above) and rotate the adjusting bolt counterclockwise, loosening the belt tension.
Installed a new Chinese generator on Shevik
Greetings to all car enthusiasts. Today I’ll talk again about my Shevik, which lately has begun to give me the pleasure of tinkering with it. Breakdowns rained down one after another, however, they were, as it were, a consequence of each other. You can even track the chronology here:
The antifreeze completely disappeared - the pump began to leak. Replaced the pump. A week later, the common drive V-ribbed belt burst
As it turned out, the generator jammed and because of it the belt broke. Why did this happen? Most likely (my version) - when replacing the pump, the service center tightened the belt too much, because we couldn’t tighten the same one at all. As a result, during the hellish “tightening”, the old gene grunted; the bearings could not withstand such abuse. Therefore, it is better to do everything yourself or in a trusted service. Well, tighten it correctly, you could press the samples with your finger by 1 cm.
How did they even manage to tighten the 1885 belt? I can't imagine))
And today I bought another alternator belt (to replace it), also bought a new “gena” and installed it. There are not even clear instructions on the Internet about replacing the generator, how to remove it, which belt to choose and how to install everything back and correctly tension the belt on all units. Therefore, I was honored to record a complete photo and video report for those in need. Go:
First I'll tell you about the generator
I took the old one, they completely disassembled it, looked at it and said that it had come to an end. The bearings were torn, and the rotor was worn out to such an extent that repairs would cost 2,500 rubles. And a new one costs 3100. It’s Chinese, but the warranty is 3 months, we checked it at the stand - everything works.
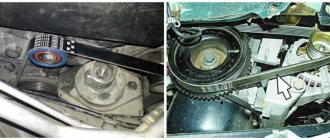
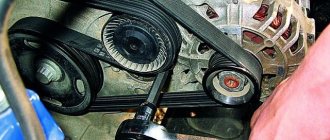
The only thing is that the pulley is a little wider, by 1 notch, which means you will have to tinker with the tension of the belt - you will need to look to press the belt closer to the generator or further so that it then fits into the grooves and does not move. As it turned out, you had to press it close to the gene, like this:
But this was wrong, the strap began to slide off the rollers and whistle wildly, because it did not fit into the grooves:
Therefore, it is better to take a native gene with the same width of the roller and with the correct number of rivulets (grooves). That’s why the belt is called a ripple belt, because the grooves must match, it turns out something like rails.
I wanted to buy a 100 Amp Pramo, but I couldn’t find it anywhere in the city; the original genes cost 4,000 rubles. So I decided to try Chinese))
How to remove a generator from a Chevrolet Niva
First you need to loosen the belt, which if tense, cannot be easily reset. So, our task is to loosen the tension roller; it is held in place by a platform with three nuts. You will need a 10mm wrench, it is very advisable to have a ratchet with the same head, preferably an elongated one, because the third nut is located directly under the belt and it is better to approach it from the side.
So, first we loosen the 3 nuts holding the plate with the tension roller:
The first 2 nuts are easy to get out with a regular open-end wrench. But the third one is much easier with a ratchet.
We've loosened it - now we turn the adjusting screw (key 10) so that it moves as far up the platform as possible, so the entire platform with the roller will move freely up and down.
We need to go up to throw off the belt.
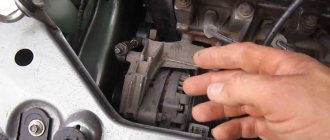
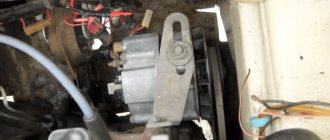
We remove the generator itself (in my case, I already put it back)
