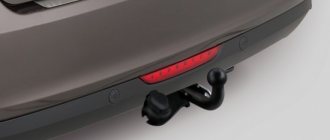
When buying a car, car enthusiasts pay a lot of attention to the braking system. Since this system is responsible for the safety and comfort of driving. Ill-designed and ill-conceived brakes can cause traffic accidents and cause a lot of minor inconvenience to the car owner.
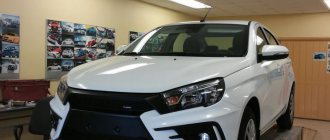
In its latest creation (Lada Vesta), AvtoVAZ showed a lot of innovations, starting from design, engine and ending with the chassis of the car. The brake system of the Lada Vesta was also not deprived of the attention of the developers and has undergone many changes and improvements.
↑ Features and characteristics of the Lada Vesta brake system
The first glance at the drum brakes of the Lada Vesta causes slight bewilderment: after removing the wheel, the owner will not find any protruding parts or mechanisms. The secret of Vesta is hidden not in nanotechnology, but under the central cap: once you pry it off with a wide flat chisel, the large nut securing the drum will open. It would seem that it is enough to use a 30mm socket, unscrew the fasteners, and that’s it. But that was not the case - you need to perform the following steps:
- Release the parking brake (“handbrake”).
- Using a thin flat tool (screwdriver), rotate the ratchet mechanism to bring the pads together.
- And only after this can you begin to dismantle the drum.
Important. In comparison with other models, the same Granta, the design of the brake system of the rear wheels of the Lada Vesta has undergone significant changes; it will not be possible to apply the previous methods of maintenance and repair to it.
The mechanism has become both simpler and more complex at the same time: in order to “get” onto the ratchet, you will need to insert the slot of a screwdriver into one of 4 holes. But you won’t have to worry about adjusting the parking brake: the adjustment will be done automatically. Experts note that the brake cylinder has become stronger, more solid, and the system itself has become more reliable; a self-regulation function has been added to it.
↑ Rear brake design
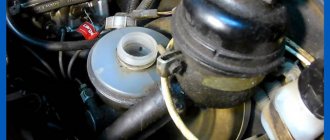
The principle of operation of the rear wheel braking system of the Lada Vesta has changed little: when you press the brake pedal, the working fluid in the hydraulic line (brake fluid) flows to special cylinders, forcing the piston to move. As a result of this, special pads diverge, pressing against the surface of a disk or drum rotating with the wheel, and the Lada Vesta car stops. As you know, starting with Granta, AvtoVAZ began installing an abs sensor, it remained on later models, only its mounting changed. The brake cylinder body has acquired stiffening ribs, making it stronger and, therefore, more reliable.
Compared to previous generations, the rear brakes on the Lada Vesta lost a tachometer disc, which was often damaged during removal or replacement of pads. It is easy to select the required spare parts, including a brake disc or cylinder, using the Lada Vesta catalog numbers. It should be remembered that not all parts from other models are compatible with West ones.
How does Lada take care of your safety?
Lada Vesta has a special adaptive system in its arsenal, which is designed to ensure maximum convenience of the braking process. The car has built-in electronics that determine how fast and how hard the driver presses the pedal. This allows you to achieve the fastest and most timely stopping of the car in any situation. The computer has an instant response and takes care of the safety of the driver of the Lada Vesta continuously throughout the entire trip.
Lada Vesta is also equipped with a built-in electronic system designed to distribute forces. It turns on at the moment when the load on the disc and drum brakes goes beyond the established norm. This system redistributes the load level, and Lada Vesta continues to move without skidding.
In addition to all the innovations listed, the Lada Vesta has a directional stability system, which is responsible for the following vehicle functions:
- if necessary, certain (depending on the situation) wheels of the Lada Vesta independently brake and create optimal conditions for movement;
- torque may vary;
- the front wheels of Lada Vesta are independently redirected in the correct direction.
Such properties allow the Lada to keep the right course during sharp turns. The trajectory of movement does not deviate from the norm due to the braking of the rear wheel located inside. The use of this technology allows the driver to have good control of the Lada Vesta at all times.
↑ Cost of disc brakes and work to replace them
Despite AvtoVAZ’s agreed decision to install disc brakes on the Lada Vesta at the front and drum brakes at the rear, there are cases when this design is not a priority. These are the following options:
- This refers to the sports modification of the Lada Vesta sedan;
- this is not a production model, but a concept car;
- the standard car was modified to compete in the World Touring Car Championship (WTCC).
In all of these cases, disc brakes will be installed on the Lada Vesta, and this modification will be completely legal.
Important. Replacing standard drum brakes with disc brakes for a regular car, if it is not planned to be used in high-speed races or championships, is unlikely to be a good alternative to the factory equipment. The drum braking system is considered more reliable in urban conditions, since it is almost impervious to weather conditions. Moreover, disk systems are less protected from pebbles, dirt, and slush flying from under the wheels, which adversely affects their performance.
On average, both types of brakes - disc, drum, regardless of their placement, rear or front brakes for the Lada Vesta are equivalent in their effectiveness. Professionals will be able to appreciate the difference, and only at speeds of 120 km/h and above. If you really want to, you can still upgrade, but it will not be cheap, especially since the modernization will have to be legalized.
Components
In such a situation, there are 2 scenarios:
- Carry out modifications in accordance with the factory diagram;
- Purchase components from another manufacturer.
And so, one of the owners of the Lada Vesta in the Exclusive configuration said that he was able to find out from an AvtoVAZ employee exactly what components were needed to replace drum brakes with disc brakes.
According to an employee of the plant, there is no need to replace the beam or reflash the ABS block, and this significantly speeds up and reduces the cost of the work.
In addition, the picture clearly shows that there is a standard spacer between the axle and the beam and it is to this spacer that the boot is fixed. From the factory, the hub and disc come separately, so after installing the rear disc brakes on the Lada Vesta yourself, there is no need to replace the bearings if you need to replace the disc.
All the components necessary to replace the brakes with your own hands are presented in the table along with the article numbers.
| Position | vendor code |
| Right brake hose mounting bracket | 8450031136 |
| Left brake hose mounting bracket | 8450031137 |
| Rear brake flexible hose assembly – 2 pcs. | 8450031129 |
| Rear brake pads (full set) | 11196-3502089-00 |
| Washer 10 | 00001-000516870 |
| Ball joint fixing bolt | 21080-2904194-00 |
| Washer 10 | 00001-000516870 |
| Ball joint fixing bolt | 21080-2904194-00 |
| Rear left brake (assembly) | 8450031163 |
| Rear right brake (assembly) | 8450031162 |
| Retainer fixing screw | 21080610526810 |
| Rear brake disc | 8450031131 |
| Rear wheel hub (assembly) | 8450031130 |
| Hex Head Screw | 00001-003836021 |
| Right rear brake guard | 8450031686 |
| Left rear brake guard | 8450031687 |
| Bolt M10-1.25-40 | 8450031161 |
| Left rear brake mount | 8450031132 |
| Right rear brake mount | 8450031133 |
The estimated cost of the entire kit for self-installation of rear disc brakes on a Lada Vesta is about 30,000 rubles.
↑ Signs of brake pad wear
Since the Lada Vesta has become more advanced during the design process, its braking system includes automatic adjustment of the handbrake, which will be effective regardless of the gearbox used - manual or automatic; pronounced signs of pad wear practically do not show themselves. In some cases, the car may experience uneven braking and a slow response to the brake pedal, but this does not necessarily indicate wear on the linings.
More often it is enough to timely replace the brake fluid for the Lada Vesta model and adjust the system. For the Lada, a frequency of 15 thousand kilometers for inspection is established, and it is recommended to change the pads every 60 thousand.
According to information from service specialists, on average, the linings on a Lada car will last 30-45 thousand. Compared to one of the first VAZ 2105s, this is quite a lot.
↑ Subtleties of replacing drum brake system pads
Sooner or later, the linings on the rear brake drums of the Lada Vesta will have to be changed. To do this, you will need to find out what type of rear brakes are installed on a particular Lada Vesta sw or sedan. Just as brake pads differ in size from different models, for example, on the Vesta station wagon and Kalina 2, there are no universal solutions for disc and drum systems. It is imperative to determine the catalog number of spare parts for the car, even if a friend with Ford claims that they installed brake pads from Priora at the service center and everything fit perfectly.
In Vesta, the braking system, regardless of the suspension and type of transmission, is clearly divided into front (disc) and rear (drum) drives. To get to the pads, you will first have to remove the wheel by unscrewing 4 nuts. It should be immediately clarified that the Grant brake linings, despite their similarity to the “native” West ones, still will not fit.
In the center of the drum there is a cover under which the fastening nut is hidden. Before dismantling, it is recommended to bring the linings together using a thin screwdriver, rotating the ratchet mechanism, and also release the parking brake. After unscrewing the nut and removing the drum, the rear brake cylinder of the Lada Vesta and, in fact, the system itself will be revealed.
Important. An unconditional reason for replacing brake pads on Largus and any other car is the detection of oiling of the contact surfaces, deep grooves (cracks or chips), and peeling along the body. In this case, the entire set is changed, that is, 4 linings (2 on each wheel), and not individual ones.
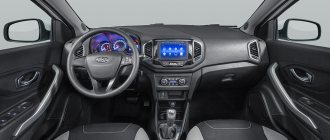
Inspection of the body from the Lada Vesta interior
After examining the front panel in the showroom, the car service specialists stated that, judging by the joints and the quality of the materials, it would begin to creak within six months. Experts have noticed that car window seals are not of very high quality; therefore, after some time of using electric windows, scratches from accumulated dust and dirt will appear on the windows.
Replacing headlight bulbs will be convenient. Hands can easily reach the lamps in the engine compartment. But replacing taillight bulbs will be complicated by the fact that it will be necessary to fold back the trunk lining. It is also difficult to find the lamp socket from the taillight. In addition, it is worth noting the presence of plugs in the front fender liners, which make access to the fog lamps easier.
In the table below we show the cost of all repair work on a Lada Vesta car, which was announced by specialists from a private independent car service center.
We replace the pads of a Lada Vesta car in case of maximum permissible wear of their linings - the minimum thickness of the pad, including its base, must be at least 6 mm.
We carry out the work on a flat area, inspection ditch or overpass.
If the fluid level in the hydraulic brake reservoir is at the MAX mark, then before installing new pads, use a syringe or rubber bulb to pump out some of the fluid from the reservoir. This operation must be performed so that when the piston is pressed into the wheel cylinder of the brake mechanism while installing new pads, fluid does not flow out from under the reservoir cap.
Using a metal brush, we clean the spring brackets and pad seats in their guide from dirt and corrosion.
To replace the cover of the upper guide pin, you need to unscrew the bolt of the upper fastening of the bracket to the pin and remove the bracket from the pad guide. Before installing the pin, put a little grease into the hole in the pad guide...
We similarly replace the pads on the other side of the car.
During operation, the surface of the brake disc becomes uneven, as a result of which the contact area of the new, not yet worn-in pads with the disc decreases
Therefore, during the first 100 km of driving after replacing the pads, until the new pads have broken in, be careful, as the car’s braking distance may increase, the pads may get hotter than usual, up to the appearance of light smoke and smell, especially in hot weather.. https: //www.youtube.com/embed/zAOeWh3Efdc. https://www.youtube.com/embed/zAOeWh3Efdc
Sources
- https://autoruk.ru/lada-vesta/tormoza-lada-vesta/remont-perednikh-tormozov-lada-vesta
- https://motormania.ru/auto-pomosh/lada-vesta-stoimost-rabot.html
- https://www.zr.ru/content/articles/852978-lada-vesta-zamenyaem-kolodki-tormoznyx-mexanizmov-perednix-koles/