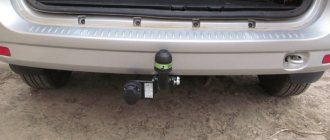
A towbar (tow hitch or trailer hitch) is designed to couple a vehicle to a trailer when towing and transporting large cargo. Installation of this accessory on modern LADA cars has a number of features. The process of installing and connecting a towbar on a Lada Vesta is described in the AVTOVAZ technological instructions.
Required
Towbar
(original catalog numbers):
- Lada Vesta sedan (article 99999218007282), price about 6800 rubles;
- Lada Vesta SW/SW Cross (article 99999218107282), price about 7,000 rubles;
A non-original towbar can be found at a price of 2,200 rubles.
Control unit (coordination)
:
- 99999215007182 Smart Connect KA.SC.7.1, price about 2900 rubles.
The matching unit is an unloading device that ensures uninterrupted operation of the vehicle and trailer electronics. The equipment protects the vehicle wiring from overloads - as a result, the vehicle’s on-board diagnostic system does not detect the connection of additional devices to the vehicle’s electrical network, and operates in normal mode.
Where can I buy?
This and other accessories are presented at low prices in our online store.
More tuning for Vesta
By the way, since you are interested in tuning your Lada, we suggest you pay attention to the following products that are in greatest demand:
- Central armrest made of hypoallergenic eco-leather
- Soft door armrests - front and rear
- Rear window frill without tape
- Sedan trunk lid trim
- Organizer on the dashboard (dashboard)
- Gas struts for the hood on Vesta
- Front and rear bumper protection and sill protection made from Italian stainless steel
- Stylish rear bumper trim (stainless steel)
- Windshield drains for Vesta
- Protective linings for door openings (plastic or stainless steel)
and more than 1000 more products for Vesta - for your convenience, you can select products by car make and model!
Installation
The design of LADA vehicles provides for the possibility of installing a trailer hitch without additional mechanical influences (drilling holes, welding) on the vehicle body.
For each LADA car model, several trailer hitch options are offered for installation, differing in design, but identical in the method of attachment to the car body.
The trailer hitch, regardless of the model and design of the device itself, is attached to the rear power elements (side members) of the car body.
Figure 2-1 shows two main versions of the trailer hitch installed on the LADA VESTA vehicle.
Figure 2-1 – Options and delivery set of LADA VESTA trailer hitch: 1 – left support bracket; 2, 7 – rod; 3 – right support bracket; 4, 9 – socket box; 5, 8 – hook; 6 – embedded strip; A – collapsible design of the trailer hitch; B – welded design of the trailer hitch
Remove the rear bumper.
Unscrew bolts 1, Figure 2-2, securing the rear bumper beam 2 brackets to the body, remove the beam assembly with brackets. Subsequent installation of the beam is not provided (replaceable head 10, knob).
Figure 2-2 – Rear bumper beam: 1 – rear bumper beam bracket mounting bolt; 2 – rear bumper beam
In the rear of the left 1, Figure 2-3, and right 3 rear side members, locate and clean two holes 2 from the faceplate layer (using a flat-head screwdriver).
Figure 2-3 – Location of mounting holes in the side members: 1 – rear left side member; 2 – mounting holes; 3 – rear right side member
Place the left 1, Figure 2-4, and right 5 support brackets into the cavity of the rear side members of the body. Fix the brackets through the holes in the side member without tightening them with the bolts and washers included in the delivery kit.
Install rod 2 on the brackets and secure with the bolts and washers supplied (replaceable head 17, knob).
Tighten the bolts securing the brackets to the body side members (replaceable head 17, extension, knob).
Figure 2-4 – Installation of a collapsible trailer hitch: 1 – left support bracket; 2 – rod; 3 – socket box; 4 – hook; 5 – right support bracket.
When installing a trailer hitch of a welded structure, insert rod 2, Figure 2-5, with brackets into the cavity of the body side members.
Insert the mounting strips 1 inside the brackets, and aligning the threaded holes of the mounting strips with the holes in the rod brackets and side members, fix the rod to the body using the bolts and washer supplied, without tightening.
Align the holes at the end of the rod brackets with the threaded holes for attaching the rear bumper beam to the body and secure the rod with the bolts and washer supplied (replacement head 10, extension, wrench).
Tighten the bolts securing the rod to the side members (replaceable head 17, knob).
Figure 2-5 – Installation of the trailer hitch of a welded structure: 1 – embedded strip; 2 – rod assembly with brackets; 3 – socket box; 4 – hook
Install hook 4 and socket 3 on the rod (spanner 19, replaceable head 19, knob).
Install and connect the electrical equipment of the trailer hitch (see below).
Install the rear bumper.
Note
: Before installing the rear bumper of a CROSS car, modify (trim) the rear bumper according to the attached template, Figure 2-6, to avoid contact and deformation of the bumper at the place where the towing hook is attached.
Figure 2-6 – Rear bumper modification diagram
Tightening torques for threaded connections:
- M6 – 9.8 Nm (0.98 kgf/m);
- M8 – 24.0 Nm (2.4 kgf/m);
- M10 – 47.0 Nm (4.7 kgf/m);
- M12 – 81.0 Nm (8.1 kgf/m).
Popular solutions
First, I’ll say a few more words about the installation. Be sure to buy good quality grease, which must be used to treat all joints during installation. This will not only simplify installation, but will also allow you to disassemble the structure in the future without any problems.
Also apply lubricant to the coupling ball, the types of which you can find here. It is better to install a protective cap over the ball treated with lubricant. It will prevent the adhesion of dirt and dust, and will also keep your hands clean when removing and installing the ball for connecting the trailer to the Lada Vesta.
Now regarding specific towbars. In Russia, Vesta owners actively buy products from Leader Plus and Bosal. I do not limit you to these companies at all, but I still advise you to take a closer look at them. Let's look at a few towbars.
- T-VAZ-41A Leader-plus. This is a removable hook that is secured with bolts. A type A ball is used. The hitch does not imply the need to cut out the bumper. Electrics are not included in the kit, but must be purchased separately. The cost of the towbar will be from 3.4 thousand rubles;
- Bosal 1234-A. An excellent trailer hitch with a type A ball. Also, there is no need to cut out the bumper to fit the structure. Includes wiring and socket. This set costs from 3.5 thousand rubles;
- Leader Plus T-VAZ-44A. Suitable for station wagon, bumper trim required. Socket and wires included, but costs about the same
The final choice is yours. Each product has its own article number, according to which you can easily find a suitable option. Search, watch, consult with specialists.
Connection
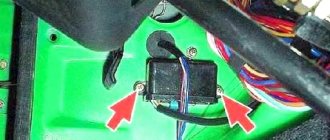
The connection is made through a special electrical module - a matching unit (smart connector).
Turn off the ignition, disconnect the earth wire terminal from the battery.
Connect the electrical module type Smart Connect KA.SC.7.1, supplied with the trailer hitch kit, in accordance with the instructions supplied with the module.
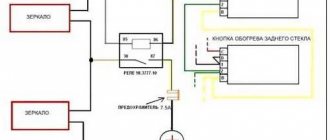
The matching block can be made independently based on conventional 4-pin relays:
Almost all the necessary contacts for connection can be found in the rear light area (see Lada Vesta electrical diagrams), or use a multimeter). Additionally, you just have to run the wire from the battery through the fuse along the left side (photo author).
Lada Vesta LPG › Logbook › Tow bar BOSAL + Smart-Connect ARTWAY
Ngày tốt lànhFinally, I got around to installing a towbar. I chose a towbar with a Bosal towbar without electrics (order number 1234A) and an Electrical Coordination Unit for the Smart-Connect Artway-Pro towbar (catalog number SC-PRO-100) Why?1. The Bosal 1234A trailer hitch has a more competent fastening compared to analogues. For example, the photo shows that it is attached instead of the rear amplifier - 4 bolts at the end of the side members, and one at the bottom.
Competitors (for example Leader) have 4 bolts on the bottom and that’s it.
2. Smart-Connect Artway-Pro SC-PRO-100. The choice is stupid because of the price. The parameters were also quite satisfactory: Tracking the connection of the tow hitch. Switching the fog light. Regulation of work with single-filament and diode lighting. Works in most cars with modern electronics. Automatically disables standard parking sensors when connecting a trailer. Sound indication if there is a malfunction in the trailer lamp circuit.
No more is needed. I paid 1,750 rubles for the happiness of owning a Chinese gadget.
Purely theoretically it was possible without it. The equipment is basic, there is no additional electrical unit. But I decided to install a smart one and relieve the standard wiring. During installation, the power, at my request, was taken directly from the battery. I installed it at the official Lada dealer in Kaluga - Aves paid 4,000 rubles for installation, the time was 3 hours.
And the question that worries many is whether installing a towbar is a change in the design - NO, subject to the conditions: It must be removable or conditionally removable. It must be designed for this vehicle. And it was installed by the service center. In short, his passport (aka installation instructions) went to the towbar - there we write down our car, VIN, and at the dealer we put a stamp that they put (now I carry this piece of paper with me along with the passport for the gas cylinder). Well, we make a note in the service book - that’s it. It's enough )
Service
Maintenance of the trailer hitch consists of periodic inspection, tightening of bolted connections, and checking the geometric parameters of the coupling ball.
The frequency of maintenance of the trailer hitch should be carried out in conjunction with the maintenance of the vehicle.
ps see other photo reports about installing and connecting the tow bar in the comments.
Let us remind you that we previously told you how you can make your own organizer in the trunk of a Lada Vesta.
Key words: trunk of Lada Vesta
+9
Share on social networks:
Found an error? Select it and press Ctrl+Enter..
How to check if everything is done correctly
For installation and connection of the structure, only technological holes are used. If they are not available, you can make them in the bottom yourself using special equipment. All elements are mounted and adjusted to the holes, everything is carefully checked, since minimal misalignment can lead to rapid wear of both the towbar itself and its wiring.
The fasteners must be tightened well to avoid possible displacement. Before using a coupling structure, it is tested to determine whether the coupling device can withstand the permissible load. Before installation, it is recommended that all holes and joints be treated with a grease-type lubricant; a plate-type compound for processing the coupling ball is best suited. Before installing the ball itself, it must be covered with a cap.
Where can I buy
You can view availability, cost and sign up for installation on the catalog page
If you live in Volgograd, you can contact us. We will help you with the choice and directly with the installation of a trailer hitch suitable for your Vesta or any other vehicle.
Thank you all for your attention and activity on our website!
Subscribe, leave comments, be sure to ask relevant questions and share your opinion with us!
( 3 ratings, average: 4.67 out of 5)
Did you like the article?
Subscribe to updates and receive articles by email!
We guarantee: no spam, only new articles once a week!
A towbar (tow hitch or trailer hitch) is designed to couple a vehicle to a trailer when towing and transporting large cargo. Installation of this accessory on modern LADA cars has a number of features. Let's take a closer look at what you need to install a towbar on your Lada Vesta and Lada XRAY yourself.

