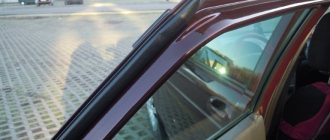
Connecting rear view mirrors Priora (SE)
Old-style mirrors have 2 blocks with wires:
Block No. 1: mirror control:
Block No. 2: heated mirrors:
SE mirrors have 3 connectors with wires (an additional plus (6th wire) is for the turn signal). Connecting new mirrors is carried out in the same way, all colors are the same, except for one - +12V mirror heating, brown is used instead of Gray.
Block No. 1: mirror control:
- red connects to red-blue.
- blue with blue-black.
- green with green-black.
Block No. 2: heated mirrors:
- Instead of gray there is brown, we combine it with blue-red (black-red).
- black with black (used for heating and for turn signals).
Block No. 3: direction indicators:
For those who haven’t figured it out, here’s a diagram for connecting the SE side mirrors on a Lada Priora:
The main thing is not to confuse the red-blue and blue-red wires. They are almost the same, so before connecting it is better to check them with a tester (multimeter or + 12V light bulb), connecting the minus of the tester to the body, and the (+) to the wire. If the lamp lights up after turning on the heated mirrors, then this is the correct wire that needs to be connected to the brown mirror wire.
Connecting the SE mirror turn signals: You can take the plus for the turn signals from the direction indicators in the car's wing.
- Left wing - blue-black and black wires.
- Right wing - blue and black.
By the way, for the VAZ 2172 the VAZ 2112 Coupe also borrows some body elements, for example, a spoiler.
Connection
Old style mirrors (without direction indicators) have two connectors (3 and 2 wires):
The mirrors of the new SE model have 1 block of 6 wires:
We cut off the wires from the SE mirror block and solder it according to the diagram:
The process of installing and connecting mirrors of the new SE model is also shown in the video:
Heated side mirror VAZ 2112
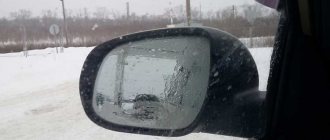
VAZ 2112 heated mirrors are an option that is not always found in the standard equipment of VAZ cars. However, in latitudes with continental and moderate continental climates, such an option as heated rearview mirrors for the VAZ 2112 is simply necessary. So, as everyone knows, in such a climate there are often periods of high humidity, during these periods the glass fogging or freezing occurs.
Standard side mirrors - article number and price
Installation of rear windows on Lada Priora.
complete instructions For the Lada Priora car, standard parts with electric drive have catalog number 2170-8201017. Price – about 3,100 rubles per set.
Heated mirrors on the Priora received a larger mirror element. Thanks to this, the driver does not have to lower them when reversing – even this difficult-to-reach area is visible. For the SE version, repeaters were added to the mirrors. Priora with electric drive, repeater and heating (catalog number 2170-8201021, price - about 3,800 rubles per set) was much more expensive than conventional versions.
Please note that kits are often sold unpainted or painted to match the body color. If necessary, paint the body of the mirror device before installation. Painting it yourself will turn out much better. Some stores offer painting only the upper parts of the body, but you can choose any painting method yourself. Speaking about the rear-view mirror of a Priora car, you can notice that it is ordinary, as simple as two rubles, attached to a holder that is secured under the trim.
Standard mirrors for model 14
Standard rear-view mirrors on the VAZ 2114 have a strong and reliable mount, but have a number of disadvantages. Their main features. poor visibility, low control variability and shaking while driving. This is especially noticeable on rough roads.
Vibration during movement often damages the plastic gasket. Due to the not very good shape of the model, part of the road is simply not visible in them. During maneuvering, the driver must be distracted to ensure that there are no lateral obstacles.
Correcting the position with a special lever, although convenient, is very primitive. Thus, the adjusted tilt angle does not allow all blind spots to be seen. Standard models are equipped with a simple wedge anti-reflective system.
Wiring diagram for mirrors on a VAZ 2114
Features of electrical equipment
Installation and connection of fog lights on viburnum
The electrical circuit of a Lada Priora car includes several main elements - front and rear blocks, control panel blocks, as well as engine control systems. All these elements are connected to each other by special plugs located on the left under the center console, as well as above the mounting block. Only the control panel and engine control system harness is located in the heating system shaft, on the driver’s side. It should also be noted that the rear block and the device are connected to the control device via an electrical package, which is located inside the car.
How to disassemble a mirror (left and right) on a Priora car. removal and installation
Do-it-yourself installation and connection of an alarm system to the central locking system of a VAZ-2114
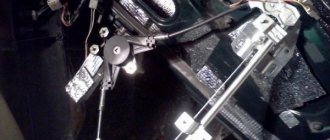
Replacing a device installed in the “Norma” or “Standard” kits with the SE version is a good way to configure it. To disassemble these devices, you will have to disassemble the case. Do the following:
- Remove the screws that secure the front pillar cover.
- Pull some of the skin towards you.
- The part is held in place by three bolts. First, lower the glass, then slowly unscrew the bolts, holding the reflective element with your other hand.
- Do not pull the device. First disconnect the wires. two gaskets should go through. First. for heating, the second. to adjust the position.
- Place the new part in place of the old one and secure it with bolts.
READ How to Disassemble the Mirror of Ford Focus 2 Restyling
Priora mirrors must be connected as follows:
- The green wire turns black and green;
- Red wire. blue-red;
- Connect the blue wire to the black and blue;
- Brown wire. to red-blue (second block);
- From black to black wire (second block; this is the “minus” for repeaters and heating).
If you are replacing this part in the winter when outside temperatures drop below freezing, you will need to be more careful with the mirror element. Once you remove it, heat it with a hairdryer or heat gun. The surface may come together and “burst”, so it will remain useless. You will have to prepare for the replacement in advance by removing the necessary tools.
Source
| Mirrors from the VAZ 2170 can be considered a gift from AvtoVAZ, since they are at all heating levels. Despite this, many motorists replace them with mirrors from the second edition of Lada Priora (SE). Most often, difficulties arise only when connecting them. |
Lada Priora Sedan › Logbook › Detailed installation of SE mirrors on Priora.
As the owner of a pre-restyling Priora, I always wanted to update the exterior with restyling. This summer I ordered assembled bumpers and with running repeaters from the nvs-car online store. Everything is in color.
After reading information from the Internet on installing SE mirrors, everything seemed quite simple, but in reality it turned out to be not entirely true.
So I'll start from the very beginning. We remove the old mirror.
On SE mirrors there is 1 chip for 6 contacts, while on the old ones there are 2 chips for 3 (adjustment) and 2 (heating) contacts.
Having looked through many articles and videos on YouTube, I have not seen anyone install a native 6-pin chip. Most cut chips from old mirrors and solder them onto new ones, some buy other chips, others don’t bother and just connect everything directly. This is not my way... After visiting about 6 auto stores, 2 electric stores and 1 car market, the chips I needed were not found, but Google found them for me literally in a matter of minutes. In general, I ordered it on the Internet for 250 rubles apiece and after 4-5 days I had the necessary chips in my hands.
The colors of the wires on the mirror, chip and door wiring were different, so I had to think a little. To avoid confusion, I drew a primitive diagram
After stripping, soldering and laying out the wires, everything looks something like this
By the way, at the soldering stage I had to use cheats, namely “summon dad”.
Next come the turn signals. It seems to be nothing complicated, we cut off the old one and solder a new one (as most people do), but this is also not my way. I decided to connect to the existing ones in order to preserve the original wiring, just in case.
The wire itself to the repeater on the passenger side is easy to find, we bend the Shumka, we see 2 wires, blue and black. We need blue. On the driver's side it's more complicated, there these 2 wires go in insulation and are located a little further, and it's just that the place is more problematic (by the way, the wire to the repeaters on the driver's side is blue-black). As a result, the following happened
Here I already soldered myself, so everything is not so beautiful, but in my opinion it holds up well. The end result is like this.
Next is the last one. The repeater is in the wing. I glued a tie to the SE plug with super glue. I poured the glue liberally and waited for about an hour to dry.
And with the same tie I attached the old wire to the turn signal in the wing.
How to Replace a Turn Repeater on a Gazelle Mirror
We offer new technical specifications.
The ability to see the road not only in front, but also behind a moving car is provided by rear view
. Their availability and service are strictly necessary.
You have the opportunity to buy a Gazelle mirror not only with a conventional manual drive, but also with a set of various applications that make control more convenient.
We offer an electrically heated side mirror for the gazelle, which will help you inspect the road in the most difficult weather conditions. Indeed, in low temperatures or during heavy rains in the absence of electric heating, inspection from the rear
hard. Turn signal indicators will be no less important. Electric control makes the mirrors much more convenient. Its presence greatly simplifies visibility settings. Each car owner, when purchasing accessories for the Gazelle, can independently choose the necessary equipment, which depends on the overall price of the product.
Design for every taste
The aesthetic design of the mirrors is a very interesting rear view of the Gazelle. A wide color palette gives you the chance to choose the product that best suits your car.
By successfully choosing the color and shape of the body, you can give a more sophisticated look to the entire car.
The shape of the reflective surface can be flat or convex. Each driver can select its own device type. It should be remembered that convex surfaces provide greater visibility, but slightly distort the true distance.
Sturdy and reliable
It is very important that the right and left mirrors are placed in a durable housing that protects them from mechanical damage. In the event of any failure, this device is often beyond repair and needs to be replaced
The need to replace the reflector and housing may be caused by wear, damage to the reflective surface, poor maneuvering, or improper entry into a garage or parking lot. Often the exterior decoration is destroyed by passers-by. The car owner must monitor the viewing status of the rear view devices
and replace them immediately if necessary.
Standard mirrors for model 14
Standard rear-view mirrors on the VAZ 2114 have a strong and reliable mount, but have a number of disadvantages. Their main features. poor visibility, low control variability and shaking while driving. This is especially noticeable on rough roads.
Vibration during movement often damages the plastic gasket. Due to the not very good shape of the model, part of the road is simply not visible in them. During maneuvering, the driver must be distracted to ensure that there are no lateral obstacles.
Correcting the position with a special lever, although convenient, is very primitive. The tilt angle adjusted in this way prevents all blind spots. Standard models are equipped with a simple anti-glare wedge system.
Wiring diagram for mirrors on a VAZ 2114
How to connect turn signals on Priora mirrors
I suggest that owners of SE mirrors with built-in LED turn signal indicators who want to implement the “Size + turn signal” (or “American size” or “American size”) operating mode in them, repeat the simple electronic circuit developed by me. The operation of my circuit is shown in the video:
As expected, the size mode is automatically turned off while the turn signals are working, and at the same time the repeaters blink in time with the turn signals. My electronic circuit has advantages over circuits assembled on relays, namely: the ability to limit the brightness of the repeaters in size mode, silent operation without relay clicks, the ability to install on other cars that use SE mirrors (for example, the 10th family).
The schematic diagram is shown in the figure:
It is necessary to assemble two such circuits
- on the right and left mirrors. The circuit is not critical to the types of elements used. Resistors - any, with a dissipation power of 0.125 W and an accuracy of no worse than ±5%. Capacitor C1 - any ceramic, C2 - any electrolytic. It is convenient to install an electronic circuit on a small prototype printed circuit board. The circuit works as follows: a time relay with a turn-on delay of about 1 second is assembled on transistors VT2, VT3. In the absence of voltage pulses from the turn signals, the circuit supplies power to the LED turn signal in the mirror. The brightness of the glow in the dimensions mode is regulated by resistor R8. For maximum brightness of the glow, you need to install a jumper instead of a resistor. When the turn signals are turned on, the time relay is reset by voltage pulses through the key on transistor VT1, and turns off the side light mode while the turn signals are operating.
Connecting turn signals on Priora mirrors
Good day!
I’ll say right away that this post is not for electrical gurus.
, but to help beginners) I’ll consider, I think a pressing issue today, connecting SE mirrors, what goes where and how.
So, let's begin. Firstly
, as many already know, the pads on SE mirrors are different, 6-pin, unfortunately I didn’t find these for sale in St. Petersburg, and as I understand from conversations, there are no such pads anywhere, so you’ll have to get a couple more pads for 6 or 7 contacts , I chose 7, they are paradoxically smaller. And 2 meters of wire.
Now about the transfer, in principle the wires match in the order in which they are placed in the blocks, and for some even in color. There should be no difficulties with this either. It’s better to check how you connected it right away, so as not to change everything again later. Next comes probably one of the most frequently asked questions : “What about the turn signal?! Where, how and where?”
The simplest and I think the correct way is to pull it out of the wing, pull it out, cut off the terminal, go into the interior again, unscrew the sill covers, bend the carpet and felt and reach for the engine shield. A black wire will immediately rush up to the rubber valve, this is it , take it and boldly pull it out.
One issue has been resolved. Second question
.There is wire 1 from the turn signal mirror, and 2 from the wing.
Using a tester, or empirically, we look for which of these 2 wires is “+”.
Currently, Lada Priora is equipped with electric drive and heated exterior mirrors. One of the popular modifications is the installation of side mirrors of the new SE model (with heating, electric drive and turn signal indicators). We'll tell you how to replace old-style mirrors with new ones with your own hands.
Required
: Electrically controlled external mirrors with turn indicator (article: 2170-8201050-75 and 2170-8201051-75, price about 3,500 rubles), turn signal caps SE.
Communities › VAZ: Repair and Modification › Blog › Mirrors from Priora for VAZ 2110-12.
Good day everyone, members of the VAZ: Repair and Improvement community!
It’s no secret that the original mirrors on the 10th family have little information content, constant rattling, etc.
Someone makes and remakes them, but I took a different path, so to speak, not the easiest. I remember the day when I saw a new luxury Priora with new mirrors. A thought arose in my head: “Have Vaz really learned to make nice and functional mirrors?”
The choice was obvious, you need to take them. With this post, I may not open America to you, friends, but perhaps it will help those who are planning to change their mirrors.
Why did I choose mirrors from Priora? The answer is obvious. 1) Appearance, they refresh the car 2) Heating 3) Electrical adjustment 4) Turn signals
Someone will say: “So what?”
“There are tons of cheaper options with the same features.” Let's
return to point 1