Today, the radio has become an indispensable attribute of a modern car. This also applies to the new product on the domestic market – Lada Vesta. Initially, this model in most versions is not equipped with speakers. Only the “Comfort” variation is able to provide its owner with standard loudspeakers.
Note that not every Lada Vesta configuration is equipped with a radio, although all cars have audio preparation. In the poorest version in terms of equipment, the seats for the speakers are closed using soundproofing panels. And in this case, installation of a radio is required. Many car owners need to know what audio training is included in it?
General provisions
Installing music is not a complicated process, but it is responsible. Before directly installing audio components in the Lada Vesta interior, you will need to understand what composition of elements constitutes audio preparation. Therefore, a logical question arises: what is included in audio training?
The “Classic” modification has all the required minimum, allowing you to seamlessly connect both the head unit and dynamic heads. We are talking about the presence of cable lines, with the help of which the designated components of the audio system are switched.
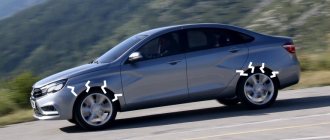
Note that the corners of the doors near the exterior mirrors in this version of the equipment do not have wiring for connecting tweeters.
Installing music involves removing the plastic plug. After removing it, we find connectors according to ISO and FAKRA standards. They allow you to connect the antenna unit. We also see the presence of “USB” and “AUX” connectors.
You can install a 1DIN format radio in the seat. The installation process itself is not capable of causing any difficulties for the owner. It involves the need to connect wires. Please note that in order to successfully install a radio that fits the “2DIN” format, you will need to perform a number of serious modifications to the panel.
Installation of loudspeakers in Lada Vesta is endowed with certain nuances.
Important! To connect standard dynamic heads, non-standard connectors are used, similar to those that can be found in Renault-Nissan cars. To be able to switch analog speakers, you will need to purchase adapters such as “ZRS-AG-22” or “CT55-17”. We do not recommend removing factory connectors, since if such an action is discovered, you may lose your warranty coverage.
Installing a radio
We pry the plug of the car radio socket from below and take it out. The socket contains plugs for connecting: USB, ISO, AUX, FAKRA (antenna).
To replace the standard audio system, you need to remove the trim and deflectors. To do this, you will need to disconnect the ground (disconnect the minus terminal from the battery). Next, remove the trim, prying it from below, and disconnect the block from the emergency parking button of the car. Remove the deflectors (4 screws for the T20 head).
Behind the air ducts, again unscrew the 4 screws. We drag the car radio towards us, disconnect the connectors with the wires. That's it, they took it off. Installation of an alternative radio takes place in the reverse order. Watch the wires during installation, try not to pinch them. Please note that a 1DIN radio is suitable for Lada Vesta.
How to remove the trim?
This is necessary for installing speakers. Here, the Lada Vesta owner will need maximum care and attention to eliminate the risk of scratching the plastic panels. Using a screwdriver is highly undesirable. It is better to arm yourself with a plastic card.
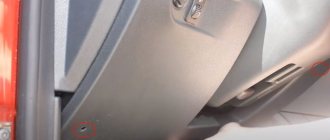
To remove the plug located on the end of the door, you will need to use a card to pry it through special recesses. Using the same principle, we dismantle the buttons for electric window lifts. Fastening components in the form of tendrils are located on the front, rear and side sections of the MUS.
The fastening of the casing is represented not only by screws, but also by 4 “hedgehogs”. The risk of breaking them is quite high if the owner does not use a specialized tool during dismantling. These “hedgehogs” are borrowed from cars from Renault-Nissan. You can use elements from Grants instead, but minor preliminary modifications will be required. Such “hedgehogs” are stronger and their price is several times lower.
According to these manipulations, the upholstery on the driver's side is dismantled. Removing the trim from the right door panel has its own peculiarities. There is no need to remove the window lift button. There is also no need to look for a self-tapping screw plug. A sufficient measure would be to remove the handle cover. To do this, we pry off the bottom plug, near which there is a convenient groove. We use the same plastic card. Now unscrew a couple of screws (10 mm), and then remove the upholstery.
Diagnostic connector Grant
MMS Grant firmware
Windshield wiper blades Lada Granta
Lada Vesta Luxe
AvtoVAZ has equipped the top version of the sedan to the maximum:
- Multimedia system with navigation (7” color display with TouchScreen, FM/AM with RDS function, USB, SD card, AUX, Bluetooth, Hands free), 6 speakers;
- Standard speakers in spacers (16 inches);
- Tweeters in mirror triangles (item 281489095r).
Let us remind you that instructions for installing speakers are in a separate article. By the way, it is possible to connect an amplifier or a rear view camera to Vesta’s standard radio.
Hello everyone) today I want to tell you how I installed music in my West) As I wrote earlier, the audio preparation in the West is somewhat different from the audio preparation on other Lada models, since the door has a Nissan (or Renault) connector for connecting their native speakers, which cannot be cut, otherwise all electrics will be void of warranty. I’ll make a reservation right away, after the last entry the guys sent me an adapter in the comments that can be ordered on the Internet, but the problem is that, firstly, it’s a wait, and secondly, it costs from 150 rubles apiece, and a minimum order must be ordered 4 pieces. And this is the least expensive option, there are also more expensive 200))) In general, I’ll return to the connector later, but now about the installation itself:
For acoustics itself, I bought a pioneer 180ub head and jbl 602 speakers. Why did I buy this particular one? Yes, because, by and large, I’ve been sick of car audio for a long time, and I don’t really want to invest in this business again)
Let's start with installing the GU, there will be practically no problems with this, we press the plug under the GU with our fingers from above and below, take it out, then we see the ISO connectors, connect them to the GU, everything is connected in addition to the GU antenna, to connect the antenna, you need to find an adapter from the Nissan connector to a regular one, and enjoy the sound... and also find the connector itself in the panel, which is not known where it is located, if it is even present in the classics, although there is an antenna, that means it should be))) but I’m not interested in the radio, I listen flash drives)
and now the most interesting thing))) removing the door trims, you have to remove them, put the speaker through the windows, and fixing it is unlikely to work, and even if it does, you still won’t be able to get to the plug))))
There are instructions for this on YouTube, at this link:
But I didn’t find instructions on the Internet for the right door, so I’ll tell you in more detail about the nuances of removing the trim on it))) Firstly, you don’t need to remove the power window button on it, and there is no secret self-tapping screw in it, just unscrew the handle, this is done as follows : on the bottom side of the handle there are grooves into which you can put a card, and by lifting the cover of the handle, remove it; inside there will be two 10mm key screws that need to be unscrewed, and that’s it, the same as on the left door. Don’t forget to remove the corners for the tweeters, which are installed opposite the rear-view mirrors.
In general, when you remove the casings, you will see the hole for the speaker sealed with Shumka, tearing it off, you will find that the holes for the screws for the speakers correspond to the Renault version. and installation of conventional speakers without spacers is not advisable, BUT! if you want, you can push them in, which is what I did, for this I pasted a vibra around the perimeter of the hole so that it would press the speaker along the perimeter, because the speaker can only be screwed on with 2 self-tapping screws, and even then, the holes even for them are located a bit narrow, but if the speaker lift it above the door, then everything can be screwed in at an angle, and everything will sit quite firmly. Again, I repeat that this option is extremely undesirable, it must be done through spacers, I just personally need the music to play in the background, and no, no listen, that’s why I was lazy and didn’t make them)
now the very moment that I spoke about at the beginning, this is the same adapter))) in general, wait a month for it to arrive, there was no particular desire, so what I came up with (although 1 person in the comments suggested this idea) I went and bought it at in the store there were 4 thin daddy terminals, as well as terminals for connecting speakers, I soldered the whole thing on the job while I had the opportunity, and put the same terminals that I inserted into the plug on heat shrink, right at the root, so that nothing would short-circuit, after Why else did I additionally wrap the whole thing with electrical tape))
here, by the way, it is very important not to blunt it and not immediately confuse the polarity) By the way, for those who are interested in whether there is wiring for the tweeters, I will say that I did not find it, apparently it is only available with the multimedia package, and you will have to pull it yourself )))
And then we close the upholstery and enjoy the sound))) although no, you won’t be able to enjoy the sound if, before installing the upholstery, you don’t glue the mesh under the speaker))) yes, while you don’t have any music, it stands quite tightly, but all this density ends after 5 minutes of listening to music, and the rattle from it will be such that it won’t seem a little)))
Mounting speakers
There is no need for special training when installing speakers. It will be enough to remove the insulating material located in the places where the speakers will be mounted. We will need special gaskets that can be cut from felt material.
If 16-centimeter loudspeakers are mounted in the front door cards, then this procedure has a number of features. The standard set of fasteners involves fixing the speaker with three screws. In our case, we will need to install special spacers, whose dimensions depend on the size of the dynamic heads.
Using this technology, speakers are installed in the rear door panels of LADA Vesta.
Equipment selection
Car tuning is limited by the driver’s imagination and financial capabilities. Manufacturers of sound mechanisms offer three product options:
- Broadband module. It is a simple design consisting of one column. Accordingly, it reproduces all frequencies at once. The cheapest option.
- Coaxial device. Consists of three speakers located in one unit. The best option in terms of price and quality ratio. The sound is more spacious and harmonious, but there is no stereo.
- Component system. The most expensive and advanced of those available. Each speaker is located separately in its own housing. The first reproduces low frequencies, the second – medium, the third – high. There is a stereo effect and the ability to adjust the sound.
The client's choice depends on several factors. Quality lovers spend more money on expensive subwoofer models. Anyone who is not considered a music lover is limited to a built-in device or the cheapest one on the market.
How to choose a speaker system?
If the owner of a LADA Vesta needs high-quality sound, we recommend choosing two-component speakers. For these accessories, the high-frequency emitter is placed in a separate unit in relation to the low and mid-frequency head.
It is advisable to install such components in the front doors. The rear door panels can be "addressed" with lower quality coaxial speakers, which will serve as an expansion of the sound theater. To install high-frequency heads, additional cabling will be required. This is how the speakers are installed.
Results
Installing music yourself is not an easy task and not everyone can do it, even though the audio system in the car is fully configured. You need to know both the connection diagram and have the skills to work with sheathing. Most ordinary owners are advised to give their own car in order to install speakers in the front doors of the Lada Vesta. You can buy speakers for installing acoustics in a car at dealerships.
Today, the radio has become an indispensable attribute of a modern car. This also applies to the new product on the domestic market – Lada Vesta. Initially, this model in most versions is not equipped with speakers. Only the “Comfort” variation is able to provide its owner with standard loudspeakers.
Note that not every Lada Vesta configuration is equipped with a radio, although all cars have audio preparation. In the poorest version in terms of equipment, the seats for the speakers are closed using soundproofing panels. And in this case, installation of a radio is required. Many car owners need to know what audio training is included in it?
Tips when installing an audio system
As we can see, the installation of acoustic components in the LADA Vesta interior is not capable of generating difficulties and dead ends. The main thing for the owner is to adhere to simple but useful rules, namely:
- We carry out the entire list of manipulations extremely carefully, without breaking the fasteners or scratching the panels.
- Since audio preparation is initially present, we just need to connect the speakers and head unit.
- We do not cut off the standard connectors, but stock up on the previously specified adapters.
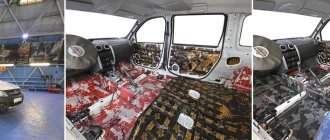
- Before directly installing the dynamic heads, we soundproof the door panels.
- Installation of the speakers is carried out on previously prepared gaskets.
Correct adjustment and configuration of equipment
An instrument called an oscilloscope is best suited for this purpose. However, it is practically inaccessible to the average car owner. In this case, you can use a simple method:
- Turn off the input pulses coming from the amplifier.
- Set the regulators to the minimum level.
- After turning on the music, select a volume of about 90% and a medium tone.
- Give a signal to one channel, and then distort the signal and slightly reduce it in the opposite direction.
- Turn off the signal. Repeat this with other sources.
Vesta's standard MMS
All versions of Vesta, with the exception of the basic one, have MMS installed. The minimum configuration of the car is equipped only with an audio system. The main functions of the MMC are playing audio files from removable media, receiving radio signals, navigation, parking assistance with video playback from the rear view camera.
The MMC on the Lada Vesta is located in the central upper part of the console and complements the updated modern design. The system is equipped with a good filling with the following characteristics:
- processor CSR S3681 B036BK K609B CPU SiRFatlas VI 800mhz Cortex A9;
- RAM Micron D9PSK 2X 256MB DDR3-1600 Clock Rate 800 MHz MT41K128M16JT-125 IT:K;
- internal memory 2 GB Micron NQ283 NAND FLASH 2gb MT29F2G08ABAEAH4-IT;
- internal memory 8 GB SDMMC 8GB SAMSUNG KLM8G1WEMB-B031;
- bluetooth CSR 8311 Bluetooth v4.1 BlueCore® CSR8311 QFN Automotive;
- WI FI CSR 6030 Wi-Fi IEEE 802.11b/g and n;
- digital video decoder AKM8859 DIGITAL VIDEO DECODER PAL/SECAM/NTNC AK8859VN;
- audio AK7757VQ Audio DSP with 24bit 3ch ADC + 4ch DAC + MIC Amp;
- power controller MPS MP4570 Automotive Power Systems;
- TPS65150 Low Input Voltage, Compact LCD Bias IC With VCOM Buffer;
- TJA1042 high-speed CAN transceiver;
- CAN and K-Line controller Freescale S9S12G96F0CLF;
- controller Fujitsu 32-bit ARMTM CortexTM-M3 based Microcontroller.
The following elements are used to manage and play files:
- seven-inch touch screen;
- “Mode” key – select modes;
- “MUTE” – mutes all sounds;
- Volume control – pressing once turns the device on or off;
- microphone for the ability to talk on the phone without hands - Handsfree;
- “Reset” – button to reboot the device;
- slot for reading a removable SD card;
- connector for reading information from removable USB media and connecting various gadgets;
- AUX connector for connecting headphones or external audio devices.
AUX and USB connectors are located near the glove compartment at the bottom of the panel. Thanks to this, connecting external devices has become more convenient.
Additional control
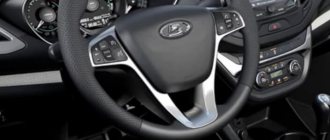
In addition to the buttons near the touch screen, MMS functions on the Lada Vesta are controlled using duplicate buttons located on the steering wheel:
- volume control;
- selection of file and radio playback modes;
- turning off all sounds;
- button for navigating through folders and tracks on removable media; in another mode, the buttons are responsible for accepting/ending an incoming call.
Firmware MMS Lada Vesta
If you have experience flashing smartphones, then you won’t have any difficulties reinstalling multimedia software. If there is a warranty, this should be done by the dealer. You can do the firmware yourself:
- A firmware image is downloaded to a FAT 32 SD card, which must contain the files chain.bin, NK.bin, chain.lst, TINYNK.bin.
- Exit to desktop.
- Open the file Windows/OEM_Settig.exe.
- Click the Upgrade OS button and start the firmware process.
After completing the procedure, you need to reboot the system while holding down the volume key - this is a radical measure. Updating to a more stable version will help eliminate malfunctions. Even a beginner can cope with this if he follows step-by-step instructions:
- Turn on the device.
- Insert removable media into the slot with the pre-loaded image for updating.
- Press “i” (information) on the display.
- On the pop-up window, you need to successively click on 4 dots in the corners of the screen.
- In the new window, click on “Software”.
- Click on “SW Upgrade”.
- In the pop-up menu, click “Upgrade”.
- The update application will open, where you need to select one of three modes. Update Radio will update the shell, Update Navi will update the navigation system, and Update OS will update the operating system.
- Having selected the desired mode, press “OK”.
All that remains is to wait for the process to complete, during which the system will reboot several times.
During the update, you cannot turn off the power, turn off the ignition, or press buttons on the radio. The process can take up to one and a half hours. When the update is complete, click “OK”.
Firmware from third-party developers or violation of software installation rules can lead to freezes and inability to boot. The described method will help you deal with this problem by de-energizing the on-board network and starting the desktop using a removable card and an empty explorer.txt file. The situation can also be corrected by reformatting the drive or flashing the device using software from the manufacturer.
Owner reviews about MMC Vesta
Roman, Izhevsk: “Compared to the basic version, the price is somewhat high, but the comfort and driving pleasure are much greater.”
Boris, Novosibirsk: “AvtoVAZ” really unexpectedly demonstrates progress in the domestic automotive industry. The multimedia system only confirms this and keeps the high bar set by the plant’s new flagship.”
Timofey, Kazan: “Instead of the factory radio, it was decided to install a cheaper one from China. It is more functional, convenient and practical. One problem - I thought all the connectors were the same, I had to spend a lot of time searching and buying adapters, and the space for the radio had to be modified. Some people don’t like China, but for me it’s a good alternative at an affordable price.”
The multimedia system can rightfully be called a breakthrough for a domestic car. It is far from ideal, it has many shortcomings, but the constant updating is encouraging - the system is being finalized and improved. Perhaps car enthusiasts will see something completely new in the next generation of VAZ cars.
