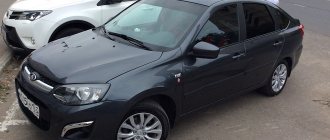
Heated seats, two connection options
Not all Granta trim levels have heated seats.
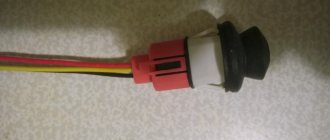
In Russia, this element is extremely necessary, because getting into a cold car is quite unpleasant and is fraught with health problems. When buying, you don’t always worry about the little things and want to buy a car at a lower price. But then people like to add the missing functions themselves. Now we’ll look at how you can make seat heating without the help of specialists, with your own hands. First, we will need to buy a heating pad, a Kalinovskaya one or one from Granta will do. The price for the original heating is 1100 rubles. In the kit you will find:
- wires, fuses, buttons
- warmers themselves for two chairs
- connection diagram
All this stuff looks like this:
If you wish, you can first remove the chairs. This will be more convenient, but leaving them in place will allow you to install the structural elements.
The installation process begins with unscrewing the plastic covers on both sides.
They need to be removed to gain access to the bolts connecting the chair and the backrest.
We unscrew these bolts and separate the seat.
Next, remove the seat covering material and fold it up. We do the same with the back.
We take our heating pads from the kit and slip them under the material.
Carefully place the casing in place, making sure there are no folds. After assembling the seat, you need to connect the black wires from the two heaters, and connect the white one to the power supply.
The power supply is located under the shift lever housing. Having unfastened it, we pass our wires from the right and left seats through the central channel. Don't forget to install the fuse, it is included in the kit.
Having completed all the steps, all that remains is to display the on and off buttons on the panel with cup holders.
The process of installing heating on Granta Liftback can be significantly simplified by using universal heating capes. In this case, there is no need to disassemble the floor of the car. You just need to throw them on the seat and plug them into the cigarette lighter socket.
Lada Granta norma→luxury › Logbook › No. 47. HEATED SEATS (Part 2) INSTALLATION
Hi all. More than a year ago I already wrote about the fact that I installed heating pads
and only now got around to describing the installation.
I started by removing the seat and bringing it home to put the heating elements in them. When I started to remove the seat, I noticed that they are attached to four sprockets, but they were easily unscrewed with ordinary heads. At home, the most dreary part began - the rings (those who installed them will understand).
I removed the seat trim and put in the elements themselves, which are glued with double-sided tape, and quite well, I’ve been driving with them for more than a year and they’re in place. The upholstered seat back was easier due to the lack of rings. I assembled everything and ran the wires under the seat.
The next step was to run the wires around the cabin. With this everything was much easier. The seats were removed and all that remained was to remove the tunnel to draw wires to it for the buttons and connect the ground.
I ran the wires to the buttons, seats and to the mounting block.
Then I installed the tunnel and connected the buttons to it. Then I installed the seats.
But the most difficult job is connecting the wires in the mounting block.
For me it was a hell of a job, although there was a clear connection diagram. At first there was a problem with unscrewing the screw due to the small distance, but with the help of a Phillips bit and pliers I sorted it out. Then I tried to turn the mounting block over, this also turned out to be not easy, it looks like the wires were short and therefore I was only able to turn the block upside down. The connection itself is not difficult, but when only one hand can reach there and when it is difficult to get to the desired terminal due to a bunch of interfering wires, then it becomes simply terrifying! Then it turned out that there was no plus for power supply and I had to take it from the power supply for the wipers. I have not yet been able to get to the place where the fuse is installed for heating, so I had to install it in another place. But in the end we managed to assemble and connect everything!
Composition of a seat heating kit and how to install heaters on Granta with your own hands
Preparation for installation of heating elements
Before connecting the heated seats on the Grant, you need to secure the heaters under the upholstery of the seats. Of course, it is more convenient to do this on dismantled “seats”, previously disassembled into two parts: the back and the support. Creating acceptable conditions for installing heating elements is the goal of the preparatory stage. By the way, when determining the reasons for the knocking of hydraulic compensators, there is a slightly different logic.
Preliminary activities are carried out according to the following scenario:
- Disconnect the power supply to the seat belt sensor located under the seat. In many trim levels, this option is available only to the driver.
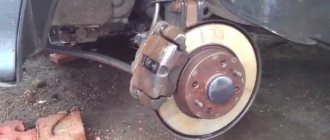
- Using an E10 head mounted on the knob, unscrew the four bolts connecting the base of the seat frame to the body and remove the seat. For ease of access to fastening elements, move the seat to the farthest or closest position. Similarly, remove and pull out the second front “seat” from the passenger compartment.
- Remove the backrest angle adjustment knob by prying it off with two flat-head screwdrivers.
- At the junction of the backrest and seat, remove the plastic covers on the left and right sides by unscrewing one screw each.
- Unscrew 2 bolts on each side securing the backrest frame to the metal base.
- Detach the backrest from the seat.
- Repeat steps 3-6 for the second chair.
Factory covers are attached to the frame with four clips. On the reverse side, the fixing elements are clamped with wires. Having untwisted the latter, we tighten the fabric. Before removing the backrest cover, disconnect the plastic lock at the bottom of the structure. When assembling, it is advisable to replace the wire with plastic clamps.
Installation of heaters
The purpose of preliminary positioning is to achieve such an arrangement of the heaters that the wires exit into the joint of the backrest and seat. You won't be able to play with the longitudinal base - the standard kit is designed strictly according to the dimensions of the depressions. After removing the protective tape, glue the element to the frame. If necessary, the foam is trimmed to allow the wire to exit unnoticed.
Do-it-yourself heated seats on a Lada Priora: video instructions
For installation you will need: standard heated seats, electrical wires, button block
heating control, four-contact relay, 15 A fuse, female and male wire terminals, corrugated pipe for electrical wiring, double-sided tape.
Removing Lada Priora seats
To remove the seats, you will need an 8 mm socket wrench or a special star socket - depending on the year of manufacture of the car. To install electrical wiring, you need to remove the decorative trim between the seats.
Using a flat-head screwdriver, bend the corners on the seat upholstery and pull out the plastic plugs. Now you can freely move the casing to the side.
Power supply or how to connect the heated front seats on the Lada Granta correctly
The cost of installation work at an unofficial service station is at least 2,500 rubles. For this money, already purchased heating elements will be installed in the car seat and the circuit will be connected according to the manual. All that remains is to make an anti-freeze product according to a home recipe and hit the road. This is for the quick ones. Painful owners will probably not like the electrical part of the integration.
Disadvantages of the standard kit
The instructions indicate how to install heated seats on the Grant and connect it to the on-board network. According to what is written, the electrics connect and function like this:
- The permanent plus is taken from the hazard warning button.
- The ground is connected to the bracket for fastening the standard wires of the negative pole.
- The standard fuse is replaced with a more powerful one.
- The heating is turned on/off using the buttons directly.
Only one function is correctly implemented - turning off the heating when the ignition is turned off. Otherwise, the connection scheme is not entirely successful:
- The positive wire that goes to the emergency light is thin and will probably work at the limit.
- The contact group of buttons operates in a dangerous mode, since it is not intended for power loads.
For your information. The kit offers simplified buttons for installation - they do not have a power indicator in the form of a yellow lamp (as on the rear window heating control).
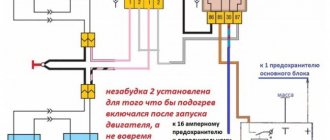
Competent connection diagram
An unfortunate result of the standard connection algorithm is a melted fuse. Such a reaction indicates that the circuit is operating at its limit. An alternative scheme for connecting heated seats will help to avoid this. It involves the use of two four-pin relays and powering them from switch K4, which supplies the output “+” after turning on the ignition.
Additional items
It is advisable to carry out installation work after purchasing an additional mounting block of reduced size. You will also need regular contacts for connecting two relays and two Lyra contact elements linking a 10A fuse. We also add additional wires with a cross-section of 4 and 1.5 mm2 to the shopping list.
The fastest way to heat your seats: a heating blanket
The cheapest and least labor-intensive way to heat seats is a cape with this very function. It can be found online:
and in specialized stores, where there are many similar products in different versions for different car models with different seats. The cape installs in seconds and is typically powered from a 12-volt “cigarette lighter” outlet. Installation does not require any special knowledge or skills. Straighten the cover on the seat, secure it with the straps according to the instructions.
The only thing you should make sure is that the pads fit your car seat, are well secured and, if possible, do not slip. Next, plug the plug into the cigarette lighter - and the heating element begins to work its magic, pull out the plug from the 12-volt socket - and the pillow stops heating:
”
Video taken from YouTube channel MrCAHEK87
There are, of course, more “sophisticated” versions of heating covers, with multi-phase regulators, beautiful appearance and even massage and cooling functions... But they still will not be as comfortable as seats with built-in heating, cooling and massage, they will break down more often , and these multifunctional covers are not cheap at all: 5-9 thousand as standard, in contrast to the same covers with a single heating function, which can be bought for 1,000-2,500 rubles .
Caution: The seat pad must not overlap the side airbags.
Connection
Rear seat heating connection diagram:
It is better to take contact “B” from a protected high-current circuit with a fuse. Contacts “A” and “C” can be found in the ERA-GLONASS lighting lamp, in the ISO radio or cigarette lighter connector. Before starting the connection, do not forget to disconnect the negative terminal of the battery.
Installation and connection of heated rear seats on a Lada Vesta on video in several episodes:
Let us remind you that we previously told you how to connect heated windows/mirrors to an additional alarm channel on Lada Vesta and XRAY, as well as how to turn on the heated windshield through a separate button.
Heated seats Lada Priora: causes of malfunction, diagram
The advantages of the Lada Priora were appreciated by many Russian consumers, choosing this particular model. The car attracts buyers not only with its visually attractive appearance, but also with:
affordable cost of components;
quite reasonable price.
In addition to the above advantages, Priora owners, of course, if they know a little about car repair, without any problems, following the recommendations of specialists, they will be able to fix minor breakdowns with their own hands, for example, replacing a fuse, and installing heated seats on a Priora will not cause any special problems.
Grant seat heating installation
In the first part
In this article, I described the introduction of a set of heating elements from the Alamara into the Granta seats. In the second part I will try to describe how we can connect them to the car’s on-board network. Let's figure out the connection together. Many connect heating through one or two relays. I had a small diagram included with the wiring harness for connecting the heating. There were no relays marked on it, just as there were no relays in the wiring itself. And the power was taken from the alarm connector. It was also indicated there that it is necessary to replace the original 5 A fuse of this circuit with a more powerful one - 10 A. Let's check if such a connection is safe: After installing the heaters in the chairs, I connected them to a powerful 12 V power supply to check their functionality . At the same time, I decided to understand the connection in more detail and make sure that this circuit is reliable and correct. I connected an ammeter to the circuit and measured the amperage under load. You can see the results in the photo:
As you can see above, with a heating power supply load for one seat, the current consumption is in the range of 2.4-2.5 A. We look at the maximum load current of our heating button - it is equal to 5A (Stamped on the button itself). That is, the current reserve for our button is quite large. The conclusion that follows is that the buttons can be freely used without a relay.
Next, you need to find out the total amperage of heating consumption on two chairs. Turn it on and measure it.
We see that the amperage did not go beyond 5 A. It follows that the recommendation in the wiring diagram is correct. That is, you can take the plus (with the ignition on) from the alarm connector and increase the fuse rating of this circuit by 5A. But I decided not to pull the wires so far, and took the plus from the connector for adjusting the heater blowing speed. There is a wire with a thicker cross-section than on the emergency gang, and there is no need to pull it through the entire panel.
Now after the theoretical part, let's get down to business:
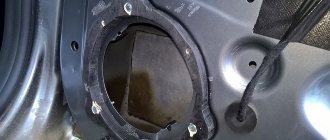
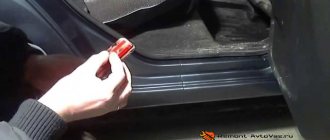
It is most convenient to connect the wiring with the seats removed. First of all, we need to remove the plastic floor tunnel. It is secured with five self-tapping screws. To begin, unscrew two screws on the right and left of the tunnel. Their location can be seen from the photographs:
By choosing the Classic package, the user gives up the pleasant warm options and sound system presented in the next Comfort equipment level. The message is cost-effective: for an additional 50,000 rubles you can equip your Lada Granta with a higher-quality audio system, and spend the remaining money on a set of standard seat heating. We take care of the installation work - we will reduce costs and properly power the circuit.
Lada Granta Snow Girl › Logbook ›
Installation of heated seats
Hi all! I ordered heated seats. There on their website it is written that the heating is standard for the Lada Granta. The kit includes 4 heating elements, 2 buttons with heating indication and a set of pre-assembled wiring. Oh yes, also a 10 A fuse and installation instructions. Well, it's a perfect kit for installation.
Now let's talk about everything in order. The heating is not standard at all! Of course it fits the seats, but it’s not original. The kit, as I already mentioned, contained two buttons, the LED of one of them did not light up. Well, it’s okay - we buy one new button (and the sediment is already accumulating).
Next, we look at who the manufacturer of these miracle elements is and see that it simply does not exist. Most likely this is Uncle Vanya from the fifth basement on the left of X Street. Attached to the kit is a red A4 piece of paper, on one side there is a drawing of a Lada Granta liftback and the inscription “HEATED SEATS” - I can pump up a million such drawings on the internet and write anything I want. On the other hand, the installation instructions are full of errors and inconsistencies.
Filka's letter. You can put anything in the bag. then on a beautiful red piece of paper (the white one will definitely catch your eye) with dirty ink, print a stupid diagram and add a couple of pictures with a car. And who is the manufacturer, what is the power of the elements - why do people need this!
You won't believe how elaborately the installation instructions are drawn in paint!
Uncle Vanya suggests that we power the elements from the emergency brake block. Well, I assembled the circuit, connected the heating elements and measured the current. Both produce 4.8 A. In terms of power, this is about 60 watts. Of course, you can power it from the emergency lights, but I didn’t like that the wiring to the block is very thin, the element itself is two and a half times thicker.
Uncle Vanya advises us to fasten the mass under the glove compartment, having first removed it. My question is: will she reach there? The wires in the kit are very short and the mass only reaches the bolt under the casing on the right. But there are not enough wires to reach my seat! In my opinion, everyone there who sells us these things absolutely doesn’t care whether the kit fits or not.
The wires in the blocks are crimped in one place (one immediately flew out in my hands).
It was decided to replace the wires with longer ones, collect them in bundles and place them in plastic corrugations.
source
Composition of a seat heating kit and how to install heaters on Granta with your own hands
Preparation for installation of heating elements
Before connecting the heated seats on the Grant, you need to secure the heaters under the upholstery of the seats. Of course, it is more convenient to do this on dismantled “seats”, previously disassembled into two parts: the back and the support. Creating acceptable conditions for installing heating elements is the goal of the preparatory stage. By the way, when determining the reasons for the knocking of hydraulic compensators, there is a slightly different logic.
Preliminary activities are carried out according to the following scenario:
- Disconnect the power supply to the seat belt sensor located under the seat. In many trim levels, this option is available only to the driver.
- Using an E10 head mounted on the knob, unscrew the four bolts connecting the base of the seat frame to the body and remove the seat. For ease of access to fastening elements, move the seat to the farthest or closest position. Similarly, remove and pull out the second front “seat” from the passenger compartment.
- Remove the backrest angle adjustment knob by prying it off with two flat-head screwdrivers.
- At the junction of the backrest and seat, remove the plastic covers on the left and right sides by unscrewing one screw each.
- Unscrew 2 bolts on each side securing the backrest frame to the metal base.
- Detach the backrest from the seat.
- Repeat steps 3-6 for the second chair.
Factory covers are attached to the frame with four clips. On the reverse side, the fixing elements are clamped with wires. Having untwisted the latter, we tighten the fabric. Before removing the backrest cover, disconnect the plastic lock at the bottom of the structure. When assembling, it is advisable to replace the wire with plastic clamps.
Installation of heaters
The purpose of preliminary positioning is to achieve such an arrangement of the heaters that the wires exit into the joint of the backrest and seat. You won't be able to play with the longitudinal base - the standard kit is designed strictly according to the dimensions of the depressions. After removing the protective tape, glue the element to the frame. If necessary, the foam is trimmed to allow the wire to exit unnoticed.
Selecting a heating kit for installation
The assortment presented in stores is wide enough so that every customer can choose the appropriate kit for installation with their own hands. These are mainly products from German, Russian and Chinese manufacturers. As practice shows, German kits (for example, WEACO) are the most reliable; their only drawback is their high price. But they are absolutely universal, they can be used in any car, both in the front seats and in the rear seats. This heating has several degrees of protection against overheating and two operating modes.
As an alternative to German products, domestic production kits and Autoterm have proven themselves well. Their products are not inferior to German ones in terms of reliability, and their consumer qualities are also quite high. All models of built-in seat heating are protected from overheating by means of a thermal relay; they use reinforced cable as a heating element. Some models have an automatic shutdown feature when overheating.
The most affordable ones are Chinese kits. Perhaps this is their only advantage, since there is no need to talk about reliability. Due to the fact that the cheapest materials are used in their production to reduce cost, the power button of such seat heating kits can easily break, the wiring burns out, and the heating is often uneven. We must not forget that a burnt-out heating element can cause a short circuit in the car's electrical wiring or a fire in the cabin. In this case, it is not worth taking risks, since the savings are very dubious.
Power supply or how to connect the heated front seats on the Lada Granta correctly
The cost of installation work at an unofficial service station is at least 2,500 rubles. For this money, already purchased heating elements will be installed in the car seat and the circuit will be connected according to the manual. All that remains is to make an anti-freeze product according to a home recipe and hit the road. This is for the quick ones. Painful owners will probably not like the electrical part of the integration.
Disadvantages of the standard kit
The instructions indicate how to install heated seats on the Grant and connect it to the on-board network. According to what is written, the electrics connect and function like this:
- The permanent plus is taken from the hazard warning button.
- The ground is connected to the bracket for fastening the standard wires of the negative pole.
- The standard fuse is replaced with a more powerful one.
- The heating is turned on/off using the buttons directly.
Only one function is correctly implemented - turning off the heating when the ignition is turned off. Otherwise, the connection scheme is not entirely successful:
- The positive wire that goes to the emergency light is thin and will probably work at the limit.
- The contact group of buttons operates in a dangerous mode, since it is not intended for power loads.
For your information. The kit offers simplified buttons for installation - they do not have a power indicator in the form of a yellow lamp (as on the rear window heating control).
Competent connection diagram
An unfortunate result of the standard connection algorithm is a melted fuse. Such a reaction indicates that the circuit is operating at its limit. An alternative scheme for connecting heated seats will help to avoid this. It involves the use of two four-pin relays and powering them from switch K4, which supplies the output “+” after turning on the ignition.
Additional items
It is advisable to carry out installation work after purchasing an additional mounting block of reduced size. You will also need regular contacts for connecting two relays and two Lyra contact elements linking a 10A fuse. We also add additional wires with a cross-section of 4 and 1.5 mm2 to the shopping list.
So, in order to connect the heated front seats on the Grant, you need to find out the number of the output plus of relay K4, which appears after turning on the ignition. This can be either the 87th or the 30th contact.
Usually this is contact element No. 30, but it doesn’t hurt to make sure once again. We remove the relay and diagnose. The test is carried out by connecting a 12V lamp to the 30th contact of the mounting block and ground. After activating the ignition, the lamp should light up.
Installation algorithm
- Installing heated seats on a Lada Granta may take you at least 3 hours
, so calculate your schedule. Especially when the weather is frosty outside. - We drive the car into the garage, if in the summer, then it can be on any flat and clean surface;
- We turn off the engine, squeeze the handbrake, put it in gear or wedge the wheels with shoes;
- We are interested in the central part of the dashboard, called the beard, and the front driver's seat. By analogy, you can install it on all the others or leave it on one;
- Using a “10” cape, unscrew the six bolts that secure the seat, two at the front and one at the back. We remove it and take it aside, it will not be needed in the near future;
- “Beard”:
remove the caps from the heating and air supply switches. Using a screwdriver, carefully pry up the inside of the insert. Be very careful, because with strong pressure the plastic may crack, and the clips that hold it on may simply burst.
We took it off, and in front of us is a picture of a tunnel niche. On the sides at the front it is secured with two screws on each side and one at the back. Unscrew them using a screwdriver. Please note right away that the rear screws cannot be unscrewed without lifting the handbrake handle and removing the pressure sensor and casing. Otherwise, you won't be able to access it with a screwdriver.
Let's move on to the seat
. Place it on a clean and flat surface. Use pliers to remove the fasteners from the bottom. We do this carefully, as everything is fragile and delicate. Remove the top part of the casing.
We unpack our heater and check its integrity. On the bottom of the seat you will see a pre-installation in the form of a through hole, and stretch the wires from the pad there. And secure the heater itself to the foam rubber using double-sided tape, which is installed there by default, so that it does not fidget.
After checking the tightness of the fit and the exit of the wires from the hole, we cover the foam rubber with sheathing and fasten the brackets back
. If their further installation is not possible, you can use ordinary wire as a replacement, if it is not important to you.
We're done with the seat, let's return to the interior of our car. We run wiring under the rugs. We connect the ground to the handbrake sensor on the body, and plus the developers clearly indicate the “emergency light”. I don’t know why I went there, they probably know better.
The keys themselves (depending on the configuration) are located in the backstage area and have a greenish LED backlight. If the circuit is correct they will light up.
After the electric hoses are laid, we install the seat itself and connect the chips. We test the heating; it should be felt in four squares at once, evenly over the entire area.
We put everything back together in reverse order.
This completes the installation of heated seats on the Lada Granta. Enjoy the warmth while the thermometer outside the window shows minus. Good luck to you.
Dear customers, in order to avoid errors when sending the electric seat heating kit 2190-6513010 with wires and buttons to the VAZ 2190/91, in the “Comment” line indicate your car model, equipment, year of manufacture.
When you have to get behind the wheel of a Lada Grant in severe cold, and feel the cold seat on your back and the fact that it’s lower, you involuntarily have to think about the fact that it wouldn’t hurt to have heated seats in the car. The fact is that the standard heated seats on the VAZ 2190/91 are found only in the luxury version of the last years of production, and in all other cars of this series heating is not provided. However, you shouldn’t despair, because anyone can do independent repairs and connect heating.
Most modern cars are equipped with many systems that provide comfort to the driver and passenger, one of which is heated seats. It is controlled using a block, looks attractive, modern, not only fits beautifully into the interior, but is also very easy to use.
Despite the fact that seat heating is a relatively new option on the bells and whistles market, this did not stop it from gaining global recognition among all motorists in the world in such a short period of time. Thanks to heated seats, the car driver can get rid of the unpleasant sensations that accompany him every time he gets into a “cold” car.
Manufacturers of heated seats have begun to produce seat heating kits for motorists who do not have this option included, which allows them to install it themselves, thereby saving their “fifth point” from unpleasant sensations.
A built-in (factory) assembled seat heating kit (for 2 seats) is installed on cars for the Lada Granta (2190-91) by default.
The product is created according to the formula “the length of the heating filament - the resistance of the material - the voltage of the on-board network.”
This means that a heating filament of this length (at a voltage of 12.5-13.5 Volts) cannot heat up more than 53°C.
The fabric base of the heating is made of non-flammable material, the heating nichrome thread is in fluoroplastic, which together completely eliminates the possibility of the product catching fire.
— Heating element (voltage 13.5 V; power 55 W) — 4 pcs.
— Heating buttons — 2 pcs.
— Mounting kit for connection — 1 pc.
— Installation diagram — 1 pc.
Standard seat heating 2190-6513010 for cars of the VAZ 2190 / 2191 family is supplied to the assembly line of AVTOVAZ OJSC, the product has been tested and has a high degree of reliability.
The front seat heating switch buttons are located inside the VAZ 2190/2191 car on the floor tunnel cover.
Unpleasant sensations are just the tip of the iceberg; cold sitting is fraught with more serious consequences than it seems at first glance.