Over time, even an interior made of high-quality materials wears out and loses its original appearance. Therefore, the car owner has a natural desire to correct the situation. There are several ways to do this. One of them is to reupholster the interior.
The procedure is quite complex and multi-stage. Not everyone has the skills and strength to do this. But there are those who take on the job with confidence, and the result exceeds expectations.
You need to act according to the instructions, focusing on your own taste, preferences and existing skills in the field of cutting and sewing. You can entrust some of the work to your beloved wife or go to a workshop to sew covers.
Do-it-yourself interior tuning preparation
Tuning or reupholstering the seats of your salon begins with preparatory activities. To begin with, let's decide on the tools that will be needed for the job:
- foam rubber for cars;
- glue in a spray can;
- sharp tailor's scissors;
- sewing machine;
- needles for leather or stretch needles for synthetic material;
- hair dryer;
- set of screwdrivers and keys.
Upholstering car seats with your own hands requires a special approach when choosing fabric. For tuning, it is best to take a special material used for the car in the studio, this is a guarantee that the appearance will remain in its original form for a long time.
- Sewing a leather car interior is the most expensive and high-quality tuning. Leather in a car does not wear out for a long time and has excellent performance characteristics: durability, environmental friendliness, and thermal conductivity. But if you are not a professional and are doing reupholstery with your own hands for the first time, it is better not to consider upgrading with natural leather, due to its high cost.
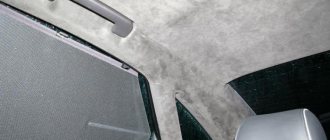
- Alcantara is more profitable than tuning the car interior with leather. This artificial material has been used to renovate interiors for a long time. Among its advantages are a variety of colors, a pleasant-to-touch surface, and good dirt and wear resistance.
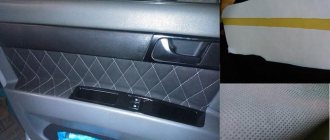
- Sewing a car interior with eco-leather is an attractive and inexpensive method of updating car seats. Ceilings, door upholstery, and rugs are also sewn from it in workshops. Eco-leather is well suited for the first independent experiments in car tuning. It is elastic and has a wide range of colors. The downside is that it wears out faster than natural material.
Required tools and materials
If you have already decided on the material in which you will reupholster the interior, it’s time to calculate its approximate volume. In total you may need from 6 to 25 meters. But these figures are very approximate: it all depends on the specific car model. So, a crossover or SUV will require much more material than a coupe car. Therefore, do not be lazy and measure the length of the ceiling, the length of the cushions and backrests, the size of the front panel, as well as the width and height of the car doors. Add up all the resulting numbers and add at least a meter as an error. Believe me, you will need it.
In addition to the material itself, you will need other tools:
A set of screwdrivers with straight and Phillips slots for dismantling some elements;
- foam;
- sandpaper;
- degreaser;
- meter tape;
- masking tape;
- cling film;
- marker;
- chalk;
- stationery knife and sharp scissors;
- reinforced threads for stitching leather products;
- sewing machine with a needle and foot for working with leather;
- special high-temperature glue for leather;
- rollers and spatulas with rubber cloth;
- industrial dryer.
Separately, I would like to dwell on the choice of glue. Do not use Moment glue or other similar superglues. Universal glue 88 is often used for reupholstering, but it also has a number of disadvantages. Buy quality glue that can withstand high temperatures. MAH is well suited for these purposes. Its price is quite high, but if you don’t want to see the coating swell and come off after just a few months, spend money on it.
Use high temperature adhesive to bond leather to plastic parts.
Regarding the choice of materials for seat upholstery
Do-it-yourself flocking of a car interior step-by-step instructions
The leader is high-quality automotive leather that will serve faithfully for many years. Alcantara and eco-leather are used less frequently, although they also have positive characteristics and excellent performance. Let us dwell a little more on the issue of materials for seat upholstery:
— Automotive leather is more resistant to temperature changes, exposure to ultraviolet radiation, and physical stress in the form of friction than shoe or haberdashery leather. At the same time, automobile leather is soft and pleasant to the touch, hygroscopic, does not stretch and does not lose its shape. There are many types of automotive leather. Nappa leather is considered the best - durable, but pliable during use, delicate and soft to the touch, and due to numerous treatments and repeated painting, it is very easy to care for (it is enough to wipe with soapy water and leather conditioner once every three to four months). The most common types of automotive leather in Russia are: Dacota (textured leather with a pattern, like BMW) and parigi (textured leather with a pattern, like Mercedes). When choosing the color of car leather, you should keep in mind that if you wear dark clothes, then the light interior will have to be cleaned much more often, but it will wear out faster and damage will be more noticeable on light leather.
— Eco-leather is essentially a leather substitute, produced with the expectation of use in more severe conditions, and therefore has high performance characteristics. The name probably comes from “save”; this material is almost in no way inferior to natural leather, but it is still impossible to achieve the smell and tactile sensations of natural leather for eco-leather. Our car studio uses the best representative of leatherette, Hortica; our car shop cannot recommend other eco-leather options to you.
— Alcantara or so-called artificial suede is pleasant to the touch, soft and velvety, but at the same time the material is wear-resistant, non-flammable (melts at 300 ° C). When reupholstering seats, it looks most advantageous when combined with leather.
— As an option for individual design, originality and chic, reptile skin is used for upholstery of the interior - a very expensive and exclusive material.
The final stage of the work on reupholstering the seats is the assembly of the seats; a lot depends on the assemblers and their accuracy during work; they must lay all the seams evenly and not miss a single fastener
After assembling the seat, it is necessary to carefully, preferably through fabric, iron it using a steam generator, taking into account the reaction of each material to exposure to high temperature and steam
Be careful not to scratch or damage the new upholstery, and carefully install the seats into the car. Now you can enjoy the comfort, coziness and stylish look of your updated salon.
Do-it-yourself dry cleaning of the car interior
To perform high-quality dry cleaning of the car interior, cleaning should be done in stages , from those places that will not need to be touched in the future:
- Ceiling;
- Doors;
- Plastic front panel;
- Seats;
- Floor;
- Trunk.
DIY car ceiling dry cleaning
The car ceiling can be cleaned using an aerosol and foam product.
Aerosol . Convenient and simple tool. Simply spray it onto the surface and wait the required time indicated on the package. During this time, all dirt is absorbed into the foam. After time has passed, the foam is removed with a napkin. It is necessary to wipe until the napkin becomes dry, otherwise streaks will be visible.
Foam . The foam is diluted with water in accordance with the proportions indicated on the packaging. After this, the foam is applied to the ceiling, after waiting for some time, it is removed with a napkin. You also need to wipe until it becomes dry .
There is no need to apply the detergent to the entire surface of the ceiling at once; it is best to divide it into small areas and treat them separately. It should only be wiped in one direction .
It is very important not to wet the ceiling, otherwise a surprise will await you in the morning. The ceiling may peel off.
Door dry cleaning
You should start cleaning with the fabric inserts, which are cleaned according to the same principle as with the ceiling.
If the door has plastic inserts, then they are cleaned with a special product - polish . Often these are aerosols or special wipes.
It is best to clean the pre-plastic surface with a damp cloth and wipe dry, and then apply an aerosol. After waiting a few minutes, the foam is removed with a rag.
You need to be careful with the area where the buttons are located so that moisture does not seep and cause a short circuit.
Dry cleaning of plastic panels
Do-it-yourself dry cleaning of the car interior should be done carefully and carefully , preventing chemicals from splashing onto the car windows. Therefore, in order not to damage the car windshield, it must first be lubricated with a sponge and soap solution. We recommend removing the car radio or sealing it with tape to avoid the risk of moisture entering the wiring.
The chemical should be applied carefully with a sponge. After waiting for some time, the foam is removed with microfiber.
Using a toothbrush and cotton swabs, you can clean hard-to-reach areas.
Dry cleaning of car seats
Cleaning seats is no different in terms of ceiling cleaning technology. It is better to start with the most contaminated areas - the end parts .
If there is a heavily soiled area (stain) on the seat, do not soak it separately. So you will get a headache in the form of prolonged drying, and in the worst case, damage to the seat.
Clean the fabric (velor, Alcantara). With such a surface, Profoam 2000, 4000 performed very well. The cleaning composition must be applied evenly to the treated area, and then after a couple of minutes, remove with a cloth, preferably microfiber.
If the stain cannot be removed , then there are some folk tricks:
- A fresh stain can be easily removed immediately with a damp cloth;
- Alcohol is easily removed with a solution of 1 tablespoon of vinegar per 1 glass of water;
- Tea or coffee stains can be easily removed with ammonia;
- The blood is well cleaned with a solution of cold water and salt;
- Rubbing alcohol works well for removing traces of cosmetics.
We clean the skin. You need to be careful with leather; it differs in type, finish, with or without a protective coating. Thus, seats made of genuine leather must be treated with special products that additionally moisturize the leather, protecting it from drying out.
If you decide to treat leather seats with soapy water, then upon completion of the procedure you need to wipe them dry and treat them with a special conditioner or leather cream. Otherwise, you risk damaging the material - the leather will crack over time .
Floor cleaning
The next stage of dry cleaning a car interior with your own hands is cleaning the floor; it’s better to start with the area under the driver’s seat , as it is the most contaminated.
The first step is to clean the mats, both rubber and fabric. Then they proceed to the floor. Foam or aerosol is applied to the floor, and after a couple of minutes it is removed with a rag or vacuum cleaner, which is faster.
The result of the work can be checked with a clean napkin; if it turns out that the surface is dirty, then the cleaning will have to be done again. Don't forget about the floor in the trunk.
Drying machine
Do-it-yourself dry cleaning of the car interior ends with drying, which will last about 6 hours, depending on what the air temperature is outside and whether you wiped the surfaces dry.
Do-it-yourself interior reupholstery preparation
DIY car interior decoration
1. Do-it-yourself reupholstery of seats and seats always begins with removing the old car seats. Dismantling makes it much more convenient to plan the dimensions of Alcantara or leatherette and their location on the upholstery covers. After this, you can use a marker to sign each fragment on a standard case.
2. Using the latches on the back of the chair, remove the cover.
3. We tear it apart into separate elements. This will make it easier to transfer their image onto the prepared material.
We manufacture new car seat covers for car interiors
4. First, press each element tightly and secure it with weights. After that, we outline the outline itself. To make reupholstering car seats with your own hands more successful and the flaps fit together well, we make small notches along the edges. The structure of each upholstery material can be easily cut with tailor's scissors.
Important! If you use fleecy Alcantara, make sure that the pile is directed in one direction on all parts. If you miss this moment, all the details will be striking in their differences.
5. Next, you need to strengthen the material. Foam rubber with a fabric base is best suited for this. It is necessary to glue the parts that we previously cut out to it (just not on the side of the fabric).
Correct reupholstery of car seats is carried out using glue in the form of a spray, for example a can of Mah glue. This is a good option, produced in Germany and better suited for use in construction and car repair. It is unacceptable to use the glue itself with a brush, because such a product quickly penetrates the pores, deforming the structure of the entire part. After this, it will be impossible to return it to its previous state.
6. We sew the fragments of the cover glued to the foam rubber together, carefully aligning the marks on the edges.
7. Next, glue the seam flaps from the wrong side of the material.
8. We cut off the excess flaps of foam rubber, so you can get more access to the upholstery material itself.
9. After this, bend the flaps to the sides and press them against the foam rubber. An important step is beating the seams on the foam rubber. To do this, you can use a simple hammer.
10. Sew the lapels with a double finishing stitch. In this case, there is no need to trim the edges that are behind the stitching - they will not be noticeable on the front side under the foam rubber.
Do-it-yourself leather interior reupholstery: how to install
11. Turn the finished cover inside out and straighten it out. It should be noted that it is not easy to put it on the chair: we thread the straps and pull our product to the back.
12. Next comes the seat's turn. Everything here is quite simple, only sometimes difficulties arise with embossed seats - then you should attach the cover to the frame using special clamps. They should be pulled through the holes of the pillow and hooked onto the knitting needle. This way it will be easier to tighten the cover along the contour.
Final stage
13. Reupholstering the seats with your own hands at the end necessarily involves drying and steaming the manufactured parts. New seat covers need to be warmed up with a hairdryer, the main thing is not to go too far and not melt them. After this, the surface dries and stretches. Each seat needs to be ironed through gauze - this allows our cover to become smooth and “adapt” to their shape.
This is where the reupholstery of car seats comes to an end: to complete the interior, all that remains is to clean them, remove fingerprints, glue residues, etc. In order to visually estimate the time it will take, as well as the degree of difficulty of reupholstering the armrest, seats and car doors with your own hands, you can watch videos and photographs on the Internet.
Scooters Maintenance and repair
In this article I will tell you how to properly replace the seat trim on a scooter. Cracked upholstery, visible foam rubber and spacers at the seams - this problem is quite common on scooters, especially with a certain mileage. All this happens for one reason - initially, the seat cover on a scooter is not made of leather, due to the high cost of the latter. Therefore, with age, under the influence of natural conditions, this material cracks, dries out and becomes unusable. It is almost impossible to avoid this, and the fact of updating the seat threatens you in any case, it is only a matter of time.
Is it difficult to reupholster a scooter seat yourself?
It's not as difficult as it might seem at first glance, but it's not as simple either.
First, you need to decide whether you will sew the cover yourself, order it from a workshop, or buy a ready-made one. Let's look at each of these points.
We make the seat cover ourselves.
1) Consider the first option, you decided to do everything yourself . But for this you will need cutting and sewing skills, high-quality threads that will not rot under the influence of water in a month, a sewing machine capable of performing such an operation with leather or leatherette, and of course the material itself. Leather remains the best option, for example, if you do not find a suitable piece, you can use leather from old jackets, etc. Leatherette will also work, but it is important to choose one that is suitable for outdoor use. Ordinary dermantins, which are used to cover sofas and chairs, will not work. The best option would be a special car one.
If you still have old trim, it is better to rip it apart along the seam and cut new pieces strictly to size. To do this, it is enough to place the ripped piece on a solid piece of prepared material and outline it with a pencil, then cut it out according to the drawing. After this, sew all the parts together. Quite a complex and painstaking job that requires special skills and tools.
We order the sewing of the cover in the workshop.
2) Now consider the second option and order a cover from a specialized workshop . The cost of this procedure will cost you about $10, which can be compared to a piece of quality seat material. As a rule, you can also pick up this material in the workshop. In total, for $20 you will have in your hands a ready-made skin that will need to be properly secured and tensioned, more on that later. In this case, you will be sure that the material is of fairly high quality (if this is what you chose, of course), and it will serve you for quite a long time.
Sequencing
How to adjust wheel alignment with your own hands: step-by-step instructions
To reupholster your car seats, follow the sequence of steps, and replacing the covers will not cause you any problems.
Step one. Remove old covers
The seats from the car must be removed to create enough free space for work. Remove old seat covers. This may not be as easy as it seems. Especially if it is pulled very tight. Much here depends on the quality of the fabric. Take your time and remove the fabric very carefully so as not to damage it. We will still need it.
Step two. Make a pattern for new covers
Separate the old cover at the seams. Spread new material on the floor and place parts of the ripped cover on it. Reinforce some parts, those that have traces of factory reinforcement, with foam rubber using spray adhesive.
Step three. Sew the parts
Now all the parts need to be carefully sewn together. The edges of the parts must be connected so that they fit snugly against each other.
Step four. Finish the seams
You are making covers for your car, so put aside your laziness and work conscientiously. The back seams need to be glued for strength and stitched with a finishing stitch. If there are small uneven edges, carefully trim them with scissors.
Step five. Pull the cover
Now you need to reupholster the car seats. Turn out the finished cover, straighten it and put it on the seat frame. Press it firmly against the frame and pull the loose ends of the material through the holes in the seat cushion.
Step six. Dry the material with a hairdryer
Now it's time to grab a hairdryer. Use a hair dryer to dry the seat covers as much as possible. As the material dries, it will stretch. To make the surface of the seats perfectly smooth, use the vertical steam function of the iron. After complete drying, the material will be perfectly stretched. Of course, provided that you did everything correctly.
Step seven. Install car seats
Assemble the seats and install them in the car. Remember that seats can only be installed in a car fully assembled. This way you can immediately evaluate the results of your work.
DIY car seat reupholstery technology
Reupholstering car seats with your own hands is within the capabilities of diligent and persistent people. Since the average car owner does not have the skills to do this kind of work, everything needs to be done slowly, following proven technology.
Before you start updating your car seats, you first need to do some simple preparatory work:
- Removing seats. Usually fastening is carried out with 4 bolts, but you must first disconnect the negative terminal of the battery in order to de-energize the security system (airbags). Under the seat, you also need to disconnect the electrical wiring terminals, if any, for example, from the electric seat heating.
- Each part of the standard case is signed with a regular marker. You can also indicate the name of the material that will be used in this area of the cover.
- Removing the standard cover from the chair. To carefully remove the old seat trim, you need to press the metal clips on the back of the chair.
- The old cover is cut at the seams into separate parts that will be used as patterns.
- Material calculation. Now each piece of the old cover can be measured and its area can be calculated. The total area of the material must be increased by 20-40%, which depends on the accuracy of measurements and cutting options.
To make new seat covers you will need some tools and materials:
The sequence of actions is as follows.
Each piece of the old cover is placed on new material and pressed with weights. Use a gel pen to mark with short dashed lines. The marked elements of the new case are cut out with scissors.
When cutting, it is important to take into account such a feature of Alcantara as the direction of the pile. When all elements are combined, the result should be a surface with the same direction of the pile. Alcantara and leather are reinforced using fabric-based foam rubber
The connection of the cut parts with the foam rubber is done using glue. You cannot apply the adhesive composition with a brush or roller to the surface of the foam rubber. Therefore, the glue is sprayed evenly from the can. The next important step is stitching the patches together. It is important to ensure that the edges of adjacent elements are accurately aligned. This will require some skill in using a sewing machine. The seam flaps, spread to the sides, must be glued on the wrong side. First, excess strips of foam rubber and material are cut off, and the lapels are cleaned and degreased. All that remains is to apply glue and press the lapels together. An important point in reupholstering the seats will be beating off the seams with a regular hammer. The lapels are sewn with a double finishing stitch, and the free edges behind the stitching are not trimmed.
Installation of a new car seat cover is carried out in the following sequence:
- Before installing the new seat cover, you need to thread the straps. The product is turned inside out and straightened out. The cover is first pulled over the back of the seat.
- Now it’s the “seat’s” turn. Usually this stage does not cause any problems. You need to use plastic clamps threaded through special holes to pull the cover to the base of the chair and secure it by the spoke. The edges of the new cover are stretched evenly along the contour of the seat.
- The leather covering should be completed by heating the material with a stream of hot air. An electric hair dryer is used for this; the main thing is not to overdo it and not burn the case. Gradually drying, the material will stretch like a drum. After this, each chair is steamed using an iron and a damp cloth. Thanks to these thermal operations, the chair cover becomes taut and absolutely smooth.
- The final operation of reupholstering the seats will be to clean the light leather or Alcantara from glue residues, abrasions and fingerprints.
Carefully reupholstered car seats will please the car owner for a long time. During the update process, you can change the design of the car seats, as well as update the upholstery of the doors, ceiling and panels. The comprehensive tuning will change the shabby interior beyond recognition, add elegance to the car and increase its value.
Preparation
When the material has already been purchased, it’s time to start cutting out the flaps that will subsequently be stretched onto the chairs. For this, a fairly simple technology is used that even an amateur can master.
The first step is to remove the old material from the chair. Usually it is stretched in the form of covers and has hooks at the bottom of the chair. After the upholstery is removed, you will have to cut it out and cut all the seams to get individual flaps. These flaps are placed on Whatman paper, and their outlines are outlined and then cut out.
At this stage, if you are working with your own hands, you need to be especially careful and not rush to finish the process as quickly as possible. It is not worth mentioning once again that any, even small, mistake can lead to the material lying unevenly or puffing up, disrupting the appearance and being very noticeable.
Finally, you should make sure that the received parts do not have significant damage or defects. Only in this case, no problems will arise at subsequent stages of work, and the result will meet all expectations.
How much will it cost to reupholster the interior with natural and artificial leather?
The final cost of reupholstering the interior depends on the price of the material. Eco-leather usually sells for 500–700 rubles. per linear meter. But natural is at least 3-4 times more expensive. High-quality glue will cost about 1,500 rubles. One jar should be enough for all interior elements.
To calculate the resulting amount, add up the parameters of all the parts. So, if it takes 5 m for the ceiling, 1.5 m for the front panel, 7 m for the doors, 6 m for the seats and another 0.5 m for the steering wheel and gear knob, then you will need to buy about 20 m of fabric. Of course, the numbers may vary depending on the size of the car. But in total, the cost of reupholstering the interior yourself will be at least 20–25 thousand rubles.
For comparison: in a car repair shop you will be asked for this service from 50 thousand rubles and more, depending on the quality of the material. When working with your own hands, the savings will be more than 50%. Whether it's worth your time and effort - decide for yourself.
To ensure that reupholstering the interior with leather does not blow your budget, it makes sense to divide this process into several stages. Let's say this month you are working on the seats, next month on the ceiling, and a month later on the front panel, armrest and other small parts. This approach will save you effort, and you can learn from your own mistakes. We recommend starting with the smallest parts - the gearshift knob and steering wheel. With their help, you can understand the general principle of constriction, and things will go much faster.
Source
Advantages of reupholstering car seats in a studio
If you need to update the seats in a short time and the money issue is not of decisive importance, then it is best to contact a specialized sewing studio.
Among the main advantages of reupholstering seats in a workshop are:
- work performed by qualified specialists with many years of experience,
- use of proven quality materials,
- choosing the preferred option,
- providing a guarantee for the service,
- Minimum turnaround time for reupholstery.
But all these advantages of reupholstering in a workshop can be reduced to zero due to the high cost of the service, which may not be affordable for a simple car enthusiast.
Workplace
Do-it-yourself seat reupholstery requires sufficient space to disassemble and place the removed seats.
Take the time to design your desktop. It should be even, smooth and large enough to easily roll out the material on it. The table should be well lit. It will be convenient for the material table to be directly connected to the table on which the sewing machine is installed. So, when working with large pieces of upholstery, the table will support the material while sewing. It will be convenient to mark and cut the material on the table.
Prerequisites for the restoration of chairs
Foreign car manufacturers have long paid special attention to the quality of driver's seat upholstery. Torn seats distract a person driving a car and prevent them from concentrating on the road
He constantly fidgets, gets nervous, trying to get into a better position. Comfortable seats give you confidence and allow you to drive comfortably, having fun and enjoying life.
When doing it yourself, every car owner must be able to handle a needle and thread, and have an understanding of the cut of the material. You can take the car to experienced specialists. They will dismantle, agree with you on the choice of material, carry out all the work, repairs, and install new cladding in place. If you want to save money and do what you love, repair the seat upholstery for your car yourself.
Signs of worn car seats that require upholstery repair:
- abrasions of the casing;
- scuffs, cracks in armrests;
- breakage of internal springs;
- torn threads, piping;
- broken frames;
- gasket ruptures;
- oil, grease stains.
All these defects are striking; the driver and passengers feel discomfort. This means that the moment has come when it is necessary to begin repairing the entire car seat trim with your own hands. The task is complex and time-consuming, but the result is amazing. Increases the driver's self-esteem, asserts his authority in the family, in front of colleagues, and fellow motorists. After all, he did it himself.
Making the salon of your dreams: how to do your own seat upholstery?
The interior of a car is of great importance to many of its owners, be it private or public transport. For the driver and passengers, a well-maintained interior means comfort and aesthetic pleasure from travel. And if its parts are worn out, then all that remains is to either order repairs in a workshop, or sheathe everything yourself. Doing this work is not as difficult as it might seem at first glance - you just need to choose the right material and acquire some tools. Additionally, you can familiarize yourself with the intricacies of reupholstering the interior of a car or minibus by watching a video on the Internet.
Materials used.
For high-quality and quick renovation of the interior with your own hands, we will need the following materials:
- A standard set of car enthusiast tools.
- Big scissors.
- Construction hairdryer.
- Foam rubber (or similar material).
- Iron.
- Upholstery material.
- Glue.
Repair technology.
Reupholstering the seats will require a certain series of actions, described in detail below.
seat reupholstery
- First of all, you need to remove the old interior trim. To do this, you need to remove the seats from the car. Further work will require a large amount of free space. Once the seats are removed, remove the old seat covers. The old casing will be needed for further work. Therefore, try not to damage it. The fabric may be stretched tightly, be extremely careful.
- Now you need to cut out a new material according to the size of the old one. To do this, you need to rip the old upholstery along the border. Lay out the outline of the old trim on the material for the new interior. Upholstery seams must be reinforced with foam rubber. To fix, use glue.
- The third step is to sew together the details of the new interior. Press the seams tightly together and sew them securely.
- Next, we process the resulting seams. Turn the material inside out and re-glue them. This procedure will ensure the reliability and strength of the potential plating. After the seams are glued, sew them from the inside out. If any unevenness appears on the seams, carefully remove them with scissors. This is necessary so that the material fits well on the chairs.
- Now, you need to stretch the material over the seats. Turn the cover back to its original position and carefully place it on the chair. Install the material tightly onto the seats, secure the loose parts of the material on the back side.
- Dry the covers with a hairdryer. When exposed to heat, the cover will stretch over the seat. To ensure that the surface of the cover is smooth, smooth it with an iron. After the material dries, it will loosen and become stretched.
- We install the assembled seats in the car and evaluate the result of our work.
Choice of material.
For a quality update with your own hands, you need to choose the right material. Let's look at the most used of them.
Leather.
leather for upholstery
The leather interior is beautiful and practical. But, when updating with your own hands, the leather is quite difficult to use. This material has certain characteristics and will be difficult to handle. If you decide to change your old upholstery to leather, it is better to entrust it to professionals. Upholstering seats with leather requires a certain amount of skill.
Carpet.
Carpet is a thin rug. It is well suited for DIY work. Kartep is very practical and easy to use. It will also help improve the sound properties of the car. In practice, carpet is often used as a soundproofing material. It will improve the sound quality of the acoustics in the car and save you from unnecessary squeaks from seats.
Alcantara
Alcantara
Looks very similar to suede. The material is increasingly used for seat upholstery. Alcantara is a synthetic fabric made from materials of artificial origin. It is easy to clean and has a long service life. Upholstering car seats using Alcantara is a very good option.
Velours
velours
In order to get a good velor interior, you need to use high quality material. Nowadays, it is not easy to find it. Therefore, velor has become less popular. In addition, it breaks down quite quickly. If you like a velor interior, start looking for quality material.
However, the choice of material is a personal matter for each motorist. Materials with completely different characteristics and properties. Choose the one you like the most. Nowadays, there are a huge number of shapes and colors. Finding the one you need won’t be difficult.
When choosing an adhesive, pay attention to the properties of the parts used in the new interior. However, the classic moment usually copes with this task
But for reliability, it will not be superfluous to choose a special glue. Use an adhesive that is easy to apply to the surface.
auto, will help give your car a new look. Carefully follow the instructions provided and the process will be simple and enjoyable. When choosing a material, carefully study its properties. With the right choice and competent reconstruction, the salon will delight you for a long time. Maintain your salon in a timely manner and you will significantly increase its service life. Good luck!
Selection of material for work
The best material for covering the interior of a vehicle is considered to be genuine leather, which preserves the ideal interior appearance of the car for a long period of time. The highest quality of them is aniline leather, which has excellent performance qualities. Among the disadvantages is low resistance to external influences. An excellent option would be semi-aniline leather, as it is endowed with better durability properties.
The final cost of reupholstery is influenced by a number of factors, including regional affiliation. For example, in the Samara region, comprehensive work for a middle-class car (eco leather is used) will cost about 50 thousand rubles. If genuine leather is used, the price will increase by approximately 1.5 times.
Decorating the interior yourself will be less expensive financially. Therefore, it is also important to choose a more affordable material. To avoid serious errors, a little practice is needed. This will help eliminate possible mistakes.
Types of materials for seat upholstery
You need to decide what material you want to use to replace the old one.
The material chosen for seat upholstery determines the level of comfort, wear resistance and ease of maintenance. There are many materials. In general, it all comes down to the choice between textiles and leather.
Let's consider the materials most often used for upholstering seats, their advantages and disadvantages.
- Genuine leather is the most expensive material. This material is timeless and fashionable. It is practical, aesthetic and durable. Leather gives an expensive look to the interior. It is easier to clean than fabric and is more resistant to stains from various types of dirt. Leather also has its drawbacks. It heats up quickly in hot weather and remains cold for a long time in winter. Imprints on the skin from heavy objects can remain for a long time. The skin is susceptible to sharp objects, and over time it rubs and cracks. Modern genuine leather has a protective layer. Modern dyes have good protective properties. Now urethane paint can be used for protection, which is very wear-resistant and flexible, not prone to fading and cracking. In high-quality leather, the dye is not only on the surface, but passes through the entire layer. This provides richer color and increased wear resistance. Caring for natural leather is more difficult than caring for its artificial counterpart. To do this, you need to buy special cleaners and conditioners. You can read more about this in the article “leather interior care.”
- Faux leather. A very versatile material that can look like anything. It can be either an imitation of regular, crocodile or snake skin. The key factor determining the quality of artificial leather is its harmlessness, the level of VOC (Volatile organic compounds). The gap between real leather and synthetic leather has narrowed as the aesthetic and tactile properties of chemically produced materials have improved significantly. Many manufacturers are moving towards faux leather for ethical, practical and financial reasons. Faux leather is easier to clean than real leather.
- Alcantara. It is an artificial ultra-fine suede. Alcantara is pleasant to the touch and more functional, unlike suede. It offers better stain and abrasion resistance, as well as fire and fade resistance. Like all materials with pile, Alcantara has a directionality (direction of the pile). This should be taken into account when sewing. This will be discussed in more detail in this article below.
- Textile. This is a cheaper option. It gets dirty more easily and absorbs liquid. The fabric can have different textures, colors and patterns. Cloth upholstery in most cars is usually made of nylon or polyester. These are wear-resistant and affordable materials.
- When reupholstering the interior, you can combine different materials.
Material selection
Before you start preparing, you should think about what material will be chosen for the new interior. In this case, it is best to choose the most wear-resistant and durable option, which will not lose its appearance over time and even after years will look as if it was just pulled onto a chair.
The main option in this case is leather. Natural material is especially durable and usually does not require replacement for ten years, even if the machine has been used quite actively. At the same time, its appearance is limited, perhaps, only by the imagination of the owner: it can have a different color, style or even texture.
A special type of genuine automotive leather - nappa - costs a little more. Nevertheless, many motorists believe that such material is more pleasant to the touch and somewhat more durable. Nappa can have different shades, but usually the texture has only one variety available to the buyer.
An alternative when choosing a material is Alcantara, which has also gained some popularity among motorists over the years. If we verbally describe the appearance and texture of such a material, we can note its velvety quality, which is a rather interesting and valuable property. Alcantara and leather have approximately the same price, which allows the car owner to make a truly balanced and informed choice.
