Replacing the parking brake pawl rod spring
If the parking brake lever does not lock into the selected position, first check the pawl spring.
If the spring is OK, replace the lever.
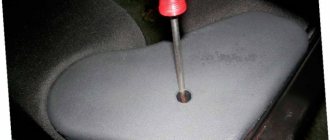
Unscrew the button from the lever
Remove the pawl spring.
Replace the defective spring
Parking brake lever repair
We install the car on a lift or inspection ditch
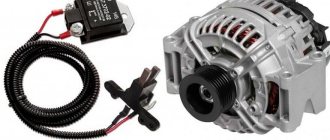
Replacing the handbrake cable
In general, in practice, handbrake cables on Priora are changed extremely rarely. And if this is necessary, then in most cases for the following reasons:
- Over time, the cables stretch out, that is, they become longer. Accordingly, even with the lever fully raised, the effectiveness of the handbrake will be greatly reduced.
- Failure or complete rupture of the cable, which can occur during sudden braking using the handbrake (there are such amateurs), or when the lever is pulled too tightly for a long time.
If for one of the reasons you had to encounter a similar problem, then it must be solved by replacement. To do this we need the following tool:
- Long nose pliers
- Flat screwdriver
- Head for 7, 10 and 13 mm
- Ratchet or crank
- Extension
- Penetrating lubricant
Replacing the handbrake cable on a Priora with your own hands
All work must be performed with the rear of the car raised, using a jack, or carried out in an inspection pit. First, unscrew the nuts securing the protective heat shield and remove it as shown in the photo below:
Now, using a 13 mm socket and an extension, unscrew the nuts of the handbrake adjustment rod.
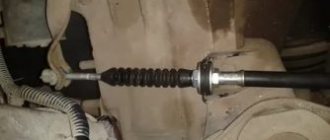
Then we remove the cables from the bar:
Now you need to pull the cable out of its seat, the one that needs to be replaced:
Next, you need to release the cable from the clamps at all points where it is attached to the Priora body.
And in other places where there are these brackets:
As a result, we should get something like the following picture:
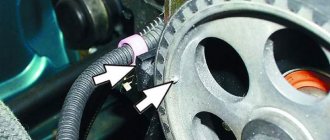
Next, we proceed to release the cable from the wheel side. To do this, it is not necessary to remove the pads; you just need to remove the lower spring, and then use a flat-head screwdriver to move the cable drive lever to the side and remove the cable itself:
And now we remove the cable from the opening in the casing. If there are any difficulties with this, first apply a penetrating lubricant:
And slightly loosening the cable in its seat, remove it from the hole:
Installation occurs in reverse order. The price of a new cable for a Priora is from 200 rubles apiece, and you can buy this part in almost any car store or market.
Parking brake lever repair
You will need: two 13mm wrenches, a 13mm socket wrench (head), a Phillips screwdriver, and pliers.
From inside the passenger compartment, remove the screw of the front fastening of the parking brake lamp switch bracket.
Please note that the ground wire of the switch is secured with a screw.
Using a 10mm wrench, remove the four bolts securing the parking brake lever (the two front ones also secure the switch bracket).
Place the bracket with the switch aside.
Remove the parking brake lever by moving the rod out of the hole in the floor.
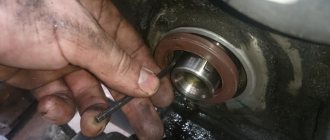
To replace the rod, remove cotter pin 1 and washer 2.
Remove the rod from the axle.
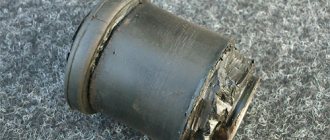
Replace worn or cracked plastic bushing.
Assemble and install the parking brake lever in the reverse order of disassembly.
After installing the lever, adjust the parking brake
Operations performed when repairing the parking brake lever on a VAZ 2170 2171 2172 Lada Priora
The parking brake lever is a brake system and not only the operation of the brake system during parking, but also your safe movement depends on its serviceability. So, in particular, the rear brake pads are set using the hand brake; in the event of a malfunction of the hand brake system, the rear brakes may not be sufficiently effective.
You will need: two 13mm wrenches, a 13mm socket wrench (head), a Phillips screwdriver, and pliers.
practical guide
The need to replace the parking brake cables arises if the cables, as a result of corrosion, have lost the ability to move in the sheath, have become very stretched, or have broken threads.
If it is necessary to replace one of the cables, we also change the other cable.
Removing the parking brake cables:
1. We prepare the car for work.
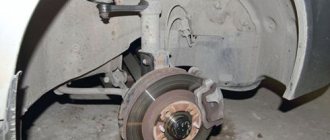
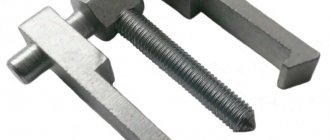
2. Remove the brake drums.
3. Remove the protective screen.
4. Remove the rear protective screen.
5. Loosen the locknut of the parking brake lever stroke adjusting nut and unscrew the locknut.
6. Using a socket wrench with a 13 mm deep head and a cardan joint, unscrew the adjusting nut and remove it from the rod.
7. Remove the adjusting rod cable equalizer.
8. Disconnect the cable ends from the equalizer.
9. At the brake mechanism of the left rear wheel, use a large slotted screwdriver to move the spacer lever forward and remove the cable eyelet from the hook of the spacer lever.
10. Using a 10 mm spanner, unscrew the nut of the bracket securing the cable to the left arm of the rear suspension.
11. Remove the front cable end from the hole in the body bracket.
12. Remove the cable from the two brackets securing it to the underbody.
13. Remove the cable from the rear suspension beam bracket.
14. We take the cable out of the hole in the support shield of the rear brake mechanism and remove it.
Basic faults
According to the law, a malfunction of the handbrake is accepted in two cases:
- If, at a 16% slope, the handbrake does not hold the equipped car (without cargo and passengers, but with a full tank of gasoline, the driver’s weight is taken to be 75 kg).
- If, on a 23% incline, the handbrake does not hold the vehicle at full load (the maximum permissible vehicle weight has been reached).
In reality, more often than not, a malfunction of this brake mechanism of the Lada Priora is noticed not by measuring the steepness of the slope, but by clicks. When another click of the handbrake is added to the usual “set of sounds” when leaving the car, every car enthusiast understands that it’s time to tighten the cable.
But the problems don't end there. For the parking brake system they can be as follows:
- The cable has stretched too far. Over time, it undergoes deformation. It can be tightened, but to a certain extent.
- The cable broke. When the “limit” is reached, the mechanical device will have to be replaced.
- The handbrake indicator on the dashboard does not light up or go off. This is due to the sensors.
- The lever button is stuck.
How to tighten the handbrake on a Priora
Adjusting the handbrake on a Priora car is done in 7 simple steps, see them below. Normal operation of the handbrake lever is considered to be two to four clicks. Typically, an increase in clicks occurs every 20-30 thousand kilometers. The stroke of the lever must remain normal, so it must be tightened in time. It is not at all necessary to immediately buy a new set for Priora, because you can handle the tightening yourself.
Before tightening the cable, prepare the following tools:
- head "13";
- keys “13”, “10”;
- ratchet;
- technical lubricant.
Carry out the work according to the instructions:
- Place the car in a pit. If this is not possible, you can raise the rear of the car and then support it. It will be inconvenient, but this method will also work. Lower the handbrake lever and put the car in gear.
- Remove the metal cover under which the cable equalizer is hidden. Its tension is adjusted there. Remove the cover fastening bolts using keys.
- Coat the handbrake lever rod with lubricant to make adjusting the tension of the mechanical device easier.
- Loosen the stem locknut.
- Pay attention to the stem nut. If the handbrake needs to be tightened, reducing the number of clicks to normal operation, turn the nut clockwise. If you need to increase the number of clicks, turn the nut counterclockwise.
- Try tightening the handbrake. It should prevent the rear wheels from turning.
- Reinstall the metal cover.
How much does it cost to tighten the handbrake and can you do it yourself?
Actually the question is rhetorical, as you understand in different regions, the cost can range from 200 to 1000 rubles. For example, in the capital, the price is often 500 – 1000, but in the regions you can raise it for 250 rubles.
And to be honest, the work itself only takes a few minutes, the main thing is to find a hole or a lift, a key of 10 and off you go. You need to tighten the middle bolt, the one that is in the middle, it is the handbrake, tighten the nut and thereby tighten the cables.
Of course, if they are rusty or torn, then everything is much more complicated; it is better to trust the master, because replacing the cables from the rear drums is not at all an easy task.
That's all, read our AUTOBLOG, I think it clarified the situation.
( 11 votes, average: 4.36 out of 5)
Similar news
Rust converter composition. Can I do it myself?
How to unscrew a brake pipe. If it has soured and the edges are torn off.
Anti-squeak plates for brake pads. Why are i needed?
Replacement of hand brake cables! — Lada Priora Hatchback, 1.6 l., 2011 on DRIVE2
Good day, citizens reading!) After the handbrake was raised and removed, the car began to behave inappropriately! namely:
-the rear of the car squatted; -behaves dullly at the start and during acceleration;
-in neutral from the hill I just stood there.
To determine it, I had to lift the rear wheels off the ground (with a jack) and try to spin them... in response there was stiff resistance.
The solution to this problem was obviously worth looking at the condition of the handbrake cables. So we go to the store and for 500 rubles we take 2 cables leading to the wheels. because I don't think it makes sense to change just one.
Work process: 1- you need an overpass or, as in my case, a repair. pit 2 - lift the rear part with jacks in order to free the two rear wheels. 3 - remove the wheels and drums. (remove the drums with a puller or 2 bolts) 4- it is necessary to remove the cables from the pads. This can be done with pliers. 5- We climb to the bottom. yes, this is where the most interesting thing will happen... 5.1 — remove the 2 rubber bands that hold the muffler. 5.2 — unscrew the muffler connection at the rear left wheel. and lower the muffler (it will otherwise interfere) 5.3 - remove the cable protection (there are 4 bolts underneath it for fastening the cables and a connecting bracket for tension) 5.4 - disconnect the cables from the adapter strip and using a flat screwdriver, prying them from different sides one by one, pull them out of the fastener.5.5 - the cable itself is then attached to the mounting loops (you can simply bend it and remove it) 5.6 - using a 13mm wrench, remove the lock nut and the main cable tensioner nut. (where the connecting strip is) 6.- remove the old cables and install new ones (it is advisable to install 2 cables at once) 7. after installation, attach them to the blocks (pull them with pliers and attach them to the block) 8. insert the cables under the car into the cable fasteners and put them on the connecting bar bar.9 - Next, you need to pull the cables with the bar onto the common cable stud and tighten the nut and locknut.
10- install the cables into the fastenings and assemble everything in the reverse order!
Issue price: 520 ₽