Normal operation of the engine, transmission system, clutch and other components of the car is unthinkable without appropriate lubrication. This need is due to a decrease in the process of natural friction between parts. An element such as the crankshaft, the tightness of which is ensured by the crankshaft oil seal (Prior), was no exception.
Unfortunately, situations occur when the sealing element, for one reason or another, allows oil to leak, which leads to significant problems in the functionality of the vehicle systems. We will examine this problem in detail in this article.
Reasons for wear of the rear crankshaft oil seal on a Priora
According to experts from large auto repair shops, the most common causes of damage to the rear crankshaft oil seals are three factors:
- Untimely oil change.
- Poor quality product.
- Excessively high temperatures when the engine is running.
In the first case, the following happens: used oil contains a large number of microparticles and contaminants that can cause damage to the elements of the system and the rubber seal in particular.
The second factor is quite common due to the increased number of counterfeit automobile products. Naturally, fakes and defective products do not meet quality standards and do not have wear resistance or long-term tolerance of high operating temperatures.
The third reason is due to severe overheating of the internal combustion engine, which has a detrimental effect on the material of the sealing ring, as a result of which it may partially melt and lose its tightness.
What is the replacement frequency?
The recommended service life of the sealing element is about 140 thousand kilometers. However, such figures are approximate, since with the same mileage of several cars, their operating conditions may vary significantly.
Replacing the crankshaft oil seal Priora
To carry out the work you will need:
- flat screwdriver;
- set of sockets and wrenches;
"Important! Before starting repairs, the gearbox and clutch must be dismantled. In addition, mark in advance the location of the flywheel relative to the crankshaft.”
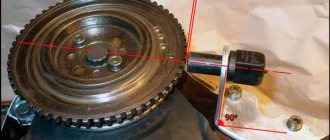
- Using a socket or wrench, unscrew the six bolts securing the flywheel. In order to prevent the latter from rotating, use a screwdriver to lock the flywheel wheel.
- After the bolts are removed, you need to remove the locking plate and pull the flywheel towards you.
- Carry out a thorough inspection of the oil seal for leaks and signs of oil leakage.
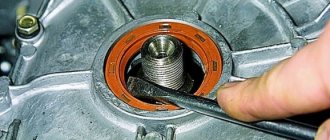
- After detecting signs of malfunction, take a screwdriver in your hand and carefully pry up the O-ring from the side of the metal sleeve. Pull the product out. "Note! Immediately after removing the product, it is recommended to inspect and test the operation of the crankshaft bearing. If its rotation is difficult or it makes unpleasant sounds, then it is advisable to replace it too.”
- Take a new crankshaft oil seal (Prior 16 valves) and lubricate the working surface of the part with engine oil.
- Place the element with the lubricated edge inward (into the cylinder block) and tuck it as tightly as possible to the crankshaft bushing.
- For a tighter and more airtight connection, you will need to use a press-fit ring (mandrel). If one is not available, a regular union head with a radius a few millimeters smaller than the sealing ring is perfect.
- Install all elements in reverse order.
Buying a new product
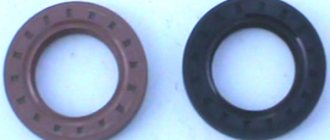
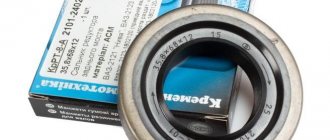
When choosing, pay special attention to the packaging and the presence of holographic elements on it. If you are sure that the oil seal in your Priora has not been changed from the factory, then take the old product with you to the store and compare the markings on the original body with the new part. If the manufacturer is the same, but the appearance (labeled markings) is different, then this is a reason to think about the authenticity of the car product.
The front crankshaft oil seal of the Priora engine is covered by a drive gear and pulley, as in principle on all engines of a series of Russian-made cars with front-wheel drive. But it must be taken into account that on engines equipped with an ECM (Electronic Engine Control System), the pulley not only drives the generator, sometimes power steering (Power Steering) or air conditioning, but also performs another of the leading control functions.
What is the crankshaft oil seal for and where is it located?
The main purpose of the oil seal is to prevent engine oil from leaking from the engine. Reliable sealing of the holes is possible due to the pressure inside the crankcase, which ensures the tightest possible pressure of the oil seal to the part. Thanks to this principle of operation, the liquid in the internal combustion engine system does not leak and does not subject the engine components and assemblies to excessive frictional loads.
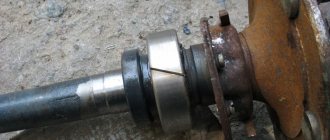
The design of the power plant determines the presence of two oil seals - front and rear. The rear rubber product is designed for installation on the part of the crankshaft that connects to the flywheel. The crankshaft end is a flange, so the rear seal has impressive dimensions and a fairly large amount of material, which ensures its long service life.
The front rubber element is mounted on the limit switch, which is the drive for the engine mechanisms. Its dimensions are smaller than the similar part at the other end, therefore the front oil seal is significantly inferior in terms of service life.
Pulley, or damper, generator drive, its purpose
The multi-belt drive of the generator and other additional units, when installed on the Priora, in addition to transmitting torque from the crankshaft, performs another important job. To understand its meaning, it is worth making a short digression into the ECM.
The principle of operation of an engine with an “injector”
Cars equipped with an ECM are radically different from conventional carburetor cars. The fact is that the ECU (Electronic Control Unit) is responsible for all the actions of the ignition and fuel supply systems. It is he who gives the signals for the formation of a spark in the cylinder chambers. And it sends signals for fuel injection by opening the fuel rail injectors. The question naturally arises, how does the computer know that it is time to issue commands to turn on the necessary nodes?
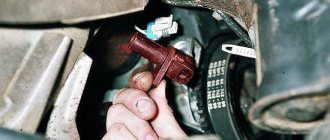
The crankshaft sensor informs him of this. It is worth considering this process in more detail. This sensor operates on the long and well-known Hall effect. That is, the signal is interrupted when a special technological clearance on the disc being read coincides with the sensor. On “injection” cars, this signal coincides with TDC (Top Dead Center) of the compression stroke of the first cylinder. So, you need to know that on Russian cars it is the pulley that does the work of the information disk.
Features of the pulley (damper)
The generator drive of the Priora, like other domestic cars, is called a damper. This is a Disk with streams, along the edge of which there is a series of teeth. In one place two teeth are missing. This is the desired position of the crankshaft, and it is from this that the computer starts counting. So, from the moment this opening enters the sensor’s coverage area, the Priora ECU sends signals to open the injectors and generate a spark in the cylinders, according to the usual scheme.
The engine operates according to tables stored in the ECU memory. From this it should be clear that the pulley not only powers the generator, but also gives the command to start the engine!
Replacing the front crankshaft oil seal
Replacing the pulley, in principle, does not represent any epoch-making task and can be considered as one of the stages of replacing the front crankshaft oil seal of the Priora. For this operation you will need the following tools.
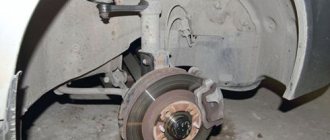
First of all, it is necessary to lift and fix the right front part of the Priora and remove the right wheel. The next step is to unscrew and remove the plastic protection under the wing.
The Priora crankshaft oil seal is replaced when there is obvious oil leakage in its area. Therefore, with the engine raised, wipe the pan in the oil seal area and start the engine for 5 minutes. Usually this is enough for fresh streaks to appear. If this is the case, Priora needs to replace this oil seal.
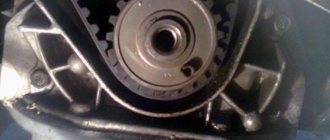
The next stage will require an assistant. It is to remove (replace) the crankshaft pulley that help is needed. It just so happens that it is quite difficult to unscrew the screw securing the damper to the crankshaft. The motor cranks even when the gear is engaged. There is a way out; you need to press the brake pedal hard when engaging first gear on the gearbox. The engine will stall, and then you can use a head with an extension to “rip off” a tightly seated bolt. And after that it comes out easily. Once the bolt is removed, the pulley can be removed freely. Below it is the crankshaft gear. It is necessary to bring the tension rollers together and remove the timing belt (gas distribution mechanism) from the gear. To remove the gear itself, you may need a puller, although most often it is removed by hand.
Well, then it’s quite simple, use a screwdriver to remove the old crankshaft oil seal and put on a new one, pre-lubricated with engine oil, in its place. After installing the key in the groove, put on the gear. Very, very carefully check that the marks on the camshaft pulleys match the marks on the casing. The mark on the crankshaft gear should line up with the groove on the oil pump housing. If everything matches, put on the belt. Mount the crankshaft pulley onto the corresponding lugs of the gear.
Replacement instructions
The sequence of actions when replacing the front and rear oil seals is slightly different. This is because the front oil seal can be replaced directly on the engine itself. Getting to the rear seal is usually more difficult.
Front oil seal
The sequence for replacing the front camshaft oil seal looks like this.
- The car is placed in neutral and the parking brake is applied.
- As with any work performed in the engine compartment, the battery terminals are disconnected.
- The plastic timing belt cover is removed.
- The valve cover is removed, for which you need to unscrew the fastening bolts with a screwdriver.
- A marker marks the location of the belt relative to the camshaft.
- Then you need to remove the timing belt. You don’t have to completely remove it - just remove the belt from the camshaft timing pulley. To remove it, you need to unscrew the fastening bolt with a 17 mm wrench, securing the pulley from turning. You can use a pry bar for fixation.
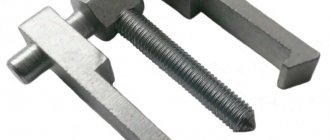
- Using a puller, the pulley is removed from the camshaft shank. If the camshaft has 2 pulleys, then both are removed, and the locations of the pulleys are also marked so that they are not confused during further installation.
- The key located behind the camshaft pulley is removed.
- Then, using a screwdriver or tweezers, remove the used oil seal. You should remove it carefully so as not to scratch the working surface of the camshaft to which the oil seal is attached.
After dismantling the old oil seal, you can proceed to installing a new one and reassembling it.
- The working edge of the new oil seal adjacent to the camshaft is lubricated with engine oil, and the outer part is treated with sealant.
- The oil seal is placed on the camshaft and then pressed using a pressing mandrel.
Further collection of the timing belt is carried out in reverse order.
- A key is placed on the camshaft.
- Then the pulley is installed. If there are two pulleys, then each is installed in the place where it was located.
- The pulleys are tightened using a torque wrench. The voltage torque can be found in the vehicle owner's manual. When tightening, it is necessary to secure the pulleys from turning using a pry bar. First you need to engage fourth gear at the gearbox.
- Then you need to put the belt on the pulleys according to the previously marked marks. You should first inspect the belt for damage, abrasions, etc. Since oil seal leaks are detected when replacing the timing belt, it is often necessary to install a new belt. In this case, it is mounted according to the factory marks.
- The tension roller mounting bolt is tightened. The tension torque can again be found in the car's owner's manual.
- Then the crankshaft is manually turned several revolutions clockwise. This checks the belt tension. If any irregularities are noticed, the tension is further adjusted.
- At the end, the valve cover is secured back and the plastic belt cover is installed.
- After replacing the oil seal, you need to add engine oil to the oil tank to the upper mark.
Rear oil seal
Rear oil seal replacement may vary from vehicle to vehicle. For some models, access to the rear oil seal is only possible when driving the car onto a lift or inspection hole and disconnecting the clutch and gearbox drive.
For other car models, access to the oil seal is limited by the camshaft position sensor, which must be removed. To do this you need:
- disconnect the electrical connector of the sensor;
- Unscrew the fastening screw and remove the sensor;
- Using a 10mm wrench, unscrew the bolt securing the gas hose holder to the sensor wire bracket;
- Unscrew the screws securing the sensor cover, remove the cover and the bundle of wires;
- remove the sensor rotor;
- Remove the sensor cover mounting plate.
After this, you can use a screwdriver to remove the rear camshaft oil seal. Replacement is carried out in the same way. After replacing the cuff, the sensor is assembled in the reverse order.
After installing the new oil seal, you must make sure that no oil leaks appear. If the oil seal is installed correctly, then even at high engine speeds the oil should not leak. Otherwise, the sensor is installed or pressed in incorrectly, or there is a manufacturing defect in the product.
Video instructions: Lada Priora replacing the crankshaft oil seal
If you find traces of oil leakage through the crankshaft seals of the Lada Priora, first check whether the crankcase ventilation system is clogged and whether its hoses are pinched, and if necessary, repair the faults. If the oil leak does not stop, replace the seals.
A sign of the need to replace the front crankshaft oil seal on the Lada Priora is oil leakage through its lip. In this case, oil is sprayed out by the rotating crankshaft pulley, as a result of which the entire front part of the engine and the timing belt are oily.
You will need: all the tools necessary to remove the timing belt (see “Replacing the Timing Belt and Tensioner Pulley”), as well as a straight-blade screwdriver (two), and a hammer.
- 1. Disconnect the wire from the negative terminal of the battery.
- 2. Set the piston of the 1st cylinder to the TDC position of the compression stroke (see “Installing the piston of the 1st cylinder to the TDC position of the compression stroke of the Lada Priora”).
- 3. Remove the timing belt (see “Replacing the timing belt and tension pulley”).
4. Using two screwdrivers...
5. ...remove the toothed pulley of the crankshaft of the VAZ 2171.
6. Remove the key from the groove of the crankshaft shank of the Lada Priora.
7. Remove the oil seal from the oil pump cover of the VAZ 2172.
8. Lubricate the working edge of the new oil seal with engine oil, install it in the cover of the Priora oil pump, oriented the working edge towards the inside of the engine, and press the oil seal into the pump cover until it stops using a mandrel. As a mandrel, you can use a head of a suitable size from the tool kit.
9. Install all removed parts and components of the gas distribution mechanism in the reverse order of removal.
10. Adjust the tension of the Lada Priora timing belts (see “Replacing the timing belt and Priora tension roller”) and the VAZ 2170 generator drive belt.
Replacing the cylinder head gasket on a VAZ 2170 2171 2172 Lada Priora[edit]
If an external leak of engine oil or coolant is detected at the junction of the head and cylinder block, remove the head and replace its gasket. A leak can also occur due to warping of the block head due to overheating. In the absence of sealing on the cylinder head gasket into the internal cavities, antifreeze can get into the oil which begins to foam (foam can be seen especially clearly on the filler neck and in the cavity of the valve cover), in addition, an oil film may appear in the antifreeze. In case of this malfunction, it is necessary to replace the gasket as soon as possible, since this malfunction can lead to engine failure due to the incorrect operation of two systems at once - lubrication and cooling.
