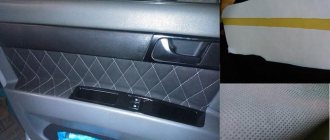
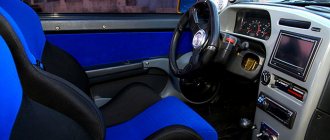
First of all, you will need new seat covers. You can either order them ready-made or sew them yourself. Practice shows that there are no particular difficulties in this work.
We remove the old covers and rip them into separate parts. We lay out the new fabric on the table, put the old parts of the cover on it and trace it along the contour. All that remains is to cut out the outlined details with sharp scissors. A finishing material called Alcantara is ideal for upholstering the seats of the VAZ 2114.
This suede-like fabric has many advantages:
- wear resistance;
- durability;
- resistance to external influences;
- elasticity (which is especially important for upholstery of products of complex shapes);
- ease of care;
- resistance to deformation due to temperature changes;
- pleasant, soft structure, reminiscent of suede.
Each part of the old cover must be signed with a marker or felt-tip pen so as not to get confused when cutting new products.
In addition to fabric, for upholstering the seats you need foam rubber, 5-7 mm thick, on a fabric basis. We glue the cut parts of the covers to the foam rubber on the reverse fabric side.
Separately, it is worth mentioning the glue used for reupholstering the seats. Regular glue in a jar and a brush are not suitable for this purpose. You can only use spray glue; in this state it will not clog into the large pores of the foam rubber and will not spoil its structure. The German Mah3 upholstery adhesive, created specifically for use in the auto industry, has proven itself to be excellent.
Now we sew all the finished parts of the cover together using a sewing machine. Any triple feed lockstitch machine will do. Now all that remains is to glue the seam flaps in different directions and flatten the seams with a hammer.
Turn the cover right side out. Now you can put them on car seats.
Manufacturing of covers
First of all, you will need new seat covers. You can either order them ready-made or sew them yourself. Practice shows that there are no particular difficulties in this work.
We remove the old covers and rip them into separate parts. We lay out the new fabric on the table, put the old parts of the cover on it and trace it along the contour. All that remains is to cut out the outlined details with sharp scissors. A finishing material called Alcantara is ideal for upholstering the seats of the VAZ 2114.
This suede-like fabric has many advantages:
- wear resistance;
- durability;
- resistance to external influences;
- elasticity (which is especially important for upholstery of products of complex shapes);
- ease of care;
- resistance to deformation due to temperature changes;
- pleasant, soft structure, reminiscent of suede.
Each part of the old cover must be signed with a marker or felt-tip pen so as not to get confused when cutting new products.
In addition to fabric, for upholstering the seats you need foam rubber, 5-7 mm thick, on a fabric basis. We glue the cut parts of the covers to the foam rubber on the reverse fabric side.
Separately, it is worth mentioning the glue used for reupholstering the seats. Regular glue in a jar and a brush are not suitable for this purpose. You can only use spray glue; in this state it will not clog into the large pores of the foam rubber and will not spoil its structure. The German Mah3 upholstery adhesive, created specifically for use in the auto industry, has proven itself to be excellent.
Now we sew all the finished parts of the cover together using a sewing machine. Any triple feed lockstitch machine will do. Now all that remains is to glue the seam flaps in different directions and flatten the seams with a hammer.
Turn the cover right side out. Now you can put them on car seats.
Front seat malfunctions and repairs
If you treat your car correctly and with care, the seats will last a relatively long time. And yet these are loaded nodes that sooner or later fail. Front seats break more often than rear seats. Main failures: wear of the casing or failure of the adjustment mechanism to perform its functions.
All this can be repaired independently in makeshift conditions.
The back does not lock and does not recline
The backrest does not recline or is not fixed; it can move back and forth without any effort. This is one of the frequent breakdowns in the seat adjustment mechanism of the VAZ 2107. It occurs due to the weakness of the unit that fixes the movements of the backrest lever. Driving a vehicle while sitting in such a seat is inconvenient and unsafe.
Repairing it yourself is not difficult. Below is described and shown how to do it step by step:
Installing a reinforced seat clamp comb
The photograph clearly shows that the comb is made of weak metal and is not very durable; it will not last long. Craftsmen have introduced a new method of repairing the fastener. This is a reinforced comb installation. It is not sold in stores, so it is better to order it from a familiar turner. Can also be found at salvage sites for old cars.
Installation of this comb is much easier; there is no need to cut anything.
We straighten the old comb and boil it if there are cracks in the metal parts of the frame. We install the reinforced comb in place, align it with the adjusting pin and weld it. To avoid burning the soft parts of the seat, you need to cover them.
Repair of front seat slides
The slides are designed to move the chairs back and forth and lock them in the required position. The main reason for the failure of the slide is contamination of the guides, but there is also a breakdown of the metal components of the mechanism structure.
This mechanism consists of the following parts:
To make repairs or clean the slides, they must be detached from the seat frame. This is done in the following order:
After this, clean and rinse the mechanism from old grease and dirt. Carefully inspect, if there are broken or damaged elements of the mechanism, they need to be replaced with new ones. After these manipulations, assemble the slide and put it in place, having previously lubricated it with a special lubricant.
Reupholstery of the front seats of VAZ 2107
A car serves a person for a long time and during this time the upholstery of the seats becomes dirty, “greasy”, or even torn. The driver and front passenger seats are most often affected by this. It’s too late to put on the covers; this should have been done earlier. In this case it is better to tighten it. There are no difficulties, the procedure is below:
Guide to replacing seats on a VAZ 2114
- Re-upholstery work does not require much space. This can be done both in the utility room and directly in the apartment. The main thing is to do everything step by step, not the whole salon at the same time. It is advisable to start work from the front seats. The upholstery is attached by the manufacturer to special hooks; they will be immediately visible after removing the old fabric. It is recommended to use nylon ties instead of these hooks. Be sure to remove the metal spokes from the old upholstery; they will be used when stretching the new set.
- Check the condition of the foam. As a rule, it is no longer in its best condition, especially in the front seats. If the foam rubber is not pressed through, then, in principle, it can be left or partially replaced.
Advice: if it is not possible to replace the seat foam with a new one, when putting on the knitting needle, retreat 2-3 centimeters from each edge. Thus, in the middle there will be a fastening through the material, and along the edges there will be a knitting needle on a knitting needle.
- The procedure for replacing the rear seat upholstery is almost identical. We insert the knitting needles from the old cover into the new upholstery and secure the fabric.
- If after replacing the upholstery you notice dents or wrinkles, it’s not a problem. In order for the fabric to shrink completely, you need to apply a little more effort. Use a regular hairdryer to dry the fabric, then iron it through the fabric with plenty of steam. The iron can be replaced with a steamer; as a last resort, if there is neither one nor the other, we use a regular water spray. From cases made of leather or Alcantara, remove stains and glue residues.
- Since the reupholstery procedure involves the complete removal of the seats, take advantage of this to carry out related work: major cleaning of the interior with washing of the ceiling, installation of heated seats, painting of frames, and so on.
Even without experience, replacing the seat upholstery of a VAZ 2114 will take a maximum of 6-7 hours of work. A little patience and our recommendations, and you will be rewarded with a clean and comfortable car interior.
Kinds
First, let's look at the types of seats that you can purchase for your VAZ 2114. There are three categories in total, the advantages and disadvantages of which are described in more detail in our table.
| Seat type | pros | Minuses |
| Racing | Ideal for professional sports, designed for very high loads, made of high quality materials | The design is uniform and is not divided into a backrest and a chair. Very expensive, cause discomfort when boarding and disembarking, and quite hard. They are not intended for driving on regular roads or for long voyages. |
| Sports | The backrest is adjustable, they look great on the fourteenth, well-thought-out safety, clear fixation of the driver, they have excellent support for the hips and shoulders, long trips do not cause discomfort | Not suitable for cars with soft suspension, there are problems with the landing, which is quite uncomfortable, especially for large drivers and passengers |
| Gran Turismo | Luxury chairs that are ideal in terms of comfort and ergonomics. Externally attractive, perfectly secures the driver, withstands heavy loads, allows you to easily sit down and stand up, can have many built-in functions, ideal for professional drivers, wide range of position adjustments | They have practically no downsides. But the more features, the higher the cost |
Don't chase fashion when purchasing sports or racing seats for regular city roads. But if you are adapting your VAZ for competitions, then it is categorically not recommended to go on the tracks on ordinary seats.
High comfort chairs
What to choose
We have decided on the types of seats, but there are a great variety of them depending on the manufacturer, size, functions, etc.
Since the VAZ 2114 is a car more likely for city roads, we will focus on the choice of anatomical seats.
Let's discuss several points for choosing them.
- Origin. Here the choice is between used and new seats. The new ones are more expensive, but they certainly have more advantages. A good place to look for used seat sets is car dismantling yards, where you can touch and inspect the product with your own hands. The choice depends on you and your financial capabilities.
- Equipment. The presence of armrests and headrests is strongly encouraged. Make sure that the chairs come with all the necessary components and fasteners. They are not always provided by the seller, so ask in advance about the installation details.
- Fastenings. Some seats from foreign cars fit perfectly under the standard VAZ holes for installation. For others, you have to do a little modification in the form of using adapters or creating additional holes. And there are also those, for the installation of which you will have to almost completely redo the seat on the body. This is far from the best option, since you will have to spend a lot of time and money.
- Manufacturer. A lot depends on who exactly made the seats you choose. If you are interested in kits from foreign cars, then seats from Ford have proven themselves to be quite good. But keep in mind that some may be too wide, which will complicate access to the handbrake and will not allow you to move the seat back and forth. Take measurements in advance. There is also a company called UNP. It specializes in the manufacture of both anatomical and sports seats for cars of the domestic manufacturer - AvtoVAZ. They have a higher quality finish and are offered with all the necessary accessories and fasteners. Working with them is more convenient and easier.
Do-it-yourself seat upholstery 09/01/2015 02:48
Dear friends! We very often receive questions about how to independently replace factory seat covers that are already worn out with new ones. That is why we decided to publish a few tips that will make the replacement procedure much easier. In fact, the main part of the questions disappears after removing the old covering, when you get a visual understanding of how to reupholster the seats.
1. If you don’t have a garage or a dry and comfortable room for this type of work, it’s realistic to replace the upholstery in your apartment; you won’t need a lot of space, of course, if you don’t take on the entire interior at once. So, let's start with the front seats. We remove the seat and disassemble them into three parts: the seat, the back and the headrest. To better understand the principle of operation, start with the simplest thing, with the headrests, remove the old trim and put on the new one (see photo No. 1)
2. After you have removed the old covering, you will see that the cover (covering) is fixed with special metal hooks to the seat frames. From the back of the back they are located below. To speed things up and simplify it, instead of hooks you can take plastic clamps or otherwise called nylon ties (see photos No. 2, 3 and 4)
3. To give the skin shape, they use special metal knitting needles; they need to be removed from the standard kit, because They are not included with the new ones. (see photo No. 5)
4. There is still a point that cannot be ignored! If the service life of the old seats is already long, most likely the foam rubber under the covers is not in the best condition. If it is not possible to buy new foam rubber for both front seats at once, replace at least the driver’s seat, or, as a last resort, swap places with the passenger seat (they are interchangeable, see photo No. 6), as a rule, the driver’s seat wears out more. If you still don’t want to replace the foam rubber, the advice is as follows: When putting on a metal knitting needle, leave a little space on each edge, approximately 3 cm. That is, the casing is fixed in 3 places, if you make an indent of a few cm, then there will be fastenings along the edges knitting needle to knitting needle, but only from the middle part through the material.
5. Let's return again to the problem with old foam rubber. If you do not have the opportunity to replace it, we advise you not to install vertical spokes on the seats (see photo); dismantle them, marked in the photo.
6. We change the rear cover using almost the same principle. We insert the already removed knitting needles from the old upholstery into a new cover and fix the fabric. The type of fastening will depend on the car model. On some cars, rubber laces or already known metal hooks, etc. may be used as fastenings.
7. It is extremely rare, but it does happen that after replacing old covers with new ones, in some places there may be minor and practically invisible dents. In order to eliminate this and make everything perfectly smooth, you need to iron the surface with a steamer (see photo No. 
8. By the way, do not forget that reupholstering the seats is the most convenient time to install or replace heated seats, clean the lower parts of the frames/slides from rust, and also, if you removed all the seats at once, you can also clean the ceiling, it will be more convenient.
At first glance, it seems that this process will take you a lot of time and it is very difficult, but if you have a positive attitude, you can handle it in five to six hours of work. And then what a pleasant feeling you will get from driving in the updated interior
Removal and installation of front seats
And so, let’s look at the question - how to remove the front seats on a VAZ 2114.
To perform this operation we will need the following set of tools:
- flat screwdriver;
- ratchet;
- knob;
- 8 mm head (or Torx 10 - in late models);
- 13 mm socket or a simple 13mm wrench.
The front seats are dismantled according to the following scheme:
- Disconnect the heated seat wiring harnesses (if equipped).
- Using a 13mm wrench, unscrew the four nuts securing the front seat tube.
- If necessary, remove the torsion bars by pulling forcefully at their edges.
- Raise the seat (you need to do this with a jerk) to its highest position (as far as possible), after which access to its fastening will open.
- Unscrew the bolts securing the seat slides in the front (on both sides).
- Pull the locking lever to move the seat forward.
- Unscrew the bolts securing the seat slide at the rear (on both sides).
- Remove the vacated seat.
Installing the seat in the car is done in exactly the same way, but in the reverse order (it should be noted that this diagram is relevant for both front seats - the driver's and the passenger's).
When purchasing new front seats, the best option would be to give preference to the so-called anatomical ones, which allow you to feel comfortable behind the wheel even on long trips.
Clock backlight in VAZ 2110
A watch is a useful thing. However, designers did not create this element of the interior of domestic cars as ideal. This concerns the lighting of the dial, which is not uniform. As a result, only individual parts are highlighted, and the arrows are poorly visible. In this situation, tuning the VAZ 2110 interior, or rather, its important element - the clock, will come in handy.
To make the backlight uniform, you should replace the factory light bulbs in the watch with modern LEDs. If you replace two light bulbs with LEDs, the illumination will be more uniform; the result ultimately depends on how the light from the diodes is scattered. If you install one instead of two LEDs, you can achieve an improved result. It should be placed in the center. You can abandon the factory bases and equip the watch with LEDs at your discretion.
However, in this situation, you will need to disassemble the watch and attach the required number of diodes with superglue. They need to be connected together, but at the same time, we must not forget about resistors. Also, if you wish, you can remove the filter or paint it the desired color.


