Purpose and design of the cardan shaft
To transmit torque from one unit to another located at a certain distance, a cardan shaft is used.
It is made of durable metal, the thickness of which is about 2 mm.
The cardan performs several tasks simultaneously. On the one hand, it serves as a shaft through which force is transmitted from the transfer case flange to the drive gear of the gearbox. On the other hand, it is able to reorient the axis of rotation.
If on a Chevrolet Niva the transfer case flanges and axle flanges were located coaxially, and the distance between them did not change while driving, then it would be possible to get by with a rigid shaft connection. However, it is almost impossible to achieve alignment, and transmission units begin to move when driving over uneven surfaces. The cardan is pivotally connected to the axles, allowing the axis of rotation to be slightly rotated. The movable structure of the shaft helps dampen vibrations of transmission units.
A cardan transmission is a set of components that ensure the transmission of force using a cardan shaft. The driveline drive design is almost the same in all brands of cars. It includes the following elements:
- shaft joints;
- cardan shafts (front and rear);
- rubber coupling (on Chevrolet Niva cars it is installed on the intermediate shaft connecting the gearbox and transfer case);
- support.
Cardan drives come in two types. The first type is transmission using unequal velocity joints. They were installed on Niva in the first years of production. Subsequently, the car began to be equipped with gears with constant velocity joints. Cardan shafts of the first type are considered to be quite strong and can be installed not only on cars, but also on trucks. The hinge consists of a pair of forks at the end, connected by means of a cross. The working element in the cross is a needle bearing.
Which cardans are best installed on a VAZ 2123?
The most popular among Shniva owners are cardan shafts from the following manufacturers:
- Tirsan Kardan is a manufacturing enterprise in Naberezhnye Chelny, specializing in the manufacture of driveshafts for AvtoVAZ vehicles and other Russian automobile plants;
- SiM (Sickle and Hammer) is a Saratov plant producing transmission components, CV joints, cardans and camshafts;
- Belkard is a Belarusian enterprise that produces spare parts for buses, trucks and passenger cars. Among other things, this company produces reinforced splined cardans for Shnivy.
Niva Chevrolet cardans
The modernization of the car affected not only the external style, but also the transmission.
Designers tried to solve the problem of shaft vibration at speed. Indeed, when the speed increased to 80 km/h and above, the “shudder” characteristic of this car began to be felt. While some owners preferred to put up with this drawback, using the car exclusively for off-road use, others periodically changed the cardans, changed the crosspieces, and balanced the shafts. It should be noted that such procedures did not give 100% success. Manufacturers decided to abandon shafts with crosses. The new generation cardans were equipped with CV joints. In theory, the CV joint should have ensured smoother rotation of the shaft parts. In addition, it was designed to work in conditions in which the axes of rotation are oriented to each other at an angle of up to 35 degrees. Despite theoretical calculations, reviews from real owners turned out to be very contradictory.
How to remove and replace?
To carry out work, it is necessary to provide access to the machine from below. To do this, it needs to be placed on an overpass or inspection hole. To replace you will need:
- Standard set of keys.
- A pry bar or a special blade.
- A log, a board and a jack or other support on which to support the transfer case.
- New cardan.
Work order:
- Place the car on the pit.
- Secure with wheel chocks.
- Turn on neutral speed.
- Remove the car from the handbrake.
- Place a stop under the transfer case.
- Unscrew the nuts securing the transfer case bracket.
- Lower the transfer case down, removing it from the studs.
- Sequentially unscrew the nuts securing the cardan to the flange. To do this, it is necessary to rotate the driveshaft so as to provide access to the mount.
- Remove the CV joint by pressing it out with a spatula.
- Unscrew the nuts securing the cardan to the transfer case flange.
To install a new or refurbished part, perform the above steps in reverse order.
Pros and cons of old style cardans
Cardans assembled on the basis of crosspieces showed excellent performance in harsh operating conditions. When used correctly, bearings are not afraid of either water or dirt. You can extend the life of bearings by adding lubricant through a grease gun. The angle of deflection of the cardan axes is relatively small, but in its operating ranges the crosspiece does not change the resource. The disadvantages include uneven operation during smooth rotation of the shaft. This is partly why vibration occurs. It is uncomfortable to drive on such cardans at high speeds. The resource of the crosspiece is limited, so they have to be changed frequently.
Packaging and counterfeiting
old packaging The plant very poorly protects its products from counterfeiting and the best guarantee is a reliable supplier.
A paper sticker on the cardan, as we all understand, is not protection. Since the Chinese have long since bypassed holographic seals, and in 2021 they have already partially resolved the issue of the originality of the part via SMS. I present two photos of how the CV joint driveshaft for the SiM field was packaged previously and now. Shafts and short universal joints sometimes arrive from the factory, simply wrapped in oiled paper. There are fakes for these cardans. The average mileage is less than 10 thousand. Raw steel without heat treatment. Don’t hesitate to ask about the warranty; those who have a factory product have nothing to fear. And those who don’t have a “10 days on receipt” guarantee. Another question I asked the plant engineer: there were batches of cardans without balancing weights. Does this mean no balancing was done? The answer was this. There are several seamless pipe suppliers to the plant. These semi-finished products also differ in quality. One of the suppliers has a pipe of such quality that the product, welded on a good four-electrode automatic machine, fits within the “tolerances” without balancing weights. new packaging
Pros and cons of the new type of cardans
The CV joint balls ensure smoother rotation of the cardan parts. If you do not allow the protective cover to rupture and dirt to get inside the separator, then the life of the hinge is practically unlimited. At high speeds there is no characteristic “beating”. There is no need to service the CV joint during operation. Now let’s note a few facts that were established empirically as a result of long-term operation. When overcoming an obstacle such as off-road, there is always a risk of damage to the protective boot of the CV joint. If it is not replaced immediately, the hinge will fail. Replacing a hinge at cost is more expensive than replacing a crosspiece. Even with a slight lifting of the car, the angle of operation of the CV joint increases. This leads to the fact that parts of the boot begin to rub against each other, and the boot fails.
Is it possible to drive a Shnivy without a front or rear cardan?
If the drive axle or driveshaft is faulty, you can unscrew the latter and drive one for a while before just turning on the center differential lock.
Reference! However, you need to remember that the Chevrolet Niva is not designed to drive on one cardan.
When the drive axle is disconnected, the second axle experiences double the load. As a result, the differential wears out quickly. If you constantly drive such a “mono-drive” Niva, the bridge will last no more than one or two seasons. Therefore, disabling one of the cardan shafts to reduce fuel consumption is not economically justified.
Also, disabling all-wheel drive impairs handling on certain surfaces, which can cause an accident.
How to disable the front axle on a Niva?
You can make the car rear-wheel drive if you unscrew the front driveshaft and lock the transfer case, or remake the design using parts from the “classics”.
An alternative to such a radical solution. make the front axle switchable. This will require the installation of a special mechanism. We remove the crankcase cover together with the clutch and shaft, and then place the front axle disconnect mechanism on the seat of the removed cover. This modification will allow you to lock the axle at will from the passenger compartment using the transfer case lever.
The manufacturer did not install a transfer case with a switchable front axle on the Niva 4x4 for a number of reasons, for example, to evenly distribute the load along the axles. But many SUV owners do not share this decision and try to make their car single-wheel drive. Do you know what uncoupling the front or rear axle of a VAZ 2121 does?
Eliminate vibration with additional fasteners
Vibration in the body is the main “disease” of the Niva; it often occurs due to improper alignment of the transfer case. Most often, vibration occurs on VAZ 21213/21214 cars, since the transfer case is mounted only on two supports on the sides of the body; on the Chevrolet Niva, the transfer case is already installed on three supports.
- driveshafts are poorly secured;
- wheels are not balanced;
- there is play in the cardan crosspieces (vibration is especially affected by play in the rear driveshaft crosspieces);
- The vibration comes from the engine itself.
Vibration when starting off on a Niva can also occur for the following reasons:
- the mounting supports of the transfer case have become loose;
- The rubber on the RK supports themselves broke.
Installing the third support of the transfer case on VAZ 21213/21214 vehicles allows you to reduce the level of vibration of the transfer case; with this support it is easier to center the transfer case. The part can be purchased at auto stores or made yourself. The finished product comes with three long studs (for model 2121); to install the third support on this machine, you will need to unscrew the short studs from the transfer case housing and install new studs from the kit. We carry out repairs as follows:
- dismantle the front passenger seat in the cabin;
- remove the floor tunnel lining;
- in the cabin we move aside the carpet covering the body amplifier (in front of the handbrake lever);
- remove the transfer case (alternatively, you can simply hang it up, but removing the third support makes it easier to install);
- We attach the bracket of the new support to the body of the RC;
- we install the transfer case in place, center it in the optimal position, and fasten the side supports;
- we combine the third support with the body, drill two holes in the bottom;
- Using washers, bolts and nuts (from the kit) we attach the support to the bottom of the body.
In order to install the subframe, the transfer case must be removed. It is more convenient to carry out such work in a pit; we carry out repairs as follows:
- leave the car in neutral gear;
- disconnect the propeller shaft from the transfer case, it is advisable to mark the driveshaft flange and the drive shaft so that during installation, align the driveshaft according to the marks - this way, the occurrence of unnecessary vibrations is eliminated;
- dismantle the muffler mounting bracket;
- remove the gearbox traverse;
- jack up the transfer case, remove the side fastenings of the transfer case;
- We treat the places where the subframe fits to the body with Movil;
- place the subframe on the gearbox studs;
- we mark the attachment points of the subframe on the side members, drill holes, attach bolts to the body;
- we tighten all fastenings, except for the transfer case supports themselves;
- we perform alignment of the steering wheel;
- Finally tighten the transfer case supports.
It should be noted that installing an additional support or subframe on the steering wheel does not always lead to the desired effect; in some cases, vibration only increases.
Principle of operation
While driving, the position of the axles relative to the transfer case is constantly changing. Therefore, to transmit forces between misaligned axes, the distance between which is constantly changing, a cardan drive is used.
The front and rear cardan shafts of the Niva differ only in length. Two types of units can be installed on a car: with crosses or CV joints.
The first design option consists of a tubular shaft, forks with crosspieces. The spline connection, which provides a change in length, is sealed with oil seals.
The cardan with CV joints is made using constant velocity joints. They are installed at its ends instead of crosses, protected by anthers.
Interesting! CV joints ensure smooth rotation of the unit at large bending angles. Therefore, all new Chevrolet Nivas are equipped with CV joint cardans.
Theoretically, the service life of a driveshaft on CV joints far exceeds the service life of a part with crosspieces. However, when the boot ruptures, lubricant leaks out of the constant velocity joint and sand gets clogged into the bearings. Therefore, when using the Niva regularly in rough off-road conditions, crosspieces are more preferable.
Note! Both types of parts have the same flanges for attaching to the axle and transfer case. Therefore, when repairing a drive, you can equally use units with crosses or CV joints.
A similar transmission also connects the transfer case to the Chevrolet Niva gearbox. In this case, an intermediate shaft is used with a CV joint at one end and splines at the other.
Chevrolet Niva Big Turtle › Logbook › The driveshaft killed me
New knocks appeared.
What it looked like: While accelerating in a straight line at any speed (i.e. under load), there was a dull rattling-muttering noise. It’s like trying to stuff ice into a running meat grinder. It’s like knocking on a full 19 liter bottle of water. The frequency of knocks is 5-8 per second. Something like this) The sound is heard in the front part. It also sounds like the sound of a broken silencer. Doesn't sound in neutral. When accelerating, if you press the clutch, it also makes no sound. If you put neutral in the Republic of Kazakhstan. Then at any speed the gearbox does not sound.
Then I noticed a complete correlation of sounds with the vibration of the RK lever.
I started sinning on the RK and/or cardans.
Gradually I got used to the sound. I started to think - maybe I’m paranoid. And that's how it all happened?
Numerous advice: “a good knock will come out” did not add to my optimism.
Any vibration, in addition to noise and discomfort, creates an additional load on the rotating units, significantly wearing them out.
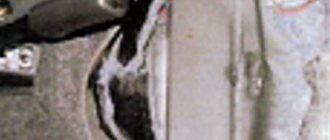
Solution to the problem: I went to the service. We lifted the car and immediately diagnosed that the bearing on the rear driveshaft was broken.
They removed my cardan. By the way, here it is:
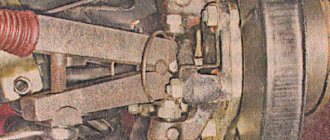
The crosspiece comes with a groove for a locking ring on the crosspiece itself:
Another option is when there is a groove for the ring on the mounting hole in the cardan fork. Then the cross is smooth:
I ended up with a cardan with a groove on the crosspieces. Using the example of a working crosspiece, the arrow indicates the place where there should be a retaining ring of a different option (when there is a groove in the hole of the fork).
Checking the serviceability of the cardan transmission
The performance check is carried out with the PP box in neutral gear. The car is driven onto an overpass or inspection hole and boots are placed under the wheels, so that the car can move, but does not roll off the overpass. Let's start testing. The check is carried out for both types of structures:
- Visual inspection. Our client inspects the joints to see if the bolts are loose, and what condition the boot is in.
- Next, both hands grasp the shaft on the side where the connections are checked, and swing with sharp movements. If there is little free play, then the design is faulty. There is no free movement.
- With sharp movements you need to rotate the shaft around its axis of rotation, while holding the hinge fork-flange with one hand. There are no circumferential gaps.
When is a device change required?
When the design of the device, so to speak, loses the balancing of the plates, otherwise all parts of the product are changed, then upon completion it is imperative to re-balance the driveshaft. On the contrary, after balancing the difficulties of the product malfunction are not eliminated, the shaft assembly with complete elements is replaced. If the shaft is not balanced, this will uniformly lead to an increase in the amount of vibration, especially at a speed of 60-80 km/h.
Balancing the cardan is done either with the help of a visit to 100, where the craftsmen will perform the related work for our client, or without the help of others, which will save money. However, that's another story.
Reviews and observations
Based on the experience of owners of the LADA 4x4 SUV, a number of advantages can be identified after disabling the front axle:
- Fuel consumption can be reduced by 3 liters per 100 km. Savings in each case are individual and in some cases may be insignificant;
- Dynamics improves. accelerates better on dry asphalt
- The maximum speed increases slightly;
- Less vibration, howling and hum while the car is moving.
Rear-wheel drive on the VAZ 2121 has a number of disadvantages:
- Significant reduction in cross-country ability;
- Significant deterioration in controllability. With the front axle disabled, it is very difficult to drive on a slippery road; this is facilitated by the short wheelbase of the SUV. On the VAZ 2131 the situation is a little better;
- The service life of parts is reduced. There is no safety margin for rear-wheel drive in the Niva's transmission;
- In winter, the oil freezes in a disconnected bridge, so sometimes it is very difficult to start moving after a long stay.
Why buy an all-wheel drive Niva and then disable the front axle? No need to drive an SUV outside the city? Saving on gasoline? It is worth considering whether it will be possible to reduce vehicle maintenance costs when, soon after one of the bridges is disconnected, it will be necessary to carry out premature repairs.
What do you think? Are there situations when it is advisable to disable the front or rear axle? Maybe it would be better to modify the Niva to improve its off-road performance? For example, install a self-locking differential or mud tires?
Other problems
To avoid transmission problems, Niva car owners must adhere to the following rules:
- Try not to change gears while slipping;
- If the lock switches with difficulty, there is no need to apply excessive force;
- When a difficult-to-pass section has been overcome, it is necessary to unlock it again, since on a flat road in this mode at high speeds the car’s controllability deteriorates, and the service life of the entire transmission decreases.
Here are the basic rules by following which you can significantly extend the life of the gearbox on a Chevrolet Niva.
Sometimes there is a knocking sound in the transfer case. The Chevrolet Niva is a more reliable car than the VAZ-2121, but such malfunctions should not be ruled out
The first thing you should pay attention to is the driveline. Previously, Nivas had crosses, the play in which caused a lot of noise and vibration
https://www.youtube.com/watch?v=4k93vmooYNM
During the operation of off-road vehicles, parts and components of the transfer case gradually become unusable due to wear. Most often, the following interruptions in the operation of the mechanism occur:
- The front axle does not engage.
- The transfer case is overheating.
- Leaks and increased oil consumption of the transfer case.
- Unauthorized disabling of the front axle.
Replacing oil seals
To change the drive seals, in addition to the listed tools, you will need:
- mount;
- flat screwdriver;
- wooden block;
- hammer;
- hex wrench 12;
- puller (two- or three-legged);
- mandrel (a piece of pipe whose diameter corresponds to the size of the seals);
- circlip puller;
- dynamometer.
To replace the drive gear seal, you must perform the following steps:
- Using a dynamometer, measure the starting torque of the drive gear.
- Fix the flange: screw a couple of bolts into its holes and insert a pry bar into them.
- Unscrew the fastening nut.
- Remove the washer and flange from the splines (here you will have to use a puller).
- Using a flathead screwdriver, remove the oil seal from the mounting hole.
Replacing the drive oil seal is done as follows:
- Remove the retaining ring and spring washer.
- Using a hammer, knock the bearing out of its seat.
- Remove the cover together with the oil seal
- Knock out the old part using a pipe.
- Lubricate the new oil seal with grease and press it into the cover.
- Assemble the knot.
Considering the low price and high labor intensity of replacing the oil seal, during repairs you should not skimp on components and use parts from trusted manufacturers.