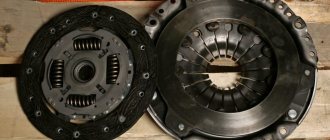
Even those who have little understanding of the structure of a car know where the calipers are and what they are needed for. Well, or at least roughly imagines it. Here they are, visible in the front (and often rear) wheels, so there is no doubt that they belong to the braking system.
The caliper, in fact, is not a complicated device, but it is rationally and intelligently made. It fails quite rarely, especially with normal maintenance. How it works, how it works, what types and designs there are - read on.
What is a support and what is it for?
A car caliper is a disc brake part that is responsible for the operation of the brake pads, the penultimate link in the transmission of force from the driver, when he presses the brake pedal, to the disc-pad pair. Structurally, the caliper is connected both to the hydraulic system and to the brake pair itself.
The caliper's job is to push the pads against the brake rotor when braking is needed and to keep the pads away from the rotor when the brake is not applied. The comfort and safety of braking depends on how well it works.
Another function that non-specialists often forget about is to fix the brake pads strictly parallel to each other and the brake disc. The slightest misalignment reduces the contact patch, degrades braking quality and accelerates wear of the brake surfaces. Therefore, it is so important that the calipers not only work well, but also do not have the slightest flaw in their design.
Why can a caliper fail?
The list of reasons due to which a given node can no longer perform the task assigned to it is quite long. However, the main enemy for calipers is corrosion, which occurs due to the penetration of water and dirt - it is they that render the working cylinders and pistons unusable. However, even with serviceable anthers, condensation accumulates in the mechanism. After all, during heavy braking, the discs can heat up to 500-600 °C in order to cool down later. And the number of heating/cooling cycles is in the thousands. As a result, due to moisture, the edges of the pistons and cylinders begin to actively corrode, and this leads to the need to apply more force to the brake pedal.
In addition, do-it-yourself caliper repair may be required for the following reasons:
low quality brake fluid, which contains too much water, which provokes metal corrosion;
oxidation of anthers due to the use of material unsuitable for these purposes to lubricate the guides;
violation of the tightness of the anthers.
The problem of tight movement of the brake piston of the working cylinder only progresses over time, and the car’s deceleration system begins to either fail completely or work every once in a while. Sometimes, to solve this problem, it is enough to inject rust remover and the “right” lubricant into the cylinder, or simply lubricate the caliper guide bolts. However, it is not always possible to get by with little blood.
Types, device and principle of operation
Structurally, the caliper consists of a housing, pistons with fittings, brackets for fixing the pads, guides, as well as boots, sealing and fastening rings for the pistons.
The operating principle is quite simple.
- The pistons are connected to the brake system hydraulics. When the driver presses the brake pedal, the brake cylinder creates pressure in the hydraulic system, causing fluid to press on the pistons (working cylinders) of the caliper and push them forward.
- Extending under the influence of pressure, the piston also pushes the brake pad (depending on the design of the caliper, only the inner one or both at once, more on this a little later).
- The pads are pressed against the brake disc, and the force and speed of compression depend on how the driver presses the pedal. Under the influence of friction, the wheel slows down.
- As soon as the pressure on the brake pedal stops, the pressure in the hydraulic system drops and the pistons move back and move the pads away from the disc. You can go!
This is the general operating principle of a brake caliper. But it would be strange if over the years engineers have not come up with several varieties of this simple design. Today you can find two main types of calipers: floating and fixed.
1. Floating design is an older type that is still used in budget cars. Its main feature is that the pistons are located only on the inside of the caliper and, accordingly, they control only the inner brake pad. When braking, the piston extends, the pad is pressed against the disc, and at the same time the guide bracket begins to move - it moves in the opposite direction and presses the outer pad.
Service
The calipers get very hot and work in aggressive conditions; these are the factors that have a destructive effect on the parts. Chinese analogues are generally destroyed by high temperatures. Professionals recommend installing either spare parts from well-known brands or originals on your car. You can't skimp on brakes.
- squeaking brakes;
- brake lock;
- deviation of the car's course when braking;
- change in brake pedal hardness.
An important detail on which the service life of the parts depends is the boot. The boot protects structural elements, in particular the piston surface and the oil seal, from dust and dirt. If the boot ruptures, dirt and sand instantly gets inside, the parts rust, the lubricant is washed out or dries out, the tightness of the seal is broken and a leak occurs. Running the piston dry leads to disastrous consequences: braking efficiency is significantly reduced, or it becomes impossible, the piston is blocked and the wheel jams.
Piston souring occurs when a worn brake pad is used for a long time. Insufficient thickness of the lining leads to the fact that the piston extends too much, and deposits form on its side surface, which prevent it from returning to its original position. If you install new pads on such a caliper, the following problems will arise:
- rapid pad wear;
- disk failure;
- uneven pad wear;
- creaking caused by overheating of rubbing parts;
- steering wheel beating, which appears due to constant pressure on the rotating disk. It is especially noticeable when braking at high speeds.
Steering wheel beating when braking
Noise in the unit can be noticed some time after installing new parts. Causes:
- design features of the unit;
- low quality parts.
To eliminate this drawback, springs are additionally installed.
Corrosion of the inner surface of the piston occurs due to neglect of the timing of brake fluid replacement. It is capable of absorbing water even from the air. Therefore, over time, even parts that only come into contact with brake fluid are exposed to water and begin to corrode.
Important! The frequency of replacing brake fluid is every 3 years.
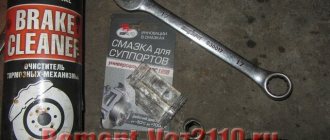
In order for the caliper to serve for a long time, it is necessary to change the lubricant in a timely manner. This action will ensure reliable operation of the piston and safe operation of the vehicle.
For calipers, you cannot use conventional lubricant such as graphite grease or Litol. It will dry quickly even with a whole anther. The main requirement for lubricant is resistance to temperature changes. Specialized lubricant is sold in packages of 45 g. This is enough for one-time maintenance.
Caliper malfunctions and their symptoms
The “body” of the caliper itself is a fairly reliable design. Mainly moving parts can be damaged: pistons, guides, pad mounting plates. In most cases, the cause of failure is damaged anthers and seals. Let's look at the most common faults.
- The guides jam. In floating-type structures, guides often suffer: due to wear of the boots, water and dirt get on them, mix with lubricant and lead to corrosion and wear. When the guides are not in order, the caliper loses mobility and begins to jam in one position, as a result of which the brake operates harder or “sticks.” You can try to clean soured guides, but more often they are simply replaced with new ones.
- Pistons jam. The cause of jamming is, as a rule, corrosion on the piston and cylinder wall, as well as wear and tear due to water and dirt getting inside. How does she get there? Through a gap in the boot, which was not immediately noticed. If there are obvious signs of corrosion, there is no point in grinding the pistons; you have to replace the entire caliper.
- Brake fluid leak. If the fittings or rubber seals on the piston are worn out, brake fluid leaks through them. The situation can be saved by purchasing new seals (there are ready-made repair kits) and replacing the fluid in the hydraulic system.
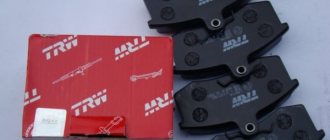
- Damage to the pads. The brake pads are installed on mounting plates. Since the load on the brakes is quite large, experts advise changing the plates along with the pads. This will cost less than buying a new set of pads and discs if the plate fails and the pads become misaligned in the mount.
Causes of jamming and creaking
Now directly about how to determine the presence of a problem.
The primary sign indicating a malfunction in the calipers of a car brake system is squeaking.
It is the creaking that indicates that the element is seriously worn out. In the near future, the unit must be replaced without fail, which the car literally and figuratively screams about. It is extremely difficult not to hear such a creak. But for some reason, thousands of motorists still stubbornly ignore it. As a result, they pay a rather high price. Sometimes even to the point of road accidents resulting from brake failure while driving. To prevent this, you need to understand the issue and understand the essence of what is happening.
The first step is to look at the possible causes. In fact, there are several potential problems to look for. Some of them arise due to the fault of the motorist, others are caused by the natural process of wear and tear.
In any case, the appearance of a squeak as a symptom is a harbinger that at the most inopportune moment the caliper may simply jam.
If you know the reasons, you can prevent them and troubleshoot them by contacting a car service center or solving the problem yourself.
The reasons are:
- The brake pads were initially installed incorrectly. As a result, they are not strictly parallel to the response drives. Because of this, creaking often appears;
- The brake discs are seriously worn out. The reasons are natural wear and tear and aggressive use of the car;
- There is no lubrication in the unit. Initially there was little of it, or it was used up;
- The lubricant was selected incorrectly. Many people skimp on lubricant intended for calipers, hence the consequences.
The most undesirable and dangerous situation is rightly considered when the piston does not return and the unit begins to jam during operation.
Imagine that you are driving a car, press the brake, and then accelerate again. But at the same time, the calipers do not release the front brakes. Additional resistance arises, the car tries to move, but cannot. The result is uncontrolled braking, extremely intense wear and serious overheating of the entire system.
Caliper repair
If the caliper is not damaged by wear or corrosion, it can be repaired and continue driving. As a rule, repairs are made in two cases: when the pads jam or when the repair kit needs to be replaced.
How to fix jammed pads?
The outer metal plates of the pads can rust from constant moisture, salt and other chemicals from the road. Even the paint with which they are covered does not help. When there is a lot of rust, the pads move poorly and can jam.
If the problem does not affect the caliper itself, the pads can be cleaned, lubricated (you need to use high-temperature lubricant and make sure that it does not get on the friction surfaces), and then put in place.
If wear, even a small one, is visible on the adjacent surfaces of the caliper, cleaning the pads will not help. Here you can only replace the part itself. Below is a video on the topic of what to do to prevent the mechanism from jamming.
How to replace the repair kit?
Buying a replacement set of rubber for a caliper is not a difficult task, the principle is the same as when buying the caliper itself (search by car VIN code or make/model/year of manufacture, etc.) When doing your own repairs, you need to prepare a place where you can disassemble caliper so that dust and sand do not get inside the mechanism, then we do everything step by step.
- Removing the caliper.
- Complete disassembly and cleaning.
- Check for corrosion and wear.
- Lubrication of guides.
- Installation of repair kit: guide seals, cylinder seals, bleeder nipple seal, guide boots, piston boots.
- Assembly and installation in place.
- Bleeding the brake system.
The video below clearly shows how to make the replacement. We advise you to turn the volume down, otherwise the music is a little annoying.
How to choose a brake caliper
It is very important that the caliper is selected to match the technical characteristics of the car, namely, its power. If you install a low-performance option on a powerful car, then at best the brakes will simply wear out quickly.
As for installing more efficient calipers on a budget car, this is already a matter of the financial capabilities of the car owner.
This device is selected according to the following parameters:
- By car make. The technical documentation must include all important information. At specialized retail outlets, specialists already have this data, so if the car was purchased on the secondary market without technical documentation, they will tell you which option is suitable for a particular car;
- By VIN code. This method will allow you to find the original spare part. However, budget analogues are selected according to this parameter with no less efficiency. The main thing is that the owners of the resource where the device is being looked for enter the data correctly;
- Caliper code. To use this method, you need to know this information yourself.
You should not immediately purchase budget analogues, as some manufacturers of auto parts are dishonest in the manufacture of their products. More guarantees - from purchasing a device from trusted manufacturers, such as Meyle, Frenkit, NK, ABS.
Caliper Lubricant
Is it possible to lubricate the “fingers” with any available lubricant? Unfortunately no. The reason is that the caliper operates at high temperatures, especially if the car is heavy or the driver likes to drive. In this case, both the caliper, the guides, and the lubricant on them heat up.
For this reason, the most common lubricants are no longer needed: they are based on mineral oils and, when heated, liquefy and flow off the metal.
The second reason why you cannot use lithol, grease, or even higher-quality ceramic and copper lubricants is their interaction with rubber boots. Most lubricants damage the rubber, the boots slip out of their places, and the fingers are left without protection.
What to lubricate with?
Only what the manufacturer calls guide lubricant. Bosch, Liqui Moly and other auto chemical manufacturers have such products. One of the indicators that a lubricant is suitable is high-temperature stability, maintaining properties when heated to at least 200 degrees.
Why can the store offer the wrong thing? Simply because there are other lubricants for calipers, such as ceramic and copper anti-squeak lubricants, which are applied to the metal plate of the pads. Yes, they do their job perfectly, but they are not suitable for fingers!
Where to perform caliper inspection in Moscow?
A center for diagnostics and repair of passenger cars in Moscow, Universalservice24, offers car owners in the capital repair and caliper repair services. All work related to caliper overhaul and repair in Moscow is carried out by our specialists in strict accordance with the car manufacturers’ regulations, thanks to which we provide a warranty for the repaired spare part. It is worth noting that the work is carried out using an extensive tool base by experienced specialists who are well familiar with all the subtleties and nuances of this process. The presence of specialists on staff with high professional qualifications and extensive practical experience, as well as a modern tool base, gives us the opportunity to repair calipers
in Moscow in the shortest possible time.
Advice for motorists
There are several rules, the implementation of which will help extend the life of calipers to the 150-200 thousand kilometers declared by the manufacturer.
- Don't skimp on brake fluid. The interval for its replacement is every 2 years, and there is no need to think that “it will do.” It won't do. Sediment accumulates in the fluid, which gradually kills both the master cylinder and caliper pistons.
- When replacing pads, inspect the calipers (or have a service technician do this). Ideally, you need to service the caliper itself: replace the lubricant, check the condition of the rubber parts, inspect the pistons. Then the first signs of problems can be caught at the very beginning and the situation can be prevented from worsening.
- Any sound from the brakes is a sign of a problem. The appearance of a squeak may be caused by natural wear of the pad, or it may be a symptom of its misalignment. In any case, you need to respond immediately to a squeak, squeal, or knock.
- Any problem with braking is a direct trip to the service station. It's better to pay for diagnostics and repairs than for someone else's bumper.
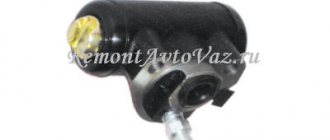
Checking the caliper guides (“fingers”) of Lada Kalina (VAZ 1118)
If after these measures the problem remains, you can proceed directly to caliper diagnostics . In this case, the cylinder and the guide pins (“fingers”) deserve special attention, along which the caliper moves when the piston exits the cylinder to compress the pads. The first sign of poor performance of the guides is their heavily contaminated surface, which impedes the movement of the caliper. This is also evidenced by uneven wear of the inner and outer front brake pads - it should not exceed 5 mm.
If you find similar symptoms, it is better to replace the caliper guides. Their cost together with all the washers and anthers is low and will not require any special expenses. The operation to remove them and install new “fingers” will take no more than an hour, provided that all four guides are replaced. If desired (or lack of spare parts), you can try cleaning the old guides.