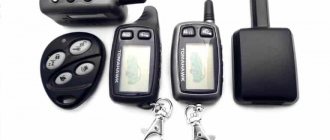
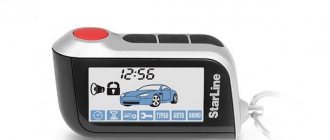
The new generation car security system SHERIFF ZX-925 provides the highest degree of security, thanks to the presence of six service channels with the ability to change the logic of their operation.
There is also a pager with a TFT screen, vehicle theft protection systems, both active and passive types. A pager (two-way communication key fob with five buttons) allows the car owner to receive signals from him about the acceptance and execution of various commands. After each activation of the protective system, information about it is displayed on the key fob screen. The delivery set of the protective system also includes instructions.
with INCREASED RANGE...
Sheriff, Zx-925 sheriff (with
- Image
- Text
SHERIFF
ZX-925 SHERIFF
(With
EXTENDED RANGE)
CAR SECURITY SYSTEM WITH SIX
SERVICE CHANNELS WITH REPROGRAMMABLE
OPERATION LOGIC, INTERACTIVE LCD PAGER,
SYSTEMS OF PASSIVE AND ACTIVE PROTECTION AGAINST THEFT AND CAR hijacking
INSTRUCTIONS FOR USE
IMPORTANT!
The system has six independent (two of them are remotely controlled) functionally reprogrammable channels. These are six physical wire lines with programmable
logic of operation, providing flexible changes in system functions to control
turning off turbocharged engines (turbo timer), searching for a car in a parking lot, remotely turning off the system siren in “NIGHT” mode with a control channel for an additional pager or mobile communication device, car security service with running
engine without an ignition key, control of additional devices according to specified
time intervals.
An interactive pager (five-button two-way communication key fob) provides real reception of signals confirming the execution of a command by the system. During one security cycle, the system provides information about each triggered sensor on the LCD display of the two-way communication key fob.
To ensure the highest level of protection for your vehicle, this security system
The theme has a programmable manual shutdown function. In some cases, for example
when the system remote control key fob transmitter is lost or does not work (or perhaps your transmitter key fob is blocked by the device’s powerful radio emissions
type "jammer"), you may need to manually install or manually remove the system
from security. Read the sections “Manually arming the system” and “Manually disabling
security system”, which describe in detail the procedures for arming and disarming the system in such a situation. In addition, this manual contains a table in one section of which the system functions are used, including the selected shutdown method.
system, and additional equipment installed in the vehicle. Although the “Secret Code” function is not programmed by default (to disable the system, you must
you can enter a personal code), the switch can also be selected to disable the system
Valet. See what method was programmed to shut down your system,
and review it in the appropriate section of this manual.
If the F13 “Secret Code” function is programmed, then recording the codes of new key fobs,
changing the secret code, changing the status of programmed functions from F12 to F28, emergency disarming of the system, turning off the system when triggered in modes
Anti-Hi-Jack is only possible after entering the secret code! Changing Function Settings
F1 to F11 does not require entering a secret code and is always available.
Prepared by AutoSet. Car alarms and car electronics.
www.AutoSet.ru
Installation instructions for main components
ATTENTION! A completely simple way to reduce fuel consumption has been found! Don't believe me? An auto mechanic with 15 years of experience also didn’t believe it until he tried it. And now he saves 35,000 rubles a year on gasoline! Read more"
Head unit
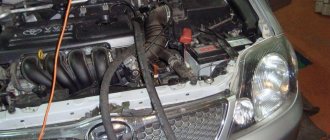
Initially, you need to decide on the installation location of the modules (for example, behind the dashboard of a car) and attach the head unit with screws. You can also attach any of the system modules using other fasteners, such as ties.
The main thing that should be said is that you should not install the security system in the same compartment with the power plant, in other words, under the hood, since the housing of the security system head module is not sealed. You should not install alarms on various electrical components of the machine. They can emit a wide variety of radio interference, which can adversely affect the communication range between the head module and the two-way transmitter.
Siren installation instructions
To install this module, find the required location under the hood. The siren should be inaccessible, as well as its wires. It should not be accessible from under the hood or from under the wheel arches. There should be no heating or moving mechanisms near the alarm horn. The siren itself must “look” down to allow water to drain from it, and the horn horn must point away from the engine. This way the siren signal will be as loud as possible. Using screws, secure the module to the selected location using a special bracket.
Limit switch installation instructions
The limit switch, which is supplied with the system, is designed to protect such opening parts as the trunk (in hatchback and station wagon cars) or the engine hood. Be that as it may, this switch must be installed on a surface that is connected to the negative terminal of the battery.
The limit switch must be placed where water does not drain or moisture accumulates. There is no need to place it under the fenders or luggage compartment drains. Install the switch in places protected by a rubber seal. The limit switch can be mounted on the bracket included in the kit or on a 6 mm hole, which you drill yourself in the right place.
The switch is installed in such a way that when closing a door, hood or trunk, its moving contact moves no less than 6 mm, and, accordingly, when opening, it must be completely released.
LED indicator installation instructions
The LED indicator is installed in the antenna module and consists of two parts. The LED indicator shows what position the protective system is in. It is also designed to warn and deter potential criminals. The antenna module, and with it the indicator, are placed in such a place that it can be clearly visible both from the outside of the car and from the driver’s seat.
Valet key
Install the Valet button where access to it will be as convenient as possible. It is best to hide the button, this will increase the degree of security and make it more difficult for hijackers. The Valet key can be installed on the dashboard of the car or under it, directly next to the driver.
Shock sensor
This sensor must be installed on a flat and solid plane, which lies between the power unit compartment and the passenger compartment, on the passenger side. The sensor must be secured using two self-tapping screws. You can also use cable ties.
Wherever you install the sensor, access to it must be free in order to adjust the potentiometer when setting up the system.
Table of contents
Page 2
- Image
- Text
Table of contents
Standard System Features 3 Programmable System Features 4
Controlling the operation of the ZX system - 9 2 5 SHERIFF
4
Functions of the transmitter key fob buttons 4 Low battery indicator, battery replacement 6 ZX system control commands - 9 2 5 SHERIFF from the transmitter key fob 7 Programming the operating modes of the two-way communication key fob transmitter 10 Confirmation signals of the ZX system two-way communication key fob - 9 2 5 SHERIFF 11 Modes operation of the security system LED indicator 12 Siren signals 12
Operating modes of vehicle side lights 12
Additional commands for arming the system
12
Passive (automatic) arming of the system 12 Manual arming of the system 13
Car protection in security mode
13
Car protection when the security mode is on 13 Car protection when the security mode is on and the engine is running 14 Warning signals about an attempt to break into the car 14 Anti-Hi-Jack mode (protection against theft and seizure of the car)
[for all VAZ cars with an electronic speed sensor)
14
Disabling Anti-Hi-Jack mode 15 Passive engine blocking (immobilizer function F17)
15
AV FUNCTION - disarming the system in two stages 16 Active protection against car theft and hijacking in monitoring mode when
engine running (active anti-robbery transponder) - function F14 16
Disabling the system
18
Valet push-button switch 18 Valet mode (temporarily disabling the system) - on/off 19 Manually disabling the security system using the Valet switch 19 Disabling the system using a personal code 19
Additional service functions for system management
20
Additional (emergency) call from a pager 20 Automatic door locking when the ignition is turned on (function F 3 / 2) 20 Automatic door locking when the vehicle starts moving (function F 3 / 3)
(for all VAZ cars with an electronic speed sensor) 20
Automatic door locking when the vehicle's STOP pedal is pressed [function F3/4). .20 Automatic door unlocking when the ignition is turned off (function F4) 20 Remote control of additional devices (CH 2) 21 Remote control of additional devices (CH 3)
21
Remote control of additional devices (CH 4) 21 Remote control of additional devices (CH 5) 21 Remote control of additional devices (CH 6) 22 Turbo timer function .. 22 Remote control of the siren (on/off, night mode of operation of the system 22
System programming
…………………………………………………………………………….23
Programming a personal code for disabling the system 23 Programming codes for new transmitters (anti-robbery transponders) 23 Programming system functions 25
Table of programmable functions of the ZX system - 9 2 5 SHERIFF
26
2 8
System Installation Guide.
— 2 —
Prepared by AutoSet. Car alarms and car electronics.
www.AutoSet.ru
Page 36
Remote engine start. Commands and functions
Engine start control in the ZX 1070 system
The automatic engine start function is integrated into the security system and is an integral part of it. To start the engine, it is necessary to make all the connections of the wires to the vehicle's on-board circuit that provide control of the engine starting function according to the diagram in the installation instructions.
Standard system functions...
Page 3
- Image
- Text
Standard System Features
• Dynamic code Super KeeLoq Pro II.
•
Separate control of security on/off modes.
• Possibility of programming up to four transmitters.
• Active protection system against car theft and hijacking.
• One four-button programmable transmitter with built-in interactive pa- per
jerome and LCD display.
• One three-button programmable transmitter. • Valet push-button switch.
• Sound confirmation of
Valet mode.
• Two-level shock sensor.
• Small-sized powerful siren. • Built-in side light control relay. • Built-in universal power output for controlling door locks. • Control of the car's central locking in Valet
and with the engine running.
• Three circuits of complementary interlocks
(installation of an additional relay is required).
• Two connectors for connecting sensors (impact, volume). • Six programmable channels
for controlling vehicle service devices
(additional blocking, turbo timer, trigger channel, timer channel, stack control
lifter, courtesy light output, etc.).
• Two remotely controlled channels by service devices. • Security when the engine is running.
• Remote control of the siren channel in security mode (disable/enable). • Additional (programmable) channel for controlling an external pager/executor
device.
• Additional (programmable) input trigger of negative polarity. • Manually setting the system to full security mode
at any time using the button
Valet
even without the ignition key.
• Silent arming and disarming of the system. • Temporary disabling of shock sensors. • Temporarily disable the passive arming function. • Disabling the alarm from the remote control. • Remote control panic
in all modes.
• Sound and light warning of system activation. • Indication of alarm channels. • Sound and light confirmation of the execution of commands from the two-way communication key fob. • Limitation of false positives. • Limited alarm time. • Perimeter security. • Bypass the fault zone. • Multifunctional LED indicator. • Trigger memory. • Status memory VALET, DISARM
(disarmed),
TRIGGERS
(state of inputs
protection) when the system power is turned off.
• Immediate alarm when power is turned off/on
systems in ARM mode (security).
• Disabling the passive engine blocking mode from the key fob transmitter. • Trunk opening control
with temporary shutdown of sensors and channel
hood/trunk security.
-3-
Prepared by AutoSet. Car alarms and car electronics.
www.AutoSet.ru
Turbo timer option and “Sheriff” signaling
As stated in the instructions provided by the manufacturer, you first need to determine where contact “15/1” is located in the car. It is this contact that receives voltage when the ignition is turned on, as well as when the starter is started. The “IGN1” cord coming from the main signal connector is connected to contact “15/1”. And then, if a turbo timer will be used, connect the “IGN2” cord:
The switching relay, controlled by one of the programmable outputs, will close for 3 minutes (option F1). The relay coil is connected to the Disarm output, but channel CH6 can also be used.
Now see what the instructions say about programming the following two pins: CH5, Disarm. Only the second of them can control the relay, the contacts of which duplicate the turbo timer:
Channel CH6 is also provided to implement the timer. This means that it is better to leave the default values. If required, you can connect a blocking relay to the Disarm output, and a pager (alarm transmitter) is connected to wire CH5.
In theory, a car alarm can be equipped with two Disarm outputs, from which they control not one normally open relay, but a set of them. Program the system as you need it.
Programmable system functions...
Page 4
- Image
- Text
Programmable system functions
• Programmable active protection function
from car theft and seizure.
• Programmable immobilizer function
(passive engine blocking).
• Programmable personal code
shutdown and system management.
• Programmable delay for
arming the system:
5 / 1 0 / 3 5 sec.
Comfort
function (close all - impulse to close the programmable
my duration is 1 0 / 1 5 / 2 2 / 3 0 sec
).
• Multi-channel programmable Anti-Hi-Jack
(remote start / when
turning on the ignition and actuation of the DOOR(+) or DOOR(-)
or
when the car starts moving).
• Programmable door lock control pulse duration: 0.5/1/3.5 sec.
•
Double impulse
for unlocking doors.
• Programmable repositioning function
on guard. • Programming the central locking control mode when re-arming.
• Passive/active
arming the system.
• Programmable automatic
door locking during passive arming
on guard.
• Programmable automatic locking
doors when the ignition is turned on.
• Programmable automatic
door locking when starting to move.
• Programmable automatic
door locking when you press the “STOP” pedal (F28).
• Programmable automatic unlocking
doors when the ignition is turned off.
• Output CH2
- low-current reprogrammable controlled channel of additional
devices: programmable time intervals, service pulses, electrical control
trunk tropic drive, trigger output 1, trigger output 2.
• SNZ output
- relay reprogrammable controlled channel of additional devices -
devices: programmable time intervals, service pulses, electrical control
trunk drive.
• CH4 output
— low-current reprogrammable channel of additional devices:
programmable time intervals, service impulses, window control
com, polite backlight output.
• Output DISARM(-)
— low-current reprogrammable channel of additional devices:
HP-type additional blocking output (DISARM(-)), pager control output or
other actuators.
• Output CH5
— low-current reprogrammable channel of additional devices:
HP-type additional blocking output, turbo timer 1, service pulses.
• CH6 output
— relay reprogrammable channel of additional devices: output
“polite” backlight, turbo timer, remote radio-controlled service-impulse channel
owls (remote switching on/off of the channel in real time using an alarm clock).
• Programmable function to disable “false” alarms of the system.
Programmable function for controlling the vehicle ignition mode by pager
in any state of the system.
MANAGEMENT OF THE ZX-925 SHERIFF SYSTEM
Functions of transmitter key fob buttons
The transmitter key fobs included with this security system use
the most advanced and reliable form of radio frequency transmission ever produced
currently car security systems. Some of the modern experienced
car thieves use devices known as code sniffers
grabber), which allow you to receive and store in memory the signal transmitted by the device
remote control of the car security system. After the driver leaves
This code is used by the hijacker to disarm the system.
Unlike the remote control devices described above, key fobs-transmitters,
included with your security system, change the code of the transmitted signal every
the first time the button is pressed, so when the hijacker plays back the intercepted
signal from your key fob transmitter, the security system simply will not respond to it.
— 4 —
Prepared by AutoSet. Car alarms and car electronics.
www.AutoSet.ru
About connection and programming
It's one thing to connect a car alarm, but quite another to deal with its programming. Why program the system? Let's try to understand this issue.
When purchasing a car in “showroom packaging”, you will have to install a fresh anti-theft system on it. In this case, the need for further reconfiguration of the program disappears by itself, of course, if no disagreements of a family nature arise.
Problems arise when you become the owner of a used car. After all, many cars have an alarm system, most likely, and your “new thing” is no exception.
So what's going on? The former car owner hands over the keys to the vehicle, one or two key fobs for the alarm and, smiling, waves his hand. What if, “by pure chance,” he had another communicator lying around at home? Who will guarantee the honesty of a person who can come at night to disarm a car and drive away with it? That's right, no one! Our modern world makes us increasingly lose faith in the presence of a conscience in some people. Therefore, the best solution in this situation is to reprogram the car alarm. Then all other “secret” keychains will lose any power.
Where do we start? First you need to switch the security system into service mode. Or it is also called Valet. With its help, the car owner can carry out maintenance of the alarm, force it to deactivate, launch additional options and attach key fobs to it.
To activate Valet mode, you must press a certain key combination called a secret code. This protection is designed to reduce the risk of illegal access to control.
If the code value has been entered at least once, then the next time the alarm settings will be available only if the code is entered correctly. Usually the manufacturer indicates it in the technical documentation, but if it was changed once and forgotten, then you have a direct route to the service center.
Next, we have prepared for you brief instructions on programming key fobs. To make it easier to understand, let's label the remote control keys as follows:
- 1 – activation of security mode;
- 2 – deactivation of the security mode;
- 3 – setting channel ch2;
- 4 – setting channel ch3;
- 5 – adjustment of remote control signals.
Another point that should not be overlooked is one important rule. It lies in the fact that the interval between two operations should not be more or less than five seconds. By exceeding the time, you provoke an exit from the settings mode. The same can be achieved by turning off the ignition. The system will notify you of the termination of programming with one short and long signal.
Well, finally we got directly to the configuration algorithm:
- We deactivate the alarm, get into the cabin and turn on the ignition;
- Press the service button three times. We will understand the successful start of programming by a single signal;
- We repeat the steps until the system produces a series of short and one long signals;
- Hold down key 1 until we hear one long signal from the device;
- We repeat all the steps with all the necessary remote controls;
- Turn off the ignition, wait 5 seconds - this completes the setup.
And now a few words about creating a new secret code:
- Disable the security system, enter the existing code;
- Turn on, turn off and turn on the ignition again;
- Using the service mode key, enter the first digit of the code, then turn the ignition off and on again;
- Repeating the same thing, set the second digit;
- Press the service button three times. We are waiting for a series of short signals and one long signal from the system;
- On all remote controls, press key 1 one by one and wait for a sound confirmation from the device.
The main thing to remember is that by entering a new code, you automatically erase the old one. This means that the anti-theft system will not be able to work with key fobs that have not been updated.
If the button on your key fob...
Page 5
- Image
- Text
If the button on your transmitter key fob is pressed more than 30 times while it is outside
control limits of the security system (for example, children are playing with it), the system will not
respond to the call of the key fob transmitter when you decide to use it again.
You need to synchronize your key fob transmitter with the security system receiver.
To do this, simply press the system arming button twice within one second.
arm/disarm the system on the transmitter key fob. After this the system will again be
respond to all remote control commands.
System arming button (ARM) System disarming button (DISARM) Programmable channel control button
CH2, control system modes when arming/disarming the system
Programmable channel control button
SNZ, control additional channels
Button for changing pager signal parameters, turning off sound and light
pager alarm
LCD display indicator combinations
3+(4) Control signal transmission (in/out of range). 5+6+7 Security mode: locking/unlocking. 8+9 Bypass the main shock sensor area.
9+10 (flashing) “Alarm triggered by strong impact” or
“arming by bypassing a faulty shock sensor.”
11 (flashing) Anti-Hi-Jack. 11 Anti-violence function enabled
car seizure.
12 (flashing) “System triggered by limit switch
door" or "arming with bypass of faulty
door zones."
13 Vibrate mode is turned on. 16+15 (flashing) Battery full/battery low. 14 Set/cancel switching on CH6 by timer. 14(flashing) Output CH6 is activated. 17 (flashing) Pager call. 18 Power saving mode (if the main system is removed from
protection, its current consumption is zero).
22 Valet mode is enabled - the icon is always shown on the display while the system is in Valet mode. 24+23 Standard alarm mode. 24+25 Silent alarm/night mode. 23+24+19 (flashing) Arming when the car engine is running. 26 (flashing) “The system is activated when the ignition is turned on.” 27+21 (flashing) “Trunk/hood open” or “system triggered by limit switch
hood/trunk" or "arming by bypassing the faulty hood/trunk area".
28 (flashing) Indication of vehicle side lights. 29 Set the CH6 installation time.
LCD display
— 5 —
Rice.
1
Prepared by AutoSet. Car alarms and car electronics.
www.AutoSet.ru
Equipment and cost of alarm Sheriff 35 pro
Car alarm cenmax: how to install and instructions for use
There are several variants of this model. Their main difference lies in the appearance of the control panel, which can be made of different materials and have a different body color. Thus, the sheriff aps 35pro t4 ruby car alarm is distinguished by a red steel remote control housing, and the same model with silver metal is produced under the name Silver. The cost of such auto protection is about $35.
The sheriff aps 35pro t7 car alarm has a new key fob design that fits comfortably in your hand. The remote control now has a silent security button and a metal mounting ear, ensuring the durability of the device. The device also has an additional programmable channel. At the same time, the cost of t7 is no different from its predecessors. It also fluctuates around $35-40, depending on the region of sale and point of sale.
The standard equipment of the Sheriff Aps 35 Pro car alarm includes the following elements:
- Control module with fasteners
- Two remote controls
- Alarm bell (may not be available on some options)
- Dual-zone shock sensor
- Valet button with connection wires
- Door terminals
- Set of wires with plugs
- Fasteners
- Engine lock relay
- Glass sticker
- sheriff aps 35 car alarm instructions in russian
Attention: In order to increase the battery life of the two key fobs...
Page 6
- Image
- Text
Attention
In order to increase the battery life of the two-way communication key fob, the presence of communication between it and the central unit of the system is controlled manually. There is no confirmation sound signal from the two-way key fob if it is found -
is outside the system's coverage area or does not receive a command confirmation signal. To check the presence of communication with the key fob-pager and the system, issue a command by pressing any button (the arming button is best suited), except F. If communication is present, the system will “return” confirmation of the command with the corresponding sound signal
Otherwise, after 3 seconds an icon indicating no connection.
Low battery indicator, battery replacement
The low battery indicator is presented on the LCD display in the form of an icon with a three-element indicating
body of the state. As the battery discharges, the number of visible elements decreases, and you may also notice a decrease in the range of the transmitter. To replace the batteries in a five-button transmitter key fob:
• set the lock to the OPEN position and remove the battery compartment cover; • remove the discharged battery; • install a new battery (type GP23A/GP24A), making sure that the polarity is correct; • carefully place the cover in its original place; • set the lock to the LOCKED position.
To replace the batteries in a four-button transmitter key fob:
• unscrew the small screw on the back of the transmitter housing and separate the halves
transmitter housing with a 10 kopeck coin;
• remove the discharged battery; • install a new battery (type CR-2032), making sure that the polarity is correct; • Carefully install the cover without damaging the LED or switches on the mounting panel.
board, tighten the small screw on the back of the transmitter housing.
— 6 —
Prepared by AutoSet. Car alarms and car electronics.
www.AutoSet.ru
Why doesn't the alarm remote control work?
You notice that the key fob has stopped responding to your actions. One solution to this problem is to reprogram the remote device. But I can't flash the remote control. Let's look at the reasons that prevent this:
- My battery is almost done. Replace the battery;
- damage to the contacts inside the remote control. Fix it yourself or contact a service center;
- exposure to interference that disrupts the connection between the key fob and the control unit. Move the car to another location.
Find out how to flash a Mongoose alarm key fob.
ZX system control commands...
Page 7
- Image
- Text
ZX-925 SHERIFF system control commands from key fobs transmitters
Table 1
FUNCTION
Arming
Disarming
Close/open doors in Valet mode or with the ignition ON Arming with the engine running
Disarming with the engine running
DESCRIPTION OF ACTIONS
Press and release button 1
(see Fig. 1).
1. The vehicle's parking lights will flash once. 2. The siren will emit one short confirmation beep. 3. The LED indicator on the car's dashboard will begin to flash slowly. Press and release button 2
(see Fig. 1).
1.
The LED indicator will turn off.
2. The vehicle's side lights will flash twice. 3. The siren will give two short confirmation beeps. Note
If the F5-automatic re-arming function is enabled, then when the system is disarmed, the LED indicator will begin to flash quickly, indicating that if no door is opened within 20 seconds, the system will arm the system. If at least one door is open within 20 seconds, the LED indicator will go out and the system’s arming mode will be canceled. If function F22 - passive arming function of the system is enabled, and F5 is disabled, then the LED indicator
will go out. The system goes into waiting mode for any door to open/close. If you open and then close any of the vehicle doors, the system's 30-second auto-arming timer will begin. The LED indicator will begin to flash quickly. Note
An attempt to disarm the system after the system has been triggered (the alarm siren has turned on) will only turn off the audible alarm. The system will not be disarmed. In order to disarm the system, you must once again
Press the arm/disarm button on the key fob transmitter when the system does not sound an alarm.
Press and release buttons 1 or 2
(see Fig. 1). If there is an additional door lock/unlock circuit, the vehicle doors will be locked/unlocked.
Press and hold button 1 for 3 seconds until you receive a confirmation signal
(see Fig. 1).
1. If there is an additional door lock/unlock circuit, the vehicle doors will be locked. 2. The vehicle's side lights behave according to function F8. Briefly press and release button 2
(see Fig. 1). The LED indicator will turn off. If the alarm was triggered in your absence, the LED indicator will flash according to the code, indicating the zone protected by the system that was triggered in your absence. The vehicle's parking lights will flash twice. The siren will sound two short beeps. If there is an additional door lock/unlock circuit, the vehicle door locks will be unlocked.
— 7 —
Prepared by AutoSet. Car alarms and car electronics.
www.AutoSet.ru
How to install?
- The installation procedure begins with installing the control unit in a place inaccessible to others. For example, you can place it behind the glove box or in the free space under the heater or air conditioner control unit. If there is space behind the dashboard, you can install the module there. Do not place it in the engine compartment or trunk due to high temperatures, possible interference and moisture. To install the unit behind the dashboard or under the heater control module, remove the plastic interior trim. The device is fixed using ties or bolts included in the package.
- The next step will be the installation of the siren; the device is installed in the engine compartment. It must be placed as far as possible from the power unit. Point the siren's horn to the side or in the direction of travel of the car, the main thing is that it is not directed downwards. Otherwise, dirt from under the wheels of the car may get on the siren. The wires from the device must be pulled into the cabin to the control module through a special technological hole.
- Then the hood switch is installed. This element is fixed on a metal surface, which must be securely connected to the vehicle body.
- Next, the shock controller is installed. This element is usually installed by specialists in the free space between the engine compartment and the interior of the car. There is a special jumper in this place. The controller must be securely fixed so that it does not operate without reason due to vibration.
- We recommend installing the LED indicator on the windshield. Its presence will allow attackers to know that the anti-theft system is activated.
- Limit switches are installed on all car doors, and the device is also mounted on the trunk door. Installation will require removal of the trim; the dismantling procedure is individual for each car.
- The antenna adapter is mounted on the windshield. When installing, ensure that the transceiver is placed as far away from metal as possible. The presence of metal components near the antenna will deteriorate signal reception and transmission, and interference may occur.
- Then you need to install the service station. This key can be used to configure and program the system, as well as emergency shutdown. An attacker should not gain access to the Valet service button, since this way he can hack the alarm. Place the key in an inaccessible location. It is advisable not to place it next to the control unit. When installing, keep in mind that if the need arises, you will have to quickly access this element.
- The final step will be connecting all components. Electrical circuits are routed from sensors, switches, antenna and service button to the control unit. Connection to the control module is carried out in accordance with the diagram included in the kit. When the components are connected, all interior trim elements are reinstalled.
Auto electrician Sergei Zaitsev spoke in detail about how the procedure for installing the Sheriff anti-theft system is carried out.
Valet Push Button Switch
The Valet key makes it possible to briefly deactivate the alarm system, so as not to hand over the remote control to a service station or parking attendant. While the alarm is in the Valet state, all security systems are turned off, except for remote control of the “Panic” mode and unlocking the door locks.
Deactivate the security system from the key fob button or Valet key, you can also do this by entering your personal code. Turn on and then turn off the ignition system. Within five seconds, press and throw the Valet key. The LED on the panel will turn on continuously. The system switched to Valet mode.
Turning off Valet mode
- Turn the ignition system on and then off.
- Within five seconds, press the Valet key.
- The LED on the panel will go off.
- The system returns to normal mode.
Alarm systems "Sheriff" have a high-quality service base, their repair will not cause difficulties for specialists, and the extensive service network will not force you to send a spare part or go to another city. Expert technicians will carry out repairs, check compatibility and quickly fix the problem. Sheriff systems are very reliable and most often repairs are simply not necessary.
The American Sheriff alarm system will reliably protect your vehicle from theft and other criminal attacks. An expanded set of functions will make driving more comfortable. The main drawback is the range of the main communicator, which in practice turns out to be less than stated.