Repair manual for VAZ 2107 Zhiguli
- Repair manuals
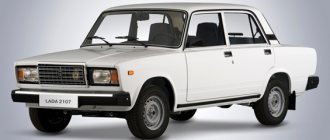
- Repair manual for VAZ 2107 (Zhiguli) 1982+.
General information about the car.
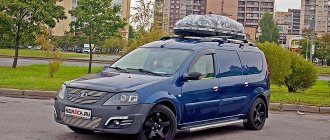
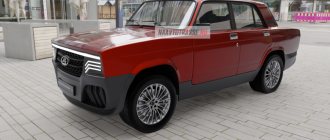
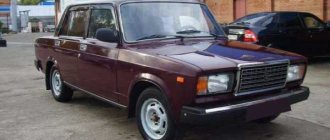
VAZ-2107 Zhiguli/Lada 1500SL/Lada Riva (“seven”) is a rear-wheel drive four-door sedan produced by the Volzhsky Automobile Plant with an improved external design. At one time, this car earned the name “Russian Mercedes” in the southern republics of the former Soviet Union for its characteristic appearance. The car was created on the basis of the base model of the family - the VAZ 2105. Just as the “six” was once considered more prestigious than the VAZ-2103, so the VAZ-2107 Zhiguli/Lada 1500SL/Lada Riva (“seven”), produced since 1982, is compared with the “five” was exclusive in itself. On the other hand, the designers quite justifiably designed a “luxury” version of it based on the purely “utilitarian look” of a small car that was cheap to produce. The differences are already noticeable in appearance: a different design for the front part of the hood with stamping to match the metal chrome radiator grille (under which the hood rusts beautifully), new rear block lights. Inside, the car was fully consistent with the then ideas about modern aesthetics (early 1980s): a “glare-free” instrument panel with a tachometer, additional service sensors and instruments. Anatomical seats with improved finishing quality look more solid compared to the same type of VAZ-2105: the front backrests are made integral with headrests, and the rear backrest has a special folding armrest. But for such equipment, sellers (and previously the state) ask for a larger amount than even for the classic VAZ-2106 or the front-wheel drive three-door hatchback VAZ-2108. The “Seven” has improved passive safety, good all-round visibility, limited, however, by the rear pillars and high seat backs, but the advantages of dynamic engines are negated by poor assembly and the lack of anti-corrosion coating on the body. The scourge of all rear-wheel drive Zhigulis is also depressing - the high loading height of the trunk, problems with the engine block, broken camshaft belts and loose bolted joints of cars produced between 1990 and 1996. Initially, VAZ-2107, -21072, -21074 cars were equipped with four-cylinder carburetor engines of models 2103, 2105 and 2106, respectively. These engines can be found with unified (since 1987) four- and five-speed (VAZ-2112) gearboxes. The five-speed gearbox for the VAZ-21074 was slightly modernized in 1992. Since 1990, engines have been equipped with connecting rods of a new design, and four years later, VAZ-21011 engines with a camshaft chain drive began to be installed on the less common modification of the VAZ-21072. All engines for the “Seven” since 1995 are not equipped with a PC-492 breaker relay, which can be determined when braking with the parking brake by the constant glow of its indicator lamp. For the European market, in accordance with environmental protection requirements, the VAZ-21073 sedan has been produced since 1991, equipped with a 1.7-liter engine producing 84 hp. with central injection system and catalytic converter. For the Chinese market, the VAZ-2107 model of the N71 series was produced with a 66-horsepower 1.45-liter short-stroke VAZ-21033-10 engine running on A-76 gasoline (the rest of the “sevens” only run on gasoline with an octane rating of at least 91). Also, on special orders, the plant produces expensive VAZ-21079 sedans with a high-speed Wankel rotary piston engine, which, if it breaks down, is very rare. True, in this case it can only be repaired at a VAZ branded service center. Ordinary consumers probably don’t need such a voracious and unstable car at high speeds. The spring suspension of all wheels is quite energy-intensive and comfortable when driving. However, creaks of the instrument panel, outdated ergonomics of the workspace, and non-linear coasting (with little information steering, you constantly have to control the trajectory of movement) are annoying. Large and uneven gaps between the panels of the doors, hood and body - these problems widen over time due to the natural wear and tear of the car and fatigue damage and deformation of the power elements of the body. Sellers pass off many of the cars sold on the market as re-exported, pointing to the marking with the letter E on the headlights, windows, tires, rear-view mirrors or the car's nameplate. However, the letter E was placed at the factory after special homologation tests, and the number after the letter indicates the country whose rules these components and assemblies comply with: 1 - Germany (Germany); 2 - France; 3 - Italy; 8 - Czechoslovakia, etc. It is also not recommended to purchase cars older than eight years (since 1990). In general, the VAZ-2107 can rightfully be called the most advanced and comfortable rear-wheel drive domestic sedan, besides, quite a lot of different companies are engaged in tuning “VAZ” models, and the “Seven” can be equipped with all the bells and whistles that increase comfort or dynamics, and for “just ridiculous money” "compared to foreign cars. Since 2001, a new model configuration program was adopted, for the VAZ 2107 model there were versions - “standard” and “norm”, for the VAZ 21074 - “norm” and “luxury”.
↓ Comments ↓
1. Vehicle operation and maintenance
1.0 Operation and maintenance of the vehicle 1.1. Vehicle operation 1.2 Vehicle maintenance
2. General information
2.0 General data 2.1 Technical characteristics of vehicles 2.2 Controls and monitoring devices 2.3. Ventilation control and interior heating
3. Engine
3.0 Engine 3.1 Removal and installation of the engine 3.2 Disassembling the engine 3.3 Possible engine malfunctions, their causes and methods of elimination 3.4 Engine assembly 3.5 Bench tests of the engine 3.6 Checking the engine on a car 3.7. Cylinder block 3.8. Pistons and connecting rods 3.9. Crankshaft and flywheel 3.10. Cylinder head and valve mechanism 3.11. Camshaft and its drive 3.12. Cooling system 3.13. Lubrication system 3.14. Supply system
4. Transmission
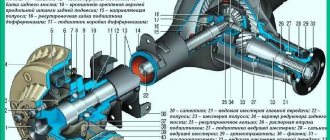
4.0 Transmission 4.1. Clutch 4.2. Gearbox 4.3. Cardan transmission 4.4. Rear axle
5. Chassis
5.0 Chassis 5.1. Front suspension 5.2. Rear suspension 5.3. Shock absorbers
6. Steering
6.0 Steering 6.1. Inspection, check and adjustment of steering 6.2. Steering mechanism 6.3. Steering rods and ball joints 6.4. Swing arm bracket
7. Brakes
7.0 Brakes 7.1. Checking and adjusting the brakes 7.2 Possible malfunctions of the brakes, their causes and methods of elimination 7.3 Bracket for the clutch and brake pedals 7.4. Vacuum booster 7.5. Brake master cylinder 7.6. Front brakes 7.7. Rear brakes 7.8. Rear brake pressure regulator 7.9. Parking brake
8. Electrical equipment
8.0 Electrical equipment 8.1 Electrical equipment diagram 8.2. Battery 8.3. Generator 8.4. Starter 8.5. Ignition system 8.6. Lighting and light signaling 8.7. Sound signals 8.8. Windshield cleaner 8.9 Headlight cleaner 8.10. Heater electric motor 8.12. Control devices
9. Body
9.0 Body 9.1. Doors 9.2 Possible body malfunctions, their causes and methods of elimination 9.3. Hood, trunk lid, bumpers 9.4. Body glazing 9.5. Windshield and headlight glass washers 9.6. Instrument panel 9.7. Seats 9.8. Heater and ventilation of the body interior 9.9. Body frame repair 9.10. Paint and varnish coatings 9.11. Anti-corrosion protection of the body
10. Modification and equipment of VAZ-2107 cars
10.0 Modification and equipment of VAZ-2107 vehicles 10.1. Car VAZ-21072 10.2 Car VAZ-21074 10.3. Car VAZ-21073-40
11. Applications
11.0 Appendices 11.1 Appendix 1. Tightening torques for threaded connections* 11.2 Appendix 2. Tools for repair and maintenance* 11.3 Appendix 3. Used fuels and lubricants and operating fluids 11.4 Appendix 4. Basic data for adjustment and control 11.5 Scheme
Bottom repair - patching holes, making sound insulation
Contents
Hide
Bottom repair - patching holes, making sound insulation
Selecting replacement parts
UNDERBODY REPAIR
Do-it-yourself: Processing the bottom of the outside of a VAZ-2107
Hi all! Last year, I accidentally discovered wet noise and cracked vibration insulation under the front seats; winter was coming, so there was only enough time to replace the wet felt. This year I decided to completely inspect the bottom, and at the same time replace the standard Shumka with vibration and add noise to the engine shield, which should have been done when purchasing the car. Since I had already noticed one rotten area in one place on the bottom, I bought in advance at the car market a sheet of metal for patches, 1.4 mm thick, according to the seller. There was also standard 0.8 mm metal, but it seemed a little thin, and the difference in price was small. The sheet was immediately degreased, matted with P280 sandpaper, primed with epoxy primer, then insulated with regular primer and finally coated with 3in1 rust-resistant enamel.
To get to the Shumka, you need to dismantle the front seats and the sofa, remove the shelf under the glove compartment, the console, the sill panels and the seat belt bobbins with locks.
The new felt also turned out to be soaked through, it’s unclear where the water came from again?
The factory Shumka at the rear was also partially wet and had already begun to rot.
The vibration is cracked and peeling in places, especially at the front, there is water and rust underneath.
I scraped it off with a dull chisel and a sharpened spatula, since it had already hardened, so it came off quite well, and I finished it in a couple of hours. The floor underneath appeared to be primed, unlike the doors where it was molded onto bare metal, and was in good condition, especially at the rear, with only a little surface rust in places.
When checking the bottom with an awl, as it turned out, not everything was good. It has rotted over both underbody reinforcements and the jack on the right front, there is sand and rust inside, although the amplifiers are still intact.
At the rear, the floor above the jacks also rotted, and on the left, the threshold was specifically grabbed, in the place where rot was initially discovered on the bottom. The threshold amplifier is completely rotten.
I cut out the rotten metal with a grinder, cleaned out the cavities and coated the inside with heated pushsal, since it couldn’t really be treated afterwards.
Then, I cut out templates from wrapping paper, calculating the overlap on the healthy metal, and then cut out patches from painted sheets using them. Before welding, I removed the controller and battery so as not to burn anything.
First, I grabbed a patch around the perimeter, and then, tapping with a hammer, I welded the seam and, after beating off the slag and cleaning it, covered it with seam sealant, which I used in the anti-corrosion test. Although, of course, it would be better to paint it first.
Read it, it might come in handy: Do-it-yourself beard: step-by-step instructions (photos and videos)
I used a 2 mm electrode, since I couldn’t find a smaller one on sale. In principle, it cooks normally, there were burns only in those places where the metal was rotten and was a bit thin. I tried the 3rd one - it’s already burning through.
At the rear left we had to install two patches from the inside and outside; the threshold amplifier, one might say, was absent there, but I think the patches will serve as something of an amplifier.
Then, I completely removed the remaining vibrations with white spirit, cleaned the rusty areas with a flap wheel, etched the rust with a converter and painted it with 3in1 paint with a roller in two layers with intermediate drying.
Just wait until it all dries well.
UNDERBODY REPAIR
The underbody is more exposed to aggressive environmental influences and mechanical damage than other elements. The poor condition of the roads also has a noticeable impact on its wear and tear. Therefore, the bottom often has to be completely digested. You can do this yourself - all you need is an inspection hole or overpass and good lighting to inspect the bottom. Tools you will need:
- gas welding or semi-automatic welding machine;
- metal scissors;
- Bulgarian;
- straightening hammers.
It is extremely important to find sheet metal of optimal thickness - thin iron is sensitive to temperature (gas welding will be required), and thick iron is difficult to process.
The bottom is restored as follows.
- All problem areas of the floor are cleaned of dirt and rust with a grinder.
- Metal patches are cut out.
- The patches are fixed in the right places and welded.
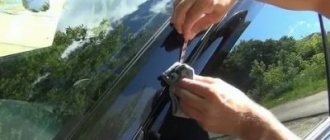
The metal patch on the underbody of the VAZ 2107 must be welded around the entire perimeter
- The seams are cleaned and coated with an anti-corrosion compound.