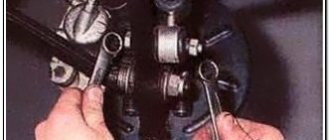
Installing power steering, part 1: Pump
Power steering (power steering) on VAZs appeared only starting with the VAZ 2110, while owners of the VAZ 2109 can only be content with steering without power steering.
Not everyone is ready to put up with this, so people independently install the power steering from the VAZ 2110 (2112) to the “nines”. In this case, we get not only less effort on the steering wheel, but also a rack with a lower gear ratio - 2.8 turns instead of 3.8, which contributes to faster steering. Let's look at how you can do this yourself in this article. This article will consist of two parts, in the first part we will look at the installation of the power steering pump, in the second - the installation of the steering rack under the power steering.
Go. First, remove the generator with bracket:
The pulley for the generator belt needs a ripple pulley, as in the figure below, so if there is another one, then we change it to this one:
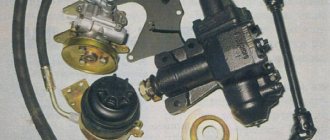
This is what the VAZ 2110 power steering pump looks like together with the bracket:
The bracket needs to be modified, namely, unscrew the engine mount, saw off the ears of its mounting, and also saw off the far right mount (it gets in the way). In the end it should look like this:
Next, instead of the generator, which we will install above, we install a power steering pump:
As you can see, the second bolt will need to be shorter.
Next, we install the generator bracket, in our example it was taken from Kalina, with a tensioner. This is what it looks like assembled with the generator:
The bracket is installed with 3 bolts in standard places:
Our generator is also from a VAZ 2110. To install it, you will have to cut the “TV” a little:
Next we install the generator and belt. You need a belt marked 6PK975 (or 970).
Inspection and identification of defects
Carefully inspect the contents and remember (you can take a photo) what was placed where and how (more attention should be paid to the position of the cylinder). You can twist the power steering pulley and carefully use tweezers to check how the blades move in the grooves of the shaft
All parts should be pulled out without effort, since they do not have any fixations, but the central axis is firmly fixed and cannot be removed.
We inspect the shaft from the reverse side, parts (power steering housing and cover wall) touching them, for burrs or grooves, everything is perfect for me.
Now we remove the entire internal economy onto “clean” rags and begin to study it...
We carefully examine the shaft; all its grooves have very sharp edges on all sides. One of the end sides of each groove has a pronounced sharpness inward, which, when moving the blade inside the groove with a constant slope towards this side, will greatly complicate its movement (this may be the first component of poor power steering performance). The side parts of the shaft grooves are also “sharpened”; this can be felt if you run your finger in different directions along the end (outer circumference), as well as along the side parts of the shaft in different directions. Otherwise the shaft is perfect, has no flaws or nicks.
VAZ 2109: power steering - how to install
The steering wheel is the main mechanism for controlling the movement of the car in the desired direction. Sometimes not only the convenience for the driver, but also the safety of his movement depends on how easy it is to operate. Power steering installed on a VAZ 2109 car will help reduce the force on it by almost half, do not create the need to acquire special driving skills, and do not make visible changes to the design of the car. In a word, these are pleasant changes at a low price. The article suggests that you familiarize yourself with the technology of installing the device yourself.
Types and advantages of power steering
The steering of the VAZ 2114 has undergone significant changes when compared with its predecessors in the form of the first generation Samara. Driving has become really better.
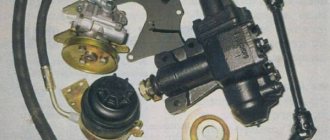
Installation kit
Customers had the opportunity to choose between electric power steering and power steering, that is, electric power steering and power steering. But how do these systems differ from each other, which one should you prefer and why? Let's try to figure this out.
Electric booster
Electric power steering operates using pulses of electrical current. This is a rather complex system in which each individual part has its own important role. Because of this, when at least one unit fails, the operation of the entire device is disrupted, it can completely stop working.
Electromechanical amplifier circuit
The task of the car owner whose car has an EUR installed is to constantly monitor the condition of the unit. A special controller is responsible for the operation of current pulses. With its help, the driver can independently set the degree of gain.
The EUR performs several tasks.
Article on the topic: Complete list of VAZ 2114 sensors: name and location
Power steering
The hydraulic booster includes a large number of elements that require not only constant monitoring, but also careful handling.
The operating principle of the power steering is based on the interaction of the steering with the oil fluid, which is contained in a special container. This is where the name of the type of amplifier comes from, since the work is based on the force of the working fluid.
Despite the rather complex technology, power steering is effective, safe, provides comfortable control, and allows you to control the behavior of the car even if the front wheels break down.
Alas, the hydraulic booster is not without its drawbacks. The main one is frequent breakdowns. They arise mainly due to leakage of working fluid.
The functions of the power steering are as follows:
What is power steering VAZ 2109
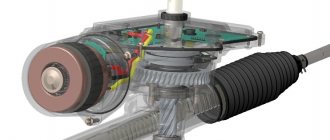
On the first models of VAZ 2109 cars, power steering was not installed. The driver has to mount the unit additionally. It consists of two parts:
- The source of energy, its role is played by a hydraulic pump.
- An actuating mechanism that is usually combined with the steering rack. The general view of the device is shown in the photo.
Installation of power steering VAZ 2109
Before mass use of the device, manufacturers tested the car, which showed:
- When moving the car with numerous turns in a limited space, the steering wheel rotated easily; it was necessary to turn it at a smaller angle than on a car without power steering.
- When driving around the city, after a little skill, the driver only gets pleasure from driving the car.
Tip: When turning the steering wheel at a larger angle than the driver expects, the power steering allows the steering wheel to be turned to the desired angle, the car will easily fit into a smaller radius.
- When driving on a free area, the number of steering wheel turns is three and a half from one stop to the other, with the hydraulic booster three and one third are enough.
- A change in the steering gear ratio led to more precise vehicle control.
- The steering works well at very low speeds in parking mode. Very little effort is applied to the steering wheel.
- Excellent results were obtained when moving at extreme conditions. Increasing speed resulted in a slight increase in steering effort, but feedback was good.
How to install power steering on a VAZ 2109
Instructions on how to install power steering on a VAZ 2109 indicate what is needed:
- Purchase a power steering kit, with all the components: a pump, a special steering gear, a pulley, a hydraulic cylinder, an expansion tank and hoses that can withstand high pressure.
- The pump fixation bracket is installed on the BC head. When installing it, the product needs to be modified: the engine mount is unscrewed, the ears for attaching it are sawed off, the far right mount is sawed off so that it does not interfere.
Installing a bracket to fix the pump
- Instead of the generator, the pump itself is mounted on a bracket.
- The crankshaft pulley is being replaced; the pump will be driven through it.
Advice: It is necessary to take into account that the drive should not go through the chain, but only through the belt.
- The steering gearbox is being replaced.
Tip: When installing a new gearbox, you will need to modify the place where it will be mounted. To do this: a hole is cut in the front end shield and the bipod is modified.
- A location is selected for the expansion tank so that it does not interfere with other parts of the engine.
- The hydraulic cylinder is installed according to the instructions included in the power steering kit. Each device manufacturer has its own installation features.
- The entire system is connected by high-pressure hoses and is well fixed.
Tip: It is necessary to ensure that the hoses cannot rub against other elements located under the hood.
- Special power steering oil is poured into the expansion tank.
- The system is being pumped. In this case, the steering wheel turns all the way left and right; if necessary, you need to add oil to the expansion tank.
- When the liquid stops leaving, you need to replenish the oil level to the top mark of the tank.
- On a VAZ 2109 car, the installation of the hydraulic booster ends with bleeding the system.
The advantages of the VAZ 2109 with hydraulic booster can be seen in the video.
Changing power steering oil for Ford Focus 2
Determining when it's time to change the power steering oil is very simple.
First, you need to pay attention to the amount of fluid in the reservoir (it is located next to the right engine mount). Secondly, you should look at the quality of the oil, or rather, at its contamination
The first signs of unsuitable oil are a dark color and a burning smell. To determine the quality of the oil, you need to take a small amount of it from the tank into a syringe and drop it onto a paper napkin.
What oil to fill in power steering Ford Focus 2
The power steering fluid in a Ford Focus can be red or green. They should not be mixed under any circumstances. You can determine the color of the liquid in the tank using the same napkin that was used to determine its quality. The manufacturer and most Focus owners recommend using only original Ford fluid. Each of them has its own article number:
- red power steering fluid for Ford - 1776431 WSS-M2C938-A;
- green Ford power steering fluid - 1781003 M2C204-A2.
There are also more inexpensive, but no less high-quality analogues from well-known manufacturers: red - Motorcraft Mercon LV with article number XT10QLVC; green - SWAG/Febi with article number 06161.
For a complete oil change in power steering FF2, one liter is enough, and for a partial oil change, 700-800 ml.
Step-by-step fluid replacement in power steering FORD FOCUS 2
Before changing the power steering fluid, be sure to warm up the car to operating temperature.
To change the power steering oil yourself, you will need a syringe, a flat-head screwdriver and an empty container.
When changing fluid, do not drop it on the timing belt, as it will corrode the material from which it is made.
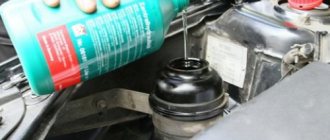
To make a partial oil change, just use a syringe to pump out the old fluid from the tank and pour new fluid into it to the required level.
For a complete replacement, it is also necessary to remove the fluid that remains in the power steering system.
1. Using a syringe, pump out the oil from the tank, remove the clamp and return hose from it.
2.Insert a suitable sized bolt or wooden chop into the hole in the tank (in this replacement we used a screw and clamped it instead of a chop or bolt).
3.Place the return hose into an empty container and secure it.
4.Fill the tank with new oil to the maximum level.
5. Set the ignition key to mark I and make a full turn of the steering wheel from left to right. After this, check the oil level in the tank. 6. All this time, old fluid will come out of the return hose. Repeat the previous procedure until clean oil comes out.
7.Reinstall the return hose, tighten the clamp and start the car.
It is very important not to start the car with an empty power steering fluid reservoir, since even a few seconds of running the pump without oil will lead to its breakdown.
This completes the oil change in the power steering Ford Focus 2.
https://youtube.com/watch?v=wcnf6MKEemc
Sources
- https://allanda-auto.ru/remont_avto/zamena_rulya_na_priore.html
- https://www.help2drivers.ru/zamena-masla-gur-na-ford-fokus-2/
What are the advantages of electric power steering on the VAZ 2109
- Easy to install. The unit is installed in one unit, there is no need to interfere with the engine compartment.
- Greater reliability, which increases due to the absence of a number of elements: pulleys, hoses, fluid.
- Environmental friendliness and energy saving. Power is consumed only when maneuvering, which reduces energy costs and saves fuel.
- Passive safety is ensured in the event of an impact; there is a self-diagnosis system.
- Information content. Increasing the speed of the car will ensure an increase in the force on the steering wheel.
The car owner decides what type of power steering to install. Any helps to reduce the effort applied to the steering wheel and ease of control.
Usefulness of the system
This statement is especially true in large cities densely packed with cars. Parking in a cramped courtyard of a high-rise building late at night in the dark under the critical comments of your neighbors is quite difficult if you have not installed electric power steering on your VAZ 2109. Try to cope without power steering in a dead traffic jam, when a slightly more promising space has become available in the next row and you need to turn it out faster than your neighbor turn the steering wheel to the right all the way, turn it back 15 centimeters, turn the steering wheel all the way to the left, move it forward 20 centimeters, turn it again, turn it back again, turn it out again and drive into the vacant space under the competitor’s nose.
Disadvantages of power steering and electric power steering
Many car owners prefer installing electric power steering on the VAZ 2114 as a replacement for the standard power steering. However, is such a decision justified from a practical point of view?
Connection
To answer this question, it is necessary to consider not only the positive aspects of this or that amplifier, which we have already done, but also point out their main disadvantages.
Article on the topic: Crankshaft position sensor (CPS) ON VAZ 2114: checking, errors and replacing the sensor
What is better for the VAZ 2114? Let's try to figure this out.
With this short list the list of shortcomings can be completed. But it is worth paying attention to some nuances.
The choice between electric and hydraulic boosters
Compelled by the realities of road practice and the vagaries of automotive fashion, owners of used cars followed the buyers of new cars. It is for them that the question of which controls to choose is especially relevant. The owner of a used “Nine” must take into account everything - from the price of the device and the cost of maintenance to the possibility of installing the unit yourself. Recently, statistics on the choice of owners of used cars has noticeably shifted towards an electric unit. The advantages are obvious:
- Electric power steering is much more compact than hydraulic power steering (power steering). It takes up virtually no space in the engine compartment.
- It is much easier to install. No hoses or belts required. The EUR is integrated into the steering column and is powered by a battery.
- The electric booster is more economical. It only works when it helps turn the steering wheel, while the hydraulic booster constantly pumps fluid.
- EUR is cheaper than power steering. This says almost everything for the owner of a used Nine. Together with the possibility of installing a power steering wheel for a VAZ 2109 with your own hands, this makes the choice almost no alternative.
When the fundamental choice is made, the eyes of many VAZ 2109 owners turn to Ladas. The temptation is strong to use something from the arsenal of “close relatives”. And this is quite possible. It turns out that the EUR from the Lada Priora fits the VAZ 2109 almost without adaptation.
Characteristics
The ESD serves to reduce the force applied to the steering wheel required for maneuvers.
It is optimal for the VAZ 2109 to install an electric amplifier borrowed from the Lada Priora. New AvtoVAZ models are produced on the basis of old ones, so the parts are perfect for nines that have not been produced for a long time.
When choosing an EUR for installation, make sure that it meets the following characteristics.
EUR from Priora
The choice in favor of just such an electric amplifier for the VAZ 2109 is due to its advantages:
- Installation is quite easy;
- The ESD will require a small amount of energy to operate;
- Eco-friendly device;
- Adapts perfectly to AvtoVAZ classics, including nines;
- Allows you to drive comfortably even at high speeds.
VAZ 2109 injector and carburetor
Without adaptation - this is for the injection "nine". In the case of a carburetor engine, everything is not so simple. The normal operating mode of the EUR involves the use of speedometer and tachometer readings in electronic format, which are not available with a carburetor engine. We have to emulate these signals.
In extreme cases, the steering can do without a signal from the speedometer. The device is used to turn off the power steering when reaching a certain speed. If the power steering does not turn off, nothing bad will happen other than a slight decrease in fuel efficiency. If you don’t want to lose this function, you can install a sensor from an injection engine to a carburetor one.
The tachometer signal is used to turn off the power steering when the engine is not running. The absence of this function will quickly drain the battery - it is better to emulate the required signal. There are three known methods:
- Removing the signal from the ignition coil through a diode limiter, which transfers the signal from 300V to the 5V level. The limiter is mounted in the engine compartment, in severe temperature and moisture conditions. This requires some caution.
- Using a Hall sensor signal. The signal will be in the range of up to 12V, it can be safely brought into the cabin and processed using the controller. To avoid interference in a long wire, you can use twisted pair.
- Manufacturing a non-contact induction sensor placed on the high voltage wire of the ignition system. A voltage of 30KV induces an electromotive force in the sensor coil, and this signal can be sent to the controller.
In the worst case scenario, you will have to connect the power steering cable to the ignition switch and manually ensure that the ignition is turned off in a timely manner when the car is parked for a long time.
Algorithm for replacing the VAZ 2108 CV joint
- Set to second gear and support the wheels with wheel chocks.
- Remove the wheel nuts and the hub nut.
- Jack up the replacement side of the CV joint.
- Unscrew the nuts and remove the wheel.
- Remove the two lower ball joint mounting bolts with the steering knuckle.
- Turn the steering wheel in the direction you want to replace it.
- Remove the splined end of the CV joint from the hub. To do this, you need to pull the steering knuckle.
- Using a pry bar, remove the inner CV joint of the VAZ 2108 from the gearbox.
- Secure the drive shaft with a vice, remove the clamps and CV joint boot.
- Use a hammer and a copper or bronze adapter to knock the CV joint out of the shaft.
Installation of EUR Lada Priora on VAZ 2109
Installing an EUR on a VAZ 2109 has become very popular. If you want to trust the professionals, such a steering system can be installed without any problems in almost any workshop. If you want to save money, car dealerships sell ready-made installation kits for the “nine”.
Having purchased an installation kit, which, in addition to the EUR itself, includes a set of wires, a special mounting plate and a shortened driveshaft for transmitting force to the steering mechanism, proceed with installation. The procedure is quite simple, it is carried out from the passenger compartment, and even replacement of steering rods is not required. The step-by-step procedure is as follows:
- Disconnect the ground terminal and de-energize the system.
- Remove the decorative steering wheel trim and unscrew the central fastening nut. How to remove the steering wheel on a VAZ 2109 without getting hit in the teeth by the recoil? To do this, leave the nut tightened for a couple of turns. Now the steering wheel can be removed from the conical seat of the axle without fear.
- Remove the steering switch block and decorative casing. The steering column of the VAZ 2109 will become accessible for dismantling.
- The ignition switch mounting bolt heads are intentionally stripped at the factory for safety. Drill them and remove the remains. Install new bolts during reassembly.
- Remove the steering shaft with the intermediate propeller shaft. Of the four shaft bracket mounting bolts, two have intentionally broken heads. Drill them, remove the remains. Install the adapter plate.
- Install the shortened intermediate driveshaft. Mount the electric booster, secure it to the adapter plate with four nuts.
- Install the electrical wiring following the wire color codes. Connect the ground to a special contact.
- Assemble the steering column - ignition switch, VAZ 2109 steering column switch, steering wheel with decorative trim.
EUR is mounted. Get behind the wheel, try out the controls, adjust the steering column - and off you go.
The factory did not provide for the installation of electric power steering on the VAZ 2109 model and other classics. EURs have become available on more modern models.
Appearance of the device
What is not provided by the factory can be installed by yourself.
Functionality check
You should check whether the steering wheel spoke is in a horizontal plane when the car wheels are in a straight position. If even a slight deviation is observed, it is necessary to identify the cause of the malfunction and eliminate it before it develops into a dangerous problem.
If something goes wrong when checking the controls, knocking or other problems appear, remove the suspension control rods and check the condition of the steering mechanism again. This will make sure that knocking and malfunctions are caused by malfunctions of the steering wheel, and not by other reasons, of which there may be many.
Sources
- https://spike.su/index.php/steering-mechanism-car-VAZ-2108-VAZ-2109-VAZ-21099-removal-and-installation.html
- https://expertvaz.ru/2108/rulevaya-rejka-upravlenie-remont.html
Installation
To change the standard steering gear to an electric steering gear, you will need to purchase the following kit:
- New electric booster;
- Wiring kit for connecting the amplifier;
- Installation plate (you can find it on the market, but some people make it themselves);
- Shortened steering shaft driveshaft;
- Protective casing for “ten” with Europanel;
- Steering wheel (it’s better to take one from Kalina);
- Emergency button (located on the panel).
Replacement kit
That's it, when all the necessary components are ready and you are ready to work, you can start.
- Since we are talking about working on the electrical system, be sure to remove the negative terminal from the battery.
- Remove the steering wheel, remove the protective cover and steering column switches. Don't forget to remove the connecting block along with the switches.
- Unscrew the dashboard trim and remove the instrument cluster. This way you can then connect the control wiring from the electric amplifier.
- Remove the ignition switch. Be careful here. Many people in a hurry tear off the splines of the fastening bots.
- Remove the steering shaft.
- Now in front of you is a disassembled structure, where the rather long studs clearly stand out. They should be shortened. Otherwise, the pins will rest against the new electric power steering mechanism.
- Install the adapter plate. For its installation, the front nuts will fit the old ones. In this case, be sure to replace the rear bolts. Their size should be 4.8 by 50 millimeters and fit 10 keys.
- If you couldn’t find the mounting plate based on the drawings below, you can make it yourself.
- It's time to connect the wiring.
- The practice of VAZ 2109 owners shows that it is most convenient to route the wiring to the battery through the holes intended for the optics hydraulic corrector hoses.
- The rest of the wiring goes to the dashboard, where the connections should be made according to this diagram.
Preparatory operations, all engines
First, remember a simple rule: the 11183 engine cannot bend its valves, so you can rotate the crankshaft and camshaft pulley separately. For motors 11186 and 21116 this would be unacceptable! Read more about engine 21116 in this material.
Before carrying out any work, disconnect the battery terminal (key 10), as well as the DPKV sensor. But first you need to remove the protective cover.
To remove protection you need:
- 11186/21116 - using a “5mm internal hexagon”, unscrew the 4 bolts on the upper part, which is then removed. And the lower part is also dismantled;
- 11183 - use a 10mm wrench to unscrew the 3 fastening bolts.
It will not be difficult to cope with what is said above.
The crankshaft position sensor (CPS) is disconnected from the connector (see photo). Then the fastening screw is unscrewed with a “10” wrench. The sensor itself must be removed.
Installation of all shafts according to marks
First check that the gear is in neutral. There is a rubber cover on the crankcase body closer to the clutch assembly. It needs to be removed.
The point is to achieve alignment of the marks on the flywheel and in the scale slot. When this is done, fix the flywheel with a screwdriver.
Of course, it is easier to perform such an operation with two people. Know that the desired position of the shaft corresponds to the alignment of marks AB and CD (see figure).
The crankshaft itself must be rotated to the right using a 17 or 19 key (motor 11183). The meaning of this is illustrated in the photo.
The alternator belt needs to be removed
The alternator belt blocks access to the timing drive parts. You will have to loosen the fastening and remove this belt.
More about this:
- We change the alternator belt on a Lada Granta with air conditioning;
- We change the alternator belt without tensioner on the Lada Granta.
Use a 13mm wrench to loosen the lower mounting bolt. Then unscrew the upper fastening nut and remove the bolt. The generator casing is pressed against the engine and the structure is secured with wire. The belt can now be removed.
Installation of the alternator belt is carried out in the following sequence:
- Secure the generator;
- Throw the belt over the pulleys, as shown in the photo;
- Having engaged 5th gear, roll the car back.
Know that reusing the alternator belt is a last resort. It would be better to buy a new part.
Lada 2109 Kroshka › Logbook › Installing power steering 2110-2112 in a VAZ 2109 Part 1
Hi all. Finally got my hands on the gur. Since I don’t have a lot of time, it was decided to split the installation into two parts, namely: installing the pump (and all the consequences) and installing the rack. Today we will talk about the pump. So let's go. First of all, we remove the old generator, its bracket and pulley (the pulley must be placed under the ridge belt).
We install a new pulley.
Let's move on to the pump, it already comes with a bracket from 2110
We need to modify it, namely, remove the support (we simply unscrew it) and saw off the ears to which the support was screwed (they rest against the lever), and in the end we get this product.
Having estimated the engine, it turns out that the third (rightmost mount) is also in the way for us; it gets on the bolt of the engine mount mounting. You can, of course, file it figuratively, take a longer bolt and leave it as is, but it seemed to me that there were two bolts to hold the pump behind the eyes, so we remove it too.
Then everything is simple: we put a pump in place of the former generator (our generator will move higher)
One bolt fit perfectly, the second one needed a short one; I didn’t have it (you can see it in the photo above), I screwed it on as best I could in order to continue the assembly and understand what else was needed.
Next we install a new generator bracket. I took the bracket from Viburnum for the tension roller; when assembled with the generator, the whole thing looks like this.
By the way, a note to “Grant Drivers”: there is a very common disease on the grant, namely the death of generator bearings, and this happens to some after two or three thousand km. Under warranty, of course, the officials change the generator and replace it with a better one, but this does not solve the problem. They fly because there is no adjustment of the belt tension on the grant and it is constantly tightened, as a result the bearings cannot withstand it, as you already understood, in order to get rid of this ailment we install a bracket from the viburnum as in the picture above and enjoy life. PS On some sites it is indicated that before going to the T, O, it is better to return everything to its place, otherwise you may lose the warranty. (Although this is not a fact and this point can be clarified with the officials)
Let's return to our sheep. So we install the bracket, it stands up without any problems, 3 bolts and everything is in place
What remains is the final “gena” (by the way, the gene is also from 2110) and this is where problems arose. The TV suddenly stopped and said that it didn’t want any new generator and that I should go through the forest. We didn’t come to any peaceful solution, so I took metal scissors and a piece of excess flesh was removed. (I didn’t want to show off)
Then we just put everything unhindered by the gene and put on the belt.
In general, that's all. By the way, the belt needed is 6PK975 or 6pk970. In fact, everything is standing still, spinning and spinning, nothing interferes anywhere. One of these days I will install the rail. So part 2 is coming. Thank you all for your attention, smooth roads and fair winds.
Lada 2109 Kroshka › Logbook › Installing power steering 2110-2112 in VAZ 2109 Part 2 (Final)
Hello everyone, as promised, the continuation of the epic with the installation of power steering. For those who missed it, the beginning can be found here. So let's go) First of all, we remove the old rail. In general, nothing complicated, we remove the steering tips, unscrew the bolt that connects the steering rack and the steering shaft (located in the pedals) and unscrew the rack itself, it is held on by 4 bolts. (I didn’t take a photo of this process, sorry)
We take a new rail. The number one problem is the tie rods. The entire Internet has confirmed that it is necessary to leave the relatives from the nine (or the collapse will not be done) They differ in silent blocks and their diameter.
On the left in the photo, the rod from the nine has a smaller internal diameter and the bolt from the ten will not fit into it, plus there is a bushing sticking out of the silent block, which we also don’t need. There are two options for solving this problem: First, cut off the bushing and drill a larger hole. The second is to take new silent blocks from dozens, grind them and press them into the first service that comes up. I went with option number 2 and it turned out like this.
Today I went to the alignment and they told me that it was all bullshit and the thrust could have been left at ten, but what can I do? Internet, such Internet)
That's it with the traction. Trouble number two is the size of the window in the engine panel. It’s small and a rail from ten won’t get there by any miracle.
That is, you need to cut. It’s difficult to explain in words correctly how to cut, the main thing is not in the photo below) I did a little borscht on top and it turned out to be a shel. about 1cm
Half of this hole is now covered by a casing that goes from above, but in any case there is a gap.
To prevent this from happening to you, do not cut too much upward. From the main hole, saw upward 1 cm further if necessary.
So, the rods are ready, the window is ready, let’s move on to the rail itself.
Photo from not mine, stolen from the Internet.
First of all, you need to unscrew all the tubes, in order to do this without problems and not tear off the splines (like me, for example), tap each bolt and they will unscrew without effort. After the tubes are unscrewed, you need to remove the mechanism itself, it can also be removed without problems (2 bolts), and in the end you will be left with a bare rail.
Where do the problems start?
When the car is in good condition, and the traction is good, and the dynamics are not satisfactory, then you enjoy the ride and the speed. But the time of testing comes, and the machine begins to remind you that material things do not last forever. And this is always an unpleasant discovery.
At first the problem is not too noticeable, only on difficult sections of the road the steering wheel begins to beat, as if afraid of the problems awaiting the car on the bumpy roads of endless Russia. But soon it begins to pound almost constantly, making the driver feel like an asphalt driller. After such a trip, it’s not easy to get your nerves in order and not shake yourself. In addition, knocking is often heard. These two symptoms signal one thing: the steering rack has failed.
Installation of power steering on VAZ 21099, 2109, 2108
Many craftsmen in the vast expanses of our homeland have created tuning studios that can, with varying degrees of success, “twist” your car and make it unrecognizable. And not only the chassis, but also the engine and transmission, that is, what is called complete tuning. On some of them you will be offered to install hydraulic booster or electric power steering .
The meaning of the VAZ 2109 hydraulic booster is clear to everyone; its importance in the vehicle configuration can hardly be overestimated. The principle of its operation is not complicated either. Structurally, it consists of a hydraulic pump as a source of energy and a performance device to which this energy is transferred. This actuator must be combined with the steering mechanism. Today, none of the car manufacturers known to us produces power steering systems on their own, but purchases them from various companies. A well-known brand that produces this equipment is Zahnrad Fabrik, a German company distinguished by the high quality of its products.
Some domestic models and, in particular, the VAZ 21106 use power steering of this particular brand and it was developed by order of Opel, especially for cars of a similar class to the 21106. Therefore, the use of this equipment on 2110 has, in fact, already been certified.
Installing a hydraulic booster on a VAZ 2109 . it was decided to conduct a small test. This idea has been in the air for a long time and finally the time has come. To begin with, I had to go down from the third floor of a multi-level garage, along ramps, turning around in a very limited space; the ZF hydraulic booster passed this test perfectly; with frequent turns, the effort was minimal. In city mode, it also did not cause any complaints and brought a lot of pleasant sensations. If necessary, the power steering allows you to “tighten” the steering wheel to the desired angle, moving the car to a smaller radius. In addition to everything, they calculated the number of full rotations of the steering wheel made. With the standard three and a half on the “ten”, with hydraulic booster this figure became 3 and 1/3, which means a change in the gear ratio and, therefore, an increase in control accuracy.
Every driver understands how easy it is to park in tight urban conditions. Our amplifier performed excellently in this case as well. When operating at low speeds, no changes were felt with the application of effort.
The same impression comes from driving at high speeds, at maximum revs. As speed increases, the steering becomes a little tighter, continuing to provide decent feedback.
If we try to sum it up, then everyone certainly likes power steering. And by equipping your car with this function, you get a completely different car and a completely different driving experience.
Installing power steering on a VAZ 2109 video
- Rebuild the gearbox (gearbox) on a VAZ 21099,2109,2108 with your own hands
- Correctly running in the VAZ 21099, 2109, 2108 engine after major repairs
- Secrets of tuning the VAZ 2106 engine
- Make the most of the classics
- Tuning VAZ 2104
- Tuning the rear beam/suspension of VAZ 21099, 2109, 2108 with your own hands
- Tuning VAZ 2102 + engine from Skoda
- Tuning 2108. Making a short-stroke rocker
What to choose?
Everyone decides for themselves which oil to fill in the VAZ 2115, taking into account not only the quality, but also the cost of the lubricant. The main thing is never to skimp on consumables, otherwise this saving will cost you more. On our website there is a detailed article about changing the oil in the VAZ 2115 engine.
Next, we will consider different brands of lubricants for domestic car engines.
Castrol
The manufacturer offers a wide range of products, which includes suitable oils for domestic cars. Engine oil for VAZ 2115 from Castrol is quite popular. Experts note that lubricating fluids of this brand perfectly protect the internal surfaces of the engine and all its elements from wear, preventing severe contamination. Another advantage of all Castrol oils is the absence of harmful impurities.
ExxonMobil
The oil manufacturing company ExxonMobil appeared in 1999, and today it produces and sells the highest quality engine oils. The products are distinguished by a successful combination of price and quality, as well as the absence of additives harmful to the engine. Has excellent reviews from owners of VAZ 2115 and other domestic cars.
Shell HELIX
We have already mentioned this oil in this article. It is well suited even for harsh Russian winters. Extra-class relish has many advantages, the main one of which is the content of detergent additives that keep the internal cavities of the engine clean and also protect against soot. This helps to extend the motor life.
Engine oil for VAZ 2115 from Shell HELIX has several unique features. First of all, it helps reduce fuel consumption due to minimal friction between parts. In addition, the oil significantly reduces engine noise and the load on the unit when driving in harsh Russian conditions.
Shell HELIX oil significantly exceeds the requirements of modern standards. The main enemy of any car engine is chlorine, without which the oil cannot work. In the Shell HELIX product its concentration is kept to a minimum.
ZIC
The company was founded back in 1962, so it can rightfully be considered a pioneer in the oil refining industry. The first production facility where the oil was produced was created in 1995, and now this brand is recognized as one of the best among its competitors.
At the moment, the ZIC company offers over 20 types of different oils, including for the domestic VAZ 2115. In addition, the company’s assortment includes flushing and special fluids for any purpose.
Motor oil for VAZ 2115 of the ZIC brand is excellent for operating a car in any climatic conditions. For severe frosts, it is better to buy a liquid with a viscosity of 5W-30, which will allow you to freely start the engine even at −40 degrees below zero without harmful consequences.
Like any modern company, ZIC works to increase competitiveness in various production areas. Motor oils produced at new modernized plants have long remained leading products on the Russian market.
G-Energy
G-Energy brand motor oils are manufactured using innovative European technologies, which helps improve the quality of the product supplied to the market. Also, these lubricants have an optimal ratio of cost and quality. These compositions are well suited for VAZ 2115 of different years of manufacture.
LUKOIL
When talking about what kind of oil to pour into the VAZ 2115, one cannot fail to mention the Lukoil brand. Everyone has heard about this company, which is constantly working to improve the quality of its products. The entire product range includes over 250 items, so every motorist can easily find an option that suits their needs.
TNK
Modern motor oils for the VAZ 2115 from TNK are well suited for operating engines in harsh Russian conditions. The company adheres to international standards and requirements in the production of its products, and also uses innovative technologies.
TNK Revolux lubricants are well suited for operating vehicles in winter. The manufacturer uses base mixtures with the addition of imported additives to create its products.
TNK Revolux is characterized by high durability and good motor protection against corrosion. Unlike many other oils, these fluids do not adversely affect engine seals and seals.
What is a hydraulic booster, why and what is it needed for?
This unit consists of two parts:
- an energy source, the role of which is performed by a hydraulic pump,
- and an actuator combined with the steering mechanism.
It is curious that even well-known large foreign car manufacturers do not produce hydraulic boosters themselves - they are purchased from other manufacturers, which, in particular, include the German company Zahnrad Fabrik.
When developing the VAZ-21106 model, domestic designers used a hydraulic booster from Zahnrad Fabrik, which, in turn, the German company developed for production Opel models of a similar class. As a result, the use of power steering on VAZ has already been certified.
After the asphalt appeared from under the snow and ice, a small test of the “ten” with power steering was carried out.
What does the manual say?
If you study the VAZ 2115 operating manual, you will find at the end a list of all technical fluids recommended by the automaker for use when servicing the car. Many auto mechanics advise pouring 10W-40 semi-synthetic oil into the engine, as it is excellent for this unit.
There is not much difference in the brand, but the main thing is to buy non-counterfeit products. Official dealers usually fill in Shell Helix 10W-40, which has proven itself well when used in these machines. Note that oils of different brands are similar in properties and differ mainly in the additives that are added to the product.
