Installation of a 16 valve engine on “07” and other classic models
Why is it necessary to install a 16-valve engine on a “classic”? And is the game worth the candle? A definite answer can only be given if we analyze all the advantages and disadvantages of such a modification. First, you need to consider what the engines of the classic series and more modern ones, for example, installed on the VAZ-2112, are. Some difficulties may arise during the work, but they can be overcome if you approach the matter with a clear head.
For most people, tuning means attaching plastic body kits and stickers to the car body. There was even such a concept as “collective farm tuning”. This phrase describes cars that have difficulty moving on the roads, but are covered from roof to wheels with stickers with emblems of some brands. It is much more pleasant when a simple car that does not stand out from the crowd has technical characteristics comparable to foreign-made vehicles, and not of the lowest class.
By the way, you can simply modify the original engine; there are many ways to do this.
Is such a replacement legal?
Recently, there has been a law according to which a car engine does not require mandatory registration. In fact, the engine of a “classic” becomes an ordinary spare part, like a bumper or thermostat. But you need to adhere to the recommendations that come from experts. When purchasing a motor, enter into a sales contract. If possible, check the traffic police database for the car from which the power unit was removed. The seller must provide you with documents that confirm his absolute right to own the car or engine.
Provided the transaction is clean, there will be no claims against you. You can proceed to the next step after installing the 16-valve engine on the “classic”. This is registration with the traffic police. Many people have an ambivalent attitude towards the procedure, since some try to formalize the alteration so that everything is official, while others take advantage of the fact that no inspector has the right to inspect the engine, and cannot demand that the hood be opened either. Even during the state inspection, they don’t pay much attention to such alterations.
Life time
Let's move on to the power unit data resource. This is a very arbitrary figure, and the final actual service life depends on a large number of indicators.
Here are some of them:
- The quality of the fuel used.
- Oil quality and timing of its replacement.
- Terms of Use.
- Timely service.
There is simply no specific single correct figure in this regard. Based on my experience, I will say that the service life of these motors is approximately the same. That is, they can last 200-250 thousand km with proper maintenance without any problems. There were copies that sold 300-350 thousand.
At the moment, these motors can really be called reliable and unpretentious. And their cast iron block means maintainability.
New eight-bug from AvtoVAZ 11182 - what changes
What engines can be installed on the VAZ “classic”
The VAZ 2107 is certainly considered a classic of the domestic automotive industry. Therefore, the same rules apply for this model as for the entire “classic” AvtoVAZ line.
Two engines can be considered the best options for the “seven”:
These 16-valve engines have virtually identical mountings and require very little modification for installation. In addition (which is also important), the current gearbox from the VAZ 2107 is quite suitable for these engines, thereby saving the driver time on installing the gearbox.
And it is advisable to purchase such an engine already used, which will significantly save the existing budget. However, a used motor should be purchased from friends or from a seller who can provide a guarantee for his product.
Sixteen valve engine
Such engines are typical for more modern versions of VAZ - for example, Priora or Kalina. The design of the 16-valve power unit is more complex than that of the 8-valve due to the presence of two camshafts oriented in different directions. Accordingly, the number of valves on the cylinders doubles.
Thanks to this arrangement, each cylinder has two valves for injection and two valves for gas outlet. This gives the car higher power and reduced noise during combustion of the air-fuel mixture.
All the advantages of a 16-valve engine
Installing a more powerful 16-valve engine on the “seven” provides the following advantages:
Installation Disadvantages
However, with all the advantages of replacing an 8-valve engine with a 16-valve engine, there are also disadvantages. Traditionally, drivers talk about three disadvantages of such an installation:
Thus, installing a 16-valve engine on a VAZ 2107 is not considered a simple procedure. Not only experience and special knowledge will be required, but also the correct organization of the entire work process, in which the choice of a suitable power unit is not the least important.
Electrical refurbishment
For high-quality operation of the new power unit, you will have to replace the gasoline pump. You can take this mechanism from both the Priora and the Twelfth, or you can save money and buy a pump from the injection model of the Seven. The fuel pump is connected according to the usual algorithm and does not require any modifications.
On the VAZ 2107, the motor is connected with only three wires. The new engine requires a qualitatively different connection. First of all, you will need to complete the following steps:
It is recommended to carry out all connections and new formations on the VAZ 2107 in the same way as they were done on the VAZ 2107 with an injection engine.
Brake system
The new motor has higher power characteristics, which means that the car will accelerate faster and brake slower. In this regard, it is recommended to modify the braking system on the VAZ 2107. To do this, it is enough to replace the main cylinder with a more powerful one, and also, if necessary, replace all the cylinders if they are badly worn.
Cooling system
As a rule, the available potential of the standard cooling system on the “seven” is enough to promptly cool the new powerful engine. However, if the engine lacks cooling, a slight modification will be required: fill the expansion tank not with antifreeze, but with a higher quality antifreeze.
Thus, installing a 16-valve engine on a VAZ 2107 is a complex procedure, as it requires not only significant physical effort, but also thoughtful action. The main difficulty of this operation is connecting the wiring and modifying the system.
Why do you need to redo car systems?
It is worth remembering that installing the 2112 engine in a “classic” entails many changes. And not only in design, but also in technical characteristics. Speed, power and torque increase. And the standard brake system is designed to work with an old motor. And it may not be able to cope with the loads that will appear after changing the design of the car. Mounting the engine takes little time - just screw it with three bolts to the gearbox. But its correct connection, configuration, adaptation of systems to new characteristics is a whole science.
Without certain knowledge of the design of the car and its components, you should not even attempt a modification. The brakes on the “classic” should be replaced, even ventilated discs can be used for more efficient operation. It is also better to use disc brakes on the rear wheels. It’s better to forget about drums, whose efficiency is not always good. The clutch unit works under greater loads than before, so it is recommended to use reinforced models. And don't forget about the crosspieces mounted on the cardan. It is advisable to replace them with more reliable ones made of high-quality metal.
What do you need to buy for installation?
Motor installation
To install a new unit, you will need to assemble a new motor and install it on the brackets, attaching the nuts to the pads. Next, the motor is mated to the gearbox. Please note that the gearbox is secured with three bolts. Next, the cooling system is assembled and the braid is extended from the control unit. There are no difficulties during installation, since you just need to connect the connectors to all sensors, as well as connect the fuel pump. If desired, a lambda probe can be connected or a snag can be installed. To save fuel, I recommend leaving the oxygen sensor.
What modifications are required after installing a new motor?
Brake system
. It is necessary to change the brake discs and pads, as well as install VUT from 2108 through an adapter. The rear brake system also requires the installation of new elements. With a significant increase in power, it is imperative to install a front brake system from 2112, and a ready-made set of disc brakes is mounted on the rear axle.
Transmission
. Unfortunately, the gearbox cannot be strengthened in any way. The installation of new bearings and synchronizers will allow you to digest the torque, which is at least twice as high as the factory values. The elastic coupling of the propeller shaft is replaced with a reinforced one. The rear axle gearbox must be supplemented with a self-locking differential with a preload of no more than 5 kg. You also need to install reinforced axle shafts, which have twice the torsional strength.
Chassis
. The shock absorbers are gas-oil all around. It is advisable to lower the suspension by 50mm. When lowered, the rear axle can move forward or backward, so the reaction rods are installed with the possibility of adjustment. Regarding the levers: either reinforced ball joints are installed on standard levers, or, ideally, the installation of new levers is required, where the lower lever has a shifted area for the ball joint, thereby unloading the lower ball joint.
Steering
. Installation of EUR at will. The steering pendulum is mounted on bearings, the steering gear, provided the side members are intact and undamaged, is secured with a special amplifier. Reinforced steering linkage.
Features of installing a power unit from a donor
Despite its apparent simplicity, when replacing the “heart of the car” with a classic, you need to take into account several nuances. One of the main points is landing the unit in its installation location. In this case, despite the identical fasteners, the following operations must be performed.
To perform the work, it is better to use gas welding, since accuracy and precision are required. Mechanical cutting can damage other parts.
Modifications to the engine itself are also necessary. This is due to the shape of the pallet: if it is not changed, it will cling to the front beam. In addition, one of the important elements is the additional installation of a support bearing in the end part of the crankshaft. Such a support is not provided for front-wheel drive vehicles, but for rear-wheel drive vehicles this element is necessary. If this operation is ignored, the gearbox and clutch mechanism of your VAZ 2107 or VAZ 2109 will experience additional loads and quickly fail.
Considering that the crankshaft on the classic is not particularly different from the Priora, no motorist will experience any big problems here.
What do you get when installing a 16 valve engine?
First of all, this is a reliable and durable motor, without all the disadvantages of a classic motor. Fuel consumption is reduced. Possibility of a wide range of adjustment: you can get a city motor with good torque from the bottom, or a riding motor for racing. The 16 valve engine is easier to maintain and repair.
At the same time, there are disadvantages. First of all - cost. The minimum cost of investment when installing 16v is 40,000 rubles. And due to the increased power, it will be necessary to strengthen all components and assemblies of the car, where you will need to invest at least 50,000 rubles. The popularity of tuning VAZ cars fell sharply with the decline of the ruble on the currency exchange. Accordingly, most owners prefer buying old foreign cars that already have a margin of safety and ample opportunities to increase power.
Source
Engine for VAZ 2107
In fact, structurally and technically, engines with 8 and 16 valves differ quite seriously. Mainly, the differences are in the cylinder head (cylinder head), because this is where the car’s camshafts are fixed.
Eight valve engine
A motor of this design has only one camshaft. This installation is optimal for the VAZ 2107, since in a well-functioning mode it controls the air-fuel mixture injection system and removes unnecessary exhaust.
The eight-valve engine is implemented as follows. In the cylinder head, each cylinder has two valve devices: the first one works for injection of the mixture, the second one works for the release of exhaust gases. It is the camshaft that opens each of these valves in each cylinder. The roller consists of several metal elements and during rotation presses on the valve.
Sixteen valve engine
Such engines are typical for more modern versions of VAZ - for example, Priora or Kalina. The design of the 16-valve power unit is more complex than that of the 8-valve due to the presence of two camshafts oriented in different directions. Accordingly, the number of valves on the cylinders doubles.
Thanks to this arrangement, each cylinder has two valves for injection and two valves for gas outlet. This gives the car higher power and reduced noise during combustion of the air-fuel mixture.
All the advantages of a 16-valve engine for the VAZ 2107
Installing a more powerful 16-valve engine on the “seven” provides the following advantages:
Installation Disadvantages
However, with all the advantages of replacing an 8-valve engine with a 16-valve engine, there are also disadvantages. Traditionally, drivers talk about three disadvantages of such an installation:
Thus, installing a 16-valve engine on a VAZ 2107 is not considered a simple procedure. Not only experience and special knowledge will be required, but also the correct organization of the entire work process, in which the choice of a suitable power unit is not the least important.
Video: 16-valve engine for the “classic” - worth it or not?
Design features
The Octopus is a very simple engine. It has 1 camshaft, 2 valves per cylinder, mechanical valve lifters with shims, a timing belt drive with one tension roller.
It couldn't be simpler. Shesnar is somewhat more complicated. It already has 2 camshafts, 4 valves per cylinder, hydraulic pushers (hydraulic compensators). Timing drive with two rollers: tension and support.
In technical terms, both of these power units are united by the fact that, starting in July 2021, a plugless piston group is installed in them. The pistons have deep wells designed for full valve travel.
What does it mean? Now you don’t have to worry about the sudden failure of one of the timing drive components. If in the case of the old one, a broken timing belt meant a lot of money for restoration repairs, but now these problems will not exist here. We will compare these power units based on several factors.
What engines can be installed on the VAZ “classic”
The VAZ 2107 is certainly considered a classic of the domestic automotive industry. Therefore, the same rules apply for this model as for the entire “classic” AvtoVAZ line.
Two engines can be considered the best options for the “seven”:
These 16-valve engines have virtually identical mountings and require very little modification for installation. In addition (which is also important), the current gearbox from the VAZ 2107 is quite suitable for these engines, thereby saving the driver time on installing the gearbox.
And it is advisable to purchase such an engine already used, which will significantly save the existing budget. However, a used motor should be purchased from friends or from a seller who can provide a guarantee for his product.
What do you get when installing a 16 valve engine?
First of all, this is a reliable and durable motor, without all the disadvantages of a classic motor. Fuel consumption is reduced. Possibility of a wide range of adjustment: you can get a city motor with good torque from the bottom, or a riding motor for racing. The 16 valve engine is easier to maintain and repair.
At the same time, there are disadvantages. First of all - cost. The minimum cost of investment when installing 16v is 40,000 rubles. And due to the increased power, it will be necessary to strengthen all components and assemblies of the car, where you will need to invest at least 50,000 rubles. The popularity of tuning VAZ cars fell sharply with the decline of the ruble on the currency exchange. Accordingly, most owners prefer buying old foreign cars that already have a margin of safety and ample opportunities to increase power.
Lada 2106 16V › Logbook › Installing a 16-valve engine in a classic body Part 1
Good evening everyone) Finally got around to writing a manual on Shisnar’s installation in classics) I decided to break everything into several parts, as it will be more convenient)
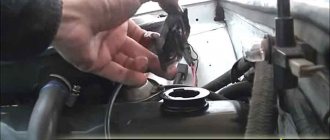
Let `s start? First, we need to purchase a VAZ 16-valve engine, there are several of them: 2112, 21124, 21126 Priora and 21128 12-valve coupe, the 128th is very difficult to find, but if desired, it can be made from the 124th, in general not this will be discussed. I got the 124th engine, 1.6 liters, plugless piston, this is the best option) First, we need to prepare the engine for installation, first of all we remove the elbow and take it to a turner who has a machine equipped with a steady rest, so that he can sharpen the elbow under the classic gearbox input shaft bearing. Here is a photo of the result
Next we need to modify the flywheel. You can, of course, order a ready-made version for a classic with a 16-valve engine, it is already lightweight and costs around 2 rubles. Everyone does it differently, some have starters with spacers, in general I’ll describe how I did it. In short, the 12th flywheel needs to be taken to the same turner, he must remove excess metal from it, approximately 9 mm of factory power losses are removed from the block side, before turning work the crown must be knocked down, we will no longer need it, we will need a classic one, they have a difference 1 tooth, this is done simply, put the flywheel on the stump and tap the crown in a circle and it flies off. After all the work done, you need to press the classic crown onto the 12th flywheel, to do this, heat the crown, just not to red, then place it on the flywheel, the crown is easily put on when heated, it should rest against the side. Then, for reliability, you can carefully grab it by welding in three places. Next we give this whole thing for balancing
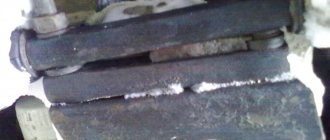
Next, we will need to modify the pallet, or rather, crush it a little, this is provided that classic pillows are used; with the Niv ones, you won’t have to crush anything, because they are taller. The pallet is replaced so that it does not cling to the beam, of course it is better to do this in place after trying on the engine, I hushed it up at the very beginning, painted it, and when I started installing the engine, it turned out that it was not enough, and I had to pull it out and replace it. Why didn’t I use pillows from the Niva, because they are stiffer and I don’t need extra vibration in the body, and the engine shield will need to be crushed more, but more on that later, photo of my pallet, unfortunately it’s hard to see, but other photos No
Lada 2101 16v Turbo › Logbook › 16v to the classics. Connecting the 21124 engine wiring. 21104 braid
So. After installing all the hardware, it was time for the electronic part. There is enough information on the Internet about this, but everything is kind of scattered, I had to sit down and figure out the wiring diagrams, although I was generally an asshole in this, I couldn’t really tell the plus from the minus. Now everything is different, thanks to Zhiguli =) The first problem I encountered when I bought used wiring was that it had an alarm system, and it was terribly messed up. I was also confused by the fact that the ignition switch chip was soldered to the engine braid with one wire, and 3 were cut off, and I kept running around looking for where they should go on the engine braid. But after reading the diagrams, everything fell into place. So. What do we need? Need 2 chips. The first is connected to the cabin wiring, the second to the fuel pump. You need to apply a “plus” to the large gray chip from the ignition switch.
You will also need to take a “minus” for the fan from this chip. This is a thick white and black wire. It comes from the fan relay. The fan is controlled by the “minus”, and the “plus” is constantly on it. In the classics it was originally the other way around. I took the permanent “plus” from the generator. Because I didn’t have a counter chip, and the terminals were too close, so I soldered a wire to the fan in front of the chip.
1 - Minus for the fan (White-black) 3 - Ignition (Blue-black). The plus from the ignition switch is connected here. 4, 5 — Wires for connecting the on-board computer (Yellow-black) 6 — Signal from the speed sensor (Gray) 7 — Check Engine light (White-red). Here a minus appears, i.e. There should always be a plus on the light bulb. 8 - To the temperature indicator (Green-white). In our case it is not used, because The temperature indicator is connected from the standard Zhiguli wiring. 9 - Tachometer signal (Brown-red) 11 - Something related to the immobilizer (Blue-white) 13 - Oil pressure sensor. (Grey-blue). In our case it is not used, because The oil pressure sensor is connected from the standard Zhiguli wiring. 14 - Signal from the fuel level sensor (Pink). In our case it is not used, because The signal from the fuel level sensor is connected from the standard Zhiguli wiring. 15 - Plus after turning on the ignition (Pink-black). A plus appears here after turning on the ignition. From here you can take a plus for the light bulb check. 16 — Exit to additional. starter relay. (Green-black). Not used.
I also want to draw attention to the connection of the tachometer and speedometer. If you are connecting a non-standard electronic speedometer, then you need to take the signal from pin 6 of the gray chip and connect it to the speedometer contacts. For example, in my case, I installed the tidy from 2115, and there is an electronic speedometer. If the speedometer remains stock, then you need to screw the speed sensor from the injection 2107 into the box, because it has an output for a cable and a chip for connecting a signal to a motor braid. The control unit must see the vehicle speed in order to work correctly.
The same goes for the tachometer. The carb tachometer will not work if you connect a signal from pin 9 to it. It is necessary to install an injection system or redo the carburetor.
Next you need to tighten the mass. There are 2 brown wires on the interior side of the engine braid. These are the disadvantages of the braid. We hook them to the body. I hung them on the pin to which the torpedo is screwed.
Now the fuel pump. We are looking for a small 2-pin chip that contains gray and pink wires. We need gray, this is a “plus” for the pump. We pull it into the trunk onto the fuel pump itself. We take the “mass” next to the tank on the body. The pink one from this chip goes to the gray chip, and from it to the fuel level on the dashboard.
Lada 2106 16V › Logbook › Installing a 16-valve engine in a classic body Part 2
Hello everyone) I haven’t posted anything here for a long time, but now I think I’ll appear here more often) And so, let’s begin.
In the first part we talked about the basic preparation of the engine, or more precisely about the modification of the knee, flywheel and pan. After all this, we put everything in place and install the classic pillow brackets along with the pillows on the block, the right bracket is placed as is on M8 studs, and the right one needs to be modified a little, drill holes in it from M8 to M10 and secure the whole thing with M10 studs. It looks something like this
Next, you need to make a flywheel boot, which is located between the block and the gearbox, a piece of tin with holes) I installed mine from the PP, just modified it a little, trimmed the left edge evenly and made a cutout for the starter, everything turned out neatly, just like the factory, photos for unfortunately not. You can leave the classic one, but we also modify it, cut out the middle part from it so that the flywheel does not catch on it.
Now we empty the engine compartment, remove the hood, take out the old engine, remove all the old hoses, remove the excess wires from the carb, if you have a carb classic, it is also better to remove the radiator. I advise you to cut the input shaft by about 5 mm in advance at the gearbox so that everything fits together normally, and so that it doesn’t drill into our knee and open the oil channel) We place an engraver and a 3 mm washer under the clutch fork stop, this is done to maintain the clutch adjustment, I I did it a little differently, I had a turner grind a new stop with a long thread and a 6 mm bushing for it, I have a clutch slave cylinder from a Chevy Niva. In short, the point is, we need the fork to stand as straight as possible, without strong distortions, like at the factory, that’s why I did the second option, this is a more competent option. This must be done, otherwise we will not get the clutch to work correctly.
Dynamics
According to the passport, the Lada Granta with an eight-valve engine accelerates to 100 km per hour in 11.6 seconds. Granta with sixteen valves - in 10.5 seconds. That is, the difference in dynamics is just over a second.
I've driven these cars a lot, and I want to say that the Granta with the eight-clopper on the bottom goes even more vigorously than with the gearbox. Peak torque in the first case is available earlier, already at 3800 rpm. In the second case, at 4200 rpm. That is, for the city, I think the Lada Granta with an 8-valve engine is more than enough.
On the track, the shesnar will, of course, feel more confident. It has power reserves when overtaking. In the summer, when you turn on the air conditioner, the power loss is not so noticeable.
If you are planning to buy a Lada Granta, install a towbar on it and pull a trailer, then I recommend choosing a gear.
Installing a 16 valve head on a classic
16 valve “classic VAZ” It has long been no secret that all VAZ engine power records were achieved on engines with 16 valve cylinder heads. And it doesn’t matter whether the engine is naturally aspirated or turbocharged - the advantages of installing a 16-valve head are much greater than the disadvantages. Engines with this cylinder head can receive a much larger filling of the cylinders with the air-fuel mixture, which, of course, leads to an increase in power. Let's take and compare two VAZ engines with the same volume, but with different cylinder heads. A VAZ engine with a volume of 1500 cubic centimeters equipped with an 8-valve cylinder head produces 77 horsepower, and a VAZ engine with the same volume, but equipped with a 16-valve cylinder head produces about 90 hp. A VAZ engine with 16 valves
The advantages of the 16 valve engine do not end there. Due to the modified shape of the combustion chamber, the 16-valve engine has higher knock resistance, this parameter is very important in our time, because The fuel we use every day leaves much to be desired. Another important advantage is the organization of engine cooling. In 16-valve engines, the cooling system works much better, and this means the reliability of the engine itself. In addition to these important differences, there is also a layout difference. In a 16-valve engine, unlike an 8-valve engine, the intake and exhaust tracts are separated on opposite sides of the head. This makes it easier to install geometrically correct intake and exhaust tuning manifolds. The VAZ Priora is most often chosen as a “donor”, because it is the most modern Zhiguli engine with 16 valves. Of course, buying a new engine like this is expensive, but with good luck you can buy a used engine from a disassembly site. Even with a complete overhaul, such a deal will allow you to save significantly. However, you will still have to disassemble the engine.
To install a new 16 valve engine on a Classic, you will need a ring gear, a starter, a main shaft bearing, all these spare parts must be from the VAZ 2101. You will also need a gas pedal with a cable from the VAZ 2107 injection engine. And finally, you will also need airbags, they can be classic or from Niva. Before installing the engine, it must be disassembled and the crankshaft removed. Next, with the crankshaft, you need to go to a turner so that he can cut out a hole for a new bearing. It is necessary to sharpen exactly the amount by which the original boss protrudes, on which the flywheel is placed in the center. After this, the bearing can be pressed in and the engine can be completely assembled.
At the next stage, you need to knead the engine shield a little so that there are no problems when installing the thermostat.
Next, you will need to remove the crown from flywheel 2112 and replace it with the crown from 2101. To avoid any difficulties in the future, the crown must be put on 9 mm further from the motor block. You need to install a classic clutch on the flywheel, and it is installed as if it were original, without any adapters.
After this, the engine can be installed on the car. The gearbox must be screwed on with 3 bolts, since the upper left hole does not line up. But this is not a problem, even with 3 bots the gearbox will hold up perfectly.
And finally, you will need to install the starter; its installation will be hampered by the metal pump pipe, which will need to be cut. In addition to the entire engine with all the attachments, you will also need a control unit and a gas tank with a fuel pump in it. To properly adjust and connect an injection engine, you need to contact an electronics engineer. Even if all sensors and other components are connected correctly, you will probably have to reflash the control unit. However, an experienced master does all this work in just half a day.
Summarizing
You will get many benefits from upgrading your car. Try to carry out all work competently, not only from the technical, but also from the legal side. Remember that it becomes impossible to easily sell a car with an engine that is not registered with the traffic police. And installing a 16-valve engine on a “classic” is not an easy task, since it will be necessary not only to carry out work on changing all the associated units, but also to lay electrical wiring harnesses.
Modern engines operate thanks to microprocessor systems and control devices (sensors), of which there are many in the car. Incorrect connection of just one element will result in the engine not starting or running intermittently. For this reason, installing the 2112 engine in a “classic” is complicated, because the standard electrical wiring does not have harnesses for new equipment.
First of all, we buy a 16-valve engine from front-wheel drive VAZs with attachments. You will also need a gas pedal from an injection VAZ 2107.
— We disassemble the engine, give the crankshaft to a turner so that he can machine it for the support bearing of the input shaft 2101:
— Then you need to press in the bearing:
— We take the flywheel from the 16kl engine, remove the crown and put the crown from the classics in its place. To avoid problems in the future, you need to remove 9 mm from the collar. — Now we assemble the engine, install a clutch from a VAZ 2110, and take a release bearing from a Chevy Niva. Before assembling the motor, you need to lightly knead the engine sump. — We need to weld the cooling system:
In any tuned engine, one of the parameters that should undoubtedly be changed, and usually upward, is the compression ratio. Since increasing the compression ratio increases the effective power output of the engine, it is therefore desirable to have the compression ratio as high as possible within certain limits. The upper limit is always determined depending on the point at which detonation occurs. Show in full…
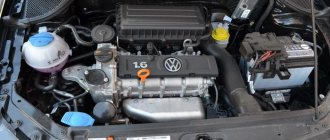
Replacing valve stem seals without removing the head of a VAZ 2112, 16 valves, step-by-step instructions with photos
Dear friends, today we will tell you in detail and with photographs how to independently replace valve stem seals on VAZ-2112, 2111 and 2112 equipped with a 16-valve engine. The beauty of our story is that in order to replace the oil caps we will not remove the head from the engine, and this is a significant saving of time and labor costs, there is no need to drain the antifreeze, unscrew the manifold, etc.
At the same time, we will do this without using an expensive valve depressurizer, which allows us to do this, but will use a regular valve depressurizer for the VAZ-2110, which can be bought on the car market for 200 rubles. Even before starting work, I recommend purchasing this desiccant, if you have little experience in desiccaning and drying, then take a stock of heels of crackers, we will also need an anaerobic (do not use silicone) sealant, unlike conventional silicone, when in contact with oil, it does not clog the channels but dissolves in it, and also buy a key for tensioning the timing pulley for 50 rubles, since the belt will have to be removed and then set according to the marks. By the way, it wouldn’t hurt to replace the timing belt and rollers at the same time, ideally. If you are ready to do it yourself - no problem, if you lack determination - I can recommend turning to the guys to replace the timing belt in Minsk, they will definitely do it well and inexpensively.
Disconnect sensors, hoses, cables
Well, if you’re ready to do everything yourself, then let’s get started. First, remove the plastic cover from the engine and gain access to the “intake manifold”
Source