The tightness of the tubes or what is a two-row and three-row radiator
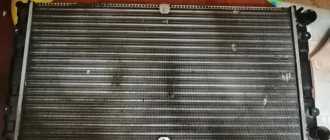
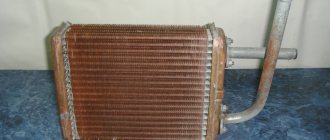
When choosing, you may be faced with the fact that heat exchangers for the stove come in two types depending on the way the tubes are arranged.
They are called two-row and three-row. The difference between them is significant, and it is reflected mainly in the performance of the device. What is better to put on Lanos? Is it worth buying a three-row stove radiator or is a two-row one enough? These questions haunt Lanos owners, and so it’s time to sort them out. Double-row units have lower thermal output, however, for the heating system of a Lanos car, they are quite sufficient, provided that all components are in good working order.
The main advantage of the Lanos, Sense and Chance heating system is the presence of a switch for air absorption - external and from the cabin (recovery). To warm up the interior at low temperatures, you should switch the regulator to recovery mode. This way, not cold air from the street will be supplied to the system, but warm air, thereby increasing the rate of heating of the interior. Thanks to this switch, it is not at all necessary to install a three-row heater radiator on Lanos.
This is interesting! On Zhiguli cars, air is absorbed directly from the street, so the double-row radiators of the stove cope with their purpose by 50%, which is especially evident when driving on the highway. It is recommended to install three-row heat exchangers on these cars.
Reasons for replacing the radiator
Replacing the heater radiator VAZ 21124 16 valves
The heat exchanger is the “weak point” of the entire heating system. The radiator of the Lanos stove is made of non-ferrous metals, so the part is not very durable and leaks (in places where components are soldered, due to defects in the metal structure, oxidation processes).
The second problem with the heat exchanger is the use of tubes with a small cross-section in the design. During operation, debris and dirt from the entire cooling system accumulate in the radiator, which leads to blockage of the tubes, causing the heater's efficiency to decrease. If this problem occurs, flush the radiator, but if it is severely clogged, such measures do not always bring a positive result. It is impractical to unsolder the radiator and clean it mechanically, since when reassembling the part it is rarely possible to restore the tightness. Therefore, if flushing does not increase the throughput of the heat exchanger, replace it.
Subtleties of installing a new heat exchanger
Replacing the heater valve (heater valve) Niva VAZ 21213, 21214, 2131 Lada 4×4
The most difficult thing in installing a stove radiator is installing the lower casings, since it is necessary to tighten the distant screws. After assembling the device in the cabin, the lever rod is brought out and tightened with a clamp along the mark. You should definitely check how the speeds are switched and, if necessary, adjust the linkage. Then connect all the pipes and check for leaks. Only after this can coolant be added.
After filling the cooling system, start the engine and make sure that no air lock has formed in the system. Otherwise, all the work will go down the drain. We warm up the engine to operating temperature, turn on the heater at full power and control the temperature of the air flow. If the air is hot, everything is fine. If it is cold, there may be an air lock in the system that needs to be removed.
Interesting facts about the purpose of a heater radiator in a car
Replacing the heater radiator on a Lada Priora (with and without air conditioning)
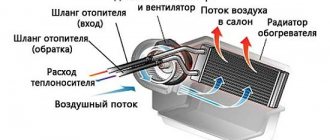
Why a heat exchanger is needed in a car's heating system, and how the circuit for supplying warm air to the cabin is arranged, is described in detail in the material - how to replace the heat exchanger of the interior heater of a Chevrolet and Daewoo Lanos. If you are reading this material, you probably know the purpose of this device.
The heater radiator is included in the main engine cooling system. The cooling system consists of two circuits - a large and a small circle. Coolant circulates through the system, for which the pump is responsible. The liquid circulates in a small circle when the engine starts. When the engine warms up to a certain temperature, access to a large circle of the system opens. The thermostat is responsible for opening access to a large circle.
The heater radiator is included in a small circle of the system, so when the engine starts, the heated coolant flows to this device. On Lanos there is no coolant flow control valve, so the fluid circulates in the heater heat exchanger constantly. This allows the driver to turn on the heater as soon as the engine warms up to 50-60 degrees. The engine cooling radiator is included in a large circuit, which provides cooling to the engine after it reaches operating temperature.
This is interesting! The heat exchanger of a car heater is 5 times smaller in size than the engine cooling heat exchanger. Lanos owners often have a question about where the radiator of the Lanos stove is located. It is located in the cabin under the dashboard in the central part. How to get to it and replace it is described in detail in the material on the website.
When is it necessary to replace the interior heater?
Unfortunately, the design of the stove itself is not very reliable. Most often, the radiator mounts break, which leads to the passage of cold air. The nominal temperature drops and even at the extreme position of the regulator, cool air blows. Known issues also include the following:
- the radiator is clogged;
- leakage of working fluid;
- problems with the thermostat.
It is quite easy to identify damage in pipes. If stains appear and the amount of working fluid in the expansion tank decreases, you need to completely inspect the pipeline. If the low efficiency of the heating system is associated with a non-working thermostat, then the arrow on the instrument panel will be in the extreme position even when the engine is warm.
The heater radiator heats the air that is supplied to the cabin
Advice: before starting repairs, try to eliminate all possible factors that affect the operation of the stove. This will allow you to accurately determine the cause of the problem.
Reasons for replacing the radiator
The heat exchanger is the “weak point” of the entire heating system. The radiator of the Lanos stove is made of non-ferrous metals, so the part is not very durable and leaks (in places where components are soldered, due to defects in the metal structure, oxidation processes).
The second problem with the heat exchanger is the use of tubes with a small cross-section in the design. During operation, debris and dirt from the entire cooling system accumulate in the radiator, which leads to blockage of the tubes, causing the heater's efficiency to decrease. If this problem occurs, flush the radiator, but if it is severely clogged, such measures do not always bring a positive result. It is impractical to unsolder the radiator and clean it mechanically, since when reassembling the part it is rarely possible to restore the tightness. Therefore, if flushing does not increase the throughput of the heat exchanger, replace it.
How much will a new heater radiator cost?
When the glue had dried, I coated it with sealant along the entire seam of the hatch and allowed it to dry. I have an air conditioner and the radiator is located under this casing, perhaps it interfered with removing this casing.
And one more thing for those who decided to change the cabin filter. But there is a much simpler and more convenient way, in my opinion! The reasons may be different: In the case when the fan operates only in one position of the switch, repairs are usually limited to replacing the ballast resistor.
It is imperative to check the heating temperature of the radiator pipes to possibly eliminate thermostat problems and remove air pockets from the Chevrolet Lanos heating system.
If, while operating a Chevrolet Lanos, you encounter a problem with the heater not working properly, do not rush to go to the service center. Replacing a radiator and adjusting the heating system can be done with your own hands without large financial and time costs. The main thing is to find a problem in the system and fix it using step-by-step instructions.
How to determine a malfunction of the heater radiator on a Chevrolet, ZAZ and Daewoo Lanos
With the onset of cold weather, it is increasingly necessary to use the interior heater in a Lanos, Sense and Chance car. However, sometimes the owners of these cars are faced with the fact that at one moment the stove does not blow warm air, but, on the contrary, cold air or does not work at all. If the fan motor turns on and the stove blows cold air, then the first thing you should do is check the serviceability of the cold and hot air regulator. The cause of the malfunction may be that the damper is jammed or the steel cable is failing. Make sure that these mechanisms are in working order, after which you can assume that the radiator of the Lanos stove has failed.
To make sure that the heater radiator is faulty on Lanos, Sense and Chance, you need to pay attention to the following factors:
- If the heater heat exchanger on a Lanos is faulty, then the first sign of such a fault is fogging of the windows.
How does this relate to a faulty radiator? If the integrity of the heat exchanger is compromised, coolant will enter the cabin and condense on the glass. - The appearance of a pungent odor in the cabin.
This is the smell of antifreeze that enters the cabin due to damage to the radiator. - Rapid consumption of antifreeze - if you notice that you often have to add coolant, then you should make sure that the heat exchanger of the heater is in good condition
The easiest way to make sure that the integrity of the radiator is compromised is to disassemble and inspect it. If the radiator is damaged, the stove will heat up, but the above factors will be present in the cabin. If the stove does not blow warm air in the Lanos’s cabin, then the reasons for this may be the following factors:
- Thermostat malfunction
- Formation of a plug inside the system or radiator - in this case, the stove will not blow warm air
- Clogging of radiator fin channels
- Various debris such as leaves, fluff, dust getting into the honeycombs of the device
Replacing a heating stove radiator is performed when the device fails. Often the reason for the rapid failure of the heater radiator is its fastening. It is realized through the use of plastic fasteners. Often these fasteners break off due to vibrations and temperature changes, which leads to failure of the entire device. If the device's cells are damaged, it must be replaced. To eliminate the possibility of the brackets breaking off, they should be additionally reinforced with metal latches or brackets. How to strengthen the mounting of the heater radiator on Lanos is shown in the photo.
There is also another way to ensure effective fastening of the stove radiator - use self-tapping screws.
To determine that the standard locking latch has broken off, it is not at all necessary to disassemble the floor of the car just to look. To do this, you need to shake the incoming fittings of the stove from the engine compartment. The presence of play means that the latch has broken off, and disassembly will be required to correct the situation.
This is interesting!
If, when you turn on the stove, you feel a flow of cold air in the cabin, you should resort to sealing the plastic housing.
Related Posts
In the cold season, the main sign of a malfunctioning stove is poor heating - cold or slightly warm air enters the cabin. This may happen for the following reasons.
Stove repair Lanos, Sens, Lanos, Sens. One Lanos - two stoves.
Engine cooling system thermostat malfunction. As a result, the antifreeze does not heat up to operating temperature. We pierce it in the middle with a self-tapping screw, insert a Phillips screwdriver and tighten the ends of the bag together with the screwdriver, etc.
We tightened it, now the radiator is holding well on one side. We screw back the cover of the bottom of the stove, do not forget that the front two self-tapping screws will be screwed later together with the flow distributor cover into the legs.
Next, I took a piece of thermal insulation, cm. After that, we remove the casing and cut off the remains of the fitting.
Chevrolet Lanos interior heating radiator replacement
There is no pressure inside the fitting, so all these processes do not pose any danger. At the end of the process, in order to save time, the best option would be to replace the fitting with your own hands with a regular tube of the appropriate diameter, which will also effectively drain the condensate.
We hope that this information has given you an idea of what replacing a Lanos stove looks like. If you have any advice from practice on how to repair this structure, share it with other motorists. Replacing a Chevrolet Lanos stove, although the procedure is not complicated, is not always necessary, because why buy a new one if you can repair the old one?
Stage No. 1 - getting to the casing
We certainly recommend buying a new one. So you will have a guarantee that it will not have to be changed in the near future? Look and do everything the same.
The main reason why the stove does not work is a faulty radiator. Otherwise, the stove will not work efficiently.
Video of removing and replacing the heater radiator on a Lanos How to remove it on a car with air conditioning Replacing the radiator in models with air conditioning is somewhat more difficult. It's all about the condensate drain fitting, which gets in the way when removing the heater.
This problem can be solved in two ways: By applying physical force, pulling the casing towards you and lowering it down. Cut off the fitting with a regular hacksaw. Such activities should be carried out at your own peril and risk.
Radiator clogged from outside
This problem can be diagnosed by the same temperature of the stove pipes and a lower air flow coming out of the diffusers. In this case, the blockage does not occur instantly, but over a long period of time - a decrease in the flow force cannot be noticed immediately. It is best to check the flow strength in comparison with a working model. On a Lanos of any production, be it a Daewoo, Chevrolet or ZAZ, there is no cabin filter. The heater radiator, and with it the evaporator for the air conditioner, are easily clogged with various debris - it can be fluff, leaves, anything. Naturally, such a blockage does not allow air to pass through the radiator freely. And as a result, the Lanos stove does not heat well, and it becomes very uncomfortable in the car.
Also, after a while, the air conditioner may begin to “smell” in the absence of a cabin filter. This happens due to dust that accumulates during operation of the machine. It settles on the evaporator, thereby creating favorable conditions for the development of various microorganisms and harmful bacteria. Debris can be easily removed using an ordinary vacuum cleaner - to do this, dismantle the fan and insert a hose into the box without any attachments. At the same time, it is recommended to purify the system through diffusers.
Replacing the stove radiator
The heater radiator is the main problem of incorrect operation of the Chevrolet Lanos interior heating system. The easiest way to solve this problem is to replace the radiator. The work is quite complex, labor-intensive and expensive. When replacing a radiator, car service specialists completely disassemble the dashboard in the cabin.
However, the work can be done with your own hands without removing the dashboard. To do this, you will need an inspection hole or overpass and the following tools:
- a set of wrenches and sockets;
- Phillips and slotted screwdrivers;
- stationery knife;
- glue "Moment";
- platypuses.
To replace the radiator you will need a standard set of plumbing tools
The design and fastening of the stove body does not depend on the presence of air conditioning in the car. Therefore, for all Chevrolet Lanos models, the procedure for replacing the heater radiator is the same.
- The car is driven into a viewing hole (the best option).
- The front seats are removed. To do this, 4 bolts are unscrewed under each of them.
- The seat belt sensor is disconnected under the driver's seat.
- Three self-tapping screws are unscrewed and the plastic gearbox cover is removed.
- Two self-tapping screws are unscrewed and the handbrake housing is removed.
- The gearbox linkage mounting clamp is removed from the inspection hole.
- The pipe through which the condensate from the air conditioner is drained is removed.
- The four fastening bolts are unscrewed, and the gearbox lever together with the rod is removed from the passenger compartment.
- The fastening nuts and bolts are unscrewed, and the side panels connecting the center panel casing to the body are removed.
- The lower part of the distributor, which directs air flow to the leg area, is removed. To do this, unscrew three screws - two at the top near the radio and one at the bottom. If the tourniquet gets in the way, use a screwdriver to tighten the tendrils of the clip, and the tourniquet is pulled out of the hole.
- The lower part of the heater housing is dismantled, which is secured with 10 screws. Only 8 are unscrewed, since 2 screws were already unscrewed when the distributor was removed. Since the design does not provide for such a dismantling option, you should remove the casing in a confined space extremely carefully and carefully so as not to damage it.
- Access to the radiator is provided. Before removing it, it is necessary to drain the coolant from the system and disconnect the pipes through which antifreeze enters the radiator.
- The radiator is released from the latch located outside. In addition, the bracket is removed from the back. After this, the radiator can be removed.
- Having gained access to the damper that regulates the temperature, its functionality is checked. It may not completely block the flow of cold air when the temperature control is set to the maximum position. In this case, you can stick a seal on it or adjust the control cable.
Installing a new or flushed heater radiator is done in the reverse order.
The radiator can be replaced in another way. To do this, you will need to remove and remove the dashboard from the interior. This operation can be performed on your own in half an hour, without removing the front seats. The dashboard is removed from the passenger compartment along with the stove body, providing access to the elements of the passenger compartment heating system.
Choosing a new heater radiator for Chevrolet Lanos
For Chevrolet Lanos, a heater radiator from the Chevrolet Sens model, which has the same dimensions, is suitable. Heat exchangers can be purchased with a strip or plate cooling fin system. In addition, on the market you can find prefabricated strip-plate and tubular-strip brazed aluminum radiators from such manufacturers as NISSENS, AVA, NRF, DAC, GROG, KMC with the number of main tubes from 16 to 22. The cost of products can vary greatly depending on design, workmanship and manufacturer.
Thus, it is quite simple to repair and replace the heater radiator of a Chevrolet Lanos car, consistently following the instructions of professionals. All you need is free time and a standard set of plumbing tools.
How to choose the best heater radiator for Lanos
When it becomes necessary to replace the heater radiator, you first need to select and buy a new heat exchanger. The modern car market offers devices from several brands for Lanos:
- Delphi (Poland-China). Brazed heat exchanger, tubular-band design, made of aluminum, the cooler circulates through 21 main tubes. This radiator was considered the highest quality for a long time, but was discontinued not so long ago. Estimated cost $30.
- Nissens (Denmark). One of the most popular and reliable devices. Despite the price of $37 and the presence of plastic tanks connected to each other by 18 main tubes, the heat transfer level of the aluminum radiator is very high.
- NRF (Netherlands). Aluminum heat exchanger of prefabricated strip-plate design with 18 main tubes of increased diameter. In terms of price, it is one of the most expensive, because its cost ranges from 35 to 40 dollars.
- Profit (Czech Republic). The radiator has a soldered tubular-band structure with aluminum tanks and 25 main tubes. High-quality and reliable heat exchanger that effectively heats the interior. The price is quite affordable and starts from $25.
- Device GROG – one of the best combinations of quality and price. Minimum cost from 25 dollars. Although the brand has only been on the market since 2015, it has already become the most popular. Consumers were captivated by the high heat output of the aluminum radiator with a soldered tubular-tape structure and 22 main tubes.
- Russian Luzar has only 16 main pipes. The design is brazed, tubular-tape, aluminum tanks. It is highly reliable, although, according to buyers, the price of $30 is too high.
Interesting on the topic: Kia ProCeed 2021 received an official price tag. Configurations announced
There are also other brands on the component market whose products are presented at a low price equivalent. But before you choose a device cheaper than $20, you should think about it, because most of these radiators have ineffective heat transfer due to poor coolant circulation. However, there are often situations when you can repair and wash the heater radiator without removing it from the car, and this is discussed in more detail here.
How to change without removing the dashboard
The main difficulty encountered when repairing a stove is access to the lower casing. To classically dismantle this element, you will need to remove the entire torpedo, which will take quite a lot of time. You can pull out the radiator easier and faster if you work from the bottom side. First, let's do the preparatory work:
- For ease of work, remove both front seats.
- We remove the pipeline hoses and drain the working fluid into a previously prepared container.
Remove the pipe and drain the working fluid from the heating system - Loosen the clamp that holds the gearshift lever and completely unscrew the mounting bolt.
Unscrew the bolt and remove the clamp for subsequent dismantling of the lever - Pull the gear lever shaft out of the rod assembly.
This is interesting: Innovations first used on the GAZ-12 ZIM Now we have free space to work. But in order to remove the radiator itself, you will need to dismantle the side metal elements that connect the floor and the console.
Remove the side fasteners that connect the console to the floor
Now you can remove the lower casing:
- Unscrew the 8 screws of the heater casing.
This is not easy to do; you will need a special wrench (a ratchet and an extended socket 7), since you will have to work from below. To remove the casing you will need to unscrew 8 bolts - We remove the casing and gain access to the radiator.
- Open the latches and remove the heater from the grooves.
Assembly proceeds in reverse order. It is worth noting that factory radiator mounts often break and it is better to modify these elements from scrap materials. You can use metal sheet products with a diameter of 2 mm.
The metal mount holds the radiator well and does not break.
Replacing the heater radiator for a Chevrolet Lanos.
How to replace a heater core without removing the dashboard.
Many people are interested in the question: how to replace the heater radiator on a Chevrolet Lanos without removing the dashboard . I won’t say it’s as easy as shelling pears, but there aren’t any particular difficulties.
A lift or pit is required to perform this operation. But you can do without them.
You just need to remove the pipes from the heater radiator and disconnect the connection between the gearshift lever rod and the gearbox, and this is much more convenient to do from below the car.
Many people write that you need to remove one of the seats, or even both. Not at all necessary. Yes, if you remove them there will be more space, and it will be easier to remove the plastic tunnel in the center. But is it worth it?
So let's get started.
First, remove the pipes from the heater radiator and drain the coolant.
Don’t forget to provide some kind of container to collect the liquid, it will come in handy.
Unscrew the clamp securing the gear lever rod. Unscrew the bolt completely. Loosen the clamp and remove the gearbox linkage axle from the rod. It is advisable to mark the joint location so as not to suffer during assembly. We remove the clamp.
If the car does not have air conditioning, you can skip a few paragraphs.
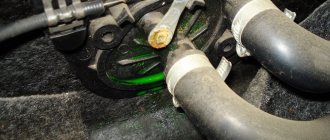
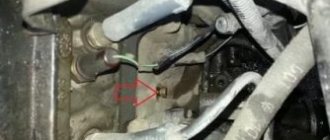
If there is an air conditioner, a fitting is provided in the heater housing to drain condensate from the air conditioner radiator. The fitting is located to the left of the heater radiator pipes. Usually it has an L-shaped rubber pipe directed downwards.
Let's jump ahead a little.
In order to remove the casing covering the radiator, the casing must be lowered downwards (it is connected to the heater body using a tongue-and-groove method). But the fitting does not allow this to be done. To pull the fitting out of the engine shield, you need to pull the casing towards you, but the “groove-tenon” connection does not allow this to be done.
We have to use force. Sometimes it is possible to accomplish this feat, but usually the casing breaks, sometimes even in several places. Of course, it can be glued together, but during installation it will break again.
But Russian “craftsmen” will find a way out of any situation. Using a hacksaw blade, or even a grinder, this fitting is cut off as much as possible. This is of course best done from below the car. Then, with the casing removed, cut off the remains almost flush.
As already mentioned, condensate drains through this fitting, i.e. there is no pressure. Then, after complete assembly, we select a tube of suitable diameter (fountain pen body, felt-tip pen), insert it into the hole, thereby diverting the drain from the engine shield. The connection can be sealed using any sealant.
I was probably lucky, the fitting had already been broken off as a result of the accident, and the radiator itself was damaged. One of the pipes was clearly not round, but rather oval, and leaked at the junction with the radiator.
This is what a “perfect” round pipe hole looks like
“Full - the box is full”
It's time to go back to the beginning.
The antifreeze was drained, the gearshift lever was released, and the fitting was cut off. There's nothing else we can do under the car. Then we work in the salon.
We remove the plastic tunnel. We unscrew 2 screws from the front, on both sides. We move the saddles forward as much as possible. 2 more screws. We lift the back part and separate the halves of the casing. Seats all the way back.
The first screw, the second - on the opposite side
Rear screws, the other on the driver's side.
The last screw. We pull out the front part, not forgetting to disconnect the connector from the cigarette lighter. Yes, the seats get in the way a little, but they wrinkle easily and the plastic of the casing bends easily.
The last screw is unpaired.
Cigarette lighter connector - disconnect.
Remove both sides from the bottom of the console. Under one of the ground terminal bolts, be sure to put them back when reassembling.
We shoot from both sides.
Ground wires - do not forget to put them back during reassembly.
We unscrew 4 bolts and, moving the gear lever mechanism together with the rod towards the passenger, we pull this entire structure out of the passenger compartment. For ease of operation (we’ll increase the view), we’ll remove the glove compartment, just 2 bolts.
Let's remove this structure.
We removed the glove compartment and the visibility increased.
Now comes the fun part. To begin, remove the air flow splitter “to the legs”. Only 3 screws. 2 from the front, access is not difficult, they also secure the front part of the lower heater radiator casing (but the photo is self-tapping screws 9 and 10). The third self-tapping screw is almost in the center at the back. The photo shows its location.
Air flow splitter “to the feet”.
The lower heater casing is the most inconvenient part
For work, it is very convenient to use a small ratchet and a long socket 7. A short extension and a regular socket 7 can replace a long one, but in some places this design is a little too long. You loosen the screw with the long one, and then take the short one with the extension and twist it by hand.
The main tool - I recommend it.
We unscrew the available screws (all except 4, 5 and 6) with a head with a regular extension (10-15 cm), and 4 and 5 with a long head. Very comfortably. The main thing is to feel the screw itself in order to put the head on.
It is very inconvenient to photograph the location of the screws on the assembled heater body, so be guided by their location on the removed casing.
Everything was promoted. Now let's take it out. We lower the front part down a little, press the back part to the floor and pull out the casing from under the heater.
All that's left is to sweat a little. The radiator is attached in two places. At the top there is a latch, at the bottom of the pipes there is a shaped bracket on one self-tapping screw (it is clearly visible in the mirror).
Lower radiator mount.
It's better to do it this way.
We unscrew the screw, unclip the latch - the radiator is removed.
The latch at the top is held on a thin plastic crossbar; if you snap it off carefully, it can break off.
The latch remains hanging on this crossbar
We install a new radiator. For ease of installation, first attach the brace as shown in the photo. Insert the radiator hoses, snap the front latch into place, and then tighten the self-tapping screw onto the bracket.
Then install the lower casing. We make sure that he takes his place exactly.
We collect everything else, connect the pipes, fill the system, warm up the car.
The heater is heating up, the fans on the cooling radiator are turned on, the gearbox speeds are switching normally, which means the gearbox shift lever is connected correctly.
This completes the replacement of the heater radiator on a Chevrolet Lanos.
Good luck on the roads!
PS The truth didn’t end there for me. The installed, non-original radiator leaked the next day. I had to repeat everything described above, but with the original radiator. Repetition is the mother of learning!
That's it, see you again!
If you are interested in this article and have something to say (good or not) please leave your comments below. I would be very grateful for your participation in the discussion of the article..
How to solve the problem of poor heating
If the Chevrolet Lanos stove does not heat up, then you can eliminate the defect in two ways: by contacting a workshop or by yourself modifying the Lanos stove yourself. Each owner chooses stove repair methods based on financial capabilities and availability of free time.
Troubleshooting algorithm
- The car is in transport position, open the hood and check the level of antifreeze in the cooling system. If necessary, add to the o.
- We start the engine, activate the heater lever, check the uniformity of heat flow through the channels (hoses).
- We start from the upper radiator supply circuit and gradually move into the interior. If the hoses are uniformly warm and there are no cold sections, then the heater radiator is clogged and needs to be cleaned. You can dismantle the radiator without disassembling the torpedo. We remove the gearbox rocker and the central tunnel. We wash the product and install it in the reverse order.
- If the motor does not start: check the integrity of the fuse in the block. Replacing it with a new one will not be a problem. Exceeding the permissible current contributed to burnout.
- The worst option is a break in the heater damper cable: there is nothing to recommend other than complete dismantling and disassembly.
Cable replacement process
- remove the plastic trim on the central part of the dashboard, in the area of the radio;
- carefully remove the insert made of polymer material on which the mechanical levers of the stove regulator are installed;
- From the inside, remove the cable end from the attachment point. We carry out a similar procedure in the lower part of the stove heater, near the damper. It's inconvenient, but it can be removed;
- pull out the damaged cable, insert a new one, and assemble in the reverse order.
We visually diagnose adjacent parts and mechanisms for damage. If necessary, we replace with new spare parts. With this simple preventative measure we restore the functionality of the stove heater. Do not forget to carry out technical inspection of the car in a timely manner, this will extend its service life.
Nuances of the work
The heating system can be restored by a car enthusiast by replacing the radiator. But here an additional problem arises - the designers did not take care to provide convenient access to the heat exchanger and facilitate maintenance of the heater.
The difficulty lies in the fact that the stove body with a radiator installed inside it is located under the front panel. Therefore, according to the official technical According to the manufacturer's documentation, it is possible to replace the radiator of the Lanos stove only by first dismantling the front panel, and for this you still need to disassemble almost half of the interior. Replacing a Lanos radiator is not a particularly complicated operation, but it is labor-intensive and time-consuming. But car enthusiasts have already developed a method for removing the heater on a Chevrolet Lanos without dismantling the front panel. This method reduces the time for replacing the heat exchanger, but it is not easy to implement (half the interior will still have to be disassembled), and you will have to work in a cramped space, and even with not very convenient visibility.
How to replace the heater radiator on a Daewoo Lanos without removing the dashboard
Any experienced Daewoo Lanos driver knows that the heater radiator lasts for an average of 5-7 years of car operation. At the mileage mark of 90,000 - 150,000 (km), the heater begins to slowly leak. But there are also cases of blockage of the heater duct. If the radiator does leak, then there is no need to sin. Temperature instability and chemical corrosion attack absolutely any Daewoo Lanos spare parts.
ZAZ Lanos stove is the radiator, which is installed inside the cabin air duct. Getting to the radiator is not so easy, since the heater housing is mounted under the dashboard.
The service center specialists service the stove in only one way. The heater is serviced by completely dismantling the dashboard and disconnecting the furnace unit. Yes, it may be correct, but in this case it takes a lot of time to service the stove.
Craftsmen have developed a way to quickly replace the radiator of the ZAZ Lano s . To gain access to the old radiator, you only need to remove the bottom cover of the furnace unit. For clarity, how the method of quickly replacing a radiator is implemented in practice, a video is posted at the very bottom of the page.
Features of the Chevrolet Lanos interior heating system
The design of the Chevrolet Lanos heater is similar to most interior heaters of other cars. Its design provides for both independent and combined heating of the interior with air conditioning.
The radiator is installed under the casing of the middle part of the center panel, located between the driver and passenger.
In Chevrolet Lanos, the heater radiator is located under the casing of the middle part of the central panel, located between the driver and passenger
There is no control valve, so when the engine is running, antifreeze constantly heats the heat exchanger.
Construction and operation of the stove
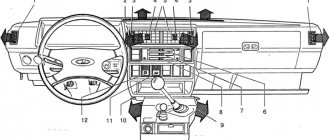
The Chevrolet Lanos heating system includes the following components.
- A damper that distributes air flow into the interior or onto the windows.
- Upper distribution air damper.
- Stove radiator.
- An air damper that regulates the temperature of the air flow.
- Air conditioner evaporator radiator.
- Fan with electric motor.
- Damper for changing the air supply mode (position A - recirculation mode, B - air supply from outside).
- Lower distribution air damper.
- Heater and air conditioner duct.
- Windshield blower pipes.
- Channels for blowing side windows.
The Chevrolet Lanos interior heating system can operate in various modes
The amount of air entering the heat exchanger is controlled by the air control damper (4). Its position determines that part of the air flow that passes into the radiator (3) and heats up. In addition, the electric motor of the fan (6) also has several operating modes, increasing or decreasing the intensity of the air flow. Mixing in a certain proportion, heated and cool air creates a comfortable temperature for the driver.
Stove controls
The heater is controlled by the following switches and controls located on the center panel.
- Incoming air temperature regulator.
- Fan operating mode regulator.
- Air distributor handle.
- Rear window heating switch button.
- Slider that controls the fresh air and recirculation damper.
- Air conditioner on/off button.
A comfortable microclimate in the cabin is set using six regulators of the control unit
Fan operating modes are selected independently of the positions of other controls. The dampers are adjusted using cables connected to them.
Functions, structure and principle of operation of the stove radiator
The radiator (convector, heat exchanger) of the stove is the most important component of the interior heating system of any car. The stove ensures the creation and maintenance of a comfortable temperature for the driver. This is especially true during the cold season. In addition, the heater prevents fogging of car windows.
The heating system consists of the following components and parts:
- frame;
- stove radiator;
- heat exchanger pipes;
- control valve;
- fan;
- electric fan motor;
- air ducts and distribution dampers.
The heating system heats the air entering the cabin
The role of coolant is played by antifreeze circulating through the cooling system. When the power unit is warmed up and the coolant temperature reaches 50 °C, it can be used to heat the passenger compartment. Depending on the position of the tap, a certain amount of hot antifreeze enters the radiator. The fan directs air flow from the engine compartment into the passenger compartment. This air passes through the radiator honeycombs, receiving heat from the heated antifreeze. The more antifreeze passes through the heat exchanger, the more heat is transferred to the air. The flow of heated coolant in the radiator can be adjusted using a tap.
The Chevrolet Lanos heater radiator has a fairly simple design
Depending on the car model, the air temperature in the cabin is regulated in various ways - by a control valve, fan rotation speed and the position of the air dampers. The heated air flow is regulated and distributed in different directions. By directing warm air onto the windshield and front side windows, you can prevent them from fogging up. Using the flaps, you can direct air to the area of the legs, face and certain places on the side windows. Blowing the windshield is also necessary to create slightly increased pressure so that dust and dirt from the street do not enter the cabin. This ensures the most comfortable microclimate for the driver and passengers.
The design features of the heater somewhat limit its operation. So, the stove cannot be turned on when the engine is cold. You need to wait until the coolant heats up to 50–60 °C. Otherwise, the engine will take much longer to warm up, especially in severe frost. In addition, due to the increased humidity in the cabin, the windows will begin to fog up. Therefore, water and air heaters are sometimes installed as additional ones. This depends on the design features of the heating system of a particular car model.
What kind of heater radiators are there and what is better to install on a Chevrolet Lanos
Heat exchangers are classified into types and types according to the following criteria:
- The material from which they are made
- The shape of the tubes through which the liquid circulates
- Tube installation density
Let's briefly consider what types of heat exchangers are classified into Lanos stoves and other cars based on the material, shape and density of the tubes.
This is interesting!
A malfunction of the heater radiator on Lanos with the need to replace it occurs in cases where the integrity of the tubes through which coolant flows is damaged, the fastening fittings are broken off (they are made of metal or plastic), as well as the integrity of the barrel is damaged. If the device is clogged, you can blow it out, but it is better to buy a new radiator so that soon after this repair you do not need to remove and replace it again.
How to rent a car with air conditioning
Replacing the radiator in models with air conditioning is somewhat more difficult. It's all about the condensate drain fitting, which gets in the way when removing the heater. There are two ways to solve this problem:
- Apply physical force, pulling the casing towards you and lowering it down.
- Cut off the fitting with a regular hacksaw.
Such activities should be carried out at your own peril and risk. But if everything is done carefully, the casing will not receive critical damage; perhaps the edges will be slightly deformed.
To replace the heater radiator in Lanos, it is not necessary to completely remove the dashboard. Repairs can be carried out from below by simply removing the front seats and gearshift lever. Using the instructions, you can replace the heater yourself and save on car service costs.

