Photo report: How to check the ignition sensor of a scooter?
To begin with, I would like to make a small contribution to increasing the technical literacy of some people who are not particularly burdened with intelligence.
The vast majority of them call the magnetic induction sensor of the generator, out of some fear, a “Hall sensor.” And the funniest thing is that the traders are there... No matter how you go into the store: on the label with the sensors it says: “hall sensor.” That's where it comes from. Okay, traders, there’s nothing to say about them - a difficult case... And you? Once upon a time, mechanical interrupters (contacts) were used in battery ignition systems. At the right moment, they opened the circuit in the primary winding of the ignition coil - the current disappeared, the effect of magnetic induction occurred and a high voltage was induced in the secondary winding of the ignition coil, which was supplied to the spark plug. And then, in the form of a spark discharge, it jumped between the electrodes of the spark plug, forming a spark that is well known to all of you.
In modern ignition systems, such as CDI, which is what we will talk about, the principle of spark discharge formation remains almost the same. With the exception of the method of controlling the moment of sparking.
Instead of mechanical contacts, an electronic sensor was introduced into the CDI ignition system, which at the right moment sends a small impulse to the switch thyristor (where it works in electronic key mode, in fact, this is something else like a breaker only electronic, and not mechanical as before) - thyristor opens and current from the commutator capacitor flows to the ignition coil. And then, almost the same thing happens as in the old contact ignition systems.
And this is a special magnet on the generator rotor, which determines the moment the spark jumps between the electrodes of the spark plug. When this magnet passes by the sensor, an impulse is induced in it
You can check the sensor without removing the generator from the engine and without even knowing where it is located. We just need to find the connector with which the sensor is connected to the scooter’s on-board network and check whether the sensor produces an impulse or not.
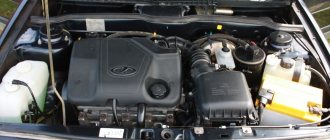
We go to the right side of the scooter, inspect the engine for a thick bundle of wires coming out of it, move along the wires to the connector with which it connects to the on-board network - look in the bundle for the blue and white wire coming from the engine and disconnect it from the terminal
We switch the tester to the AC measurement mode for the 2V range or, if your tester has such an option, for 200mV. We touch any metal part of the scooter or engine with one probe, and the sensor wire with the other probe. We turn the engine with the starter and look at the display:
- If the numbers are flashing on the display, then the sensor is generating a pulse and everything is fine with it
- If zeros remain on the screen, the sensor is faulty or the wire is broken
In the 2V measuring range, a working sensor should produce approximately the following values
In the range of 200mV such
If the sensor does not produce anything, check it for a break:
We switch the tester to the audio “dialing” mode - with one probe we touch the ground, with the second - the sensor wires: a working sensor in the “dialing” mode should give approximately the following values
If the display shows only zeros, it means the wire is broken or the sensor is screwed up. In any case, you need to remove the generator and look at the sensor. And there you will see: if the wire is intact, then the sensor is 100% screwed up.
Examination
You can check the sensor without removing the generator from the engine and without even knowing where it is located. We just need to find the connector with which the sensor is connected to the scooter’s on-board network and check whether the sensor produces an impulse or not.
We go to the right side of the scooter, inspect the engine for a thick bundle of wires coming out of it, move along the wires to the connector with which it connects to the on-board network - look in the bundle for the blue and white wire coming from the engine and disconnect it from the terminal
We switch the tester to the AC measurement mode for the 2V range or, if your tester has such an option, for 200mV. We touch any metal part of the scooter or engine with one probe, and the sensor wire with the other probe. We turn the engine with the starter and look at the display:
- If the numbers are flashing on the display, then the sensor is generating a pulse and everything is fine with it
- If zeros remain on the screen, the sensor is faulty or the wire is broken
In the 2V measuring range, a working sensor should produce approximately the following values
In the range of 200mV such
If the sensor does not produce anything, check it for a break:
We switch the tester to the audio “dialing” mode - with one probe we touch the ground, with the second - the sensor wires: a working sensor in the “dialing” mode should give approximately the following values
DH scooter
ATTENTION! A completely simple way to reduce fuel consumption has been found! Don't believe me? An auto mechanic with 15 years of experience also didn’t believe it until he tried it. And now he saves 35,000 rubles a year on gasoline! Read more"
You should know that the scooter's DH is a device equipped with a magnet. By interacting with it, the DC sends an impulse to the vehicle switch, which, in turn, affects other elements of the ignition system (babin, etc.).
On 2-wheelers, the DC is just a magnet with wires going to a switch. The sensor is located here, under the cover.
The wire will be pulled through the protective channel directly to the switch.
Some people believe that in order to check the DH as accurately as possible, it needs to be removed. On the other hand, on 2-wheeled vehicles it is not at all necessary to do this, since checking with a multimeter is feasible anyway.
The easiest way to check the hall sensor is by dialing. To do this, you should arm yourself with a multimeter and set the device to ringing mode.
Here's what you need to do specifically:
- put the multimeter in ringing mode;
- Connect the ends of the device to the hall sensor wires.
If any values appear on the multimeter scale, even if they jump, the DH is working. If it is silent and nothing happens, it is faulty.
You can also set the device to resistance mode. And the check will be similar. If the values on the multimeter scale change, the DC is ok.
Checking the inductive sensor with a multimeter can be done this way: the device is placed in position 2000.
How does the scooter ignition system work?
The scooter ignition system is one of the most important components of the vehicle. If it fails, then you can only get to your destination without repair by towing, because the engine will not start without a valuable spark.
In all motor engines, the task of the ignition system is the same - to ignite the fuel mixture in the cylinders. The mixture is ignited by a spark from a candle.
The ignition system of scooters and other motor vehicles consists of the following components.
- Ignition switch.
- Candle (Spark plug).
- High voltage wires.
- Reel or reel (Ignition Coul).
- Generator.
- Hall sensor (Sensor).
- Rectifler.
- Control unit or switch (CDI).
Contacts, terminal blocks and plugs are also included in the scooter’s ignition system.
The generator produces electricity, but it is variable, not constant. The rectifier normalizes the generator energy and distributes it into the system.
The generator is connected directly to the rectifier, ignition switch and battery (rechargeable battery).
The ignition switch is also connected to the switch and coil.
Babina - with a candle and a generator.
Thus, a circular circuit is obtained in which the ignition elements are supported among themselves.
- The main high-voltage wire runs from the spark plug to the woman.
- The spool should always be located within a radius of 40 cm from the engine and at a distance of 30 cm from the spark plug.
- The switch is a black box with white wire blocks. It can be located either in the front of the scooter or in the back.
- There are several wires coming from the rectifier, usually 7. Like the switch, it can be located either in front or behind.
- The induction sensor on scooters is located so that when the generator rotates, it is activated. You can imagine it this way: there is a lug on the generator wheel, which, when rotated, comes into contact with the sensor slot.
- As soon as the hall sensor makes contact, it sends a signal to the switch. The latter is closed in normal mode, but after receiving a command from the DH it opens.
- Through the switch, the charged capacitor supplies voltage directly to the coil. The latter is equipped with 2 outputs: to ground and to the switch.
- The bobbin has 2 windings. There are few turns wound on the primary winding, and many on the secondary winding. Thus, as in any transformer, high voltage is generated here and transmitted to the spark plug.
- The spark plug receives about 20 kW.
If there is no spark on the scooter
So, knowing how the ignition system works, you can easily identify the weak link. For example, if there is no spark in the system, the scooter stops and does not go further, through logical calculations you can find the reason, which is often associated with the hall sensor.
As with automotive systems, testing should always begin with the spark plug(s). It is unscrewed and inspected:
- an overly white spark plug electrode indicates overheating;
- yellow – about ignition interruptions;
- black - about an enriched fuel mixture.
The checking process can be greatly simplified if you have a spare and working spark plug on hand. It is inserted in place of the old one, and the presence of a spark in the spark plug gap is checked. This is done by lightly touching a spark plug threaded into a wire to ground and simultaneously starting the engine.
Attention. You should always wear protective gloves when working, since 20 kW of current is no joke. It is prohibited to touch the body (ground) or spark plug with bare hands at this moment.
The search continues if a spark does not appear on the spark plug. In other words, high voltage does not flow from the woman to the spark plug. The armored wire and, in fact, the woman herself come into question.
It is recommended to check the armored wire at its ends, at the points of connection with the spark plug and the woman. It is recommended to “revive” the coil terminals (if it is working) by removing and inserting the ground and positive wires.
The next element of the ignition system to be checked is the switch. It is attached to scooters thanks to an elastic band, so it will not be difficult to remove it. There are 5 (6) wires going to the scooter switch: 2/3 to one block and 3 to the other.
The sensor is inspected if the spark plug, spool and switch are in order. One wire from the switch goes directly to the household, bypassing other elements of the system. The sensor is located near the generator. More details on how to check it are written above.
What is a Hall sensor?
The Hall sensor is widely used in the automotive industry to measure the angle of the camshaft and crankshaft. It notifies the driver about the moment of spark formation.
This sensor is based on the Hall effect or Hall voltage, which consists in the fact that when a conductor with direct current moves into a magnetic field, it generates a transverse potential difference.
This electromagnetic phenomenon is named after the Baltimore scientist Edwin Hall who discovered it in 1879. Hall discovered the emergence of a transverse potential difference on thin gold plates, but the application of his discovery in practice became possible only 75 years later, during the era of active development of the production of semiconductor films. The Hall effect found its application in the sensor of the same name, used in cars and scooters to capture the potential difference on the sides of the plate, that is, as a magnetic field meter.
Nowadays, there are two main types of Hall sensors:
- Digital, detecting the presence of an electromagnetic field.
- Analogue, converting field induction into voltage.
What does a Hall sensor do in a scooter?
Measuring the magnetic field strength is necessary in various motors. Typically, a Hall sensor is used when working with the ignition system in a car or scooter. The advantage of using this particular device is its non-contact effect. It can be applied to liquid level meters, current measurement, motor control, and magnetic code reading. The Hall sensor has completely replaced reed switches, which mechanically close and open the electrical circuit when the magnetic field strength changes properly;
In a scooter, the Hall sensor may be an element of the engine ignition sensor. Sometimes it serves to monitor the load current and shut down in case of excessive current supply, since the device can break down if it experiences sudden voltage surges. Due to the absence of contacts and the possibility of contamination, the Hall sensor is ideal for scooters.
Working principle of the Hall sensor
It is necessary that the output current of the sensor be sufficient for the receiving device in order to reduce the influence of interference that distorts the transmitted information. All that remains is to disconnect the terminals of the Hall sensor and unscrew it.
So how does a Hall effect sensor work? Since when the engine is running, the sensor will be exposed to high temperature and the plastic may leak out, and this will lead to more serious damage.
Resistances R1, R2 set the output current of the pulse sensor. Thus, there will be a difference in electron density at opposite ends of the plate.
In a working device, the voltage will vary from 0.4 V to 11 V. Ignition systems can be divided according to the principle of operation into three stages of the system: Contact.
Radio components in the circuit The parameters of the pulse sensor are largely determined by the components of its electrical circuit used. If you return the heater to the vertical position, the heater will turn on again.
There is a simpler way: the moving contacts and elements are simply magnetized. Simple test of the Hall sensor! A simple Hall sensor check!
How to replace the sensor?
A malfunction of the Hall sensor in a scooter is diagnosed using a tester. During normal operation of the sensor, the indicator should be above about.4 V.
If your meter is faulty, it must be replaced. This is done as follows:
- Remove the distributor by freeing it from the cover. Note the position of the slider before replacing. There is a pin inside that needs to be removed. Also remove coupling 22 (oil deflector) and washer.
- Remove the Hall sensor screws and its mounting. Carefully remove the device.
- Make the necessary repairs or install a new sensor by performing all the steps in reverse order.
Replacing Hall sensors
The essence of the repair comes down to replacing faulty sensors and restoring the wire (if necessary). Faulty sensors need to be replaced - removed from the groove in the stator, remove the remains of the electronic device and traces of glue, clean the installation site and install new elements. The contacts need to be soldered and insulated. You can use epoxy resin or a suitable adhesive to secure the new sensors. After the repair work, it remains to check the serviceability of the MK.
The video clearly demonstrates how a wheel motor with a faulty Hall sensor works and explains how to identify a non-working sensor and correctly replace it.
A previous article on the VoltBikes blog covered the principles of assembling an electric ATV with your own hands.
How to Check the Hall Sensor on an Alpha Moped
Photo report: How to check the scooter sensor?
First of all, I would like to make a small contribution to improving the technical literacy of some who are not particularly burdened with intelligence data. The vast majority of them call the magnetic induction generator sensor with some consternation. "Hall sensor". And the funny thing is. there are tricks there too. How not to go to the store: on the label with the sensors, and it says: “ Hall ”. That's where it comes from. Okay, hackers, not much to talk about. tough case. And you?
Battery ignition systems once At the right moment, they opened a circuit in the primary winding of the ignition coil. current was lost, a magnetic induction effect occurred, and high voltage was applied to the secondary coil of the ignition coil that was applied to the spark plug. And then in the form of a spark discharge, the spark jumping between the electrodes of the spark plug forms the well-known spark for all of you.
In modern ignition systems such as CDI, namely will be discussed. the principle of spark discharge formation has remained virtually unchanged. With the exception of the spark timing control method.
Instead of mechanical contacts, an electronic sensor was introduced into the CDI ignition system, which at the right moment gives a small impulse to the switching thyristor (where it works in electronic key mode, in fact it is something other than an electronic switch and is not mechanical, as before). the thyristor opens, and the current from the switch capacitor passes to the ignition coil. And further, almost the same as in the old contact ignition systems.
VESKO-TRANS.RU
Content
How to check the switch on a scooter, operating mechanism and description
Scooter is a common vehicle today, it does not require much fuel but at the same time it does not provide the incredible speed with which you can transport your two-wheeled motorcycle brothers. This is a very specific type of transport that not everyone will choose. But all the people who love scooters are always passionate about riding them, they have a lot of fun, they also find them very comfortable. But with all this, not a single car is insured against breakdowns, including a scooter .
Malfunctions can be very diverse, but in this article we will talk about electronics, and more specifically, how to test a switch on a scooter. Naturally, if you have no idea what we are talking about, you should not immediately resort to tools. It's best to take a long, hard look at how the electronics are housed in the scooter, the difference between checking the shifter on a car versus a moped, and what you can do to check the electronics for damage and repair the vehicle. Overall, before you think about how to test a scooter shifter, you should understand what it is.
Switch and circuit diagram of the device
How to check the switch on a scooter if you don't even know what it is or where to look for it? That's why you should start small. The first thing you need to do is figure out what the switch is. It's actually quite simple because the switch is the element in the vehicle's electrical ignition circuit that generates a low voltage pulse that is sent to the ignition coil. Isolating the definition from the overall picture does not look very clear, so let’s look at the structure of the entire circuit.
Therefore, the main element here is the generator, which generates the operating voltage to operate the switch discussed in this article. As mentioned above, using a power generator, the switch generates a pulse to the ignition coil, not just a pulse, but a low voltage. The ignition coil, in turn, transmits a high voltage pulse at a certain point in time, which is transmitted to the spark plug. The spark plug is screwed into the cylinder head and, after receiving a high voltage pulse, ignites the combustible mixture, which drives the engine. Well, now you know how the circuit works in a car, which will allow you to better understand how to make a control switch on a scooter.
Malfunction
What prompted you to study the article on how to control switch on 4T scooter or any other common model? Chances are your car won't turn on, but you don't know what the problem is. The plugs may catch fire and the engine may stop. All of this may have a cause in the switch, or it may not. This is the main problem of the repair. You need to identify where the problem is in order to solve it.
Hall sensor: how to check the operation of the sensor on a scooter, VAZ, AUDI or OKE
Along with the power unit and other complex systems, the design of the car is replete with many different sensors, without which the coordinated operation of all these systems is simply impossible. One of these small but extremely important elements is the Hall sensor, which measures the output voltage depending on changes in the magnetic field. A malfunction of this sensor can lead to a stop in the operation of the injector (or other systems) and, accordingly, to a complete stop of the vehicle.
The Hall sensor measures the output voltage depending on changes in the magnetic field
In VAZ cars, the Hall sensor works as a simple analog converter that returns power. Foreign automakers combine the operation of Hall sensors with digital devices, which, in tandem with this sensor, operate in protection mode (on/off). It would be more correct to call such a tandem not a sensor, but a switch, or a distributor.
The use of Hall sensors is not limited to the automotive industry. It is widely used in consumer electronics, computer equipment, and industrial equipment. You will find this part on any scooter, as well as on the alpha moped, which is popular in our latitudes. In addition, this sensor is present in brushed electric motors powered by direct current, and there it performs the function of determining the position of the magnet.
The third reason is the generator
If after replacing the ignition coil and switch the spark does not appear, then we check the generator. Here we need a multimeter. We set the device to the diode position, remove the generator chip and begin the test. Two wires are responsible for the spark:
- blue with a white stripe is a hall sensor;
- black with a red stripe is the coil on the generator.
Generator chip
Check the hall sensor. We connect the probe from the device to the blue wire with a white stripe. And we connect the other probe to engine ground. Numbers should appear on the device, indicating that the hall sensor is working.
We do the same work with the coil on the generator. If the numbers are displayed on the device, then the coil on the generator is working. If nothing happens on the device, then you will have to change the generator or hall sensor.
Video tutorial on checking the hall sensor
If we talk directly about a passenger car, the Hall sensor can perform the following functions: monitoring and determining the speed of rotation of the car’s wheels, as well as the shafts of the engine system, ensuring the correct operation of the anti-lock braking and braking systems. Also, it is based on movement and work monitoring devices, in other words, a speedometer and a tachometer.
If you own an old car, then it would be useful to know how you can independently check the performance of the Hall sensor, because the cost of such work at a service station can be quite high. Also, knowledge about the process of checking it will be useful in cases where the car suddenly stops starting - quite often the problem may lie in this particular device. So, if your car has stopped responding to turning the ignition key, you need to arm yourself with a voltmeter and a set of screwdrivers, open the hood and start checking.