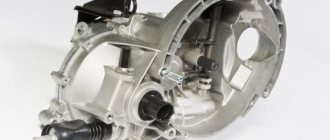
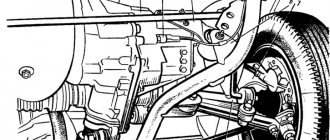
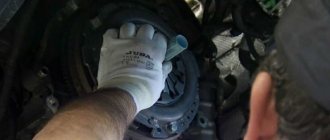
A few words about the clutch cable drive
Foreign automakers extremely rarely equip their cars with such a clutch drive, preferring more reliable hydraulics that rarely fail. But on vehicles of Russian manufacturers, cable clutch mechanisms are standard. And this despite the fact that they have a lot of real shortcomings, which are well known to owners of domestic cars.
The clutch cable needs constant adjustment during operation, which is due to the natural operating wear of the clutch drive. It quickly becomes covered with rust, breaks off at the most unexpected moments, and so on. It is for this reason that every driver driving a car with a manual transmission is simply obliged to know what to do if the cable that interests us fails.
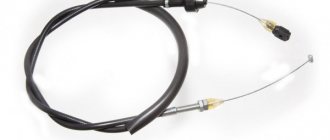
We will talk further about how to change and adjust the cable mechanism. Now let’s describe it in a few words. The cable is connected to the clutch pedal using screws, its other end is also fixed with a screw, but to a special bushing in the shield. In this case, the cable is screwed to the pedal as tightly and reliably as possible, and to the bushing more freely, due to which the described mechanism rotates on the axis without any serious difficulties. In addition, a stop must be installed under the pedal, which protects the cable from breaking.
Function of cables and jackets on switches and brakes
A cable is a straight metal thread with increased strength. Receives and transmits all forces to the mechanism. Thanks to this transmission, the switch or brake actually operates.
The gearshift cable connects the shifters and switches. When you press the lever, it tightens or loosens, depending on the gear selection. Optimal tension maintains the operating condition of the derailleur and instant chain transfer across the sprockets.
The brake drive cable is thicker and stronger than the previous one, as it takes on more force. Constant tightening and loosening increases its length over time, requiring periodic tension adjustments. Operating principle: pressing the handle causes the metal thread to move. Attached at the other end to the brake body (caliper), the cable forces the pads closer to the braking surface. When the handle is released, it moves in the opposite direction.
The shirt is a braid of cables. The shell allows the cable force to be transferred to the mechanism where the transmission point is not fixed:
- tail feather – switch;
- brake lever – front brake;
- lever – rear brake;
- steering wheel - frame.
The simplest version of braiding is twisted metal wire coated with a flexible polymer on top. The ends of the shirts are equipped with lugs, from where the exposed (adjustment) section of the cable comes out. Another function of the sheath is to protect the cable from mechanical damage.
Adjusting the cable drive - how to do it?
If you depress the clutch when changing gears, but the pedal goes to the floor instead, there is a problem with the clutch cable. In such a situation, you should drive as carefully as possible to a safe place on the road (for example, to a parking channel), stop the car and find out the reason for the failure of the mechanism we are considering.
Some car enthusiasts are sure that the cable cannot be adjusted; in their opinion, only replacing the mechanism can help, which is not entirely true. The car manufacturers themselves strongly recommend not to rush to install a new cable until the cause of its failure is determined. Often, a simple design adjustment solves all problems. It is performed using two 17 keys according to the following scheme:
- the locknut is slightly loosened so that the adjusting (tension) nut has sufficient distance to move;
- After this, the tension nut is manipulated until the required level of cable tension is achieved.
The results of the process are monitored by pressing the clutch pedal to determine the ease of its movement. In cases where, after tightening the cable, you do not notice any changes in the “behavior” of the pedal, you need to repeat the manipulations with the tension and lock nut again. And then press the pedal again. You may have to perform the stretching procedure several times. Until you achieve proper clutch pedal travel.
The main thing here is not to overdo it. If the cable is overtightened, it will immediately burst. And if the tightening is insufficient, the mechanism will not be able to effectively perform its function. Separately, we note that some cars are equipped with self-adjusting ratchet cable mechanisms. There is no need to manually adjust them, since their length is adjusted automatically when they wear out during use. It is enough just to regularly check the clutch pedal travel.
Which clutch cables are better to buy – original or not: opinions of car owners
- The Chinese did not disappoint! “I purchased a mechanical “cartridge” made in China. I paid only a few dollars, I’ve been using it for three years, constantly pulling the clutch. I was pleased with the work of the Chinese. But if you want to change the auto-adjustment cable, I advise you to buy a more expensive, original one. Because the mechanism is not fully thought out and cannot be repaired, in which case it will only have to be replaced.”
- There have been no problems for two years now.
“The cable didn’t break, but stuck halfway through the pedal stroke when returning. That's why he kept lifting it with the toe of his boot. I wanted to change it. I studied all the most acceptable options and decided to buy the original. Although expensive, it closed the issue. It's been two years now. There are no problems driving in traffic jams.”
Clutch replacement operation
If the clutch cable on your car breaks, or its adjustment described above does not bring the expected results, you will have to install a new cable drive. Experienced drivers always have a spare cable in the trunk, having learned from the bitter experience of its breaking.
You can make a “spare wheel” yourself, but experts do not recommend doing it yourself in this matter. Firstly, because a homemade cable breaks quickly. Secondly, the process of making it yourself requires a lot of time, as well as the availability of tools and additional devices (machinery vice, grinder saw and others). Believe me, it’s easier to buy a reliable cable than to make it yourself.
Features of setting up the new clutch drive
To check the correct installation of the mechanism, measure the distance between the end of the damper and the clutch fork (or cable tip). In the first case, the length (distance to the fork) should be from 86 to 91 millimeters, in the second (to the tip) - from 60 to 65 millimeters. The distances shown are valid for most vehicles. But in some cases they can have other meanings. Then you will have to adjust the mechanism using the tension nut manually (according to the diagram given earlier).
Then a final check of the clutch cable's functionality is performed. To do this, press the pedal 2-3 times, measure again and make sure the resulting distance corresponds to the recommended values. If there is no match, we set up the mechanism again. When the required values are achieved, be sure to tighten the locknut. Now you can safely hit the road!
How to change the clutch cable on a VAZ-2114 photo and video
It is possible to replace the clutch cable on a VAZ-2114 at home and you don’t have to go to a car service center, where they will charge a considerable amount of money for repair operations. So, many motorists, as practice shows, carried out the replacement with their own hands. This article will tell you how to perform this procedure, and will also tell you about some of the nuances and subtleties.
Video about replacing the clutch cable on a VAZ car
The video will tell you how to replace the clutch cable, and also tell you about some of the subtleties and nuances of the process.
Replacement process
Diagram of a car clutch
Most car enthusiasts and owners of the VAZ-2114 are accustomed to doing most of the repair and restoration operations on their car with their own hands. Replacing the clutch cable is no exception. Of course, not everyone is able to do this on their own, because they do not know where to start and carry out the process.
Algorithm of actions on the VAZ-2114
In principle, when everything is put together, you can proceed directly to the repair process:
- We remove the negative terminal from the battery to disconnect the power to the car.
- We find the cable and begin the dismantling process.
- Using a 17mm wrench, unscrew the fastening nuts.
Cable mounting bolts under the hood
Using 17mm wrenches, unscrew the clutch cable fixing nuts
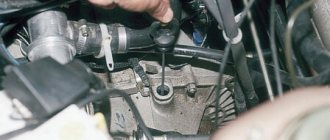
We remove the cable from the bracket and clutch fork.
We remove the clutch cable from the seat from the fork
Clutch pedal bracket under the hood
Disconnect the eyelet securing the cable to the pedal
The cable is pulled out from the engine compartment, so it needs to be pushed through from the passenger compartment. You can, of course, pull under the hood and pull it out, but this is dangerous because you can hit wiring or other elements.
We completely dismantle the cable
Clutch cable adjustment process
Cable selection
The old clutch cable is worn out and needs to be replaced.
While researching the spare parts market while searching for a clutch cable for a VAZ-2114, it turned out that there is an original part, as well as several analogues that are no different in quality, and in some cases even better.
Original article
2109-1602210-10 – original catalog number of the clutch cable manufactured by AvtoVAZ. It is installed quite easily and simply, and also does not require modifications or improvements. The cost of the product is 1200 rubles.
Analogs
In addition to the original part, you can find analogues that are recommended for installation on the VAZ-2114. So, what non-original parts can be found on the spare parts market:
- Adriauto 0101 is an Italian manufacturer that offers high-quality clutch cables. The average cost is 1000 rubles.
ABS K22120 – part made in the Netherlands. High quality and not expensive. The average cost is 1200 rubles.
conclusions
Replacing the clutch cable on a VAZ-2114 car is quite easy and simple. So, anyone, even a novice car enthusiast, can do this on their own in 1 hour in their garage
Particular attention should be paid to product selection and quality
So, a high-quality part will serve for a long time and will last its entire resource. If the replacement process itself seems complicated and impossible, it is recommended to contact a car service.
Replacing the clutch release cable
If the cable breaks or moves tightly in the sheath, replace the cable assembly. Remove the air filter (see “Removing the air filter”). In the engine compartment...
... by pulling the cable forward, we remove the leash with the cable from the groove of the clutch release fork lever
Using a “17” wrench, unscrew the nut securing the front end of the cable sheath to the bracket on the gearbox several turns, holding the sheath by the hexagon with another wrench of the same size.
We remove the end of the cable sheath from the bracket on the gearbox. Inside the car, under the dashboard...
...using an 8 wrench, unscrew the nut securing the cable sheath bracket to the pedal bracket. The operation of removing the housing of the automatic cable length adjustment mechanism from the clutch pedal pin must be performed in a hard-to-reach place. To make the operation easier, pull the clutch pedal firmly towards you...
...so that the trailing edge of the pedal slightly deforms the thin sheet metal of the body panel. Use a screwdriver to pry up the retaining bracket of the clutch pedal pin...
...and remove it (for clarity, shown in the engine compartment with the clutch pedal cover removed).
Replacing the Grant clutch cable:
1. In the cabin, under the instrument panel, using an 8 mm wrench, unscrew the nut securing the cable sheath bracket to the pedal assembly bracket.
2. Use a Phillips screwdriver to pry the spring clip and remove it from the groove of the clutch pedal pin.
3. Remove the eye of the automatic cable length adjustment mechanism housing from the clutch pedal pin and remove the upper part of the cable from the pedal assembly bracket.
4. In the engine compartment, pull the cable forward and remove the cable guide from the groove of the clutch release fork lever.
5. Rotating counterclockwise, unscrew the leash from the threaded end of the cable.
6. Remove the rubber protective cover from the cable end.
7. Remove the end of the cable sheath from the bracket hole on the gearbox.
8. In the passenger compartment, remove the cable sealing cover from the hole in the front panel and pull the cable into the passenger compartment.
Note:
Before replacing the cable, check the condition of the plastic bushing on the pedal pin. Replace the worn bushing with a new one and apply grease to the pin.
9. Replacing the Grant clutch cable. Installation sequence.
– pass the cable through the hole in the front panel from the passenger compartment into the engine compartment;
– install the sealing cover into the hole in the front panel;
– put the automatic cable length adjustment mechanism on the pedal pin and secure it;
– screw a plastic leash onto the threaded end of the cable so that the end of the cable end is flush with the end of the leash;
– insert the leash into the groove of the clutch release fork lever;
– adjust the clutch drive.
10. To adjust the clutch, pull the cable forward by the threaded end until it stops, overcoming the force of the clutch pedal spring, and hold the cable in this position.
How to Replace the Drive Cable on Shifters and Brakes
A bicycle derailleur is a capricious thing and requires periodic adjustments, in particular, adjustment of the cable tension. The brake system drive also becomes unstable from time to time. This will be indicated by weak pad movement, poor performance and reduced braking efficiency. Despite this, the procedure for adjusting and installing a new cable is simple and accessible when repairing a bike.
Caring for brake and transmission cables for bicycles and jackets:
Trim frayed ends only with special tools: semicircular scissors, chisel or hacksaw. Once a season it is necessary to lubricate the cables with a thick compound. The caps should tightly close them from the external environment.
Damaged or excess pieces of shirts are trimmed using a grinder or a grindstone. After trimming, it is advisable to straighten the coils from the inside so that the cable does not rub against them.
On a bicycle, the length of the drive cables must have some margin so that they can be tightened during adjustment. Also, they should not dangle freely when moving or bend.
