December 29, 2015 Lada.Online 165 172 25
The manufacturer did not install a 4x4 transfer case with a switchable front axle on the Niva for a number of reasons, for example, to evenly distribute the load along the axles. But many SUV owners do not share this decision and try to make their car single-wheel drive. Do you know what uncoupling the front or rear axle of a VAZ 2121 does?
Refinement technology using the example of the Niva “Turbo Osa” car
The technology has been tested on this model; the RPM (front axle gearbox) has an independent suspension as standard. To save time, you can purchase ready-made tying kits.
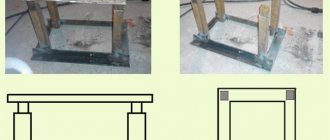
Many car enthusiasts make brackets, plates and fastenings with their own hands, providing colleagues with drawings of their own design.
Important! Such structural elements must be made of durable steel. It is unacceptable to use factory silumin elements as a platform for fastenings.
General rules for revision
1. The untethered bridge must be fastened at three or four points that do not have a rigid connection with the engine. 2. The front axle beam and anti-roll bar are used as supports. 3. When determining the new position of the RPM, it is important to prevent horizontal displacement of the axes of the propeller shaft and axle shafts.
The bridge can be uncoupled using a gearbox suspension kit from Chevrolet NIVA.
Therefore, most car owners prefer steel brackets made independently or in the factory.
For cars taking part in off-road competitions, a version of the RPM steel body has been developed. This gearbox is structurally equipped with lugs for independent suspension. There are also additional subframes for extreme conditions of use of the NIVA. When installing the latter, the question: “how to untie the front axle” does not arise, since the gearbox is mounted in the subframe.
Some useful tips:
• Since the engine no longer bears additional load, you can replace the standard hard cushions of the power unit with softer ones, from VAZ classics. • When attaching the lugs to the front axle beam, welding should be carried out by an experienced welder who is familiar with the technique, which allows not to “release” the metal. The beam is a load-bearing structural element of the car, and its strength should not be reduced. • The welding areas should be cleaned of scale, then the joints should be thoroughly primed and painted. • After untying, the RPM should not touch the engine and beam either in a static position or while the vehicle is moving. • If you are producing a suspension lift, you should select a decoupling kit that takes into account the increased angles of the CV joint and driveshaft. • The silent blocks of the brackets of the untethered gearbox are subject to wear in the same way as the cushions of the power unit or suspension elements. The replacement of these elements should be included in your list of operations during maintenance.
Kit options
On sale you can find several different options for ready-made kits for decoupling the VAZ 2121 front axle gearbox. Let's look at some of them.
Ready-made kit kit ZSTehnology OPM-1 for untying the Niva RPM, which includes a steel front gearbox housing cover and brackets connected through silent blocks and welded to the front beam. The retail price of this complex is 3100 rubles. Among the disadvantages: you will have to buy additional clips and stabilizer bushings.
A more durable and complete ZSTehnology OPM-2 Ultra-PRO kit. Unlike the previous one, the package includes all the necessary parts and can be used on all modifications of the Niva. The price in stores is 4,000 rubles.
The kit for independent mounting of the VAZ 2121-2131 front axle gearbox from SONDA is a similar set of brackets and a steel plate for additional protection. The cost of such a set is 4100 rubles.
There are companies that are engaged in the modification of Niva cars; they can custom make a decoupling kit with better quality parts, which will increase the reliability of the unit. Some owners of domestic SUVs prefer to make homemade parts for decoupling the front axle.
Reviews and observations
Based on the experience of owners of the Lada 4x4 SUV, a number of advantages can be identified after disabling the front axle:
- Fuel consumption can be reduced by 3 liters per 100 km. Savings in each case are individual and in some cases may be insignificant;
- Dynamics improves. The car accelerates better on dry asphalt;
- The maximum speed increases slightly;
- Less vibration, howling and hum while the car is moving.
Rear-wheel drive on the VAZ 2121 has a number of disadvantages:
- Significant reduction in cross-country ability;
- Significant deterioration in controllability. With the front axle disabled, it is very difficult to drive on a slippery road; this is facilitated by the short wheelbase of the SUV. On the VAZ 2131 the situation is a little better;
- The service life of parts is reduced. There is no safety margin for rear-wheel drive in the Niva's transmission;
- In winter, the oil freezes in a disconnected bridge, so sometimes it is very difficult to start moving after a long stay.
Why buy an all-wheel drive Niva and then disable the front axle? No need to drive an SUV outside the city? Saving on gasoline? It is worth considering whether it will be possible to reduce vehicle maintenance costs when, soon after one of the bridges is disconnected, it will be necessary to carry out premature repairs.
What do you think? Are there situations when it is advisable to disable the front or rear axle? Maybe it would be better to modify the Niva to improve its off-road characteristics? For example, install a self-locking differential or mud tires?
Key words: 4x4 gearbox
Lada 4×4 3D SR20DE “My podpopnik” › Logbook › Untying the front axle
The kit for decoupling the RPM, which I bought from the guys from IQ-racing, was primarily needed not to reduce vibration, which now really doesn’t exist, and not to prevent the body and studs from tearing under wild loads, as this I’m not testing the car, but in order to install the SR safely, since I don’t see any point in tying the gearbox to the SR.
And so, we have a decoupling kit, when I unpacked it, I was disappointed that it was not completed with brackets and stabilizer bushings. Luckily the store was nearby, I had to buy some)
The kit consists of side ears with silent blocks and oil seals, a lower reinforced steel cover with its own drain plug, a set of ears for welding onto the front beam, bolts are also not included in the kit, I had to buy a couple of tenths of bolts with washers and nuts.
The oil in the diff was disgusting with a silvery streak, but there were no large chips on the plug.
The gearbox itself was a big lump of dirt, both side seals were leaking, fortunately the new ears have new seals))
To install the uncoupling, I had to disassemble the entire front chassis, at the same time I removed the silent blocks and axles of the lower arms, which became loose and knocked wildly) (It turns out that it was they who knocked, it was impossible to determine with the car hanging up)
Having pulled out and cleaned the gearbox from dirt, I washed it inside and removed the studs of the old fastening to the internal combustion engine.
On the internal combustion engine, I also unscrewed one of the fasteners, I wanted to first cut off the front ones, which are part of the internal combustion engine supports, but there was a lot of hassle, so I left it for now.
We twist the old RPM cover, put a good layer of high-quality sealant and install the blue new cover.
We remove the bearings and old mounts with triangles from the drives, and put new ears in their place.
The old drive ears were mounted on studs, after trying it, I realized that in the future when removing it it would be a complete mess, so I replaced the studs with bolts.
We hang the gearbox by the stabilizer and start pushing the drives in, the left one comes in and sits down without any problems.
The right one rests with the new ear against the pants on one side, against the beam on the other, and against the engine support on the third. I had to unscrew the engine support and lift it slightly so that the ear would fall into place.
Next, we align the RPM on the beam, insert the ears and cook)
At the same time, the RPM dropped below two cm relative to the motor.
I filled the RPM with TOYOTA 75W90 oil.
Oddly enough, I didn’t notice anything that could cause such a vibration at XX, and after a couple of days it disappeared on its own... mysticism)) maybe something got used to it)))
At the same time, during this work, I measured how the SR would fit; it would fit on the pallet and block without any problems) the most difficult part will be the exhaust, which will pass from the side of the steering gearbox))
Source
Sequence of work.
1. We purchase (make) a kit for untying. When making it yourself, we drill holes in the pan in accordance with the diameter of the studs. 2. We securely install the car on supports, preferably above the inspection hole. 3. Drain the oil from the gearbox. 4. We dismantle the CV joint drives, having first freed the steering knuckles of the wheels. 5. Disconnect the front driveshaft from the flange. 6. We remove the axle gearbox from under the car. 7. On a flat working surface, separate the bottom tray and side covers of the RPM. 8. On top of the CV joint drive covers, using elongated studs, screw the earring brackets. It is possible to replace the installation sequence of covers and brackets, depending on the kit you choose.
9. Instead of a standard pan, we attach a reinforced one, with installed clamps for attaching the anti-roll bar to the beam. In addition to the factory gasket, we use sealant. The pallet will experience additional loads, so the tightness needs to be improved. 10. We hang the RPM with the rear mount on the stabilizer beam. We center the axis of the propeller shaft and the axis of its flange in the gearbox. 11. On the bridge beam we mark the fastening eyes for the brackets for the front suspension of the gearbox housing. 12. We weld the eyes to the bridge beam and perform anti-corrosion treatment. 13. We fix the earrings in the eyes using polyurethane or rubber silent blocks. 14. Check the vertical . 15. Attach the axle shafts and driveshaft, secure the steering knuckles. 16. Fill the gearbox with oil according to the operating instructions. 17. Without starting the engine and without removing the car from its supports, check the free rotation of the wheels and the front driveshaft. 18. We make a test drive, after which we re-inspect the car in the inspection pit.
Lada 4×4 3D › Logbook › 18. Installation of pairs 4.3 and decoupling of the front axle gearbox
Dd, everyone! I want to start this entry with the words - Elevator is evil!
If you are making a lift and installing 29″ wheels, be prepared to at least replace the pairs and untie the gearbox; cutting the arches is not specified at all - cutting is a must!
After the lift, the angle of the front drives changes and the grenades work in critical angles, they begin to crunch, the anthers begin to tear. Ideally, after a good lift, the front gearbox should be untied. Initially, we lowered the gearbox by placing washers, but with constant off-road use, the design does not justify itself; if you jerk hard, the original studs will not hold up :))).
The desire to drive off-road and go fishing haunted us and we decided not to put everything off and did everything as soon as possible.
I'm installing a gearbox
To begin with, I cut off the standard fastenings of the gearbox, then, to make the task easier, I tried to screw the gearbox to the stabilizer:
I screwed it on, but it doesn’t fit into place because... rests against the beam. Therefore, I unscrewed it from the stabilizer and jacked up the gearbox through a wide board and brought in the drive:
Don’t forget to coat the joints with sealant and install a gasket. I forgot, I had to take it off and redo it...
One side is ready:
The second situation is similar:
I screwed the brackets on the beam, and tightened the brackets on the beam, but without force. I think I’ll drive about 10 meters, and then I’ll tighten the brackets on the stabilizer.
After assembly, I looked at the coincidence of the standard hole for fastening the gearbox and the cut off pin. There is a slight displacement - about a centimeter. It feels like if you put washers under the bolt in the bracket on the beam, the hole and the cut pin will match.
To celebrate, I assembled the left side of the suspension:
Collected because It was interesting to change the position of the wheel when replacing bushings in the beam. The wheel has moved forward approximately 1.5 cm.
Perhaps such a shift will allow you to install wider wheels without resorting to a lift, but this is not certain.
In general, if you liked it, then share it with your friends, maybe this article will help someone when untying the gearbox.
Source
Lada 4×4 3D enthusiast's technical equipment › Logbook › RPM decoupling
Most of the avid growers go through this)
I won’t describe much, everything is quite banal.
Painted the brackets, plate and cover of the RPM
Regarding the installation: A slightly different path was chosen. I didn’t remove the bridge, I only removed the right (original) bracket (although I had to suffer with an angle grinder). I filed it down and temporarily put it in place with a new one. This was done in order to correctly align the bridge.
I loosened the stud nuts of the left “original” brackets by 1-2 turns, and did the same with the bolt securing the right “original” bracket.
Here's what came out of it:
The danil4x4 kit turned out to be incredibly well thought out! Everything coincided! All that remains is to adjust the gaps (2-3mm) for the welding seams and grab the ears. Then remove the RPM, finally scald and paint them. Which is what was done.
After untying, I removed the right and left (closer to the gearbox) brackets. Unfortunately, the third gearbox support bracket is the load-bearing engine support bracket. There were no problems with it (no need to cut it), the gap is about 5mm.
This type of RPM fastening has been installed by the Niva plant since the summer of 2021!
. This allows you to relieve the engine mounts and get rid of the mutually transmitted vibration of the RPM - internal combustion engine.
The pillows were later replaced with “classic” ones.
All-wheel drive features
Chevy Niva is, as mentioned above, an SUV, which, unlike a regular car, has permanent all-wheel drive and its ground clearance is higher than that of a regular car, this is done so that it can be used without problems where there is off-road. While driving, the front and rear axles of this car are constantly running, and they are controlled by the transfer case. To reduce gasoline consumption, one of the bridges is turned off; when turning off, you should avoid surfaces where there is snow, ice or dirt. Let's look at what mechanism can be used to shut down.
