Setting timing marks on a 16-valve VAZ-2112 with your own hands
Car : VAZ-2112. Asks : Kostikov Vladimir Igorevich. The essence of the question : I can’t fix the timing marks, how can I set the marks on the timing belt?
I have a problem. When replacing the timing belt, the upper pulleys were not fixed, and now it is not clear how to align them. The marks on the pulleys do not “look” in exactly the same direction. Maybe it would be easier to tighten all the pulleys to the TDC position in cylinder 1? If we are talking about 16 valves, I am familiar with setting the marks on the VAZ-2112: I performed this operation on the timing belt 21124. Well, I have a 1.5 engine. Are there any differences?
Timing marks - installation of timing marks using the example of a VAZ 2110, 2111 and 2112 engine
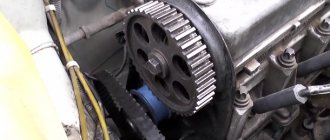
Dear friends, today we will tell you the basics of setting timing marks using the example of a VAZ 16 valve engine. It's no secret that correctly set timing marks are the key to proper engine operation. If the marks are set incorrectly, then normal engine operation is impossible. It is also important to tension the belt correctly, this greatly affects its durability. So, when do we have to deal with the procedure for setting timing marks? When, according to the regulations, we need to replace the timing belt at the next maintenance, by the way, the rollers are also necessarily changed along with the belt in this case. Also, if our pump is “covered,” the timing belt will have to be removed, since it is this that drives our “water pump.” Well, what if (the worst case scenario) is that our belt broke. Here, if the engine is “plug-in”, then this is a huge nuisance, the pistons meet the valves, and at a minimum, we are guaranteed to remove the cylinder head and replace the valves. So, what are timing marks and where are they applied? The first is the marks on the camshaft pulleys, both on the intake and exhaust:
They must coincide with the mark on the crankshaft, and there are already several methods for calculating this mark. It’s quite difficult to remove the generator belt pulley (it doesn’t allow you to see the mark) and see if the marks match.
With such a coincidence of the piston marks, they are at TDC (Top Dead Center)
The second method is to calculate the DPKV sprocket by the teeth
And finally, the third option for setting the crankshaft position is the marks on the flywheel, they can be seen if you remove the rubber plug on the gearbox:
These are the options for comparing timing marks that we offer you using the example of 1.5 16V engines installed on the VAZ-2110, VAZ-2112 and VAZ-2111. If you still have questions regarding timing marks on your specific engine, ask them on our forum, in the appropriate section.
About timing marks and their displacement — Lada 2111, 1.6 l., 2005 on DRIVE2
I have been looking for information on timing phases on a 124 internal combustion engine for a long time and came across this material quite by accident. In general terms, I understand what is being said here. But it would not be bad if someone thoroughly chewed on what exactly a change in one direction or another means in pulsations, the angle of inclination of the first tip, the transition through zero, and the value of the maximum vacuum rarefaction.
From my own experience, I can say that shifting the intake 1 tooth to the right adds elasticity. As well as the displacement of the intake together with the exhaust to the right. And shifting the exhaust to the left gives a noticeable jerk-kick (acceleration) somewhere around 3500 rpm.
Timing PHASES on VAZ 2112. The belt was specially rearranged by tooth, back and forth. Engine 21124 (1.6 16kl.) gears:
• ХХ = 840 rpm (engine is warm, measurement after turning off the fan, t = 97 degrees) • difference between DR and DPKV is 0.32 degrees • SOP for DR 14 degrees (real 14 degrees) Note: 1) the difference between DR and DPKV is calculated as follows: First, auto-adjustment is done according to DPKV, then a marker (1 or 2) is placed at the beginning of the ruler (i.e., the value of the marker displayed on the ruler will be 0). Next, auto-adjustment is done according to the DR and the value of the marker (on the ruler) set earlier at the beginning of the ruler is looked at. The displayed value will be considered the difference. 2) the difference between DPKV and DR is calculated as in point 1 only in reverse. First, auto-adjustment is done according to the DR, then according to the DPKV 3) Real UOZ - UOZ according to the scanner 4) As a result of all the experiments, the ECU did not produce a DF (phase sensor) error
Issue 0 tooth is normal; Intake 1 tooth back
Issue 0 tooth is normal; Intake 1 tooth back
Issue 0 tooth is normal; Intake 1 tooth forward
Issue 0 tooth is normal; Intake 1 tooth forward
Release 1 tooth forward; Intake 0 tooth normal
Release 1 tooth forward; Intake 0 tooth normal
If the timing marks of the VAZ 2112 16 valves are off
People, don’t scold me, I’m strong!
My hands are scaly, but they still don’t know how to do anything ((((it’s time to change the belt and rollers. And yet I decided to type the Murzilok myself and type a bunch from the forums.
but at the most crucial moment the phone rang, I chatted and forgot that I had not yet secured the pulleys and removed the belt.
As I understand it, they switched a little or something, it’s not clear. In general, the marks have shifted ((((I thought about adjusting the marks by twisting these upper pulleys, but it’s not convenient to constantly click (((somehow to try what I collected. The result was not pleasing.
Here are photos of the marks as they were installed:
The mark at the bottom coincided, but it was absolutely right on the cent. but the label matches the label.
True, the old belt seemed to be about the same.
Did you collect everything except the belt? The revs fluctuate and it doesn’t start because the vacuum hose of the adsorber is not covered or there is some other place where air is drawn.
and here's another one. I still haven’t found it (((or is there no 4th mark? Looks like I did it wrong or didn’t finish it like I should have. Phew I calmed down. Otherwise I was thinking PPC)))
So it’s okay that you manually turned the pulleys so that the marks matched?
phew then the 3 marks coincided. So you need to look where the air is sucking? I'll take a look at the adsorber. I didn't understand about the hairpin. what kind of stud?(((
I didn't understand about the hairpin. what kind of stud?(((
the result but the breeder is bad! The revs are behaving strangely. around 500 when starting up and slowly after some time they rise to normal. and a couple of times it didn’t start at all.
The rustling sound disappeared when it was hot. The revs are normal and it also seems to drive well. but for some reason it seemed to me that the engine began to run with a completely different sound (maybe, and I didn’t really understand the tension (in the book it says, like, apply 100N of force (((and here’s how to damn apply these 100N)))) pulled it, felt fingers press 5 millimeters.
People, don’t scold me, I’m strong! My hands are scaly, but they still don’t know how to do anything ((((it’s time to change the belt and rollers. And finally I decided on my own
I typed in Murzilok and printed a bunch from the forums.
but at the most crucial moment the phone rang, I chatted and forgot that I had not yet secured the pulleys and removed the belt.
As I understand it, they switched a little or something, it’s not clear. In general, the marks have shifted ((((I thought about adjusting the marks by twisting these upper pulleys, but it’s not convenient to constantly click (((somehow to try what I collected. The result was not pleasing.
Here are photos of the marks as they were installed:
The mark at the bottom coincided, but it was absolutely right on the cent. but the label matches the label.
True, the old belt seemed to be about the same.
Source
Set the timing marks correctly - otherwise you will bend the valves!
The VAZ-21124 engine has a special feature: no matter how its pulleys are turned, it does not bend its valves. With the 21120 engine (16 v 1.5 l) such jokes will not work! If the pulley positions are not too far off, try putting on the belt and turning the mechanism to the “TDC 1 and 4” position. From now on, always use the following instructions:
- The crankshaft is set to the required position by checking the mark on the generator drive pulley (photo 1) or on the crankshaft pulley (photo 2);
Alternator drive pulley and crankshaft pulley
Exhaust and intake shaft pulley
In theory, on the VAZ-2112, marking is carried out the same way, no matter what engine we are talking about. Here are photos for engine 21120.
What it looks like in reality and in the instructions
Take the time to find the inspection window on the gearbox housing. There is another mark under the plug.
The last step is optional. And they do it so as not to redo all the work “from scratch.”
Updates for VAZ-21124
On a 1.6 engine, all actions are performed in the same way as described above. There is one exception - the generator drive pulley is aligned according to the mark on the casing (see photo).
Generator drive pulley, motor 21124
However, if this mark is not there, use the proven method: 20 teeth are counted from the DPKV body. Instead of the 21st there should be a “pass”.
The timing pulleys can be rotated as you like - the pistons will not touch the valves in any case. Compare what the pistons of two different engines look like and it will become clear what we are talking about.
Two different 16 valves
For those who don't understand anything
In theory, you can use an alternative configuration method. Let the camshaft pulley marks point straight down. Then the mark on the crankshaft pulley should face up (TDC 1 and 4).
If there is no fixing device, you can make it yourself. Even a puller for suspension springs will do (see photo).
Urgently help timing marks 2112 - Community "Lada 2110, 2111, 2112, 112, Bogdan" on DRIVE2
Please tell me how to set the timing belt correctly, the situation is like this: I took off the valve cover, check it by pushing the hydraulics. I didn’t loosen the timing belt, I didn’t remove the belt. Before removing the camshafts, just in case, I decided to check how the marks were set, whether the marks on the flywheel coincided with the marks on the camshafts, just as in the instructions. I repeat, I didn’t loosen anything, I didn’t remove the belt. I pull the camshaft pulley, the crankshaft turns and the marks on the flywheel and the marks on the camshafts do not match. At the same time, when the camshaft risks coincide with the slots, the first and fourth pistons are at TDC! I turned it many times, the result is the same: when the mark on the flywheel appears, then the camshafts are oriented at 15.00 and another revolution later, at 09.00. But when the camshafts are at the top of the marks, the mark on the flywheel is not visible. They say they did some capital work before me, maybe they screwed the flywheel on incorrectly, they couldn’t remove the crankshaft pulley, it probably got stuck. Is it correct to set it to TDC even if the mark on the flywheel does not match? Very grateful in advance! The car is parked, but I drove it without problems before!
Full size
TDC of the first piston, timing according to the marks. Wire is inserted instead of a screwdriver
Full size
And here there is a risk on the flywheel in the slot, but the distributors are not looking up! Both the second and 3rd are in TDC
Full size
Full size
Full size
Full size
Full size
Full size
Injector types
The injector controls fuel injection and can also control the ignition. On all new injection machines, the ignition is set by a computer and regulated by filling in different firmware. But this was not always the case, and on older cars, the same Japanese from the 90s, the computer regulates only fuel injection, and the ignition timing is set using a distributor and is set in the same way as on old Lada models, and depending on the speed The ignition timing is adjusted using a more complex vacuum system than on carburetor Zhigulis. Sometimes, one tube breaks, and during operating mode the traction may disappear; you will have to look for and correct this defect.
Movable timing marks "Priors"
These are recesses on the shaft gears and on the flywheel. The protruding part of the flywheel has strips cut into it. With their help, it is good to determine the ignition timing with a strobe. But you shouldn’t trust these notches when installing the belt. It's better to rely entirely on gear markers.
Protrusions on camshaft gears
On the outer part of the gear drive, there is a protrusion in a certain place. On each of the gears, it is installed in its place.
Ignition system sensors and marks
For the ignition system to operate correctly, the computer needs to read the correct information from the sensors. Subsequently, this information will be processed in accordance with the fuel maps hardwired into the injector.
The main signal comes from the crankshaft sensor. This sensor shows what position the crankshaft is in at a given time and, based on it, calculates at what moment it is necessary to inject fuel, and at what moment this same fuel should be ignited, depending on the engine speed, which is also determined by this sensor.
1 – crankshaft drive disc; 2 – crankshaft position sensor; 3 – angle of rotation of the crankshaft; 4 – output signal of the crankshaft position sensor
And this is what a typical signal received by a computer from the crankshaft sensor looks like. Pay attention to 270° - this is like the zero point, showing the computer that the engine has completed a revolution and a new cycle begins. This is achieved due to the absence of a tooth on the crankshaft drive sprocket.
Replacement process
When does a belt need to be replaced? If you naively trust the manufacturer and hope that it will last the entire 100 thousand km, problems cannot be avoided. An experienced and competent driver always conducts a visual inspection, noticing replacement signals such as:
Note. It would also be a good idea to check the tensioner roller, which, if faulty, can cause enormous damage not only to the belt, but also to the main parts of the internal combustion engine.
Replacement is carried out using the following tools:
Belt removal
We begin the replacement, presented here in the form of step-by-step instructions:
Note. To easily unscrew the bolt securing the generator drive, you need to rest a pry bar against the crankshaft so that it does not turn. It is better to use the services of an assistant who will hold the crankshaft from turning while the bolt is unscrewed.
Installation
Before you begin installing a new timing belt, you should carefully prepare everything. First of all, this concerns cleaning the pulley from oil and dirt, as well as cleaning the tension roller.
Note. If the parts are heavily soiled, it is recommended to use a rag soaked in gasoline or white alcohol.
Note. When installing a new belt, pay attention to the tension of the drive branch.
Note. If after installing the belt you hear a characteristic noise in the camshaft, it is likely that there are problems with the tension roller bearing, which is also of great importance for internal combustion engine mechanisms.
To verify this, you should remove the rollers and begin to slowly rotate the bearing, making sure there is no play or jamming. In addition, you need to pay attention to traces of oil leaks. If the malfunctions described above are detected, then the roller itself needs to be replaced.
Step 1: Belt removal
First, unscrew the screws holding the shield that protects the entire mechanism from dirt. After removing the shield, it is necessary to remove the cover protecting the timing drive, located at the bottom front. To do this, you need to unscrew two screws. Then remove the belt from the generator drive. Here comes a very important moment.
It is necessary to install all shafts in the correct position. On the camshaft pulleys and the rear drive cover in the 16-valve version of the Priora car, the timing marks must match. This is done using the crankshaft. It must be turned to the desired position.
In a Priora car, the timing marks should not only be in relation to the camshafts, but also in relation to the crankshaft. To do this, remove the rubber plug in the upper part of the clutch housing and see if the marks match.
If on the flywheel it is located opposite the recess of the upper cover of the clutch housing, then everything is adjusted correctly. Often, when unscrewing a bolt, the valve timing is disrupted. To prevent this, the flywheel should be locked.
To do this, you will need a regular screwdriver of a suitable size. It must be inserted into the clutch housing between the teeth. It will be more convenient to use the help of a partner for this task. Next we proceed to the final stage.
1. Unscrew and remove the bolt for securing the pulley
2. Remove the support nut
3. Loosen the bolt securing the belt tension roller with a 15mm head
4. Remove the belt.
Ignition control
Electronic ignition control
How to set the ignition angle? On systems with electronic ignition control systems, this can be done using computer diagnostics that connect to the Electronic Control Unit (ECU) or the “brains” of the car. And there you can see how the engine operates in real time - what signals are received from the sensors, what engine speed, fuel consumption, injection timing, ignition timing and other input and output data.
Basically, you don’t need to change anything during operation unless you change the firmware. That is, if the machine somehow began to work incorrectly, then most likely there could be several reasons:
Therefore, as such, the ignition is not set on injection machines, it is already built into the system, but it is worth checking whether the marks are set correctly.
Adjusting the ignition marks on the VAZ-2110 injector
When the engine is running, there are some phases that must work synchronously, the camshaft must coincide with the crankshaft, and the timing of fuel injection and ignition must correlate with them. Let's look at all this using the example of the VAZ-2110.
How to set the ignition on a VAZ 2110 injector
If the car doesn't start, it shoots, sneezes and everything goes wrong - the marks are not set somewhere and you need to sort it out.
On any car, the timing marks must be set perfectly, only then it will work normally. On the VAZ-2110, the crankshaft mark is located on the flywheel. You need to look through the inspection window on the gearbox housing; you can see the flywheel through it. It’s better to illuminate it with a flashlight, because it’s so easy to see.
When is it necessary to replace the timing belt and set the marks?
Without exaggeration, a worn timing belt can be called a “ticking time bomb.” The importance of this element in the car system is difficult to overestimate. Usually it is made of high-quality rubber, the service life of which is designed for 50-60 thousand kilometers. But, if the vehicle is operated in unfavorable conditions, the replacement interval will be different.
Replacing a belt and pump is a labor- and financially expensive process. But all the work will cost much less than repairing a failed engine due to a broken gear mechanism. In no case should you save money and put off scheduled car maintenance “for later.”
In most cases, the replacement interval is indicated by the manufacturer in the documentation for the vehicle. In addition to the resource built into the belt, it is worth considering the following factors that shorten the service life of the rubber element:
As you can see, there can be a sufficient number of breakdowns in the car system that directly affect the service life of the belt. If the scheduled replacement time has come, or its resource has been prematurely exhausted, it is not enough to simply replace the old mechanism with a new one - you also need to take care of the correct installation. To successfully do all the work, it is enough to arm yourself with the necessary tools and know how to align the belt with the marks.
How to set the ignition on a VAZ 2110
Among the most popular cars in the domestic engineering industry, it is worth highlighting the VAZ 2110, or as it is also called “Ten”. This vehicle was produced in 1995 - 2007. The 8 valves of the VAZ 2110 were a kind of replacement for the usual carburetor. The main difference between the models is the method of supplying fuel to the fuel cylinders. In the injection machine, everything happened under pressure.
The VAZ 2110 has 8 valves and a more powerful engine. At the same time, fuel consumption is less. Car repair requires the use of additional equipment and painstaking work. Engine capacity 1.5 – 1.6 liters. How to correctly set the ignition on a VAZ 2110 injector with 8 valves? To do this, you need to know the technology of work and then all the actions will seem simple. This will be discussed further.
When to tension the timing belt
The timing belt of the VAZ-2112 and other VAZ models is tensioned in the following cases:
If the cause of the intervention is a broken or “slipping” belt, you must first ensure the integrity of the valves. A broken gas distribution mechanism (drive) leads to engine damage on 16-valve 1.5-liter power units. However, in cases of drive failure at high speeds, valves and CPGs are also destroyed on other engines.
They check the operation of the timing belt on the VAZ-2114 and other models equipped with 8-valve units by turning the camshaft manually. A working mechanism should turn with some effort. A faulty one, as a rule, cannot be affected.
During the procedure, it is necessary to check the compression in each of the cylinders. The easiest way to do this is to tightly cover the spark plug hole with paper. If there is pressure in the cylinder, the plug is knocked out of its seat at a certain stage of camshaft rotation. It is not recommended to carry out a similar test on 16-valve engines. The risk of damage to an initially good valve mechanism is too great. There are no grooves in the pistons of one and a half liter engines of this type. Therefore, valves that move down bend when they contact the piston surface.
Setting the piston of the first cylinder to the TDC position of the compression stroke
Setting the piston of the first cylinder to the TDC position
When carrying out work related to removing the camshaft drive belt (timing), the valve timing may be disrupted; to prevent this from happening, the piston of the 1st cylinder is set to the TDC (top dead center) position of the compression stroke. If the valve timing is incorrect, the engine will not be stable or operate properly. Set TDC according to the mark on the camshaft pulley (when installing according to the marks on the flywheel or crankshaft pulley, the piston of either the 1st or 4th cylinder may be in this position). After this, be sure to make sure that the marks on the flywheel or on the crankshaft toothed pulley are aligned (if the generator drive pulley is removed). If the marks on the flywheel or crankshaft pulley do not match, then the valve timing is incorrect (the piston of the 1st cylinder is not installed at TDC). In this case, it is necessary to remove the camshaft drive belt and rotate the crankshaft until the marks align. Important! Rotate the crankshaft exclusively by the pulley mounting bolt (do not rotate the crankshaft by the camshaft pulley itself).
TIP Since it is inconvenient to turn the crankshaft using the bolt that attaches the pulley to it, you can do this in one of two ways
Lada 2112 2007, 89 l. With. - with your own hands
Cars for sale
Lada 2112, 2007
Lada 2112, 2008
Lada 2112, 2008
Lada 2112, 2007
Comments 48
I don’t know what they write about here regarding belt tensioning on 2112; on PRIOR everything is tightened bit by bit through the tension roller. The right branch of the belt must already be laid through the guide roller: - through two camshaft pulleys, a crankshaft toothed pulley, through the pump and have sufficient tension. In this case, the marks on the camshaft pulleys and the crankshaft toothed pulley must be fixed to the corresponding counter marks. In this position, holding the belt with your hand on the left side of the branch, on the side of the tension roller, so that it does not weaken and does not jump over the teeth, no matter where and in what place (and this is possible even for one tooth), we place or slip the tension roller under the belt , insert its bolt and tighten everything with such a turn of the roller by hand that the belt does not loosen and does not jump over the teeth.
Next, spin the engine several times, or maybe it’s better, by the wheel with 4-5 gear engaged, and make sure that all the marks on all the pulleys match perfectly. How to recognize the mark on the gear ring of the generator drive pulley on the crankshaft, I have already written below and given a drawing. With the wheel removed and the stand hanging up with the steering wheel turned, this crown and the DPKV are clearly visible, or almost well, through the mirror.
Then, after cranking the engine several times by hand, carefully, slowly - and what the hell is not joking, the marks didn’t match when parked and the valves were bent with the starter, yikes, then you begin to tighten the roller to working condition.
At the moment when, when cranking the engine, the right branch self-tensions when viewed from the side of the pulleys - and the left one weakens, this is where you need to tighten the roller - like how everyone around writes and rips off each other. On a Priora, the tension of the roller may be weak or weak, the belt will jump, or the roller may be pressed against the belt so that it and other damn spare parts will become sick.
Don't be afraid to start the engine to see how your video lives when the engine is running. Nothing will happen to either the belt or the roller when adjusting in a tightened state. The main thing is that the belt does not dangle too much, otherwise it will either fly off or fly like plywood over the toothed pulleys and damn it, bend the valves. If the tension roller is dead, overtightened, the belt may hum a little from the tightening, which in turn will affect the PUMP because it will not last long from a strongly overtightened belt (of course it will not immediately fall apart) - then we begin manipulations to tension the roller . The ROLLER on a Priora should be alive when the engine is running. It should vibrate inconspicuously on the tension spring and this is clearly noticeable, and when you press the gas sharply it jumps, pushing up well with the belt and this can be seen even by a blind mole.
How to evaluate the work already done
Accurate diagnosis is carried out using a computer. However, it is also possible to independently assess how correctly the circuits are functioning.
For the carburetor model VAZ 2110, marks are also set in order to regulate the ignition system.
If the ignition of the VAZ 2110 8-valve injector occurs early or, conversely, late, then the ergonomics of the entire engine deteriorates. Power also decreases. The engine is exposed to high temperatures and excessive loads. Among other things, detonation may occur. All this can lead to the VAZ 2110 losing ignition.
Setting the ignition timing
Required only for carburetor models. For the work you will need one tool - a strobe light. It is sold in almost any auto store and has a reasonable price. It is also advisable to have a wrench so that you can unscrew the nut that secures the distributor.
When the ignition timing is correctly set, mark 1 on the flywheel should be between the middle division (notch) 2 and the previous division 3 of the scale. Otherwise, adjust the ignition timing.
To adjust the ignition timing on a VAZ 2110 you need to:
To understand the ignition adjustment process in more detail and clearly, it is recommended to watch the corresponding videos. To resolve the issue of how to set the ignition on a VAZ 2110 injector 8, you can additionally consult with experienced car owners.
