HOW IS EXHAUST GASES OUT?
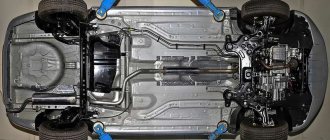
To remove exhaust gases, a VAZ 2114 exhaust system was developed and installed, the diagram of which is shown in the figure.
Exhaust system diagram
It consists:
- Bracket for fastening the exhaust pipe;
- Sealing gasket;
- Clamp;
- Additional muffler;
- Rubber shock absorber;
- Central muffler;
- Rubber shock absorber;
- Clamp connecting pipes;
- Neutralizer;
- O-ring for the hinge;
- Oxygen sensor;
- Reception pipe.
Exhaust gases are removed as follows. From the exhaust manifold, exhaust gases enter a channel called the exhaust pipe, which directs them further into the converter. From its name it becomes clear that it is designed to burn the remaining flammable substances in the exhaust gases.
It primarily dampens exhaust noise and reduces turbulence. The next “obstacle to gases” is the muffler resonator, in which “acoustic mirrors” reduce the noise of escaping gases even more. And the last stage will be the central muffler. The exhaust system is manufactured and installed in such a way that gases are emitted outside the vehicle, which prevents them from entering the cabin.
What is a car muffler for?
Regardless of the make and year of manufacture of the car, all its systems serve one purpose - to ensure stable operation of the engine and movement. The exhaust system may seem insignificant compared to systems such as the brakes or fuel. However, it is the vehicle's exhaust system that has the most direct impact on engine performance.
The muffler is an integral part of the exhaust system . Its main purpose is to remove exhaust gases outside the car. In addition, the part also serves to reduce noise, since residual fuel can burn in the exhaust system pipes.
The pipe comes out from the rear left side of the car
How to attach
The muffler on the VAZ 2114/2115 is attached to the car body. To ensure that the pipe is securely fixed and does not vibrate during movement, two fastening methods are used:
- bolted;
- on rubber suspensions.
Bolts and nuts for fastening the muffler pipes are made of special heat-resistant alloys
The muffler is attached directly to the exhaust manifold with bolted connections, which guarantee complete tightness of the joints. The middle part is also fixed with bolts and nuts. And the resonator and exhaust pipe are suspended on special hooks on the bottom with elastic bands. These suspensions are easy to remove and put on, but at the same time provide rigidity even when driving on uneven roads.
Schematic design of the exhaust system on a VAZ 2114/2115
The gas exhaust system of the VAZ 2114/2115 consists of several parts. Connecting to each other in series, all parts ultimately serve one purpose - reducing noise and removing exhaust emissions outside the body.
1 — bracket for fastening the exhaust pipe; 2 - gasket; 3 — clamping device for the bracket; 4 — additional muffler; 5.7 — “pillows” for muffler suspension; 6 — main muffler; 8 — clamp connecting the muffler pipes; 9 - neutralizing device; 10 — hinge sealing ring; 11 - sensor that monitors the oxygen concentration in emissions; 12 — exhaust pipe for mufflers
HOW THE CENTRAL SILENCER IS SET UP
They are made of aluminized steel, stainless steel, ferrous metal and painted with powder coating. The installation of direct-flow sports mufflers is gaining popularity. The muffler structure can be seen in the figure.
Muffler
The VAZ 2114 muffler consists of:
- Metal body;
- Thermal insulating layer;
- Partition;
- Pipe with perforations;
- Calibrated hole (throttle);
- Front pipe with perforations;
- Inlet pipe;
- Partition in the middle part;
- Exhaust pipe;
- Partition in front of the muffler;
- Rear perforated pipe;
- Partition at the back;
- Metal body.
It should be noted that the exhaust system of the VAZ 2115 with a carburetor engine differs from the design described above. It does not provide for the installation of a neutralizer for exhaust gases.
Exhaust system design
The functional structure of the exhaust system is designed in such a way as to reliably regulate the removal of chemical waste outside the vehicle.
VAZ 2114 muffler diagram
The gas exhaust structure consists of the following components:
- Exhaust manifold. Designed to unify gas cylinders into a single system. Its mounting must be sufficiently rigid to cope with dynamic loads.
- Catalyst. Designed to convert harmful chemicals into gaseous impurities that are safer for human health. The need to reduce gas toxicity is determined by environmental standards for mobile vehicles.
- Reception pipe. Connects the two previous components of the gas exhaust structure.
- Resonator. Its immediate function is to reduce the noise level emitted by the exhaust system. This is achieved through special acoustic mirrors. However, this structural element is a rather vulnerable point in the overall mechanism, since it is constantly exposed to high temperatures. Stainless steel can simply burn through. Therefore, it must be periodically welded with electrodes, or the resonator must be replaced.
- Muffler 2114. Also contributes to noise absorption during engine operation.
- Corrugation. An elastic hose is necessary to suppress mechanical vibrations produced by the engine. Over time, the corrugation structure stretches, forcing the owner to replace it.
ABOUT FACTORS AFFECTING THE SERVICE LIFE OF EXHAUST SYSTEM ELEMENTS
Elements of the exhaust system operate under the influence of mechanical, thermal and other types of loads.
The following factors have a strong influence on service life:
- Rapid heating to high temperatures, which can cause overheating of system elements;
- Frequent fluctuations in rapid heating and sudden cooling;
- The occurrence of vibration during operation of the power unit;
- Susceptibility to shock and mechanical damage;
- Pollution when driving in bad weather conditions;
- Getting scratches and chips from road surface particles;
- The occurrence of corrosion spots both inside and outside the exhaust system elements;
- Insufficient effectiveness of metal protection.
It is safe to say that for most of these factors, the timing of their manifestation is easily postponed to a later time. It’s worth changing your driving style, periodically cleaning the exhaust system from dirt, applying a protective coating yourself, and the problems will go away on their own.
Is it possible to repair the VAZ 2114 muffler?
Before purchasing a new muffler for your car, you need to evaluate the possibility of repairing it. Experience shows that these parts are quite repairable. If you decide not to rush into purchasing an expensive part, you need to remove the muffler, clean it thoroughly and carefully inspect it. The damage can be significant, including a pipe falling off the muffler barrel or in the form of cracks and small burnouts.
Repair of muffler VAZ 2114
The nature of the repair also depends on the results of the inspection, but in any case, having decided to repair the VAZ 2114 muffler. To do this, you need to purchase a muffler repair kit from a car shop.
If the damage is quite serious, and the metal from which the muffler is made is still strong enough, then it is recommended to weld the burnouts. A semi-automatic machine is used for welding; a metal plate up to 2 mm is used as an overlay. The seams are made thick to avoid burnout.
Small cracks are sealed with silicone-based sealant that can withstand temperatures up to 1000 degrees. You can cover it with fiberglass, filling it with epoxy resin with special, heat-resistant additives. With this repair option, after installing the muffler, you need to start the engine and idle for an hour to allow the epoxy to set.
The procedure for removing the muffler for repair and its subsequent installation is similar to the procedure for replacing it.
Photo and video instructions for independently replacing the additional muffler on VAZ 2114, 2113, 2115 cars
To carry out the work of replacing an additional muffler, you need an overpass or inspection hole.
- Disconnect the additional muffler from the main muffler.
Unscrew the 2 bolts securing the neutralizer to the additional muffler flange. If the bolts do not unscrew, you will have to moisten them with water or saw them off with a grinder.- Disconnect the suspension cushions from the additional muffler brackets.
- Remove the additional muffler.
- Install the additional muffler in reverse order.
ABOUT SIGNS OF PROBLEM
As soon as there is even the slightest suspicion of problems with the exhaust tract, it is necessary to take measures to identify and eliminate these suspicions. Driving with a faulty muffler can cause problems from neighbors and traffic police.
You should be alert to the following manifestations in the operation of the exhaust system:
- The appearance of increased noise from a running motor;
- The presence of exhaust odors near the car, and in some cases in the cabin;
- The appearance of smoke from burnt-out exhaust elements under the bottom of the car;
There is no need to put off solving this problem. Take a few minutes to locate and determine the breakdown. After this, a decision is made to eliminate it. There can be only two options here: repairing the muffler or replacing the VAZ 2114 muffler.
Muffler 2114: replacement and repair
In turn, the main muffler is usually the first to fail.
As a rule, this will be indicated by increased noise, the appearance of ringing and rattling, the smell of exhaust in the car interior, etc. As a rule, the easiest way is to replace the muffler with the original one, which is installed from the factory. Such mufflers are reliable, there are no problems with installation (if the products are truly original, since there are many fakes on the market).
It is quite possible to choose an analogue solution, but not all mufflers are of high quality and can be installed on the car without modifications. For this reason, you need to take into account all the nuances before purchasing.
Experts also recommend changing the fastening bolts, choosing the original or high-quality analogues. If you skimp on bolts, they will stick to the bottom, after which problems will arise when you try to remove them. Let us also add that if a knocking sound from the muffler appears, the rubber hangers may require replacement.
Having prepared all the parts, you should also have the necessary tools: a pair of open-end wrenches 13, a hammer, a chisel, brake fluid or WD-40, and a flat-head screwdriver.
The replacement process itself generally suggests the following:
- The car is driven into the pit and raised on a lift;
- If this is not possible, you should jack up the car or drive it onto an overpass, and then install wheel chocks;
- Having climbed under the car, you should treat all joints of pipes and bolts with WD-40, leave the lubricant for 15 minutes;
- Afterwards, you can try to unscrew the bolts; if this fails, then cut them off using a chisel or hammer (when doing this, avoid hitting the bottom);
- Having unscrewed the pipe, the element is removed from the rubber hangers, lifting the part (in the case when the rubber is “hardened”, you can pry it off with a screwdriver). The muffler itself on the VAZ 2114 and 2115 is attached to 5 hangers;
- After dismantling, you can repair the old muffler or install a new one.
Having completed the work, you should proceed to installing the part on the car; Before installation, it is advisable to clean all parts and mounting points of the muffler on the bottom from rust and dirt, lubricate it, and treat it with anti-corrosive, if necessary. - When installing, you must first tighten the muffler 2114 or muffler VAZ 2115 under the car body and place it in the same way it will be installed on the car. Next, the exhaust pipe and resonator are hung on rubber hangers. Afterwards the quality of fastening is checked;
- Having installed all the elements, you can begin to twist the nuts on the bolts, tightening them tightly, but being careful not to overtighten the threads.
At this stage, the work of replacing the muffler is considered complete. All that remains is to start the engine and check the tightness of the exhaust system, making sure there is no noise. They also make a test drive to make sure that the muffler does not catch anywhere and does not knock while swinging on the suspensions.
REPAIR OR REPLACEMENT
Diagnostics has detected one or more small cracks in the resonator housing or main muffler. In this case, replacing them with new parts is not economically profitable. You can make repairs yourself. To do this, purchase a muffler repair kit: it includes rubber shock absorbers (the pipe is suspended on them) and clamps (for connecting the pipe joints). They can be purchased in several types.
VAZ 2114 mufflers can be repaired in the following ways:
- Buy any heat-resistant sealant and coat the burnout cracks with it, namely cracks, not large holes. The next step is to clean the body of dirt, paint and rust. After this, the cleaned area is degreased and a sealing layer is laid on the area to be repaired;
- Buy a repair kit with heat-resistant tape and binding wire. The part to be repaired is again prepared by analogy with the first method. After this, carefully wrap the body with tape and tie it with wire. The burnt area heals itself as the engine operates;
- Repair using cold welding. First of all, prepare cold welding for use. Next, you need to thoroughly clean and degrease the damaged area. After this, the damage can be repaired by welding (cold).
Of the methods described, the method using a repair kit received the most positive feedback.
For car owners who have access to electric welding, we can recommend this method of muffler repair. A patch of the required size is cut out of a sheet of metal 1.5-2 mm thick. Apply to the repair site and scald. Then the repair site needs to be treated with a protective compound. Good results are obtained by using semi-automatic welding in shielding gases.
Replacement
HOW TO REPLACE
Diagnostics showed that the repair will not give the expected effect, which means you need to change the VAZ 2114 muffler. This is quite easy to do if you have a new part. The replacement operation is carried out with your own hands in the garage or even just in the yard.
By any available means, access to the exhaust system elements is ensured. All bolted joints are processed using a wedge. If you don’t have one at hand, kerosene, brake fluids or oils will do. Prepare spare rubber cushions for suspension and tools in advance. You will need:
- Two open-end wrenches, socket wrenches or 13-socket heads:
- Metal brush;
- Small hammer.
Sometimes it is impossible to unscrew the bolts and they are cut off in an accessible way. Keep this in mind when preparing for work.
You can change the VAZ 2114 muffler like this:
- Unscrew the bolt on the connecting clamp and remove it along with the sealing gasket;
- Release it from the suspension, disconnect it from the resonator and remove it;
- When installing a new part, the gasket must be coated with sealant for exhaust systems and installed in the reverse order.
Instructions for replacing the muffler on a VAZ 2114 with your own hands.
- open-end wrench 13 (preferably 2 pieces),
- WD-40,
- rags
- hammer and metal brush.
- The first thing you need to do is purchase a new muffler (a new clamp assembly with an O-ring + muffler suspension cushions, you can use old ones).
- The car must be driven onto a pit or overpass. We find the clamp connecting the main and additional muffler (item 7 in the diagram). The clamp is tightened with two bolts and nuts that need to be unscrewed. As a rule, the nuts become very sour, use WD-40 and a metal brush (sometimes you can’t do without a grinder).
- After unscrewing the clamp, dismantle the main muffler by removing it from the muffler suspension pads (item 5). Important: do not lose the graphite O-ring that fits between the pipes.
- Now you can install the new muffler. Important: do not rush to hang the muffler on rubber pads. Using a clamp, connect the muffler pipes, do not forget about the O-ring. Advice: when installing the muffler, place something under it, it will be more convenient.
- We fix the muffler on the muffler suspension cushions, that's basically all.
In order for the muffler on your car to last longer, I recommend diagnosing the exhaust system at least once a month. This way you can detect possible problems in a timely manner.
How to repair a “glushak” with your own hands
The muffler on the “fourteenth” and “fifteenth” is considered one of the most vulnerable points of the car. The fact is that due to exposure to high temperatures, the metal quickly burns out, that is, the tightness of the system is broken. Therefore, the part must be changed as soon as there is a suspicion that it is not working.
Reasons for failure
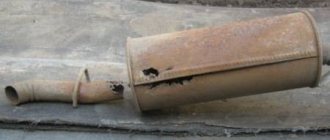
Most often, mufflers “burn out” - that is, due to hot exhaust, the metal inside the housing begins to thin out, which ultimately leads to the appearance of holes. However, this is not the only reason why the silencer may fail:
using a homemade device - handicraft products do not differ in quality and long service life;
mechanical shocks from uneven roads - dents and deformations of the pipe also lead to loss of tightness;
Rust and corrosion sooner or later affects even the highest quality original mufflers.
In general, all of the above factors influence service life to some extent. The car owner can easily identify all of the above faults - just drive the VAZ into the inspection hole and visually examine the muffler. In addition, when deformations, burnouts and corrosion reach their “peak”, the part will begin to make characteristic sounds when moving - gurgling, sharp pops, knocking.
Why is the muffler knocking?
This part on the VAZ 2114/2115 can make knocking noises only in two cases:
it hits the body;
When moving, it touches the gas tank housing.
In any case, it is necessary to immediately take measures to eliminate this malfunction. Most often, the problem lies in severe wear of the rubber suspensions. It is enough to change them and the muffler will again return to its normal position under the bottom of the car.
